Fix: Can’t Connect To This Network Error on Windows
‘Windows 10 can’t connect to this network’ is a possible network error faced by Windows 10 users while trying to connect their device to a network. However, while this error states the issue, it does not give any information about why the error occurred or what to do to fix it.

Our team of experts had a look into this issue and discovered that it is likely to be caused due to the following reasons:
- Slow internet connection – Your internet connection might be quite slow, preventing you from connecting to the network. In this case, you can try restarting your router to develop a strong connection between your devices.
- Generic corruption error – Your system might be infected by a bug or a generic corruption error that is preventing it from connecting to a network. The best course of action, in this case, will be to run the built-in troubleshooting utilities in the Windows operating system. Since this error is network-related, we will be running the Network Adapter troubleshooter.
- Corrupt or outdated drivers – The relevant network drivers installed on your system should be up-to-date to be able to connect your system to another network. If your drivers are outdated, installing the latest updates is likely to do the trick for you.
Now that we know about the potential causes, let’s have a look at the troubleshooting methods that worked for other users.
Restart Your Router
Rebooting your router, which is also called power-cycling, will clear out the short-term memory which is typically referred to as a cache. This helps your devices to provide a better, smoother service. In addition, the router can re-pick the least crowded channel for each frequency, resulting in a stronger connection between your devices.
All that you need to do is unplug the router for at least 10 seconds, then start it again. And while you are at it, we also suggest restarting your computer. Once both the devices are up and running again, check if the network error is resolved. If it persists, move towards the next method below.
Run Network Adapter Troubleshooter
Using the Network adapter troubleshooter is also a good way of resolving network and connection-related problems in Windows. This inbuilt diagnostic tool scans your operating system for issues and recommends fixes for the potential problems it identifies.
Here is how you can run the Network Adapter troubleshooter to resolve the problem under consideration:
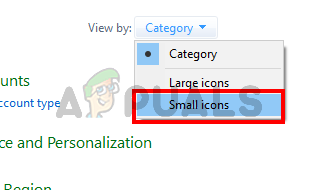
- Launch Control Panel and change the View by type to Small icons. This should display an extensive list of the Control Panel items.
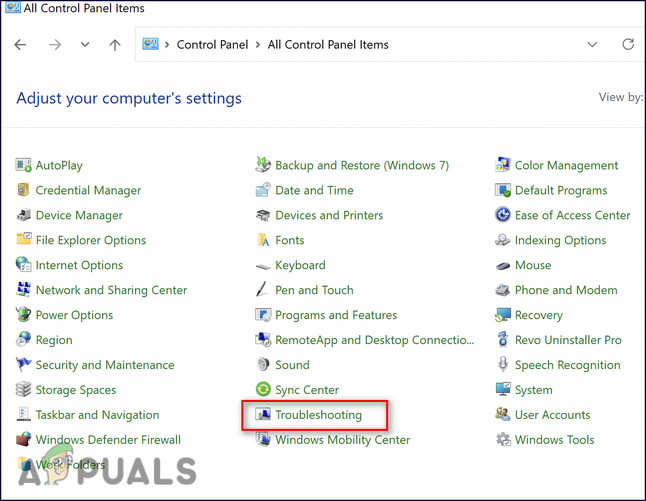
Switch to Small Icons in Control Panel to Access AutoPlay - Select Troubleshooting from the list of options available.
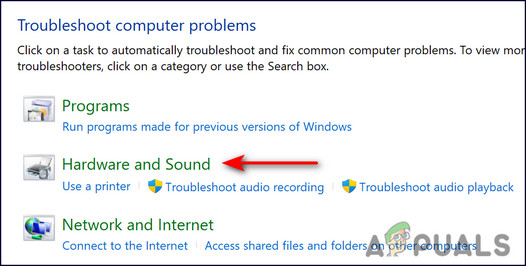
Click troubleshooting - Then, click on Hardware and Sound and select Network Adapter. This should launch the troubleshooter.
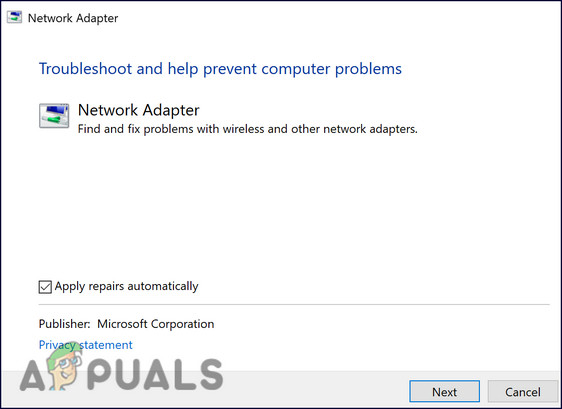
Go to hardware and sounds - Click on Next in the dialog box that popped up on your screen. Doing so will initiate a scan.
- Wait for the scan to complete and then select the network adapter to diagnose. If you want to scan all the adapters for issues, select the last option.
- In the next dialog, choose the problem you are encountering.
- Follow the on-screen instructions to proceed. Once the scan is complete, check if you still face the network error.
Reinstall Network Adapter Driver
To enjoy seamless connections, your relevant drivers should be working perfectly fine. If they happen to be corrupt or outdated, you are likely to run into errors such as the ‘Can’t connect to this network’ code.
If you haven’t updated your network adapter drivers in a while, then now is a good time to do so. In case the error is being caused by outdated or corrupt drivers, reinstalling them should do the trick for you. Once you uninstall the corrupt driver, Windows will automatically install the latest one upon reboot.
Here is all that you need to do:
- Type Device Manager in the search area of the taskbar and click Open.
- Inside the newly launched window, locate Network adapters and expand it.
- Right-click on the targeted adapter and select Uninstall device from the context menu.
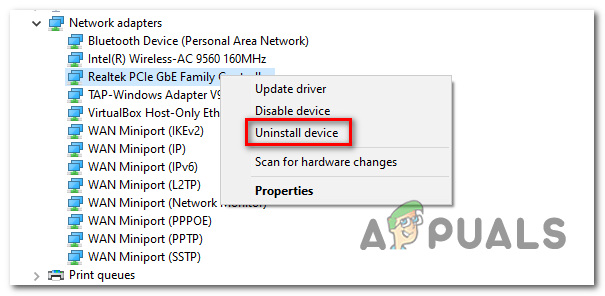
Uninstalling the Network Adapter - Then checkmark the box associated with Delete the driver software for this device and click OK.
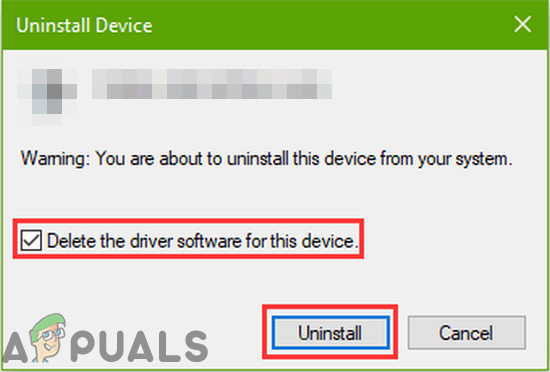
Select Delete the Driver Software For This Device and Click on Uninstall - Once done, reboot your PC.
- Upon reboot, your computer will automatically install the driver again. If it does not, head over to your manufacturer’s website and install the driver manually.
- Reboot your PC again and check if the network error is solved.
Create a Restore Point
There are times when certain errors become almost impossible to fix. In cases like these, you can restore the last working state of your Windows installation using System Restore.
The system does this by creating “restore points” in the OS every now and then.
A restore point consists of a set of snapshots of your Windows system files, specific or all of your program files, registry settings, and your hardware drivers. Windows automatically creates a restore point periodically and before performing critical operations, but you can create your own at any time.
Here is how you can use these restore points to revert your system back to a time when the error under consideration was not present:
- Type Control Panel in the search area of the taskbar and click Open.
- In the newly launched window, select System and Security.

Accessing the System and Security tab - Then, click on System and choose System Protection.
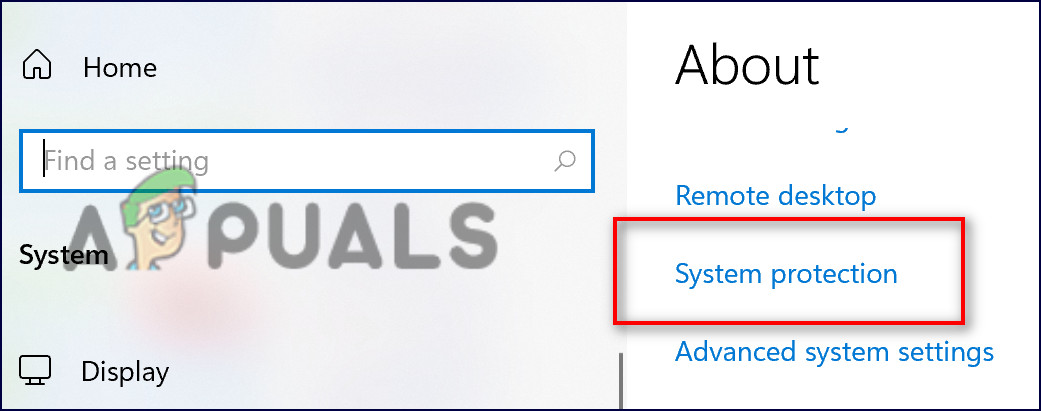
Open system protection - Head over to the System Protection tab and click on System Restore.
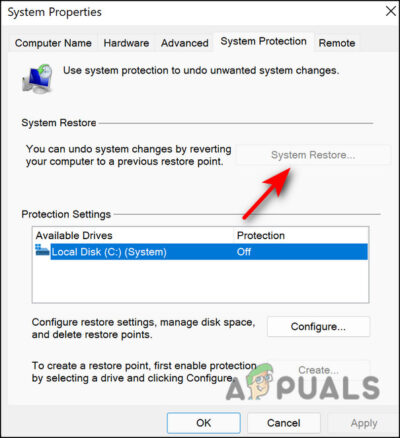
Click system restore - Follow the on-screen instructions to proceed. There should be a confirmation prompt on your screen. Choose Recommend Restore there.
- Once the process is completed, your operating system will move to a previous point in time where the network error was not present.
Enable Internet Protocol Version 6 (TCP /IPv6)
Another fix that worked for several users was enabling Internet Protocol Version 6 (TCP /IPv6). If it is disabled on your computer at the moment, follow the steps mentioned below to enable it. However, if it is already enabled, move to the next method below.
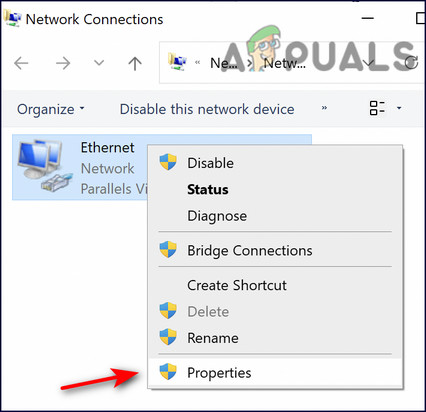
- Right-click on the Windows icon in the taskbar and select Run from the list of options available.
- Type ncpa.cpl in the text field of the dialog box and hit Enter.
- Right-click on your wireless adapter and choose Properties from the context menu.
Click properties - Locate Internet Protocol Version 6 (TCP /IPv6) in the Networking tab and checkmark the box associated with it.
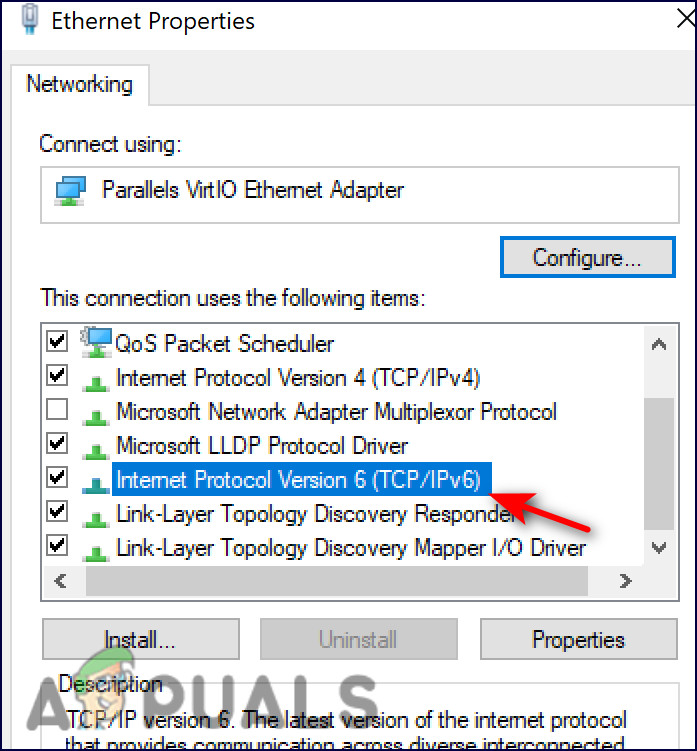
- Click OK and then reboot your PC to save the changes.
- Upon reboot, check if the network error code still appears.
In-Place Upgrade
Finally, if you have come this far without a solution and are still facing the error at hand, we encourage you to go ahead and perform an in-place upgrade.
This method involves installing a new version of the Windows operating system without removing the older one. These upgrades take the same amount of time as reinstalling the operating system. Additionally, you may lose some customized Windows settings during this process.


