How to Fix the CNMSSC DLL Error on Windows?
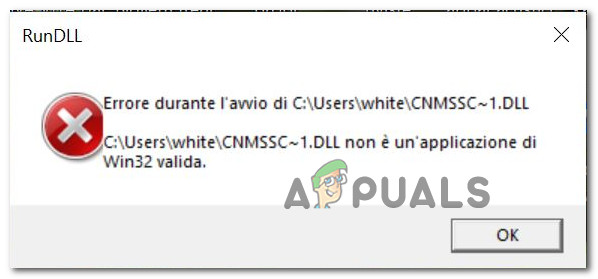
Some Windows users are reporting that every time they boot up their computer they get an error pointing towards an issue with the CNMSSC.DLL saying ‘Is not a valid Win 32 application‘. This problem is much more frequent on older Windows versions (Windows 7, Windows 8.1, and Windows 10), but there are also reports of it occurring on Windows 11.
After we’ve investigated this particular issue, it turns out that there are several different scenarios that might end up triggering this error. Here’s a list of potential culprits that you should be mindful of if you’re currently experiencing this issue:
- Conflicting Canon Process – As it turns out, oftentimes, this particular issue is caused by a Canon Printer process. There’s no official explanation on why this occurs, but community members report that it’s probably due to a conflicting driver that interferes with the CNMSSC.DLL file. To fix the issue if this scenario is applicable, you should try force-stopping the Canon Printer process via Task Manager or simply uninstall the mother software (Canon Printer Software) in case the first method is not effective.
- Corrupted Startup key – If you get this error every time your computer boots up, it’s very likely that you’re experiencing this behavior due to a rogue startup item that is calling the CNMSSC.DLL even if the file is no longer present on your printer. You can correct this behavior by cleaning the Shell Startup folder or by running the Autoruns software to clear any rogue startup item.
- Outdated Windows version – As it turns out, this problem might also be related to your current Windows version. Several users dealing with the same kind of problem have confirmed that once they updated their Windows version to the latest version, the CNMSSC.DLL-related issue stopped occurring.
- Remnant cnmssc~1.dll key – Depending on how you uninstalled your Canon printer software and associated dependency, you might end up experiencing this error at every startup due to a registry key that is still calling the now-missing file even though it’s no longer present on your system. In this case, the only way to resolve the problem is to remove every mention of the cnmssc~1.dll from your Registry cluster via Registry Editor.
- 3rd party application interference – As it turns out, this problem can also occur due to some kind of interference caused by some printer supporting application or security suites that are blocking the DLL file from kicking into action. You can test out this theory by deploying a clean boot and seeing if the error stops occurring. If the error no longer occurs while in clean boot mode, you can systematically get rid of every 3rd party suite until you identify your culprit.
- Security issue – Under certain circumstances, you can expect to deal with this issue after your antivirus suite ended up quarantining the CNMSSC.DLL or an associated dependency. In this case, our recommendation is to run a Microsoft Safety Scanner deep scan and complement that with Malwarebytes to ensure that your PC is no longer infected. A Malwarebytes will also serve the purpose of cleaning any startup items that might be triggering this error.
- System file corruption – Depending on the source of this issue, this error might also be caused by some type of system file corruption that is currently affecting your system. In this case, the quickest and most efficient way of resolving the problem si to deploy a repair install or clean install procedure.
Now that we went over every potential cause that might trigger the CNMSSC DLL Error, let’s go over every confirmed fix that other affected users have successfully used to get to the bottom of this issue.
Disable the Canon Printer Process (if applicable)
If you’re just beginning to troubleshoot this particular issue, the first thing you should do is check if the issue is often caused by the Canon Printer process.
There’s no clear explanation of why this happens (from Microsoft), but it may be due to a Canon driver conflict that interferes with the CNMSSC.DLL file.
If this scenario is applicable, the easiest way to fix the issue is to try force-stopping the Canon Printer service through Task Manager.
Several affected users have confirmed that they stopped seeing the CNMSSC.DLL-related error after using Task Manager to effectively disable every Canon-related printer service.
Follow the instructions below for specific instructions on how to do this:
- Press Ctrl + Shift + Enter to open up Task Manager on your PC.
- If the simple interface is open by default, click on Show more details to open up the expert interface of Task Manager.

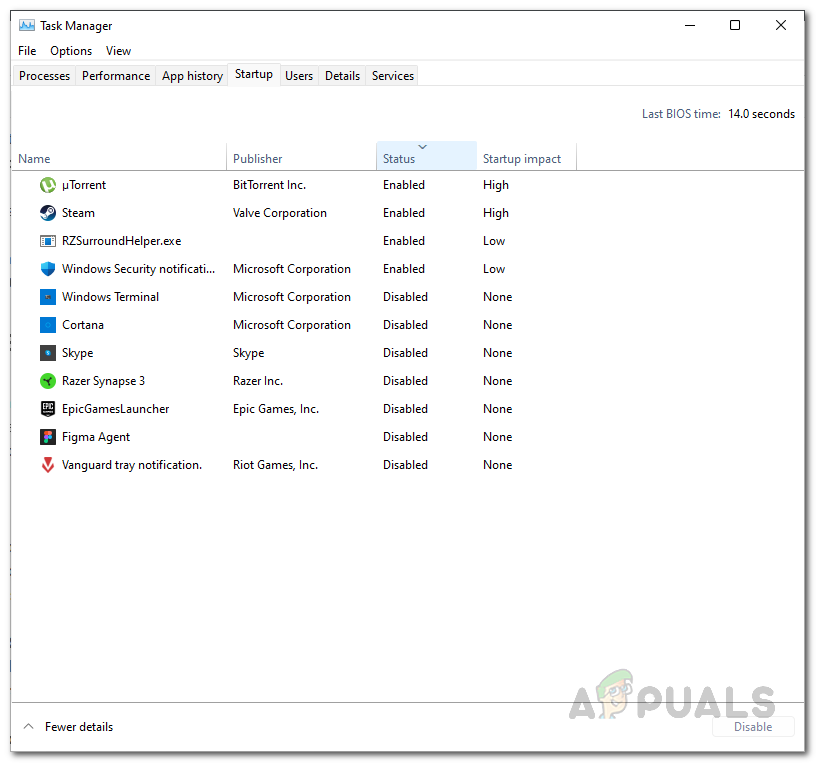
Accessing the expert Task Manager interface - Once you’re inside the expert interface on Task Manager, access the Startup Tab tab, then go ahead and search for every Canon Printer process and disable it (by right-clicking on it and clicking Disable from the context menu).
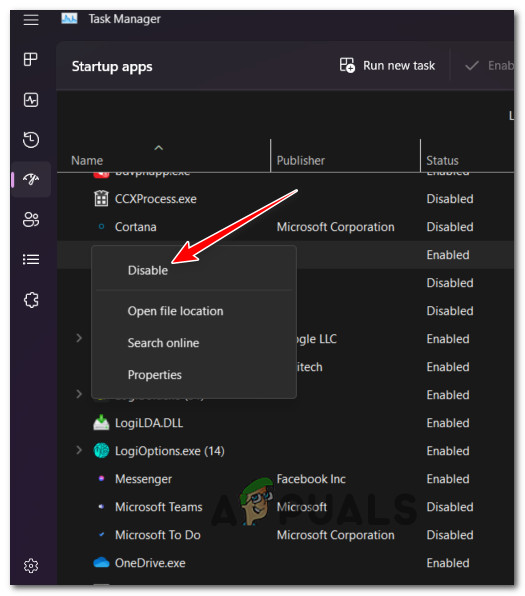
Disable the Service - Once every Canon startup service has been disabled, reboot your PC and see if the error stops occurring.
If the same CNMSSC.DLL error is still occurring, try the next method below to uninstall the potentially conflicting Canon Printer software.
Uninstall the Canon Printer Software (if applicable)
If the first method didn’t work in your case, chances are the problem is being caused by the parent application of the startup service (that we tried disabling in the method above).
If this scenario is applicable, the next logical step would be to uninstall the parent application – Canon Printer Software.
Note: Only consider this method if you’re not actively using the Canon Printer Software or any associated dependency or feature. If you use the native printing functionality on Windows, you can easily uninstall the software as the native printing protocol will be used instead.
In case this method is suitable, follow the instructions below to uninstall the Canon Printer Software:
- Press Windows key + R to open up a Run dialog box.
- Next, type ‘appwiz.cpl’ inside the text box and press Ctrl + Shift + Enter to open up the Programs and Features menu with admin access.

Accessing the Programs and Features menu - If you are prompted by the User Account Control (UAC), click Yes to grant admin access.
- Once you’re inside the Programs and Features menu, scroll down through the list of installed programs and locate Canon Printer Software.
- When you see it, right-click on it and choose Uninstall from the context menu that just appeared.
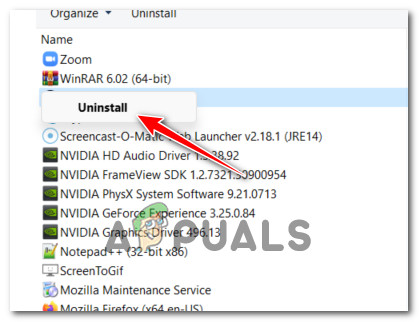
Uninstall the Canon Printer Software - Inside the uninstallation screen, follow the outline steps to complete the uninstallation, then restart your PC and see if the problem is fixed once the next startup is complete.
If the issue is still not resolved yet, move down to the next potential fix below.
Clean the Shell Startup folder
If you see this error each time your computer starts up, it’s probably because a rogue startup item is calling the CNMSSC.DLL, even if the file is no longer on your printer. You can fix this by cleaning the Shell Startup folder or running Autoruns to remove any rogue startup items.
This method was used successfully by a lot of Windows 10 and Windows 11 users.
Note: All you need to do is open up the Shell Startup folder and clear every unsolicited startup item from there.
For step by step instructions on how to do this, follow the step below:
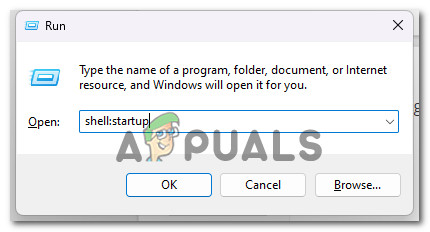
- Press Windows key + R to open up a Run dialog box.
- Next, type ‘shell:startup’ inside the text box, then press Ctrl + Shift + Enter to open up the Shell Startup folder with admin access.
Accessing the Shell Startup folder - If you’re prompted by the User Account Control (UAC), click Yes to grant admin access.
- Once you’re inside the Startup folder, press Ctrl + A to select everything inside, then right-click on a selected item and click on Delete from the context menu that just appeared.
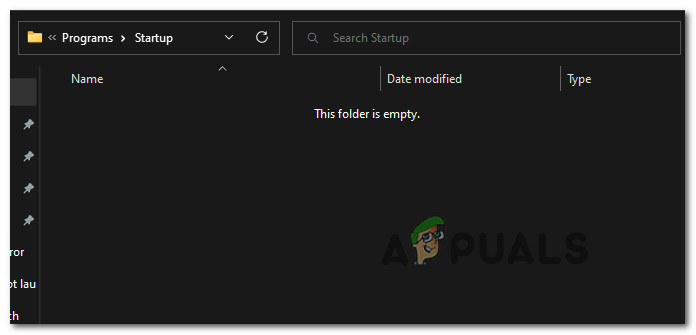
Clearing the Startup folder - After every startup item is deleted from the Startup folder, repeat the action that was causing the CNMSSC.DLL and see if the problem is now fixed.
If the problem is still not resolved, move down to the next method below.
Remove responsible startup item via Autoruns
If you’re getting startup errors related to the CNMSSC.DLL file, it’s likely because a malicious file that was part of the infection has been deleted by your security suite.
It’s not uncommon for some security suites to miss some files when dealing with infections. Sometimes startup items and registry keys will still remain on the system, calling the malicious file to execute even if the file was deleted by the security suite. Whenever this happens, Windows will automatically trigger a pop-up error.
There are several ways to deal with an error associated with the dnsapi.dll file, but let’s go for the easiest approach out of the bunch.
Note: Autoruns is a software vetted by Microsoft that can identify, organize and delete unused runonce, run, startup folders, and registry keys.
In our case we can use it to identify and remove the startup items (or registry keys) that are calling the file that is no longer there. Here’s a quick guide to installing and using Autoruns to remove errors associated with the CNMSSC.DLL file:
- First, let’s download the latest version of the Autoruns utility.
- To do this, visit the download page of Autoruns from any browser to initiate the download.
- Once you’re inside the correct page, click on the Download Autoruns and Autorunsc.

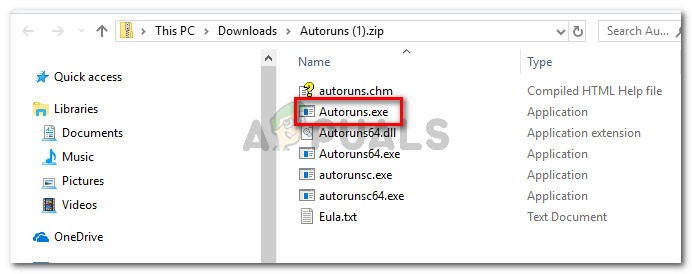
Downloading Autoruns - Once the download is complete, extract the .zip file and double-click on the Autoruns executable to open it up.
Extracting Autoruns - Once Autoruns is opened, wait until the Everything list is populated, then scroll down through the list of available Autorun entries and locate CNMSSC.DLL (look at the Image Path).
- Once you see it, right-click on it and choose Delete from the context menu to prevent the executable from being called at system startup.
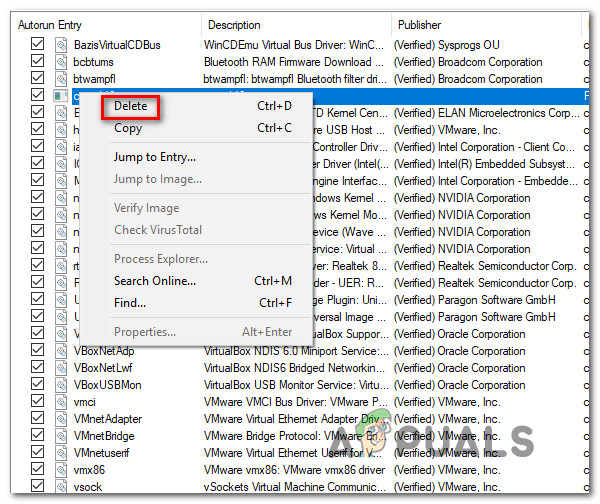
Deleting the Auto Run key - Restart your computer and see if you see any CNMSSC.DLL prompts at system startup.
If the problem is still not fixed, move down to the next method below.
Update Windows to the latest version
It turns out that this problem might be related to your current Windows version. Several users experiencing the same problem have confirmed that updating their Windows version to the latest version stopped the CNMSSC.DLL-related issue from occurring.
One popular reason that might cause this behavior is when Windows Update already has a scheduled update ready to do update the printing component.
Some users encountering the same error code have reported that they fixed the issue by updating their Windows version to the latest build available. After doing this and restarting their computer, most reported that the CNMSSC.DLL startup error was no longer occurring.
If this scenario is applicable to you, try installing every pending update for your Windows OS and see if this takes care of the issue automatically:
- To open the Windows Update tab of the Settings app, press Windows key + R to open up a Run dialog box.
- Next, type ‘ms-settings:windowsupdate’ inside the text box and press Enter.
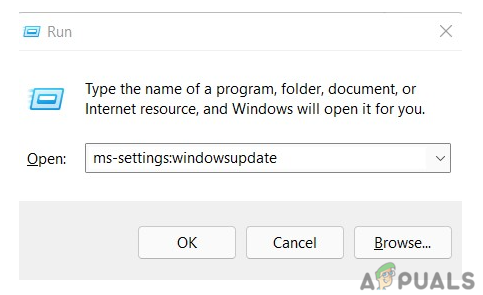
Accessing the Windows Update menu - Once you’re inside the Windows Update screen, go to the right-hand section and click Check for Updates.

Check for Updates - Then, follow the on-screen instructions to install each pending update until your computer is up to date.
- If you’re prompted to restart before you can install every pending update, restart as instructed.
Note: Once a startup is complete, return to the Windows Update screen to finish installing the remaining updates. - After you install every pending Windows update, you should find that CNMSSC.DLL startup error stops occurring.
If the problem is not yet fixed, move down to the next method below.
Remove cnmssc~1.dll from Registry Editor
If you uninstalled your Canon printer software without taking care of all the dependencies, you might start seeing this error message every time you turn on your computer.
That’s because there’s still a registry key somewhere that’s trying to call the now-missing cnmssc~1.dll file. To fix the problem, you’ll need to find and delete every mention of cnmssc~1.dll from your Registry using Registry Editor.
This method was confirmed to be effective by a lot of Windows 10 and Windows 11 users that we’ve previously uninstalled the Canon Printer software incorrectly.
Here’s how to do this:
- Press Windows key + R to open up a Run dialog box. Next, type ‘regedit.msc’ inside the text box and press Ctrl + Shift + Enter to open up the Registry Editor with admin access.
Accessing the Regedit menu - When you’re prompted by the User Account Control, click Yes to grant admin access.
- Once you’re inside the Windows Registry Editor, make sure the Computer entry is selected from the left-hand menu, then go to the ribbon at the top and click on Edit > Find.
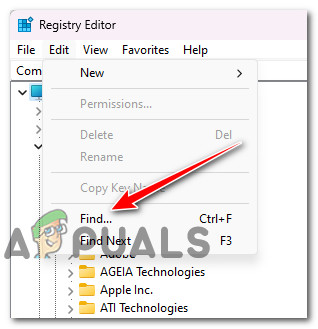
Using the Find functionality on Registry Editor - Inside the Find What dialog text box, type ‘cnmssc~1.dll’ and press Enter.
- Once the first result is found, simply press the Del key, then press Enter to confirm the deletion.
- Next, press F3 to continue searching and continue deleting every key containing mentions of the cnmssc~1.dll file until there are none left.
- Restart your computer and see if the startup error stops occurring.
If the same kind of issue is still occurring, move down to the next method below.
Deploy a clean boot
You might be encountering the CNMSSC.DLL error code because of some kind of application or service conflicts with the printer dependencies.
To see if this is the case, you can force Windows to boot with only the essential drivers and startup programs. This type of startup (clean boot), will help you identify any software conflicts that might be causing this particular issue.
Here are the steps for performing a Clean Boot on Windows and seeing if a 3rd party service or startup item is causing this startup error:
- Make sure you’re signed in with a Windows account that has administrative privileges.
- Press Windows key + R to open a Run dialog box, then type “msconfig” and hit Enter to open the System Configuration window.
Accessing the MsConfig interface Note: If you’re prompted by the User Account Control (UAC), click Yes to grant administrative privileges.
- Inside the System Configuration window, go to the Services tab and check the box next to Hide all Microsoft Services.
Note: This will make sure you’re not disabling any critical services needed by the operating system.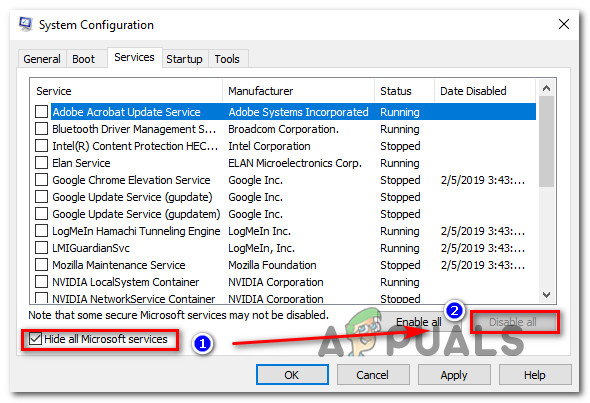
Disable Non-essential startup services - Then, disable all remaining services at once by clicking the Disable all button.
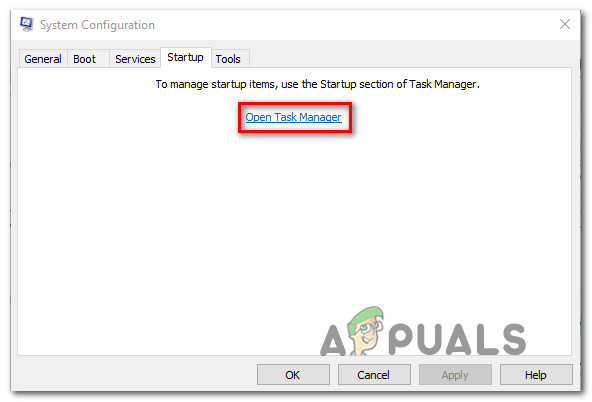
Note: This operation will stop any 3rd party services and other non-essential built-in services from causing an app conflict that might lead to the cnmssc startup error. - Once all services have been disabled, click Apply changes, then go to the Startup tab and click Open Task Manager.
Opening Task Manager - In Task Manager, go to the Status tab and start selecting each service individually, then click Disable to prevent it from running at startup.
Disabling apps once again - Once all 3rrd party services have been disabled, close Task Manager and restart your computer for Clean Boot mode.
- After the next startup sequence is complete, open Microsoft Store and see if you can download the application or game that was previously failing. If not, you can identify which conflicting app or service is causing the error code by systematically re-enabling everything that was disabled, one item at a time, coupled with frequent reboots until you find which one is causing issues.
In case this method has confirmed that no 3rd party application, service, or process is causing the issue, move down to the next method below.
Initiate a Safety Scanner scan
If none of the methods so far were effective in your case, the next step should be to ensure that you’re not experiencing this issue due to a virus infection.
To make sure that’s not the case, you can try running the Microsoft Safety Scanner from Safe Mode.
Note: This will ensure that you’re using the most powerful virus-removal tool that Microsoft has developed, without worrying about 3rd party interference.
Here’s a quick guide on running the Microsoft Safety scanner from Safe Mode:
- Power on your computer (or restart it if it’s already on) and wait until you arrive at the initial login screen.
- Once you see the initial login window, click on the power icon (bottom right corner).
- Once you see the power contact menu, hold the Shift key while clicking on Restart to prompt your computer to boot in Safe Mode.
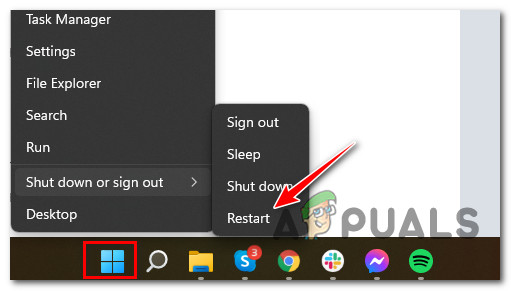
Booting in Safe Mode - As soon as you do this, your computer will restart and the new state will be enforced.
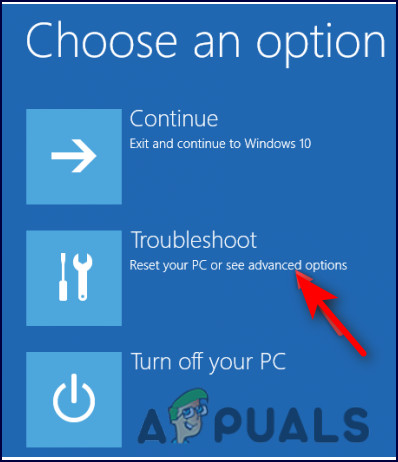
- Eventually, your computer will arrive inside the Troubleshooting menu. When you see it, click on Troubleshoot.
Accessing the Troubleshoot menu - Once you’re inside the Advanced Options menu, start by clicking on Startup Settings from the large list of available options.
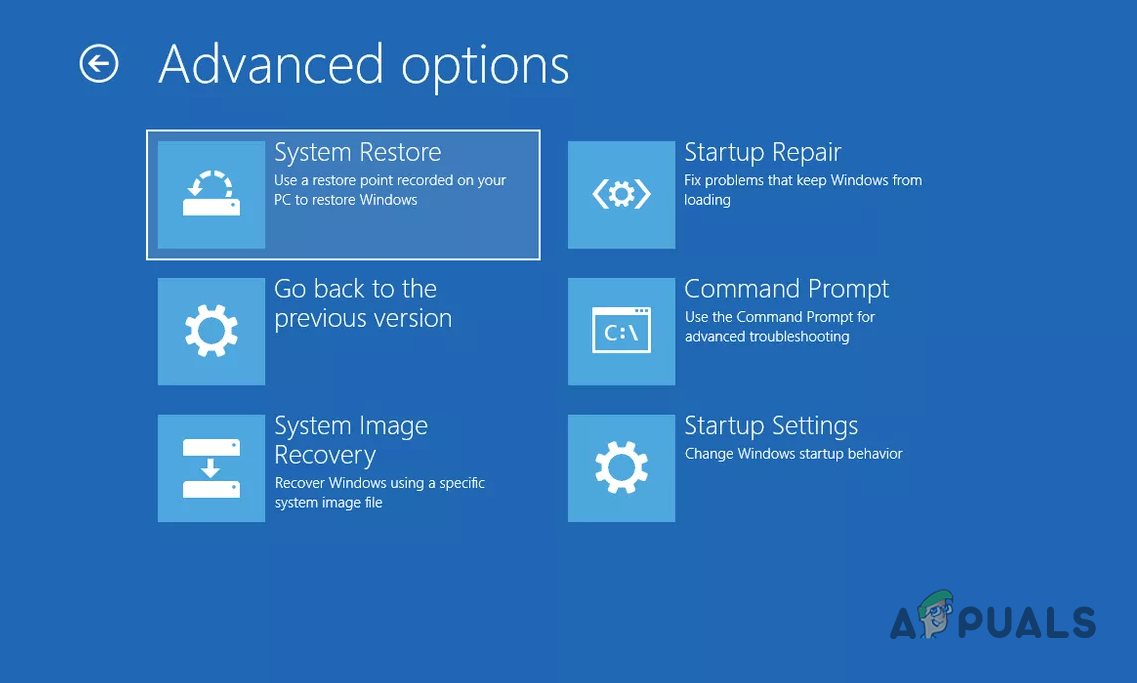
Accessing the Startup settings menu - Inside the Startup Settings menu, press F5 to boot up in Safe Mode with Networking.
Note: It’s important that you boot in Safe Mode with Networking, so that your computer has Internet access later on when we will download and use the Windows Safety Scanner utility.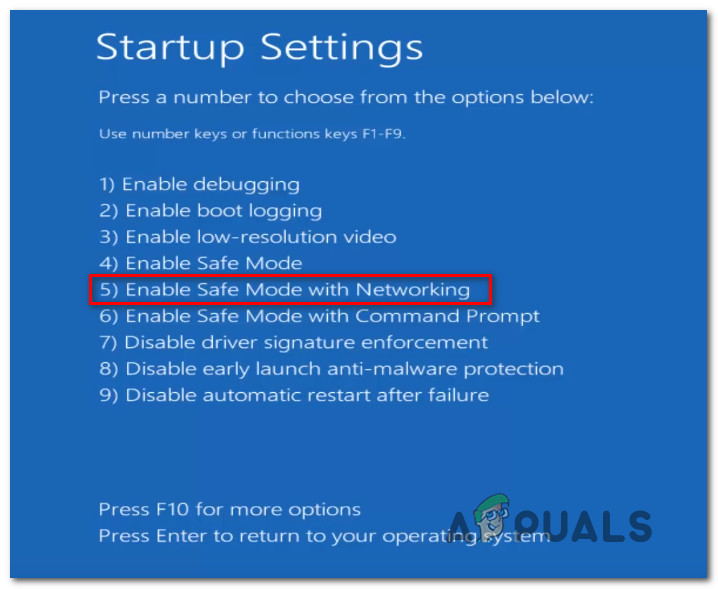
Boogting in Safe Mode with Networking - Once your PC has successfully booted in Safe Mode with Networking, download the latest version of the Microsoft Safety scanner according to your Windows bit version.
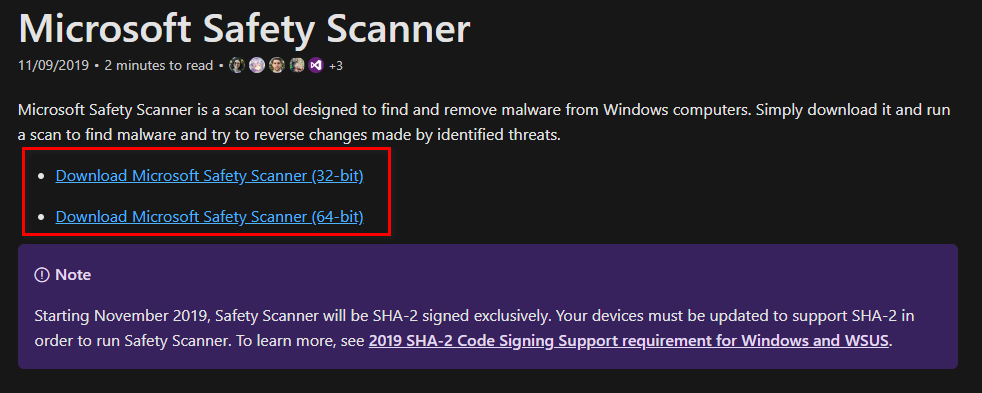
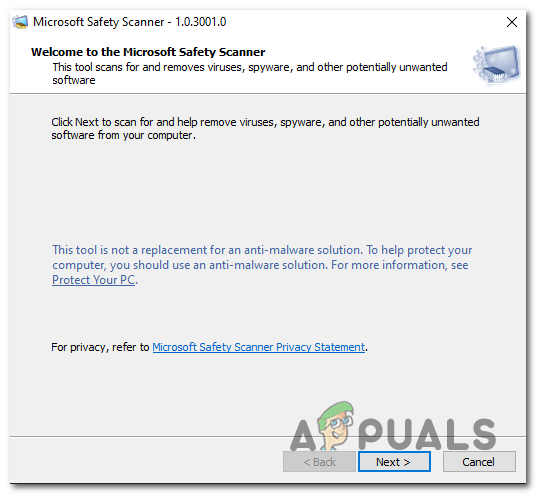
Download the Microsoft Safety scanner - Wait until the download is complete, then double-click on the MSERT.exe file to open up Microsoft Safety Scanner. If you’re prompted by the UAC (User Account Control) prompt, click Yes to grant administrative privileges.
- Follow the remaining prompts to initiate a scan with the Microsoft Safety Scanner.
- Wait patiently until the process is complete.
Download the Microsoft Safety Scanner - Once the process is complete, restart your computer in order to boot it in normal mode, then see if the operation has allowed you to remove the problematic startup error.
If this method didn’t work for you, move down to the next method below for a way to address the virus infection issue with a 3rd party utility.
Deploy a Malwarebytes scan
If the CNMSSC.DLL file is not located in its authentic location and your virus scan reveals suspicious activity, you should deploy a security scanner to remove the malware infection. Based on past experience with similar cloaked viruses, the most efficient software to use in this case is Malwarebytes. It’s free and will identify most malware that exhibits this behavior.
To make things easier for yourself, follow this article to learn how to deploy a deep scan using the free version of Malwarebytes to get rid of the virus infection.
If the scan completes successfully and the virus infection is removed, restart your computer and see if there is any evidence of the CNMSSC.DLL file at the next system startup.
In the event that this process reveals that the CNMSSC.DLL file is genuine, move down to the final potential fix below.
Perform a repair or clean install
If you’ve come this far and you’re still encountering the CNMSSC.DLL error, it’s clear that you’re dealing with a severe corruption issue that cannot be resolved conventionally.
In this case, the only way of taking care of the problem is to reset all Windows components to ensure that you remove any instance of corrupted system files.
Most users choose the radical solution – a clean install that does the job but also removes any personal data including applications, games, media, and documents.
If you want to go for a less destructive route that will allow you to refresh your Windows components without affecting any of your personal files (games, apps, photos, documents, etc.), you should go for a repair install. This procedure will allow you to keep all your personal data.
In case you want to perform a repair install, follow this guide for step-by-step instructions on completing this procedure.


