chkdsk /f /r vs chkdsk /r /f
Almost every one of us knows about the chkdsk (Check Disk Utility) that can be used in almost all Windows versions. For people who don’t know what chkdsk is, it is pronounced as check disk and it is a command that you can run from the Command Prompt/Power shell or via the Properties window. In order to use the chkdsk command, users must have the Autochk.exe file on their systems.
Why use the Chkdsk?
Now that you know what a chkdsk command is, you must be wondering about the scenario where you would use this command. The chkdsk command is used to check and fix any errors on the targeted disk. For example, if you cannot access a certain disk or you suspect that a file maybe corrupted then you can use the chkdsk commands to check the drive for any errors and fix those errors.
There are basically two things that the chkdsk can be used for:
- Disk Errors: Chkdsk can be used for detecting any problems with the integrity of a file system of the select disk volume. If it finds any issues with the integrity of the file system or the file system metadata then it fixes those logical errors automatically.
- Physical Errors: Chkdsk can be used for detecting bad sectors on the selected disk volume. The bad sectors can happen either because of the physical damage to your disk or because of badly written sectors. The former is known as the hard bad sector and the latter is known as the soft bad sector. Chkdsk automatically fixes these errors as well.
A lot of people are skeptical about using the chkdsk commands mainly because it isn’t the best disk checking tool and it takes a lot of time. Although this might be true but chkdsk can help prevent loss of data and it is very easy to use. It is already present on your operating system so you don’t have to download anything and it literally takes a few clicks to run the chkdsk on the targeted disk.
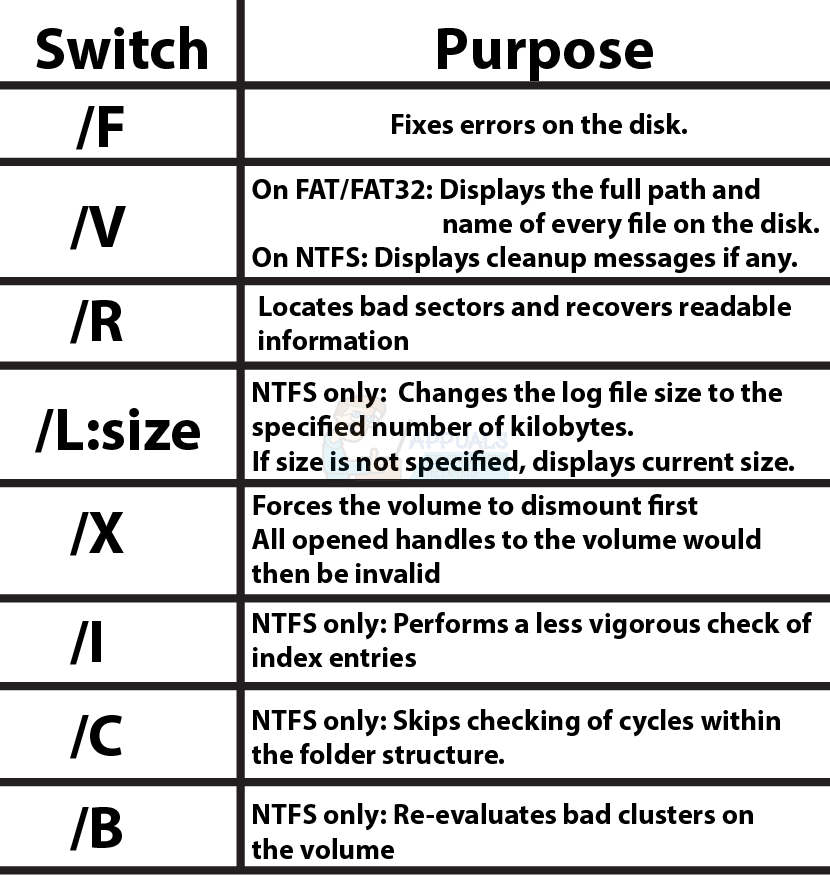
Chkdsk Switches/Options
There are multiple options that can be used with the chkdsk command. The options available with the chkdsk have their specific functions.
Format
The format for using these commands is chkdsk [/?]. Where “?” will be replaced with the option that you want to use.
Example
For example, using the command chkdsk /r will locate the bad sectors on the targeted drive and will try to recover the readable information.
Note: These options are also known as Switches.
Chkdsk Volume and Filepath
Chkdsk can be run on specific drives and folders. Once you specify a drive or a folder (by giving its path) the chkdsk will only check the targeted drive/file. This will save you a lot of time if you are suspecting problems with a specific drive or file/folder. You don’t have to run the chkdsk on the entire hard disk.
Format
The format for specifying a volume or file path is: CHKDSK [volume[[path]filename]]] [/Switch]
Example
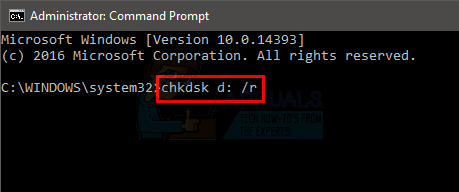
For example, if you want to check the D drive on your system, you will write this command: chkdsk d: /r
chkdsk /f /r or chkdsk /r /f? Which one to use?
One of the most common commands that are used today are chkdsk /f /r or chkdsk /r /f. Some people prefer to use the chkdsk /f /r command to fix the errors where as other people use chkdsk /r /f to fix corruption problems. You might have already seen the purposes of both /r and /f switches. The /r looks for bad sectors and recovers any readable information. The /f switch fix the errors on the drive. If you are doing research on fixing a corrupt drive or some other file, you will see that some people will advise you to use chkdsk /r /f where as some people will tell you to use chkdsk /f /r.
Are both commands the same?
So, which command should you use? Are there any benefits of using one over the other? The thing is, both are pretty similar commands. Both of these commands do the same thing but just in a different order. The chkdsk /r /f locates bad sectors and recovers readable information and then fixes the errors. The chkdsk /f /r does the same thing but in the opposite order.
Main Difference
The main difference between the /r and /f command is that the /r is used to locate the physical errors on the disk whereas the /f is used to locate the disk errors.
Best option
The best option for you here is to use none of these commands. This is because using the /f switch whether before or after the /r switch is useless. The /r command locates the bad sectors and recovers any readable information which implies /f. This makes the /f option redundant when using with the /r. If you use chkdsk /r that means that you are automatically using chkdsk /r /f. The /r means that everything that /f does is done as well as anything extra that /r does
So, the answer here is that you should use the command chkdsk /r. This command is enough and there is no need to include the /f.
Note: If you only want to locate and fix the disk errors then you should only use the /f command.
How to use chkdsk?
You can use chkdsk in 2 ways. The first way is via the command prompt or, in other words, the hard way. This is because you will have to type the commands and it might be a bit technical for you. The second option is to use the graphical interface. This option is suited for the majority of users especially for people who aren’t so tech-savvy. Steps for using chkdsk via both of these options are given below.
Command Prompt or Power Shell
Follow the steps given below to run chkdsk commands on Command Prompt
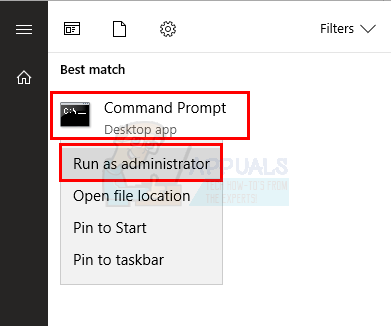
- Press Windows key once
- Type command prompt in the Start Search
- Right-click Command Prompt from the search results and select Run as administrator to open an elevated command prompt.
- Now type chkdsk d: /r and press Enter. Replace D with the drive letter you want to check.
Graphical User Interface
You can use chkdsk utility without the command prompt or power shell as well. Here are the steps for using the chkdsk utility
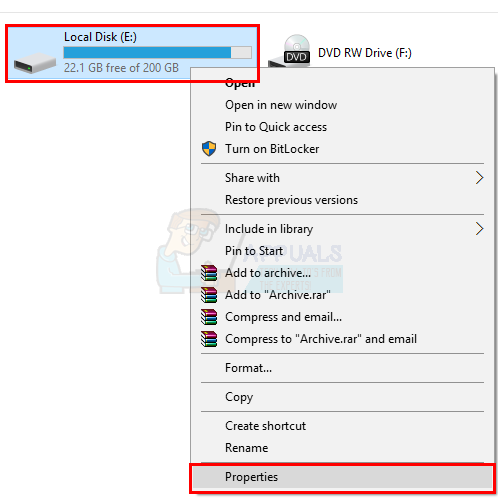
- Go to the folder or disk you want to check via the chkdsk. In our example, we will check the drive E
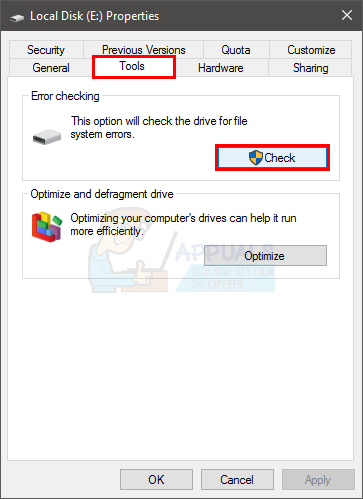
- Right click the targeted volume and select Properties
- Select Tools tab
- Click Check button in the Error Checking section. If you have Windows 7 then the button name will be Check Now.
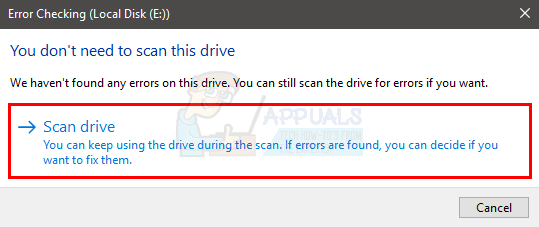
- You might see a dialogue telling you that you don’t have to run the scan. You can close the dialog and go back to your normal usage or you can click Scan drive to forcefully run the chkdsk utility. Note: Once you click the button and you have Windows 7, you might see a new dialog with Automatically fix file system errors option and Scan for and attempt recovery of bad sectors You can select deselect both of these options or select the one suitable for you or select both of these options. Once done, click Start to start the scan. Keep in mind that running chkdsk with both options will take a lot of time, probably a few hours.
- Once the scan is complete, you will see a confirmation dialog. You can click View details to look at the details or click cancel to close the dialog.
Note: Once you start the scan, you might see the dialog saying that the disk is in use and the scan will be performed on the next startup. Click the Schedule disk check button to confirm or click cancel if you don’t want to scan on the next startup.
Problems with chkdsk
There will be cases when you will see an error message when trying to run the chkdsk command. Here are a couple of very common error messages and steps on how to solve these issues.
An unspecified error occurred
If chkdsk gives an “An unspecified error occurred” error then you won’t be able to check your disk for errors. The error will look like this
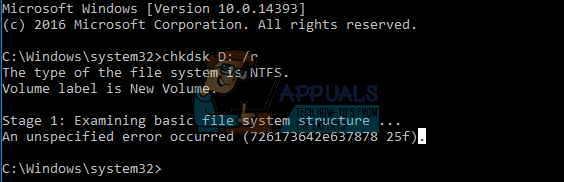
Note: If the steps in the article don’t solve the issue and you are using a low-frequency AMD CPU then click here and download the Hotfix from Microsoft’s official website. Once downloaded, run the Hotfix and check if it resolves the issue.
Cannot continue in read-only mode
You might see the “Cannot continue in read-only mode” error if you run the chkdsk /f command (most of the time). The error will look like this
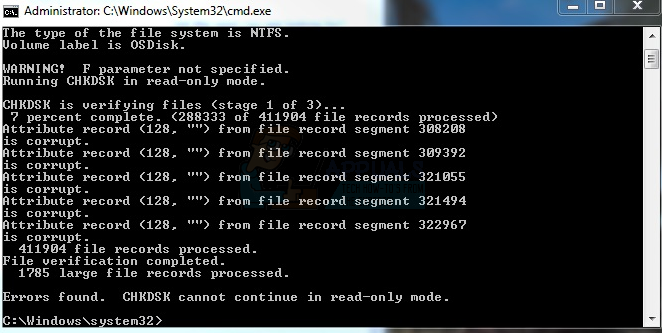
Solution
If you see this error then you should run the chkdsk /r command or chkdsk [drive letter] /r command. You might see a message
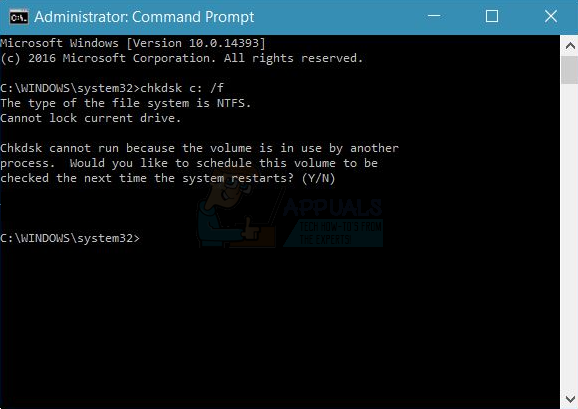
“Chkdsk cannot run because the volume is in use by another process. Would you like to schedule this volume to be checked the next time the system restarts? (Y/N)”
If you see this message, simply type Y and press Enter to schedule the scan. Once done, reboot and the scan will run on the startup.
Cannot lock current drive
If chkdsk gives a “Cannot lock current drive” error then you won’t be able to check your disk for errors. The error will look like this
Thanks bro!