How to Change Android System Font without Apps

Changing the default system font on an Android device should be the easiest thing in the world, yet on many devices it’s actually rather complicated. The issue stems from the fact that stock Android does not offer the ability to customize system font – this is something that some device manufacturers have built into their ROMs. Furthermore, while some device manufacturers (Samsung, HTC, LG, etc) offer a way to easily change font, it’s often through their theme store where you will need to purchase a new font you like.

Android users are likely familiar with the plethora of font apps out there – FontFix and iFont are two such examples. The drawbacks of these apps however is their potential to brick your device – while the developers of both of those apps have made them extremely user-friendly, accidents can happen, usually due to fonts not being given the correct system-permissions after installation.

What we’re going to do is change your system font through ADB, which is a bit more technically involved, but it significantly reduces risk to bricking your device.

Warning: You must only use TrueType font files (they will end in .ttf file extension).

Where to Find Fonts

Most of the font-changing apps pull fonts from online font directories. You can just as easily browse these directories on your PC and download the font files for pushing to your Android phone. Here are some of the best free font directories available:

Google Fonts
Font Squirrel
DaFont
Urban Fonts
1001FreeFonts

Requirements

ADB (see “How to Install ADB on Windows”)
A rooted phone
[Optional] Auto Font Unbricker

How to Change Font on Android with ADB

Download the font you want to use to your PC desktop.

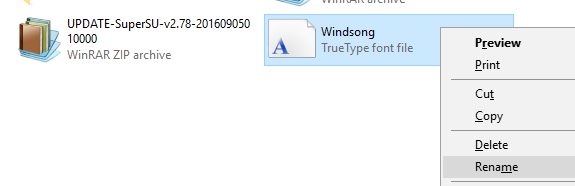
Place the font on your phone’s external storage via USB transfer. Rename it to Roboto-Regular.ttf – this is very important, because we need to trick the Android system.

Open an ADB terminal and type the following commands:
adb shell
su
mount –o remount,rw /system
cd /system/fonts

ADB is now inside the fonts directory of your Android device. Now, Android phones typically use Roboto font for the system, with variations of that font for menus, notification bar, etc. They are:

Roboto-Regular.ttf
Roboto-Bold.ttf
Roboto-Italic.ttf
Roboto-BoldItalic.ttf

So what we’re going to do is first replace the Roboto-Regular font, but you can also use this guide for replacing the bold, italic, and bold-italic versions of Roboto with those same versions of your chosen font.

Before continuing, let’s make a backup of the Roboto-Regular font incase something goes wrong. Type into ADB terminal:
mv Roboto-Regular.TTF Roboto-Regular.ttf.bak

Now we’re ready to replace it with your custom font. Type into the ADB terminal:
cp /sdcard/Roboto-Regular.ttf /system/fonts

And now we need to set the file permissions for the font, which is extremely important – this is where a majority of device bricks occur when using font-replacing apps.

Type into the terminal:
chmod 644 Roboto-Regular.ttf
exit

Now power on your Android device – you should see your new font being used for a majority of the system UI, such as the Settings menu, notifications bar, etc.

If Something Goes Wrong:

A lot of novice users panic when their device goes into boot-loop. Recovering from a boot-loop depends on what caused it, and luckily, recovering from a boot-loop caused by font tampering is as simple as restoring the original Roboto font to the Android system. Inside the ADB terminal, type:

Adb devices
su
mount –o remount,rw /system
cd /system/fonts
rm Roboto-Regular.ttf
mv Roboto-Regular.ttf.bak Roboto-Regular.ttf
chmod 644 Roboto-Regular.ttf
exit

Now power on your device, and it should be back to normal. In the rare example where this doesn’t fix a boot-loop after changing your system font, there is a tool available for exactly this problem, called “Auto Font Unbricker”.

Just download the Auto Font Unbricker to your PC, connect your device via USB, launch the program and follow the on-screen instructions.

ABOUT THE AUTHOR

Kevin Arrows


Kevin Arrows is a highly experienced and knowledgeable technology specialist with over a decade of industry experience. He holds a Microsoft Certified Technology Specialist (MCTS) certification and has a deep passion for staying up-to-date on the latest tech developments. Kevin has written extensively on a wide range of tech-related topics, showcasing his expertise and knowledge in areas such as software development, cybersecurity, and cloud computing. His contributions to the tech field have been widely recognized and respected by his peers, and he is highly regarded for his ability to explain complex technical concepts in a clear and concise manner.

Comments

15
    AR
    Arnav74 Oct 6, 2018

    does this work with emoji fonts too? I want to keep Google product sans as my text font, and as I have a Samsung galaxy s8, if I replace then SamsungEmoji.ttf in /system/fonts using the method above with another ttf with just emojis, will both run simultaneously?

    KP
    kinoe Peter Sep 22, 2019

    Hi Kevin, thanks for your great tutorial. It seems to be very useful though my try stucked during adb shell
    I wonder should it be done in recovery mode? Though adb recognizes my device but adb shell returned: device unauthorized
    Booted into the system adb shell and su run smooth but remounting doesn’t make sense, does it?. I’m not sure how to proceed and don’t want to fiddle around and eventually brick my phone.

    So what do i miss?

      SW
      Shane Warren Author Sep 22, 2019

      Go into the developer options for the phone and revoke the USB Debugging authorization and restart the adb server. After that, reconnect the device and try again,

        KI
        kinoe Sep 25, 2019

        Thanks for your answer. Did as you mentioned: revoked the USB Debugging authorization and restarted the adb server, reconnected the device and tried again to adb shell from windows and Linux into the phone in recovery mode..to no avail:
        error:

        This adb server’s $ADB_VENDOR_KEYS is not set
        Try ‘adb kill-server’ if that seems wrong.
        Otherwise check for a confirmation dialog on your device.

          SW
          Shane Warren Author Sep 26, 2019

          Make sure that when you reenabled USB debugging you gave the authorization for the computer to access in the message “Allow USB Debugging Access? The Computers RSA key fingerprint is …”. Also, go into this folder “C:Users/$Name/.android adbkey.pub” and delete the ADB key file. It will automatically be regenerated after you restart. In the end, revoke USB debugging authorization again and try one more time.

          KI
          kinoe Sep 27, 2019

          Thank you for bothering!
          Unfortunately adb authorization of my phone still fails.
          What I did so far:
          Phone (Android 8.0):
          -disabled USB Debugging authorization
          -revoked the USB Debugging authorizations
          PC (Windows 7):
          -adb kill-server
          -deleted: C:Users/$Name/.android/adbkey.pub & C:Users/$Name/.android/adbkey
          -adb start-server
          Phone:
          -enabled USB Debugging authorization
          -reconnected to PC
          -gave authorization in the message “Allow USB Debugging Access? …”
          PC:
          -adb devices (good=authorized)
          Phone:
          -rebooted into recovery mode
          PC:
          -adb devices (FAILED=unauthorized)

          SW
          Shane Warren Author Sep 27, 2019

          I’m afraid that’s all I could suggest on the matter, what device are you using?

          KI
          kinoe Sep 27, 2019

          Shiftphone 6m
          I tend to do the procedure of changing the system font with a root file manager like X-plore, but if I crashed my phone again and I would not be able to access the GUI, ADB from recovery mode would be useful for fixing.

          SW
          Shane Warren Author Sep 27, 2019

          Try to change the USB Computer Connection from MTP to PTP or any other listed option and check. Change cables connecting the computer and the mobiles and see if it helps.

          KI
          kinoe Sep 28, 2019

          Thank you Shane. I will try another cable. But changing the USB Computer Connection from MTP to PTP is not an option in recovery mode, is it? My normal android system running doesn’t have any problems with adb authorization.

          Maybe it’s a misunderstanding, cause I’m trying to change the font from a windows pc to an android phone in RECOVERY MODE. Is the same possible with adb when the normal android system is running without risking to corrupt the phone?

          SW
          Shane Warren Author Sep 28, 2019

          Turn the normal android on and when you make the connection change the mode from there, after changing it and saving that configuration, put the phone in recovery mode and try the process. Also, did changing the cable help? Also, this seems like a longshot but make sure to download and install the drivers for the mobile on your computer.

          KI
          kinoe Sep 29, 2019

          Nothing helped: no cable, no connection mode, no reinstallation of up to date drivers.

          I suppose this issue is linked to the specific phone and/or configuration. So I turned to the manufacturer of the phone and wait for an answer. Thanks a lot for your help

    SW
    Shane Warren Author Sep 22, 2019

    No only one of them will run.

    AR
    Arsal Sep 27, 2019

    its telling me that theres no space left on device when i use the cp command. Also, it says that the Roboto-Regular.ttf doesnt exist when its clearly there

    SW
    Shane Warren Author Sep 28, 2019

    Do this command: “/system free space” To verify that there is free space on the device.