Fix: Can’t Connect to Network in Windows
The connection attempt starts, the adapter briefly turns off, then turns back on, followed by the “Can’t connect to this network” message. This shows that Windows fails to finish the Wi‑Fi connection setup because of a break in the adapter or network software during the process.

The main cause is a bad or unstable Wi‑Fi adapter, with other causes including old or clashing drivers and conflicts from third‑party Wi‑Fi apps. Hidden hardware problems such as loose internal Wi‑Fi cards or badly placed USB dongles can also cause this error.
1. Tweak Wireless Network Adapter Drivers
Sometimes the cause of this error is in how Windows talks to the network adapter, and old or damaged drivers can break that link. Updating, rolling back, or reinstalling the Wi‑Fi adapter driver can bring back proper working, making sure the hardware and operating system share connection data without breaks.
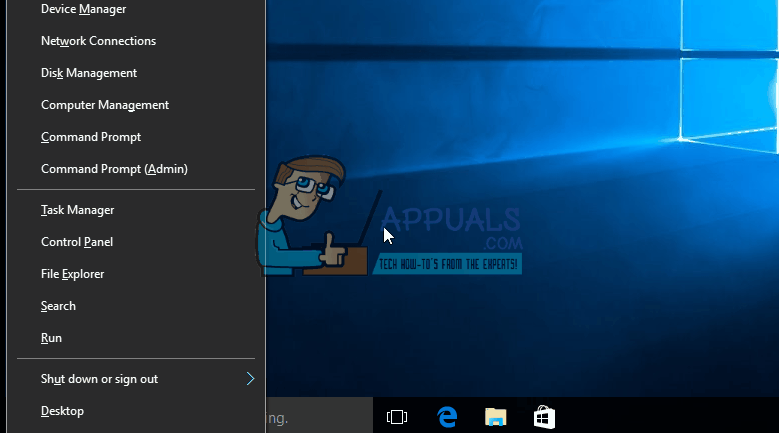
- Press Windows key + X to open the menu above the Start button.
- Select Device Manager from the list.
- Expand Network adapters, then select your wireless adapter (the name varies by PC/manufacturer).
- Right‑click the adapter and select Update driver.
- Select Search automatically for drivers.
- Windows will search, download, and install an updated driver if available. Click “Close” when done.
- Restart your computer. If Windows can’t find a newer driver, connect your PC to the router with an Ethernet cable and download the latest Wi‑Fi driver from your PC or adapter manufacturer’s website, then install it.
- If this doesn’t help, repeat the process up to step 4 and choose “Browse my computer for drivers”, then select “Let me pick from a list of available drivers on my computer”.
- (Advanced) You can uncheck “Show compatible hardware” to see all drivers and pick a closely matching driver for your adapter’s chipset. Only do this if you’re confident about the chipset you have.
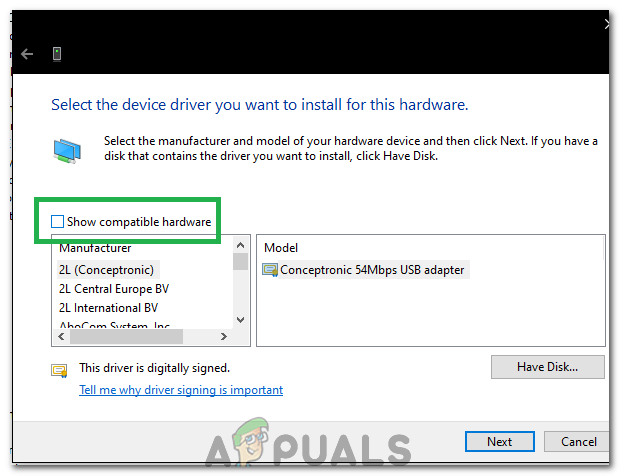
Unchecking the “Show Compatible Hardware” option. - Check to see if the issue persists.
- If it still persists, try rolling back the driver: repeat up to step 3, right‑click the adapter, and select “Properties”.
- Open the Driver tab and select “Roll Back Driver” (if available).

Selecting “Rollback Driver” option - Follow the on‑screen prompts, then test your connection again.
2. Power Cycle your Router or Modem
A quick restart of the router or modem can fix temporary software bugs, refresh the network’s IP address, and restore a stable connection between the device and Windows.
- Press the power button on the back of your router/modem to turn it off, or unplug it.
- Wait at least 30 seconds before turning it back on.
- When your Wi‑Fi network shows up in the list again, try connecting to it and see if the problem is gone.
3. Run the Windows Troubleshooter
Built into Windows, the network troubleshooter can automatically find and fix common connection problems by resetting network parts, fixing wrong settings, and making needed fixes in the background.
- Press Windows key + R, type Control Panel, and press Enter.
- In the “Search Control Panel” box (top right), type “Troubleshooter” and press Enter.
- Select “Troubleshooting” from the results.
- Go to Hardware and Sound.
- Click Hardware and Devices and run the troubleshooter. You can also run the Internet Connections and Network Adapter troubleshooters (under “Network and Internet”) for more targeted checks.
- From Hardware and Sound, you can also click “Configure a device” to check for general hardware issues. If Windows reports driver compatibility issues on Windows 10, continue with the next steps.
- Download the latest network (Wi‑Fi) driver from your manufacturer’s website and save it to your desktop.
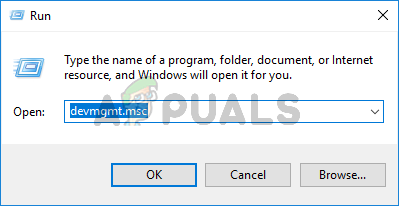
- Press Windows key + R and type “devmgmt.msc” in the Run dialog.
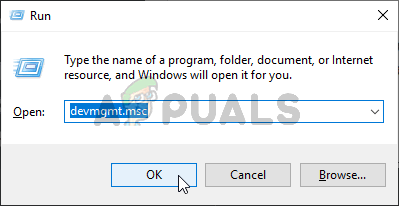
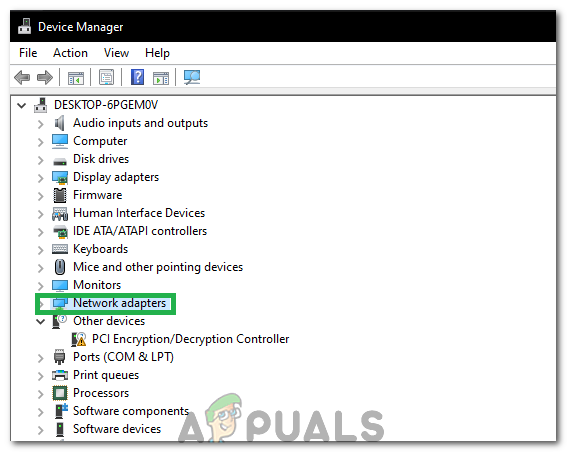
Running the Device Manager - Find your adapter under Network adapters and right‑click it.
- Select Uninstall device. If you see the option, check “Delete the driver software for this device”, then confirm and follow the prompts.
- Right‑click the driver installer you downloaded and select Properties.
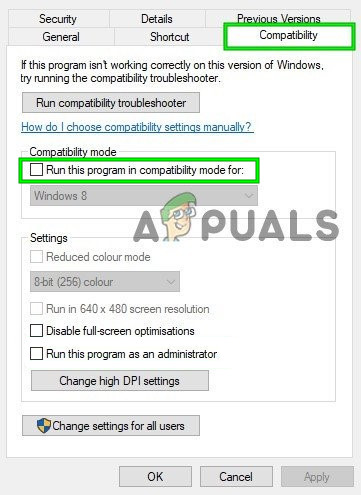
- Go to the Compatibility tab.
- Make sure “Run this program in compatibility mode for” is unchecked first, as shown in the screenshot. If the installer fails or the driver only supports older Windows versions, check it and pick Windows 7, then try again.
Uncheck Run this Program in Compatibility Mode - Now right‑click the driver file and select “Run as administrator”. If prompted, click OK.
- Complete the installation and restart your PC.
4. Change Network Key (Security/Encryption) from WPA-PSK/WPA2-PSK to WPA2-PSK with TKIP/AES for your Wireless Adapter
Changing the network security mode to WPA2-PSK with TKIP/AES can fix matching problems between the router and the Wi-Fi adapter, making sure the encryption matches what the adapter can handle during connection.
- Press Windows Key + A to open Action Center.
- Select Settings.
- Click Network & Internet.
- Click your Wi‑Fi network’s Advanced options (or “Properties”).
- Under Properties, look at Security type to see what your network is using.

If it shows WEP or WPA (TKIP), change your router’s Wi‑Fi security to WPA2‑Personal (AES). If you’re not comfortable doing this, ask your internet provider to help. Advanced users can log in to the router, open the Wireless Security settings, and switch from WEP or mixed WPA/WPA2 modes to WPA2‑PSK (AES). The simplest way to access the router is to find your Default Gateway IP and enter it into your browser’s address bar. To get the IP, click Start -> type cmd, open Command Prompt, and type ipconfig /all.
Go through the list until you see the Default Gateway IP.
5. Forgetting Network
Removing the saved network profile makes Windows throw away old connection settings, like wrong security keys or settings, and make a new profile the next time you connect.
- Right‑click the “Wi‑Fi” icon in the system tray and select “Open Network & Internet settings”.
- Click “Wi‑Fi” in the left column.
- Select “Manage known networks”, click your current Wi‑Fi network, then click it again.
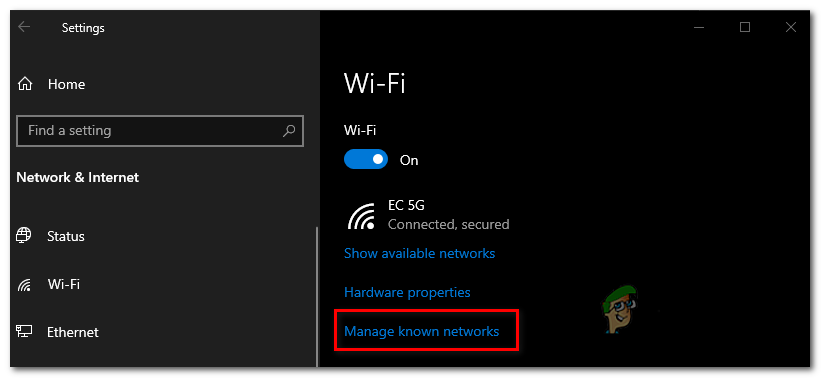
Accessing the Manage known networks menu - Click “Forget”, then close Settings.
- Connect to your Wi‑Fi again and enter the correct password to see if it’s fixed.
6. Network Reset
Doing a network reset reinstalls all network adapters and brings back default network settings, clearing broken settings or clashing rules that may block connections.
- Press “Windows” + “I” to open Settings.
- Click “Network & Internet”, then select “Network reset”.
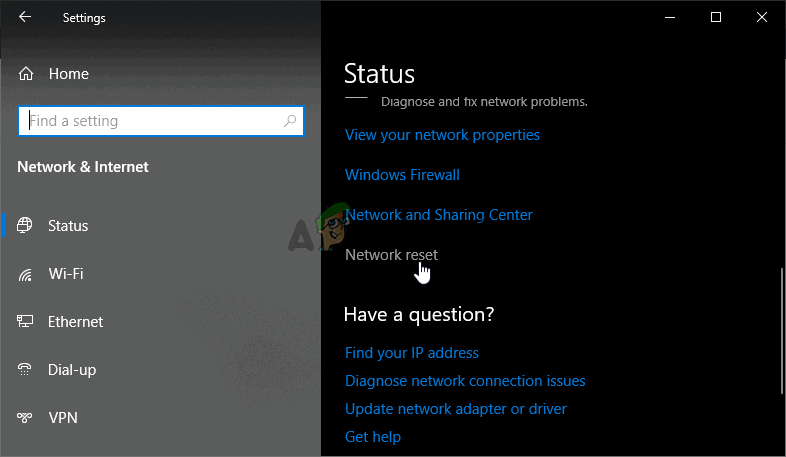
Performing a network reset - Click “Reset now” and let Windows complete the process (your PC will restart).
- After the reboot, reconnect to your Wi‑Fi and test again.
7. Changing Transmission Mode
Some routers/adapters have issues when certain wireless modes are enabled. As a test, you can disable 802.11n on your adapter:
- Press “Windows” + “R” to open Run.
- Type “devmgmt.msc” and press “Enter”.
Type devmgmt.msc and Press Enter to Open Device Manager - Expand “Network adapters” and right‑click your “Network Adapter”.
Clicking on the “Network Adapters” option - Click “Properties”, then open the “Advanced” tab.
- Select “802.11n Mode” (or similar) and set “Value” to “Disabled”.
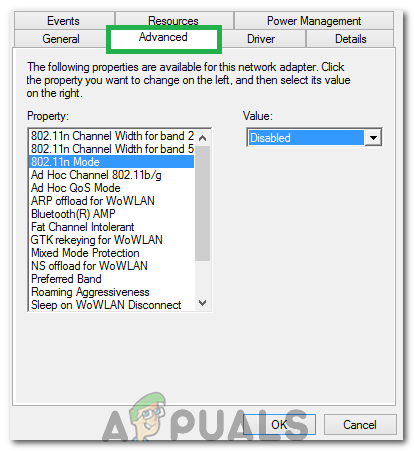
Clicking on the “Advanced” tab and disabling the option - Test your connection. If it works, update your router’s security to WPA2‑AES (Method 4) and try re‑enabling 802.11n later for better speeds.
8. Re-Enabling Wireless Adapter
In some cases, the issue is simply fixed by disabling the network adapter and enabling it again. This refreshes the adapter and clears minor glitches.
- Press “Windows” + “R” to open Run.
- Type “devmgmt.msc” and press “Enter”.
Type devmgmt.msc and Press Enter to Open Device Manager - Expand the “Network adapters” list and right‑click your “Network Adapter”.
Clicking on the “Network Adapters” option - Select “Disable device”.
- Wait 10 seconds, then right‑click it again and select “Enable device”.
- Also try disabling any other unused network adapters and keep only the one you use enabled.
- Test your connection.
9. Changing Network Name
For some users, simply changing the Wi‑Fi network name (SSID) from the router fixed the issue. Log in to your router’s web page, go to the Wireless or Wi‑Fi settings, change the network name, save/apply, then reconnect from Windows. This varies by router/ISP—check your router manual for exact steps.
10. Network Reset
You can also reset the Windows network stack (TCP/IP, DNS, and Winsock) using Command Prompt:
- Press “Windows” + “R” to open Run.
- Type “cmd”, then press “Shift” + “Ctrl” + “Enter” to open an elevated Command Prompt.
- Type the following commands, pressing Enter after each one:
netsh winsock reset
netsh int ip reset reset.log
netsh advfirewall reset
ipconfig /flushdns
ipconfig /registerdns
route /f
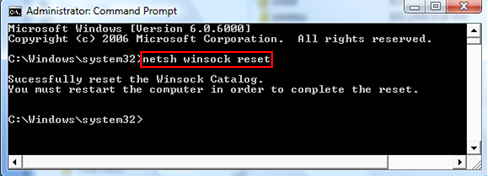
- Wait for the commands to finish and reboot your computer.
- After the restart, try connecting again.
Note: Also try rebooting the router by unplugging it from power and plugging it back in after about 30 seconds. In addition, disconnect any unnecessary USB peripherals (for example, USB hubs, external drives, wireless dongles) temporarily and check if that helps, as they can sometimes interfere with wireless adapters.