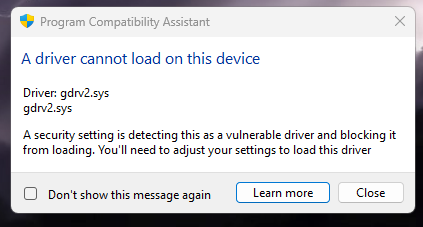
How to Fix ‘Cannot Load Gdrv2.sys Driver’ Error in GIGABYTE?
The error “The Gdrv2.sys driver is not loading” comes from GIGABYTE’s software. It usually occurs when Windows blocks the driver due to compatibility issues, missing signatures, corrupted files, or security restrictions. In simple terms, Windows sees the driver as unsafe or unverified and prevents it from loading.
To fix this error, you’ll need to either update, remove, or manually allow the driver, depending on your system setup and needs. Below are several methods you can try, starting from the easiest fixes to more advanced ones.
1. Uninstall GIGABYTE Utilities
Note: If you don’t use GIGABYTE utilities for RGB control or system tuning, this is the simplest fix. Uninstalling them won’t affect your system performance and will remove the problematic driver.
Some GIGABYTE utilities include drivers that are not fully compatible with newer Windows security features. Tools like App Center, RGB Fusion, Aorus Engine, and EasyTune rely on the Gdrv2.sys driver to manage hardware controls such as RGB lighting, fan speed, and performance tuning.
However, features like Memory Integrity and Windows Driver Signature Enforcement can block this driver due to potential security risks. Uninstalling these utilities removes the Gdrv2.sys driver from your system, which can resolve this error and prevent future conflicts.
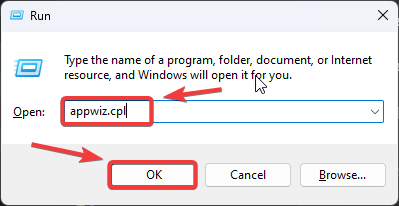
- Press Win + R to open the Run dialog, type appwiz.cpl, and click OK to open Programs and Features.
- In the Programs and Features window, locate and select any GIGABYTE utilities that might be interfering with your system. Pay special attention to:
- APP Center (motherboard control suite)
- EasyTune (overclocking utility)
- RGB Fusion (LED control software)
- System Information Viewer (SIV) (hardware monitoring tool)
These utilities sometimes include low-level drivers that can conflict with system operations.
- Right-click each GIGABYTE utility and select Uninstall to begin the removal process.

- Follow the uninstaller’s prompts carefully. Some utilities may require multiple steps or ask to keep user settings—choose complete removal when available.
- After uninstalling all GIGABYTE utilities, restart your PC to ensure all associated services and drivers are completely removed from memory before testing if the issue is resolved.
2. Check for Driver Updates
An outdated or unsigned GIGABYTE utility driver often causes this error—especially if Memory Integrity is enabled in Windows. To fix this, try updating the GIGABYTE utility that installed the Gdrv2.sys driver.
Visit the official GIGABYTE Support page, enter your motherboard model, and download the latest version of the utility (such as App Center or System Information Viewer). If a signed and updated version is available, installing it should prevent Windows from blocking the driver.
You can also try updating the driver from the Windows Device Manager utility. Here’s how:
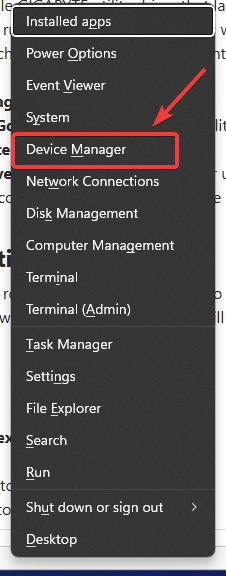
- Press Win + X and select Device Manager from the menu.
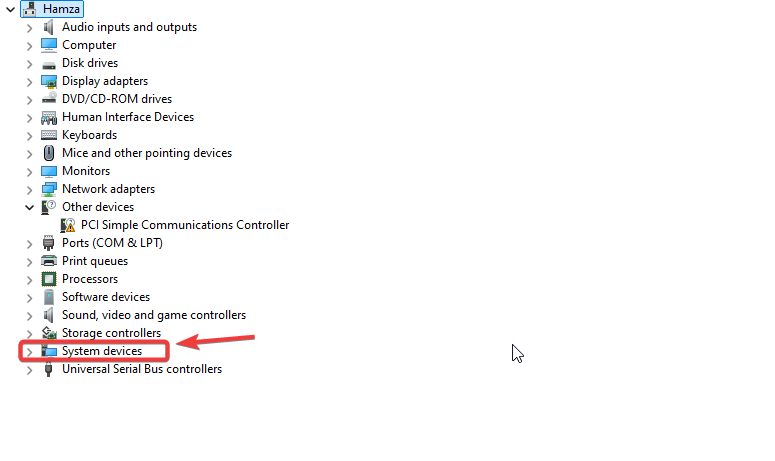
- Expand the System Devices section and locate any GIGABYTE-related drivers, particularly Gdrv2.sys.
- Right-click the driver and select Update driver from the context menu.

- Choose Search automatically for drivers to let Windows find and install the latest compatible version.
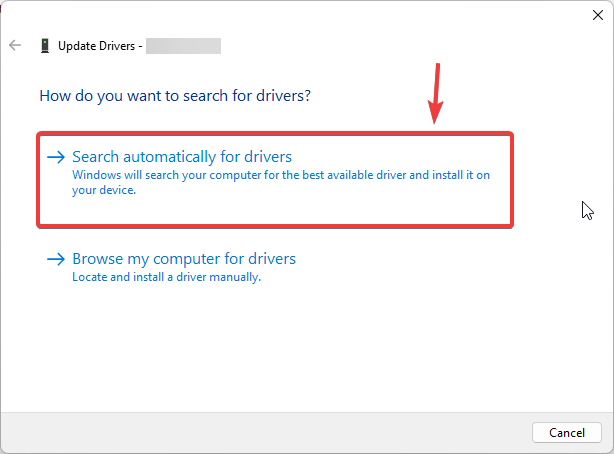
- After the update completes, restart your computer to apply the changes and check if the error persists.
If no update is available or the issue still persists, consider uninstalling the utility completely or disabling Memory Integrity (not recommended unless necessary).
3. Disable Memory Integrity Setting
The Memory Integrity feature in Windows helps protect your system from malware and unauthorized drivers by blocking anything that appears unverified or potentially unsafe. It is part of a security layer called Core Isolation.
However, this feature may prevent certain drivers—like the GIGABYTE Gdrv2.sys driver—from loading, especially if they’re not properly signed. Disabling Memory Integrity can sometimes allow these drivers to run, but keep in mind that doing so will reduce a layer of protection in your system.
Only proceed if you’re confident the driver is safe and from a trusted source.
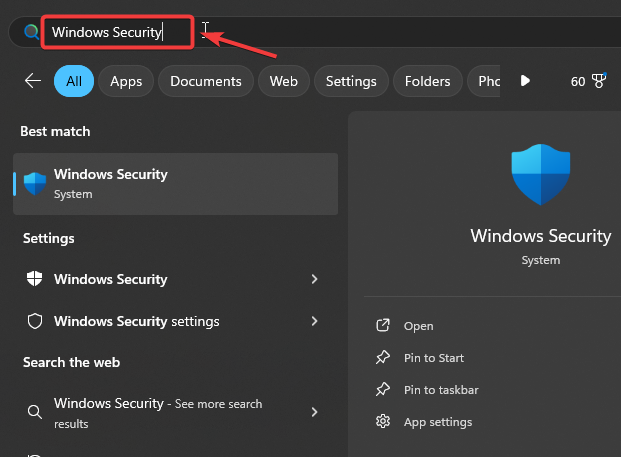
- Press the Windows key, type Windows Security, and press Enter to open the security dashboard.
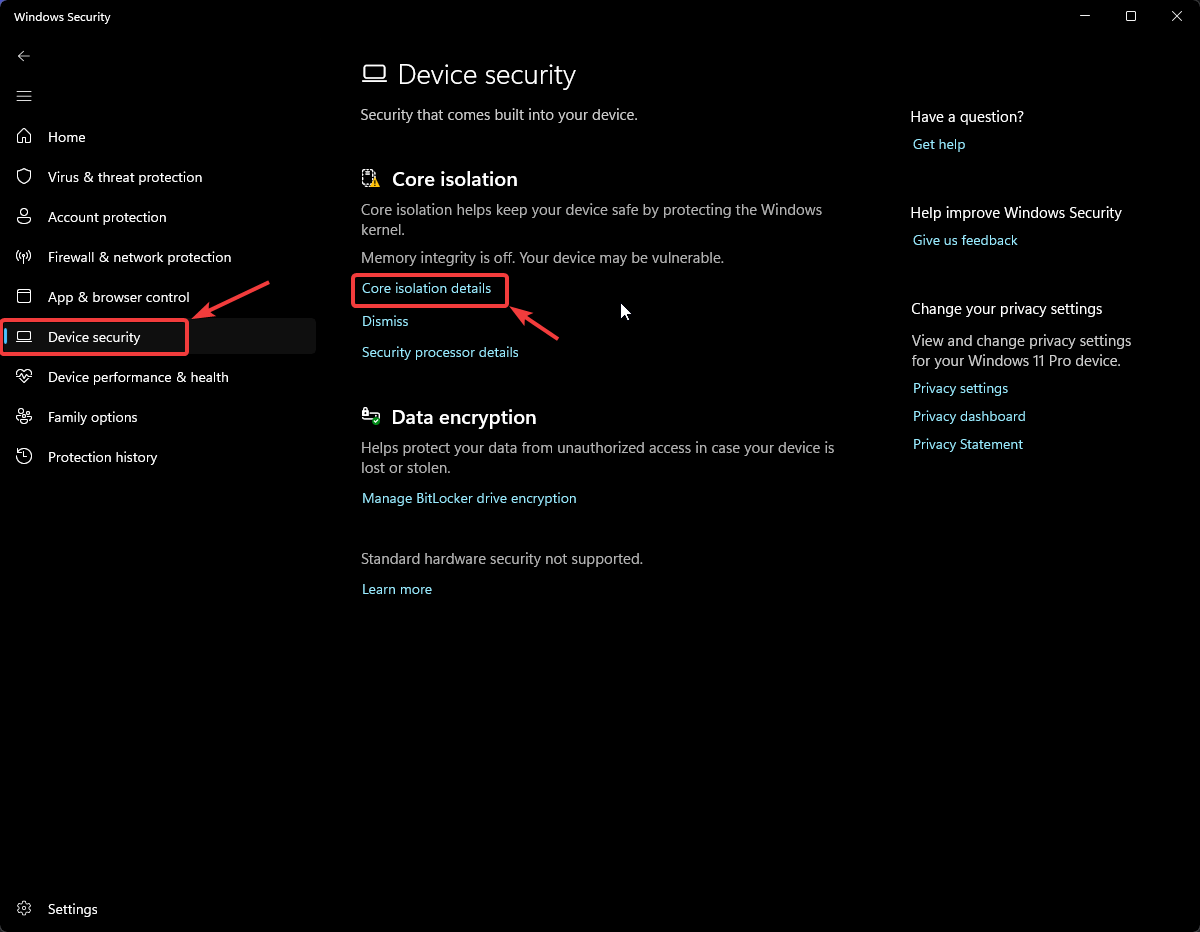
- Select Device Security from the left panel, then click Core Isolation Details to access memory integrity settings.
- Toggle off the Memory Integrity switch. (Note: This security feature can sometimes conflict with anti-cheat systems.)
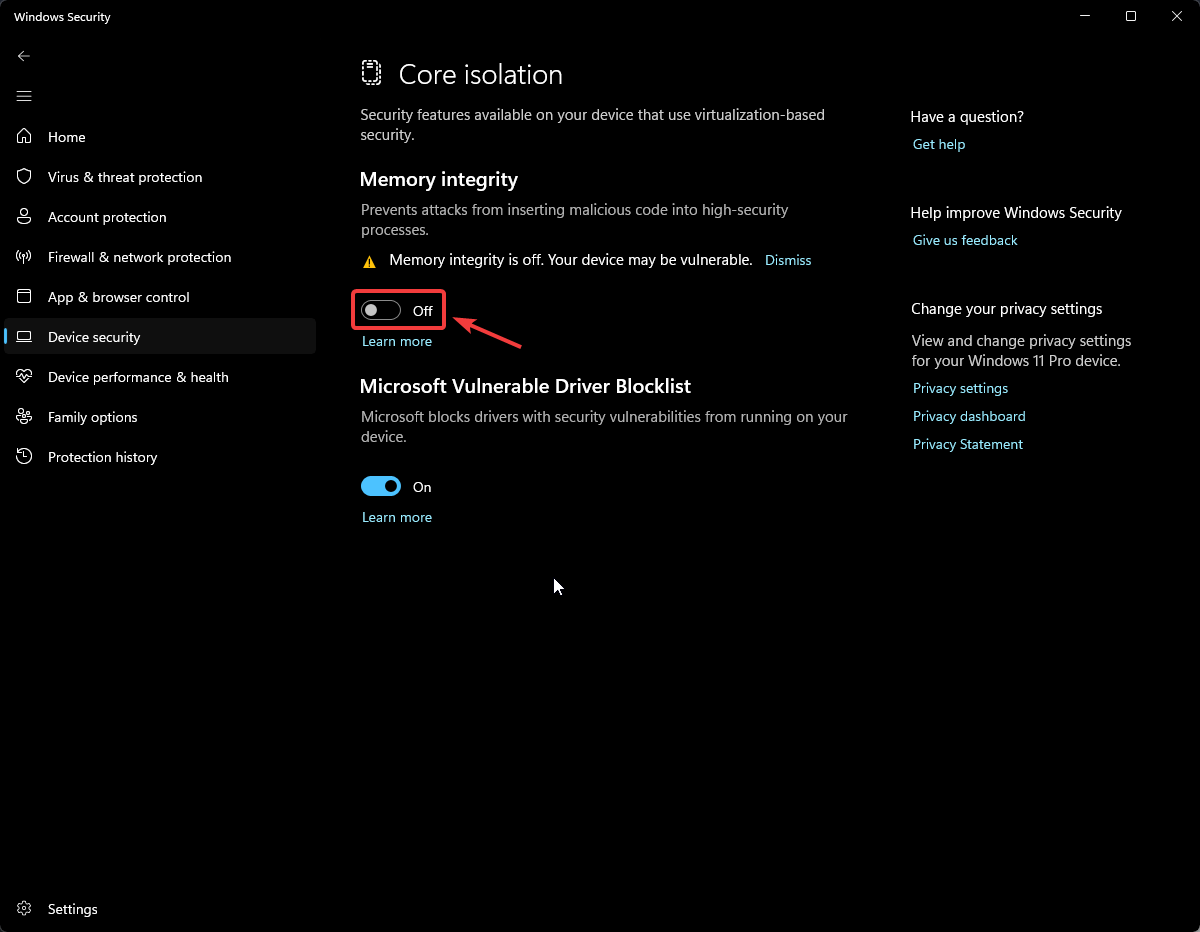
- Restart your PC for the changes to take effect, then verify if the error is resolved.


