How to Google Chrome Won’t Install on Windows?
When you try to install Chrome on Windows, it sometimes fails. The setup might freeze, close suddenly, show errors like “This app can’t run on your PC,” or get stuck at “Connecting to the Internet.” This usually means the installer can’t run properly.
The most common reasons are that the installer doesn’t match your computer, the setup file is broken, or there are leftover files or registry entries from old Chrome installs.
The following methods provide clear, step-by-step instructions to help you resolve common problems when installing Google Chrome. After reviewing the possible causes, let’s explore effective solutions.
1. Install Chrome via Command Prompt (CMD)
As a first step, try installing Google Chrome through the Command Prompt. This method can circumvent problems caused by graphical installer failures, permission issues, corrupt downloads, or third-party antivirus interference.
Running the installation as an administrator can help prevent permission-related obstacles that may block Chrome’s installation.
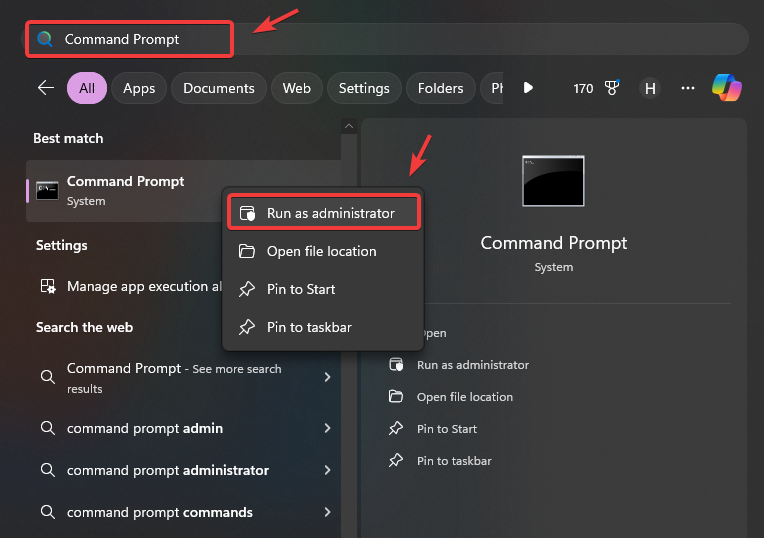
- Press the Win key to open the Windows Search Menu.
- Type Command Prompt into the search bar, then right-click on the result.
- Select Run as administrator to open the Command Prompt with elevated privileges.
- Enter the following command to initiate the Chrome installation:
winget install Google.Chrome
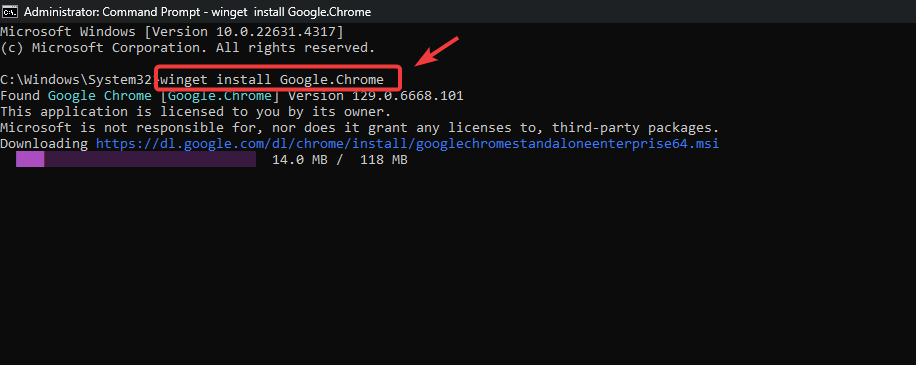
- Press Y to accept the license agreements.
- After completing these steps, Google Chrome should install successfully.
2. Perform a Clean Uninstall and Reinstall
If residual files from a previous Chrome installation exist, a clean uninstallation is crucial. This process removes all Chrome-related files and registry entries, eliminating remnants that could prevent reinstallation.
This method also involves deleting specific registry entries, which act as a record for installed programs within Windows.
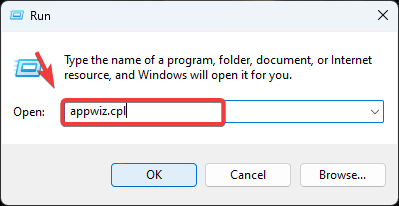
- Press Win + R simultaneously to open the Run dialog box.
- Type appwiz.cpl and click OK to access Control Panel > Programs and Features.
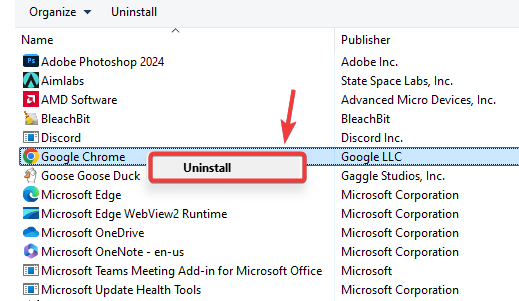
- Locate Google Chrome in the list, right-click, and select Uninstall.
- After uninstalling, browse to the following directories and delete the Google folder if present:
C:\Program Files (x86)\Google\C:\Program Files\Google\C:\Users\[Your Username]\AppData\Local\Google\
This step ensures that no leftover files remain from the previous installation.
- Open the Start Menu and search for Registry Editor.
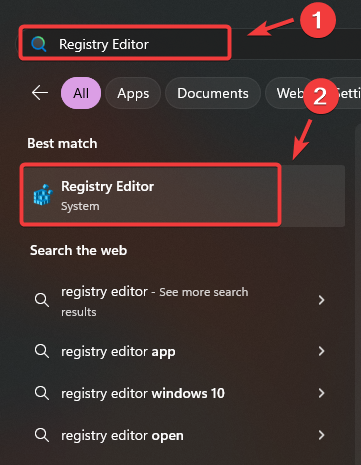
- Press Enter to open the Registry Editor.
- Navigate to the following registry key and delete it if it exists:
Computer\HKEY_LOCAL_MACHINE\SOFTWARE\WOW6432Node\Google\Update\Clients\{430FD4D0-B729-4F61-AA34-91526481799D}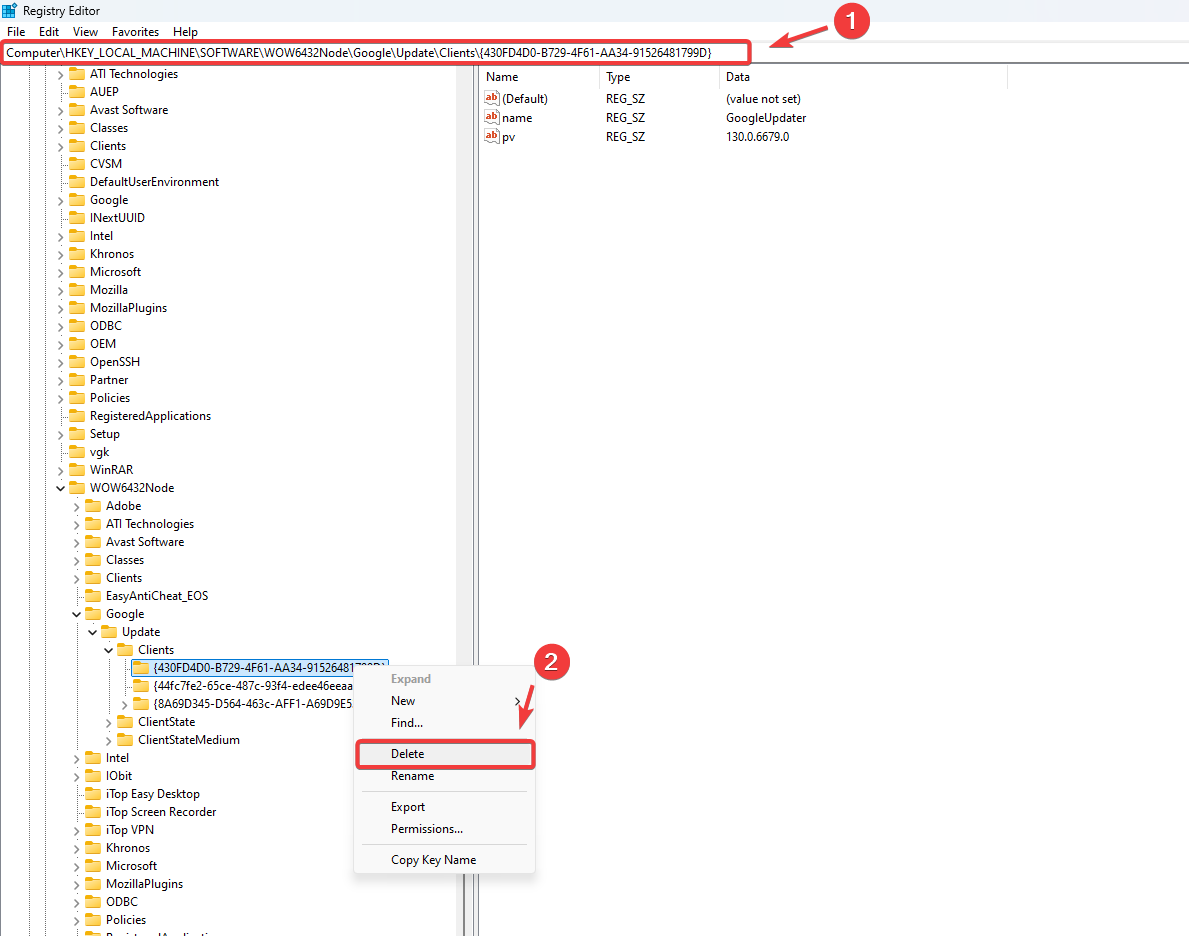
- When finished, restart your computer. Restarting ensures all changes take effect.
- Next, download the latest Google Chrome installer from the official website.
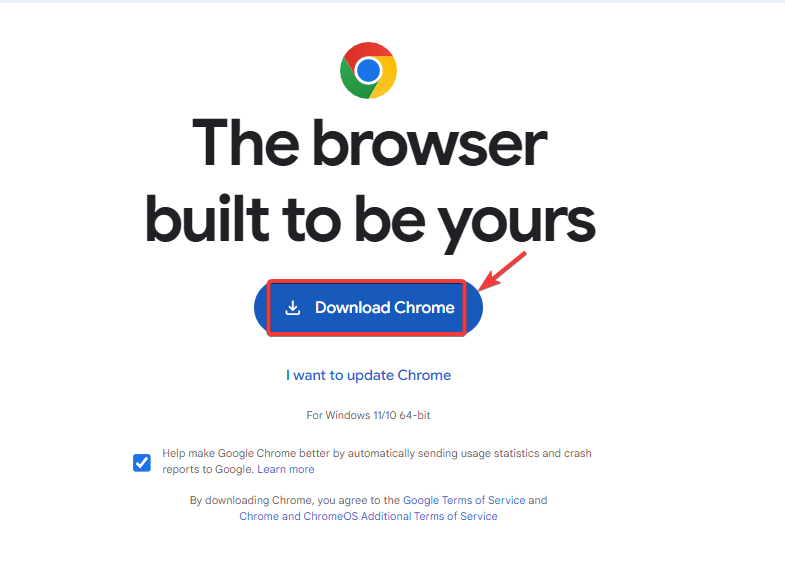
- Double-click the downloaded installer to begin installation.
- Verify whether Google Chrome installs correctly. If installation still fails, continue with the next method.
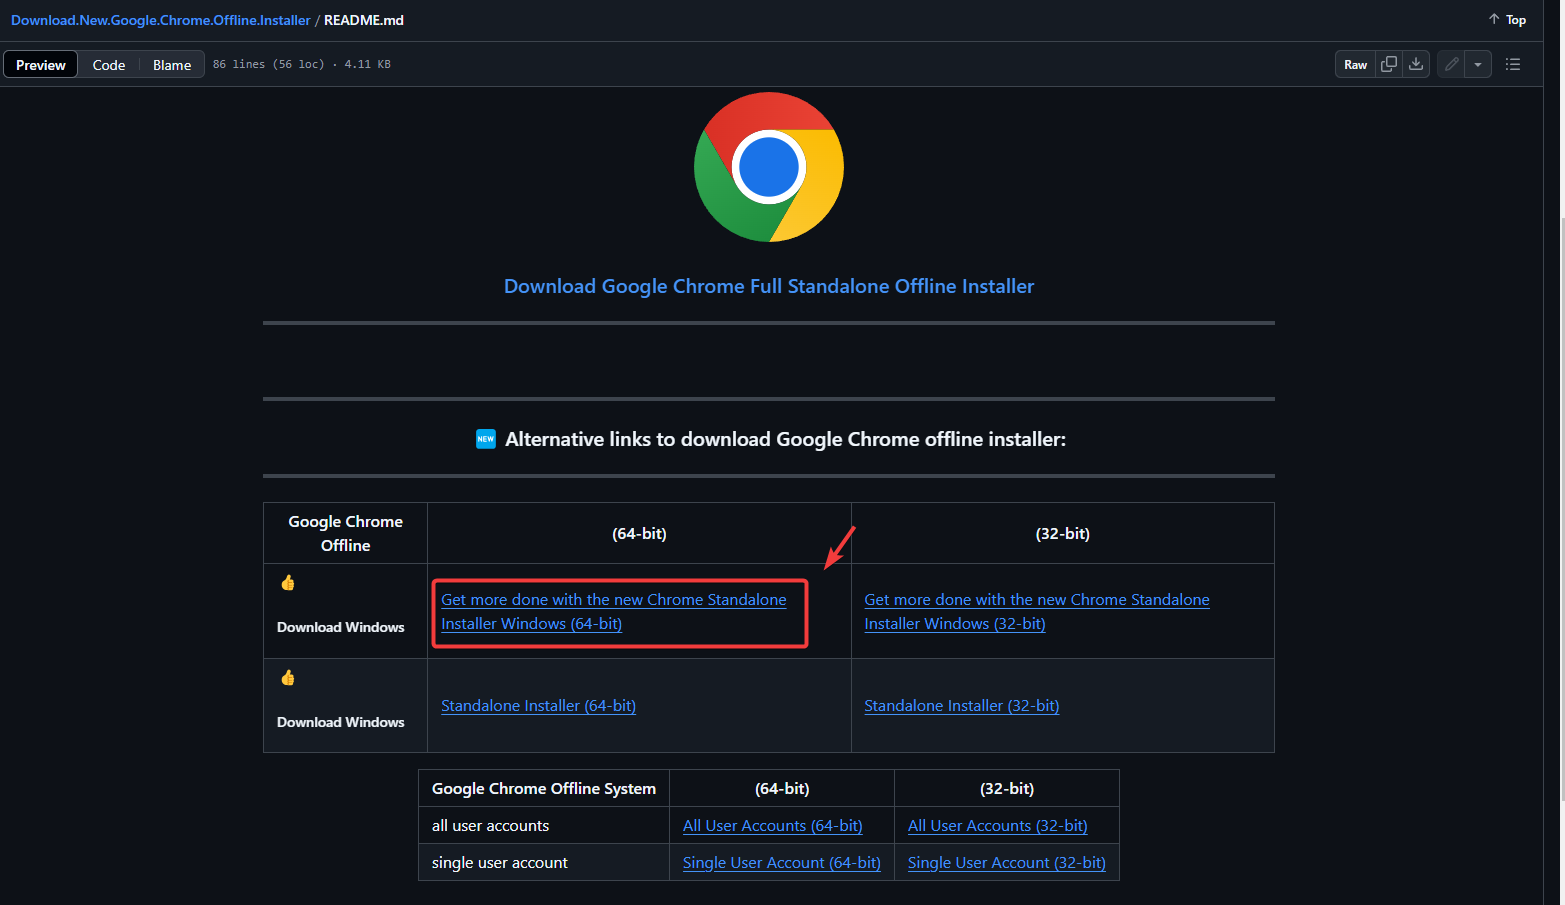
3. Use the Google Chrome Offline Installer
The Chrome offline installer is a robust alternative, especially if your Internet connection is unstable or restricted by firewalls during installation. This method provides the full installation package, allowing you to install Chrome without needing to connect to Google servers during setup.
- Download the Google Chrome standalone offline installer from the link provided.
- After downloading the installer, run it and follow the instructions to complete the installation of Google Chrome.
- After installation, check if you can launch Google Chrome successfully.
Why this works: The offline installer does not rely on a stable Internet connection and bypasses download-related restrictions or corrupted installations, providing a complete and verified package.