How to Fix Camera output in Black and White Monotone?
A common problem people report is that their camera suddenly shows only black and white video, even when the room has good light and it used to show colors correctly. This usually happens because the camera’s color settings are turned off or changed by the software, causing the camera to show only shades of grey.

The most common reason is that a greyscale or accessibility mode has been turned on in the system settings. Other possible causes are old or incorrect camera drivers, interference from other software, or changes made by recent system updates.
Before you try the solutions below, make sure your camera is not set to night mode. Also, check that there isn’t a sticker or anything blocking the camera lens or flash. If you’re using an external camera, try it with another PC to see if it’s a hardware issue. For internal (built-in) cameras, check if the issue persists when you start your computer in safe mode. If the camera only shows black and white in one specific application, try reinstalling that application to see if it fixes the issue.
1. Change the Camera Settings
If your camera settings are not correct, you may not be able to use the camera in color mode. Adjusting these camera settings can often solve the problem. You can access camera settings using camera-specific software (like ThinkVantage Communication Utility), your PC’s built-in camera app, or even programs like Skype.
1.1. Enable Color for the Camera
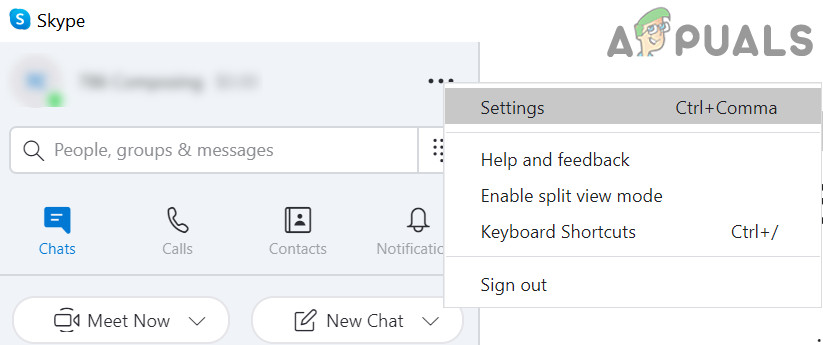
- Open the Skype application and sign in using your credentials if you haven’t already.
- Click on the three horizontal dots (ellipsis) near the top right of the left pane in Skype, then select Settings.
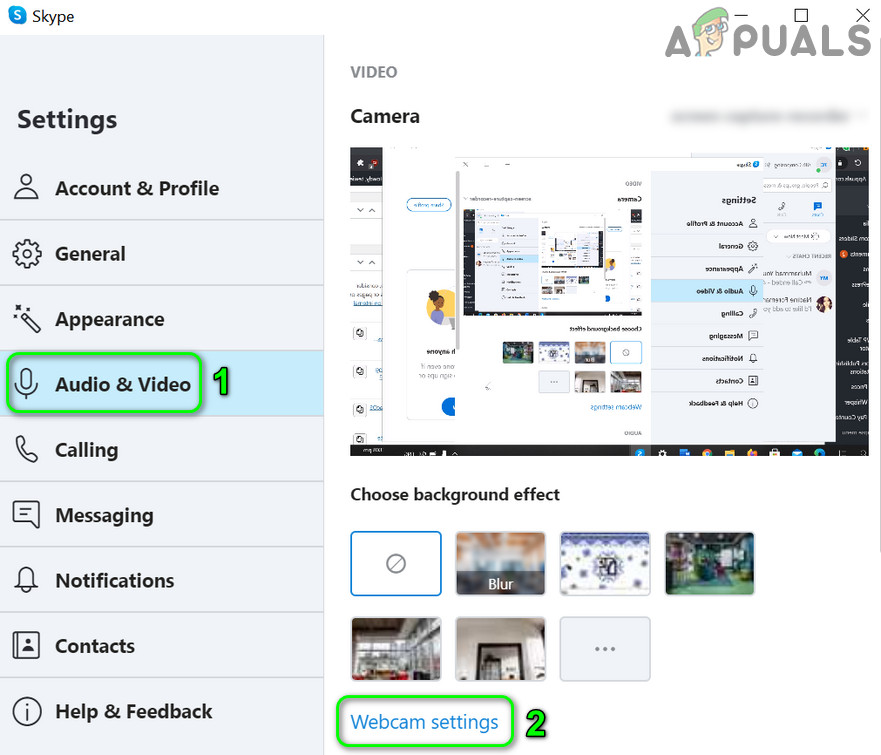
Open Skype Settings - Go to the Audio & Video tab (on the left), and click on Webcam Settings (on the right).
Open Webcam Settings in Skype - Look for ColorEnable (usually in the “Video Proc Amp” tab) and make sure it is checked. Check if your camera now displays in color.
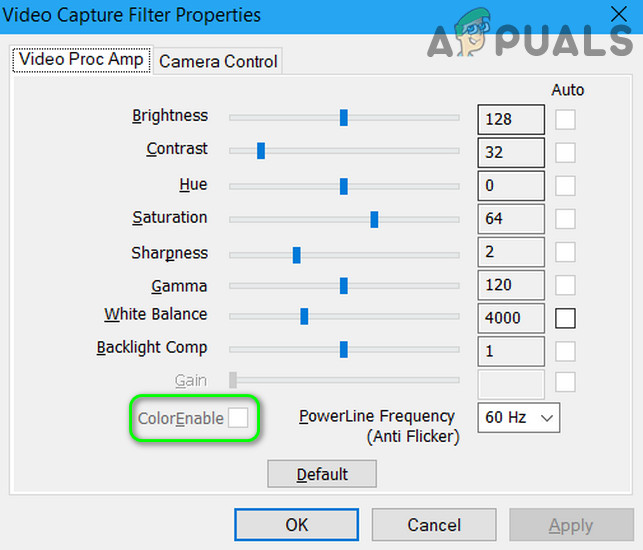
Check ColorEnable in Skype Webcam Settings
If you are using your camera’s companion software (opened through the Start Menu), check its Settings, Tools, or Options menu for any entries to enable color or disable the black & white mode. In the Dell Webcam Central software, make sure the color toggle is enabled in the application’s settings.
1.2. Change the Saturation Settings of Your Camera
- Open Skype and log in with your account.
- Go to Settings (three horizontal dots at the top right of the left pane), then select the Audio & Video tab.
- Click on Webcam Settings and ensure the Saturation bar is not close to zero. Setting saturation too low may cause your camera to show black and white only.
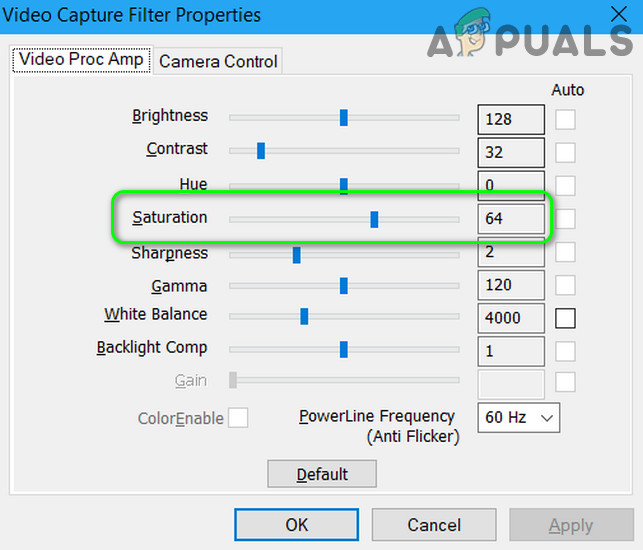
Saturation is Not Near to Zero in the Webcam Settings of Skype - Click Apply to save your changes and see if your camera now displays color.
1.3. Reset Camera Settings to Default
- Open Skype and go to Settings.
- Navigate to the Audio & Video section and select Webcam Settings.
- Click the Default button to reset your camera settings to default. Check if your camera is back in color mode.
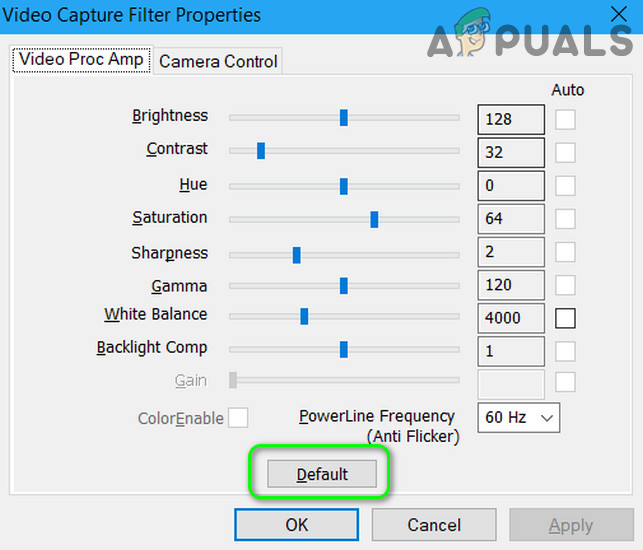
Revert Webcam Settings to Default in Skype
If you use Cyberlink YouCam software, follow these steps:
- Open Cyberlink YouCam and select Enhance the Current Video and Image (the icon looks like a reel and bulb).
- Click the Default button (you may need to go to Advanced). See if this resolves the camera problem.
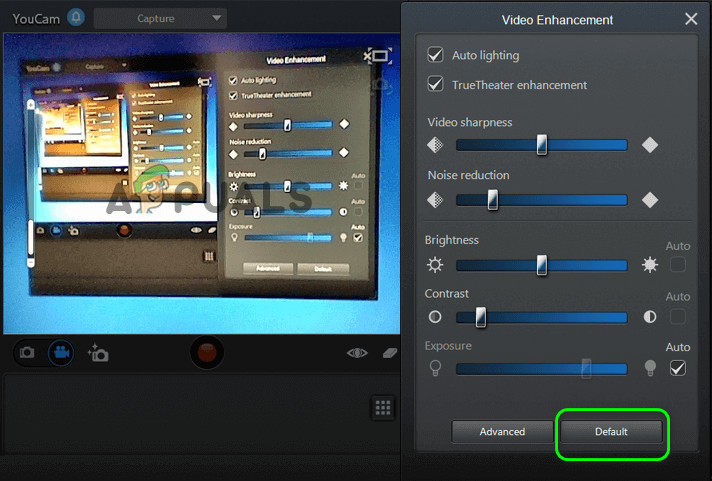
Set Your Camera in YouCam to Default
If you use Dell Webcam Central:
- Open Dell Webcam Central and go to Settings.
- Click on the Restore Defaults button. See if the camera now shows color output.
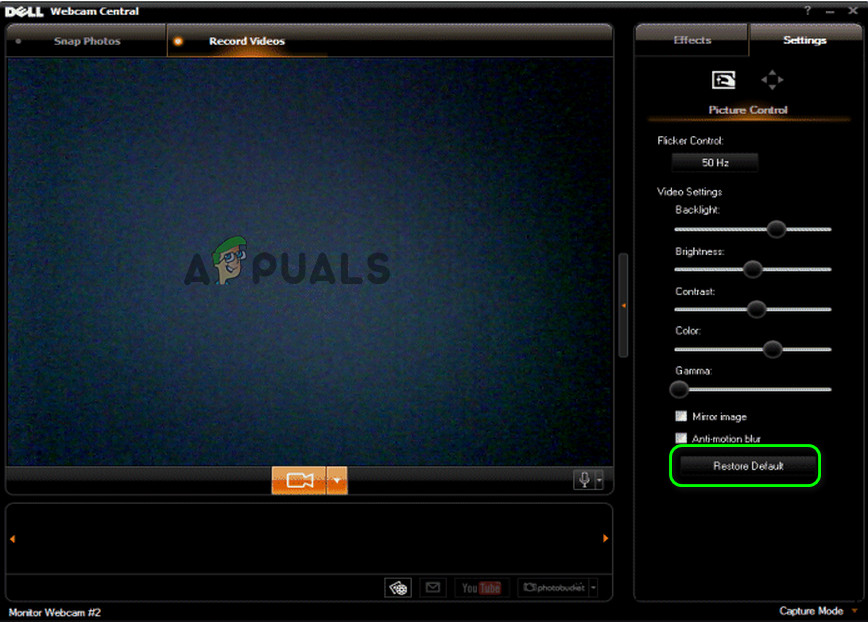
Restore Your Camera in Dell Webcam Central to Default
2. Roll Back the Camera Driver
Sometimes, a recent camera driver update can be buggy. If this happens, going back to the previous driver version could fix the problem.
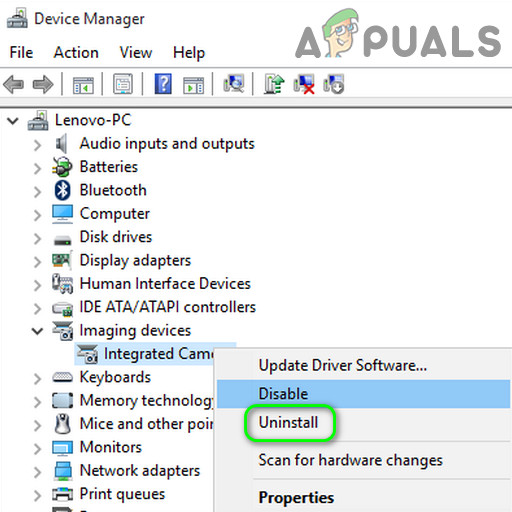
- Right-click on the Windows button and select Device Manager.
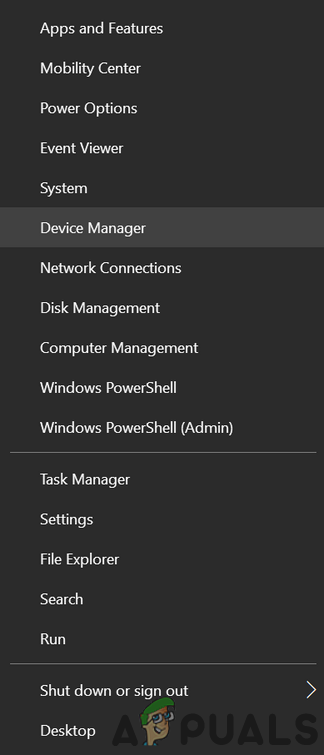
Open Device Manager - Expand Imaging Devices, then right-click on your camera.
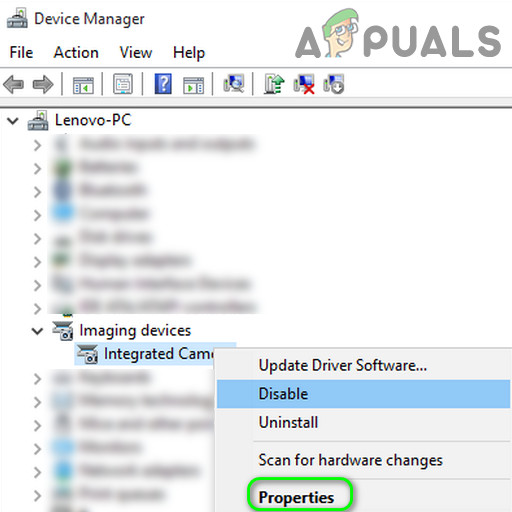
Open Properties of Camera in the Device Manager - Select Properties and go to the Driver tab.
- Click on Roll Back Driver and wait for the process to complete.
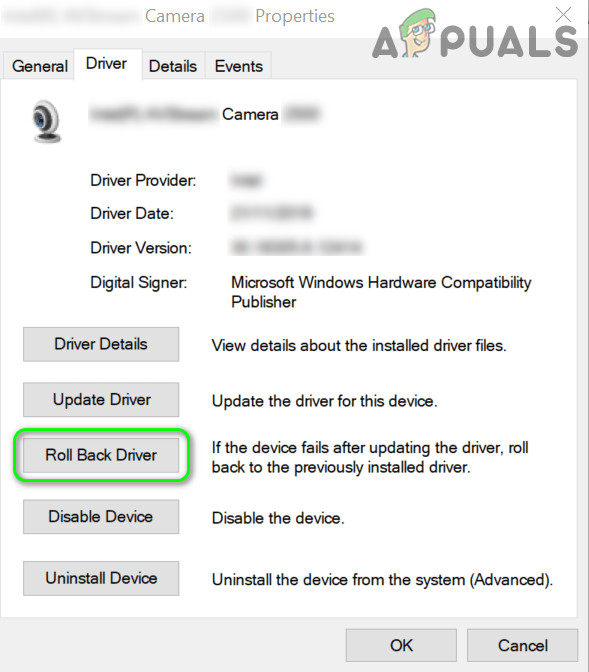
Roll Back the Camera Driver - Restart your PC and check if your camera is working properly. If it is, you might also want to prevent Windows from updating the driver automatically.
3. Update Your Drivers and Windows
Microsoft and other device manufacturers update drivers and Windows regularly to fix problems and add new features. Keeping everything up to date can resolve your camera issues.
- Manually update your drivers and Windows to the latest versions. If you use an update utility (like Dell Support Assistant), use it to update your drivers. If your camera is a model like LifeCam Studio, make sure the firmware is also up to date.
- Once updated, check if the camera now shows color output.
4. Uninstall the Buggy Windows Update
It’s possible a recent Windows update caused the camera to stop working properly. In that case, uninstalling the update may solve the problem.
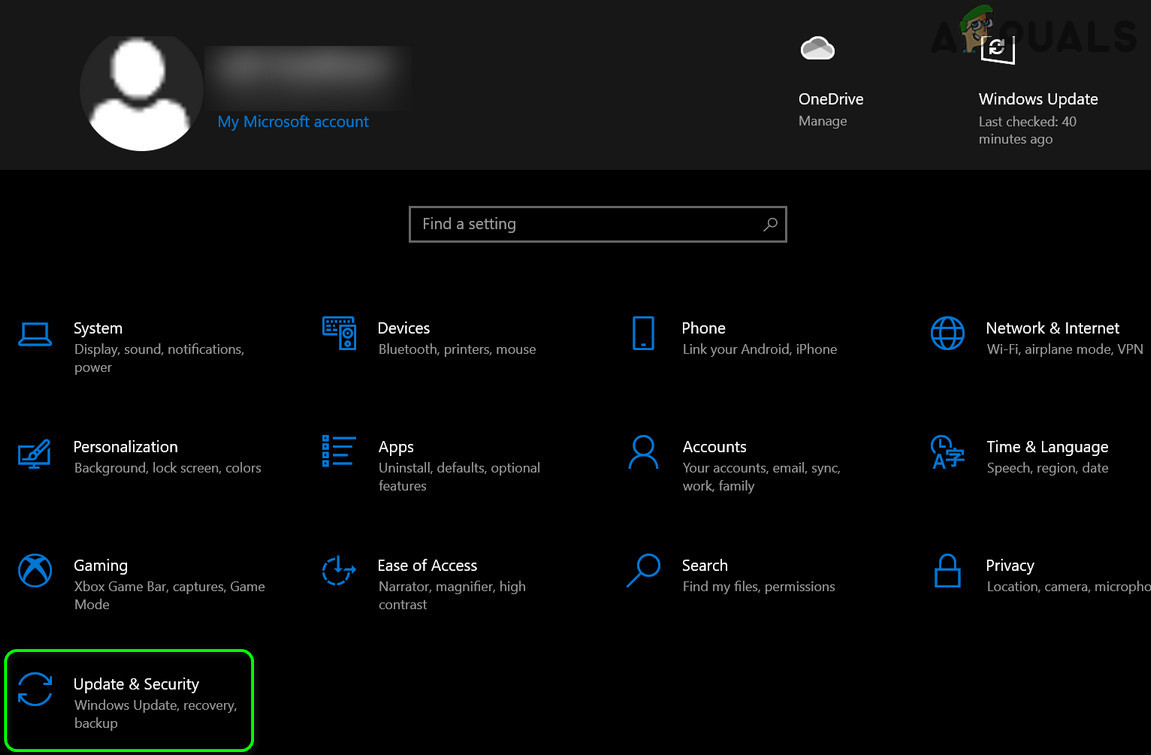
- Press the Windows key and open Settings.
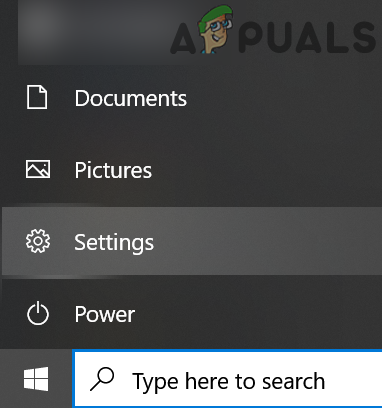
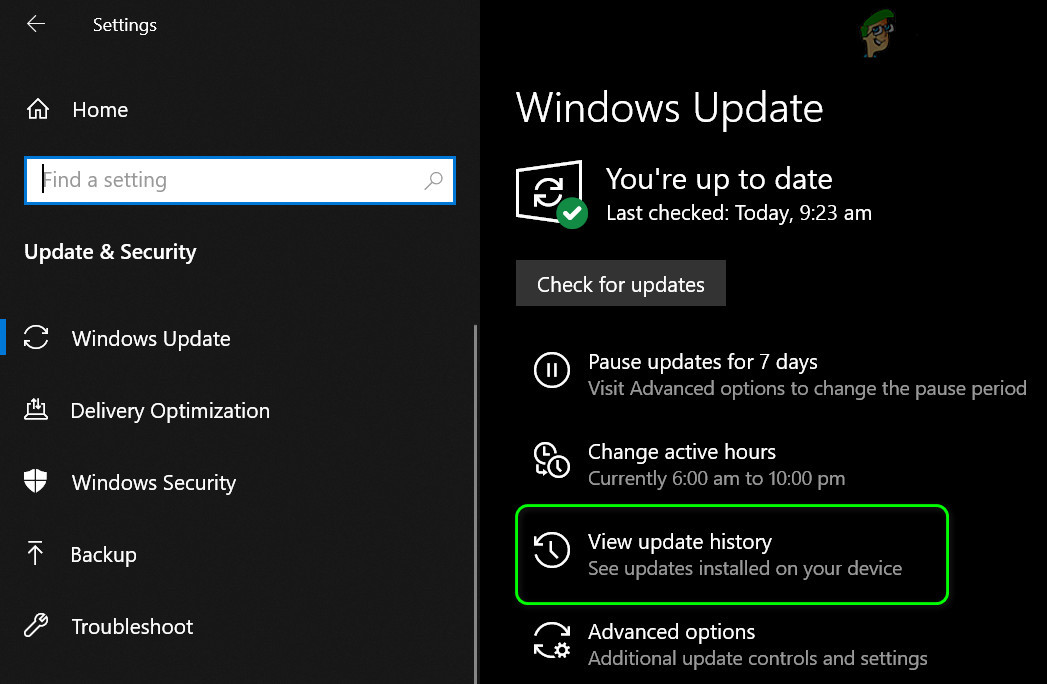
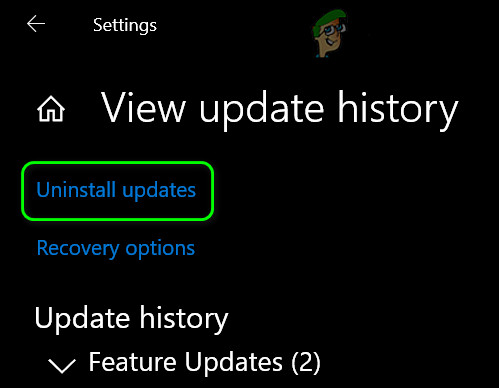
Open Settings of Your System - Click Update & Security on the left, and then click View Update History on the right.
View Update History of Your System - Click Uninstall Updates and select the update you think is causing the issue.
Open Uninstall Updates - Click Uninstall and follow the instructions to remove the update.
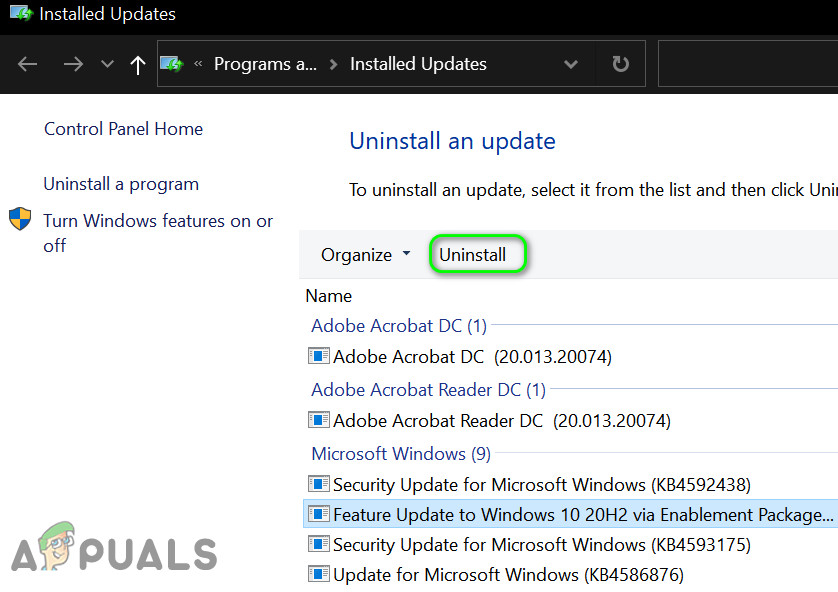
Uninstall the Buggy Windows Update - Check if your camera now works correctly. If it does, you may want to pause Windows updates temporarily to avoid the same issue coming back.
If the issue started after a major Windows 10 feature update, you might need to revert to the previous Windows version.
- Go back to Update & Security as described above.
Open Update & Security - Select Recovery from the left menu, then click Get Started under Go back to the previous version of Windows.
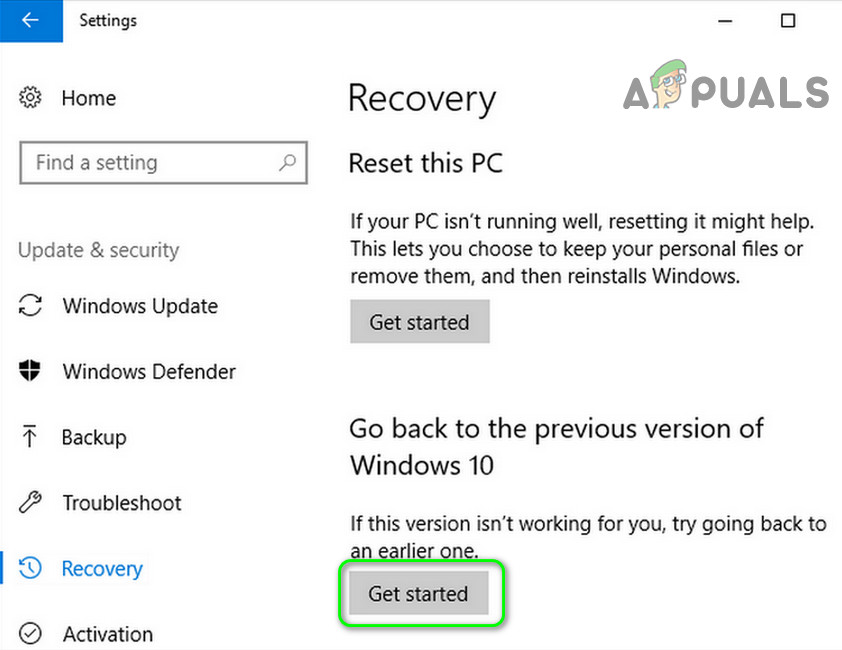
Go Back to the Previous Version of Windows 10 - Follow the on-screen instructions to roll back. Check if your camera issue is resolved afterward.
5. Reinstall the Camera Driver
If your camera driver is corrupted, reinstalling it could fix the color issue.
- Open a web browser and visit your camera manufacturer’s (or PC manufacturer’s) official website.
- Download the latest camera driver for your device.
- Right-click the Windows button, and open Device Manager.
- Expand Imaging Devices and right-click on your camera.
- Choose Uninstall Device, and if prompted, check Delete the driver software for this device.
Uninstall the Camera in the Device Manager - Click Uninstall and wait for the process to finish.
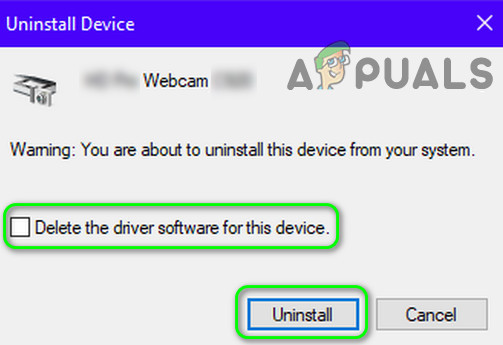
Check the Option of Delete the Driver Software for This Device and Click on Uninstall - Restart your computer, then install the driver you downloaded as an administrator.
- Restart your computer again and check if the camera now shows color.


