Change NAT Type from Moderate/Strict to Open in Call of Duty: Warzone
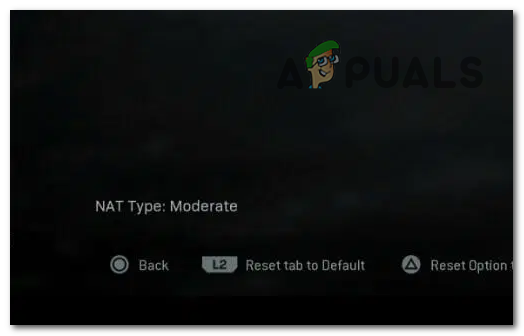
Lag, disconnects, and trouble joining friends in Warzone usually happen because of a Moderate or Strict NAT type.
NAT type controls how easily your console or computer talks to other players online. The main reason for a Strict or Moderate NAT is that your router’s ports aren’t open or UPnP isn’t turned on.
Sometimes, it happens if you have two routers (double NAT). This problem blocks connections, makes it harder to join games, and can cause higher lag or matchmaking errors.
Now that you know the main causes, let’s review all the effective methods players have used to solve this problem:
1. Reset Your Firewall
As a first step, try resetting your Windows Firewall. This will restore Firewall settings to their original defaults and let you choose which apps are allowed through again.
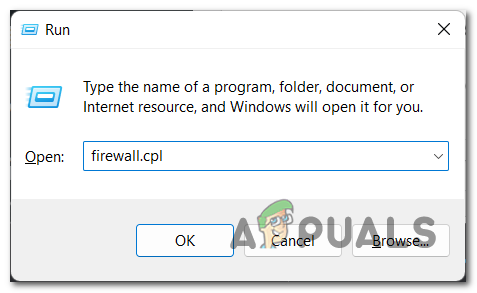
- Open the Windows Defender Firewall. The fastest way is to press Windows key + R to open the Run box, type ‘firewall.cpl‘, and hit Enter.

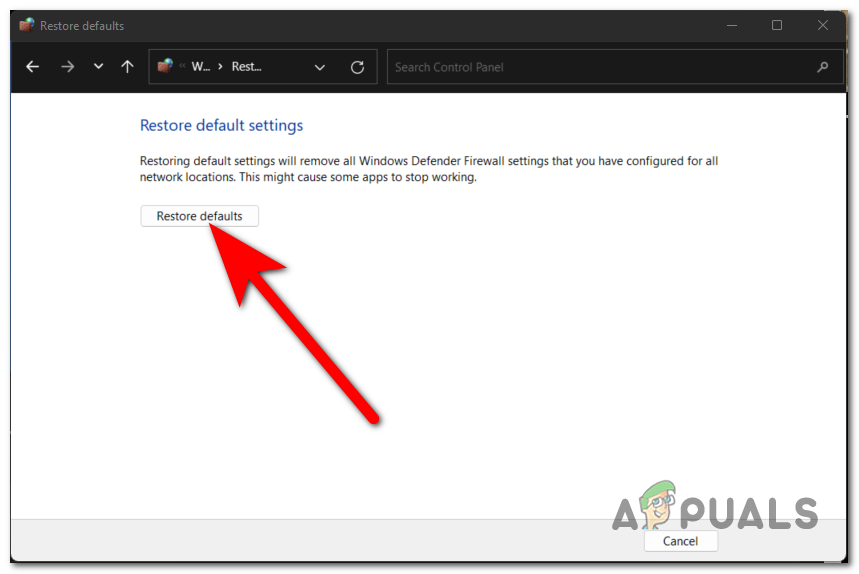
Opening Windows Defender Firewall using the Run box - In the Firewall window, click on Restore defaults in the side menu.
- Then click the Restore defaults button in the main area and confirm when prompted.
Resetting Windows Firewall to default settings - The Firewall settings will now be reset. The next time you launch Call of Duty Warzone, make sure to allow both public and private networks when prompted.
- Start Warzone and check the main menu to see if your NAT Type is now “Open.” If it’s still Strict or Moderate, move on to the next step.
2. Set a Static IP
Your next option is to set a Static IP address for your device. This can help avoid IP conflicts and improve your network reliability for online play. Many users have found this resolves their NAT problems.
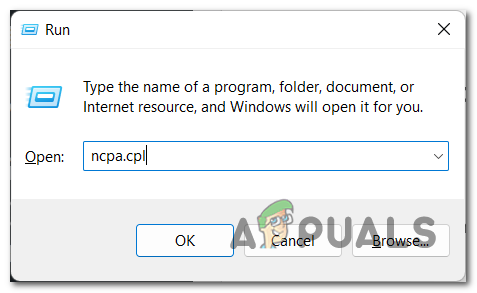
- Open the Network Connections window. A quick way is to press Windows key + R, type ‘ncpa.cpl‘, and press Enter.
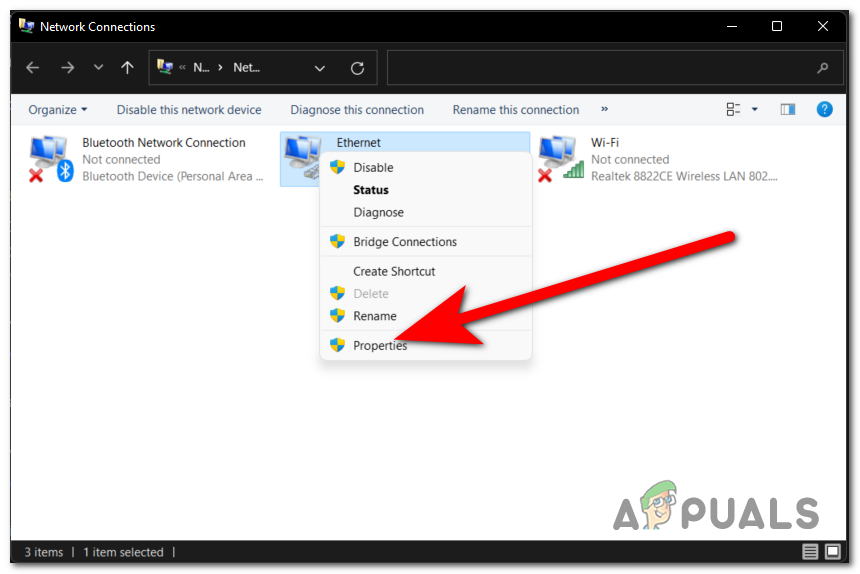
Accessing Network Connections through Run box - Find the main network connection you’re using.
- Right-click on it and choose Properties.
Opening Properties for your network connection - Double-click on Internet Protocol Version 4 (TCP/IPv4).
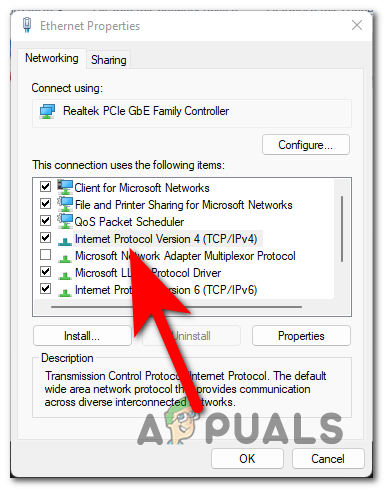
Accessing IPv4 properties - Select Use the following IP address to manually set a static IP.
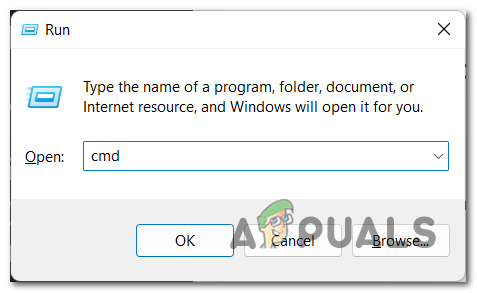
- Press Windows key + R again, type ‘cmd‘ and press Enter to open Command Prompt.
Opening Command Prompt - Type this command and press Enter to view your IP address and subnet mask:
ipconfig /all
- Note the IPv4 Address and Subnet Mask listed in Command Prompt.
- To create a Static IP, keep the first three number sections the same as your current address, but change the last section to a new number, such as 200 or 210.
Tip: For example, if your address is 192.168.0.105, you could set it as 192.168.0.200 for your Static IP. Avoid using the exact same address as another device to prevent conflicts. - Enter your new Static IP and subnet mask into the IPv4 Properties window.
- Find the Default Gateway in Command Prompt, and enter that in the Properties as well.
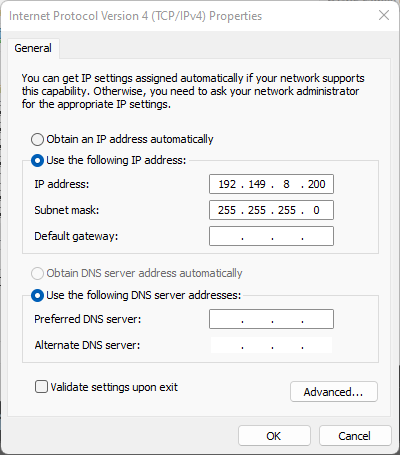
Setting a Static IP address - Press OK to save your changes.
- Try launching Call of Duty Warzone and see if your NAT Type has improved.
3. Forward Ports
Another major reason for NAT issues is that your router might be blocking the specific ports that Call of Duty Warzone needs to communicate online. To solve this, you can manually forward the required ports through your router’s settings.
Note: The exact steps to forward ports can vary depending on your router brand. If these instructions don’t match exactly, refer to your router’s manual or the manufacturer’s website for details.
- Open your internet browser and type the following in the address bar, then press Enter:
192.168.0.1 or 192.168.1.1
- You should see your router’s login page. Enter your username and password.
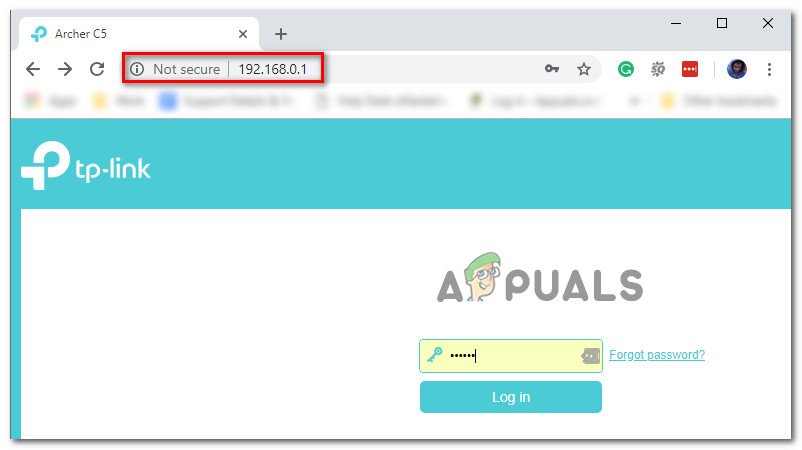
Logging into your router’s settings Note: If you haven’t changed the login info, try admin or 1234 for both username and password. If that does not work, search online for instructions specific to your router model.
- In your router settings, look for an area called Advanced or NAT Forwarding (Port Forwarding).
- Go to Virtual Servers or a similar menu, then click Add or Create New to start adding ports.
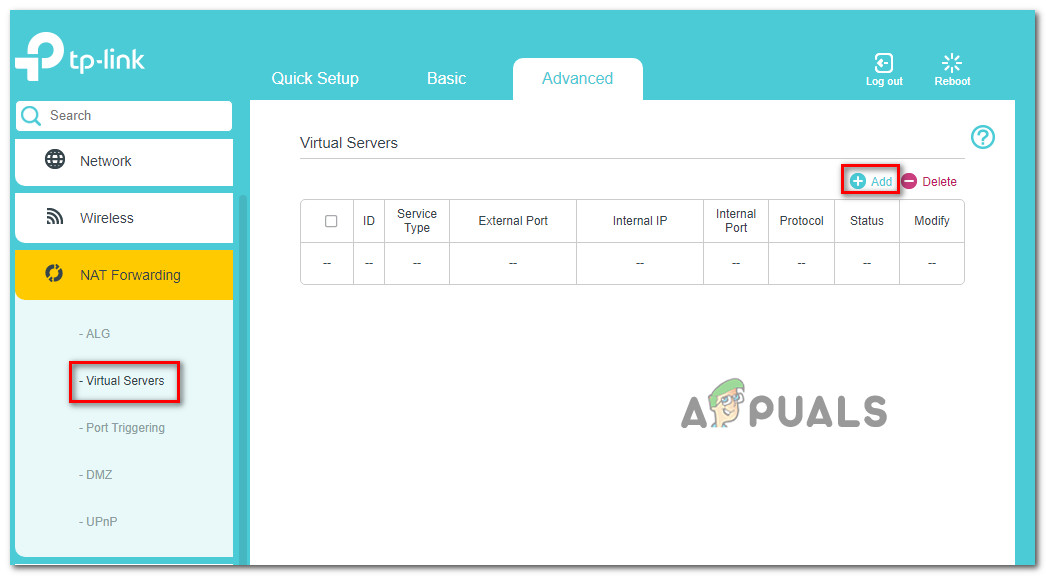
Adding ports for Call of Duty Warzone - Add the following ports depending on your gaming platform:
PC
| TCP: 3074, 27014-27050 | UDP: 3074, 3478, 4379-4380, 27000-27031, 27036 |
PlayStation
| TCP: 1935, 3478-3480 | UDP: 3074, 3478-3479 |
Xbox
| TCP: 3074 | UDP: 88, 500, 3074, 3075, 3544, 4500 |
Once you have saved these changes, start the game to check if your NAT Type has updated to Open.
4. Add the Game as an Exception in Firewall
If you’re still experiencing connection problems, try adding Call of Duty Warzone as an exception in the Windows Firewall. Sometimes the firewall blocks game traffic, which can cause NAT problems. Creating this exception tells Windows Firewall to always allow game connections.
- Open Windows Defender Firewall by pressing Windows key + R, typing ‘firewall.cpl‘, and pressing Enter.
Opening Windows Defender Firewall - On the left sidebar, click Advanced settings.
- In the new window, select Inbound Rules and then click New Rule.

Creating a new inbound rule - Follow the prompts and enter the file path to Warzone’s game executable file.
- Follow the rest of the instructions on the screen to add the rule.
- When done, your game will be set as a Firewall exception.
- Start Call of Duty Warzone and check if your NAT Type is now Open.


