How to Fix BSOD Error 0x00000154 on Windows 10/11?
The system suddenly crashes with a blue screen and stop code 0x00000154 (UNEXPECTED_STORE_EXCEPTION). This often happens when the disk is being used a lot, or even when the computer is idle but some background programs are running. This error means that Windows found an unexpected problem when trying to read or write to your storage drive (SSD or hard drive).
To protect your computer, it stops everything. The most common cause is a failing SSD or hard drive. Other possible reasons include old storage drivers, third-party antivirus programs, or damaged system files.
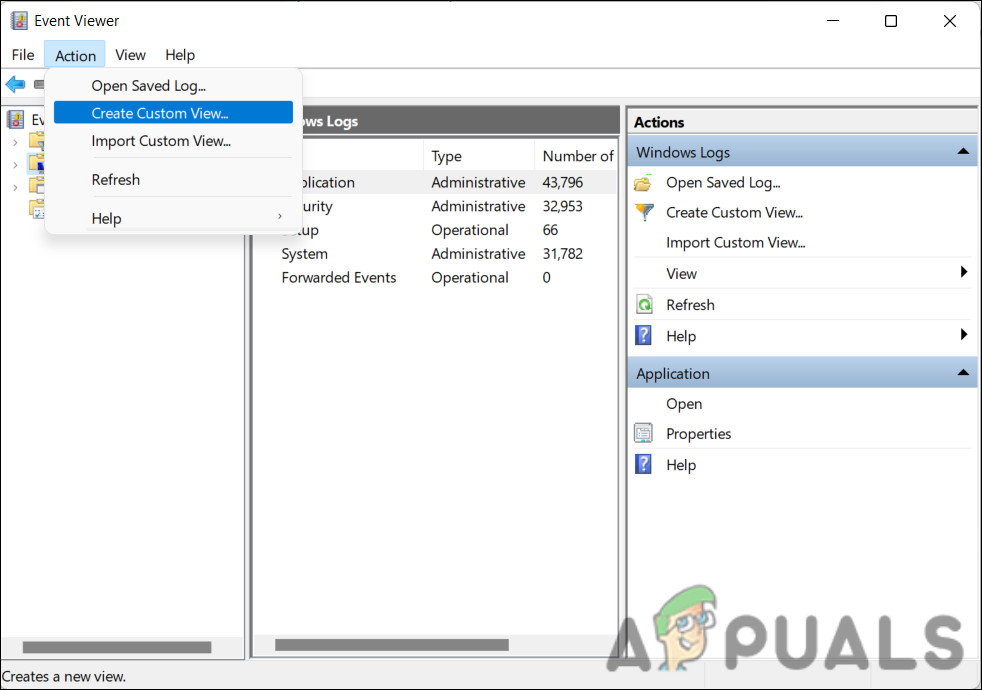
Before we get into troubleshooting steps, it’s important to first identify what might be causing the problem. One of the easiest ways to do this is by using the Event Viewer. Event Viewer logs different types of system and application messages, including errors, information, and warnings.
- Press the Win + R keys on your keyboard to open the Run box.
- Type eventvwr.msc into the box and press Enter.
- In the Event Viewer window, click Action at the top, then select Create Custom View.
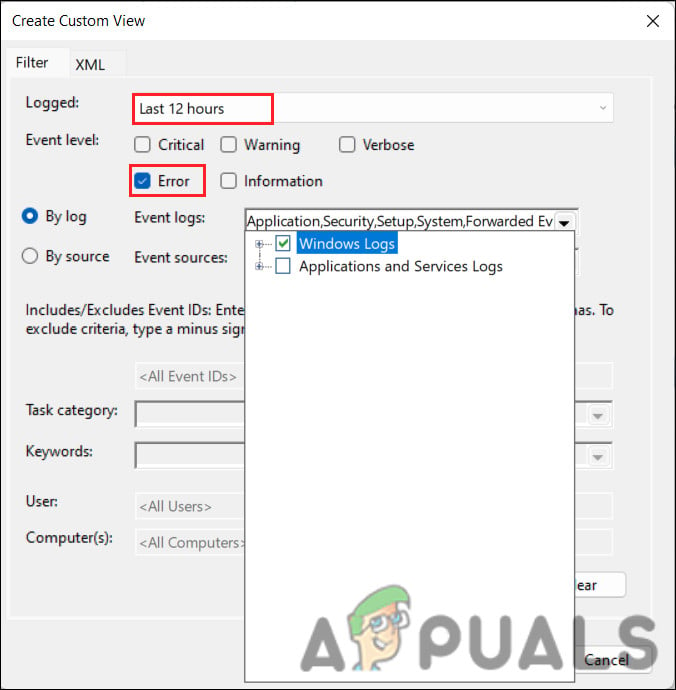
Create a custom view in the Event Viewer - Expand the dropdown for Logged, and choose the time period when the issue happened.
- Select Error under the Event level section.
- Expand the dropdown for Event logs and select Windows Logs from the list.
Create a custom view in the Event Viewer - Click OK to continue and give your custom view a name.
- Now you’ll see a list of errors that occurred during the time frame you selected. Look for the BSOD error and see what is listed as the cause.
1. Run the Memory Diagnostics Tool
The Memory Diagnostics Tool is helpful for checking your RAM for possible problems. It can help identify issues that cause slow performance, random freezes, or blue screen errors like the one you’re experiencing.
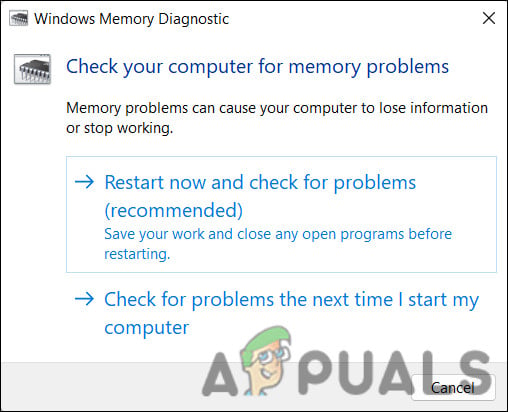
- Search for Windows Memory Diagnostics in the Windows search bar and click Open.
- Choose whether you want the tool to run right away or after you restart your PC. When your computer restarts, the tool will automatically begin checking your memory.
Run Memory Diagnostic tool - To do a more thorough test, press F1, use the Up and Down arrow keys to select Extended, and then press F10 to apply those settings.
2. Update Your Drivers
Outdated or faulty drivers can also cause this error to appear on your system. You should check Device Manager for any drivers that might be outdated or not working properly. Once you’ve identified an outdated driver, update it by following the steps below.
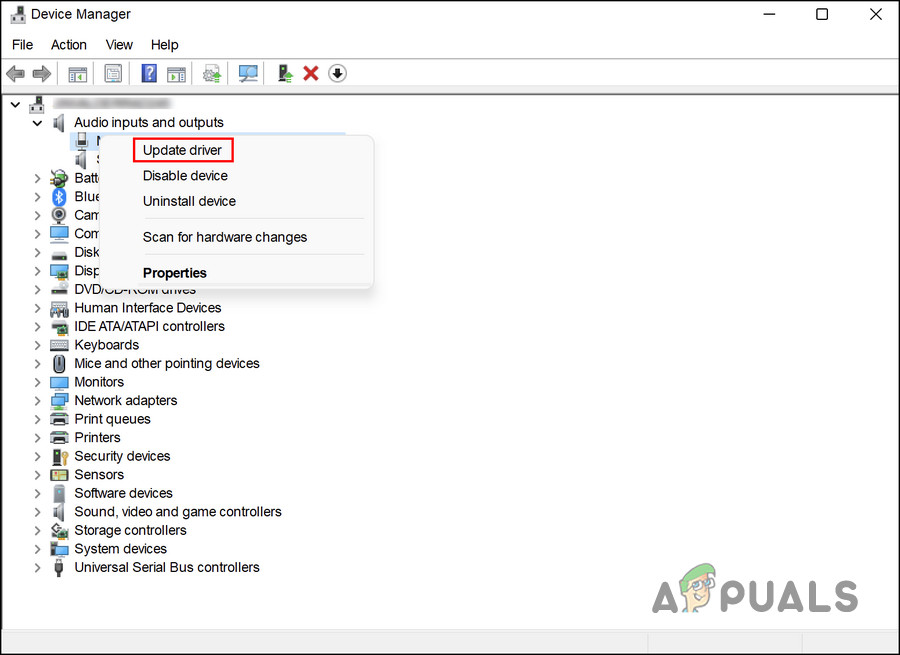
- Search for Device Manager in Windows search and click Open.
- Look for any drivers that have a yellow warning sign next to them. This indicates the driver could be corrupted or outdated.
- Right-click the driver that has an issue, then select Update driver.
Choose the Update driver option - Choose Search automatically for drivers and wait while Windows looks for updated drivers.
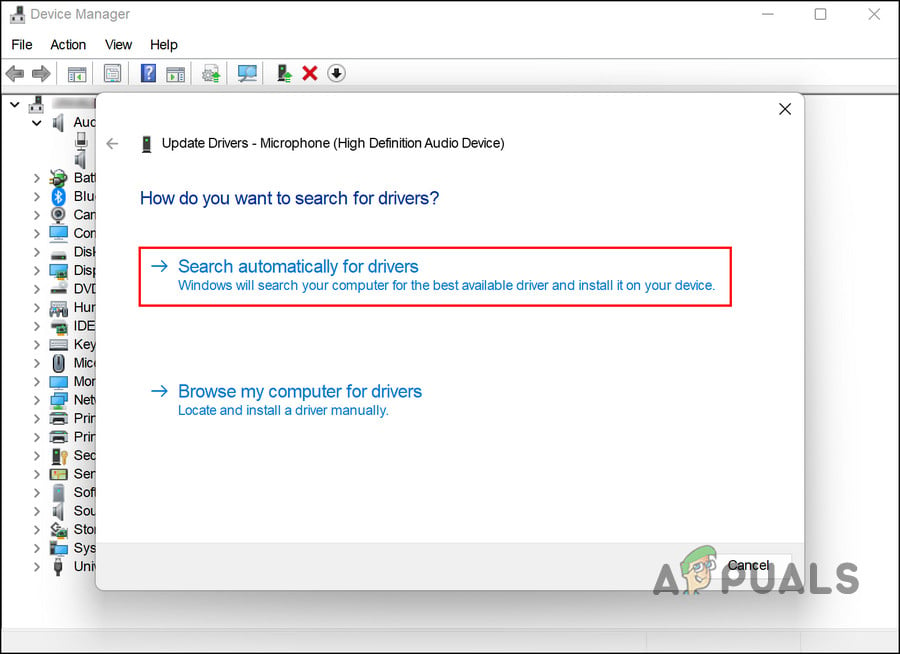
Click on the Search automatically for drivers option - If Windows finds a new driver, follow the on-screen steps to install it.
You can also visit your device manufacturer’s website to download the latest drivers directly. Once all your drivers are updated, check if the error still occurs.
3. Run an SFC Scan
System File Checker (SFC) is a Windows tool that scans for and repairs corrupted system files. It helps keep important files and settings safe, and often resolves issues like blue screen errors. When you run an SFC scan, Windows looks for corrupt or missing system files and replaces them with the correct versions if needed.
- Type cmd in the Windows search bar, then right-click Command Prompt and choose Run as administrator.
- Or, press Win + R to open the Run dialog, type cmd, then press Ctrl + Shift + Enter to run it as administrator.
- In the Command Prompt window, type the following command and press Enter:
sfc /scannow
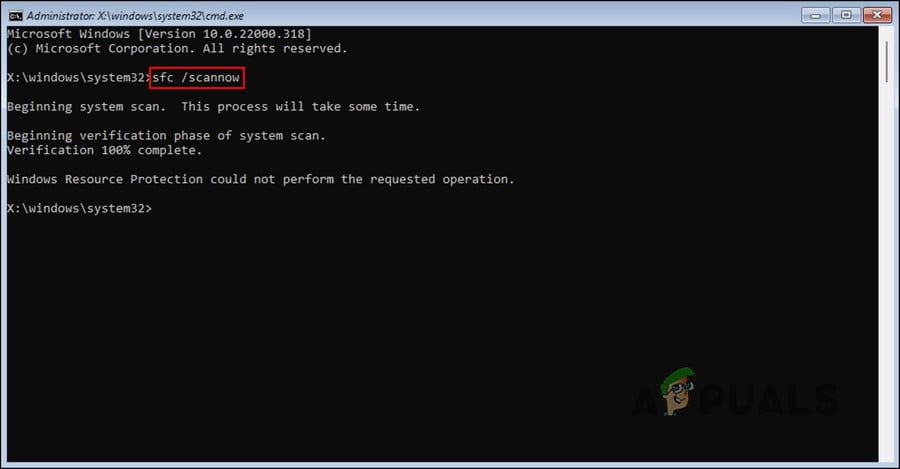
After the scan finishes, check if you still experience the blue screen error.
4. Install Pending Updates
Running an outdated version of Windows can also lead to this problem. If you haven’t updated your system in a while, installing the latest updates might fix it.
- Press Win + I to open Windows Settings.
- Click on Windows Update in the left menu.
- On the right, click Check for updates and let Windows search for any available updates.
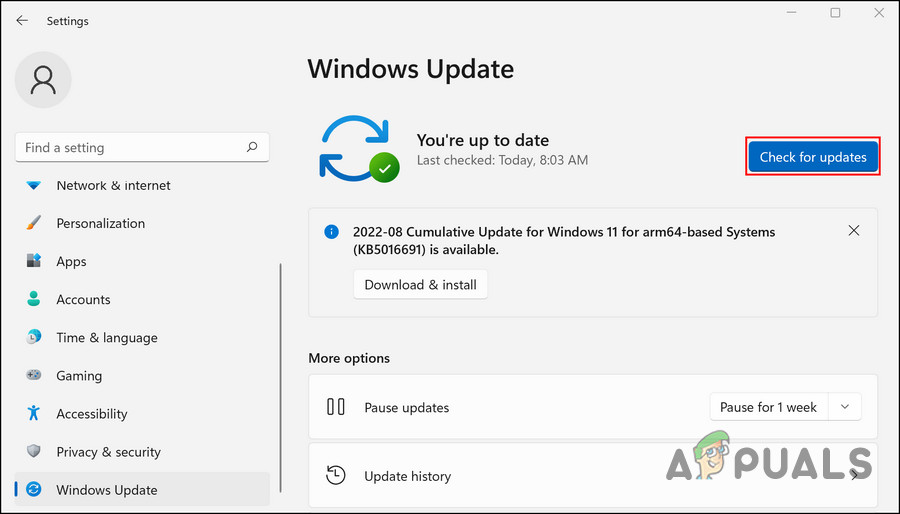
Check for the Windows updates - Install all available updates one by one, and then see if the issue continues.
5. Disable Antivirus Temporarily
Sometimes, antivirus software can interfere with normal system operations, which may cause errors like the blue screen. While antivirus programs keep your computer safe, they can sometimes block certain features or files by mistake.
You can try disabling your antivirus temporarily to see if it resolves the error. Here, we’ll show you how to do it with Avast antivirus. The steps may be slightly different for your antivirus program.
- Right-click the antivirus icon in your system tray (bottom-right of your screen).
- From the menu, select Disable > Disable until the computer is restarted.
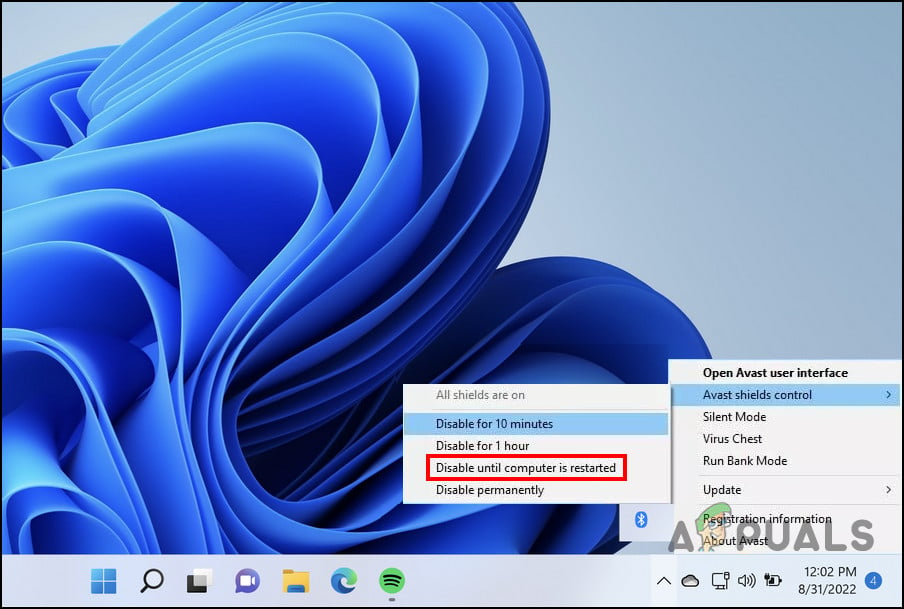
Disable the antivirus until you restart the computer
After disabling the antivirus, try the steps that caused the error again and see if the issue is fixed. If it is, you may need to adjust your antivirus settings or switch to a different program.
6. Disable Fast Startup
Fast Startup helps your Windows 10 or 11 computer boot up faster after shutting down. It works by using a part of the hibernation process instead of a full shutdown. While Fast Startup is enabled by default on most computers, it doesn’t always load every driver or service correctly, sometimes causing blue screen errors.
If you believe Fast Startup is the problem, you can disable it easily through the Control Panel.
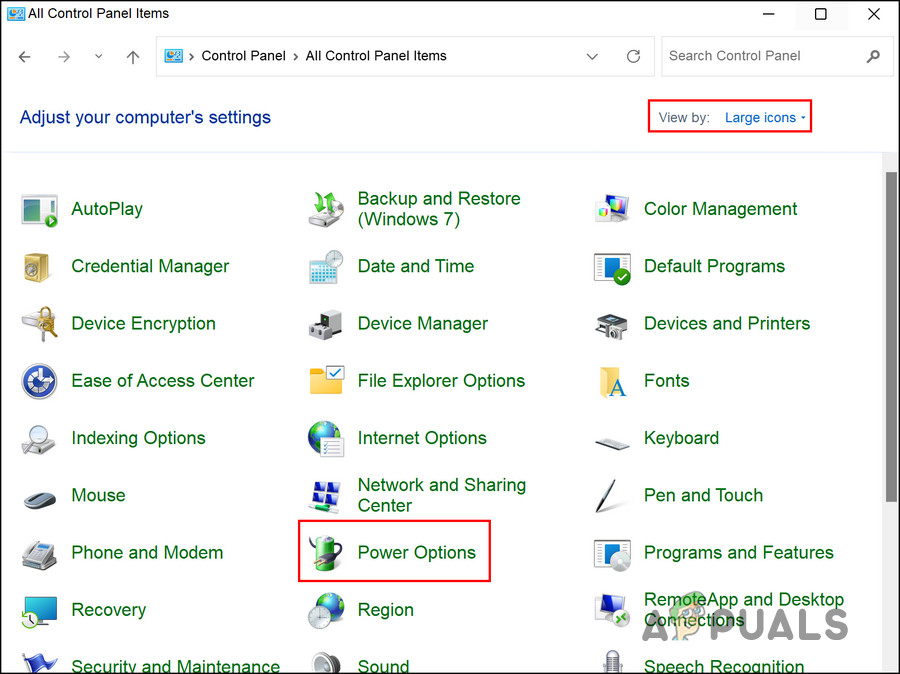
- Search for Control Panel in the Start menu and click Open.
- In the Control Panel window, click Power Options. You might need to first select View by: Large icons to find it.
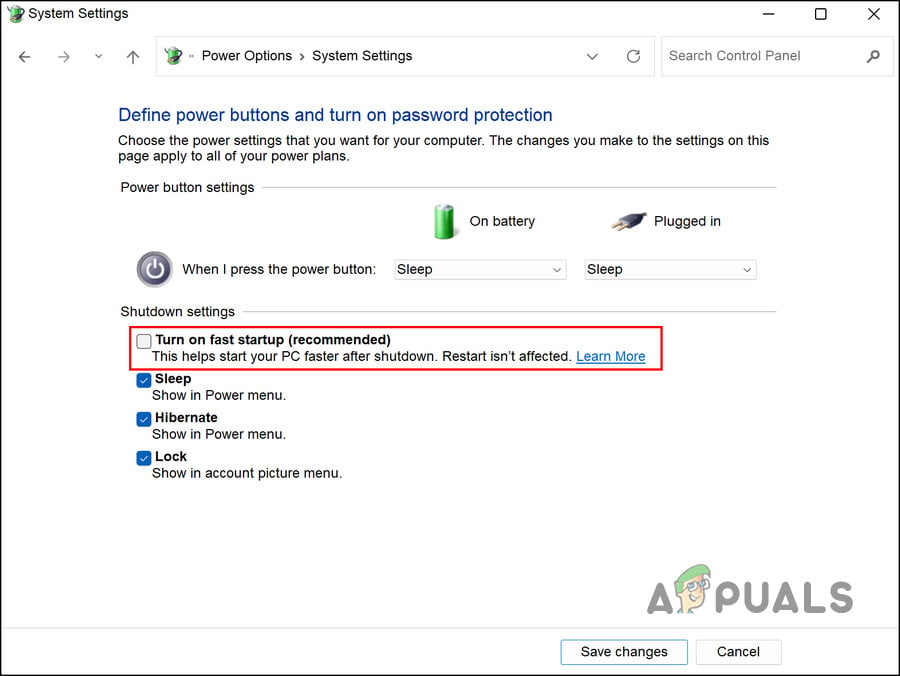
Click on Power Options - Click Choose what the power buttons do.
- Uncheck the box next to Turn on fast startup.
Disable the fast startup feature - If this option is greyed out, click Change settings that are currently unavailable, then uncheck the box.
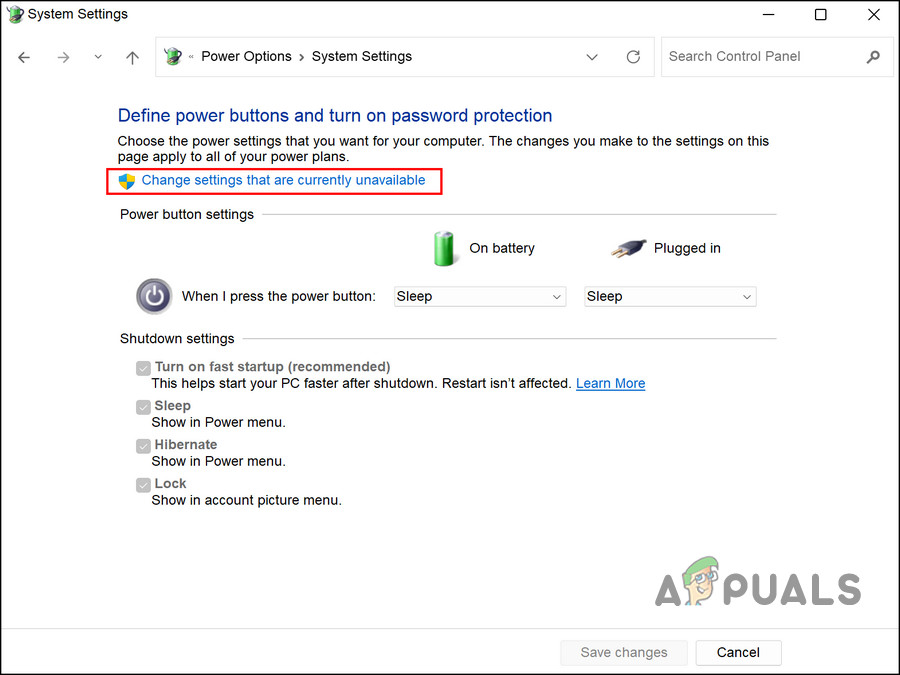
Click on the Change settings that are currently unavailable button


