Fix: Boot Device Not Found (3F0) Error on Ubuntu PC
The “Boot Device Not Found (3F0)” error stops your computer from starting and shows a black screen with a warning from the BIOS. This error means the computer cannot find anything to start, like an operating system. The most common reason is a missing or damaged GRUB bootloader.
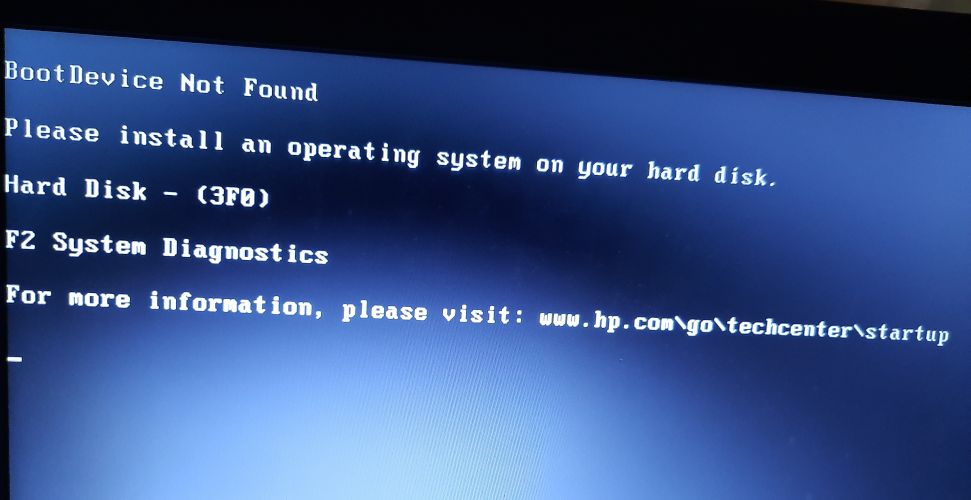
Other causes can be a broken or unplugged hard drive, the wrong boot order, or issues between UEFI and Legacy boot modes.
In this article, we will discuss different ways to solve this error
1. Fix BIOS Settings
The most straightforward way to fix this error is to reset your BIOS settings to their default state.
- Turn on your computer and press the key that opens the BIOS settings. For most HP models, this is F10, but it could also be Esc, F2, F9, or F12 depending on your model. If you’re unsure, check the manual or look up your model online.
- In BIOS, look for an option like Reset to defaults. The wording may vary – it could also be Restore Defaults or Factory Reset. Select it, confirm your choice, and then exit BIOS after saving the settings.
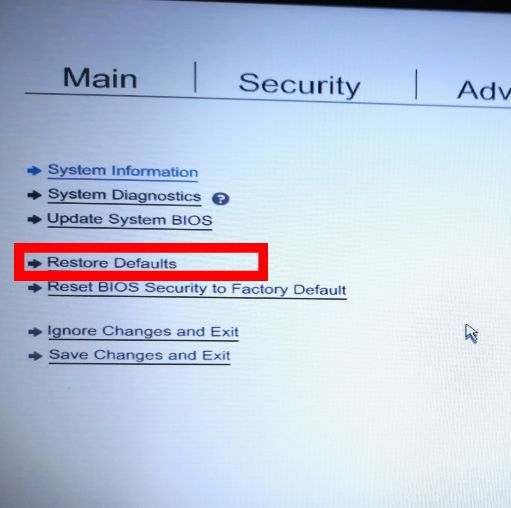
Reset BIOS Settings to default - If this doesn’t solve the problem, try the additional BIOS fixes below.
Another possible fix is to set your hard disk as the primary boot device:
- Go back into BIOS as described above.
- Find the section called Boot Options.
- In the boot order list, move the hard disk to the top as the first boot device.
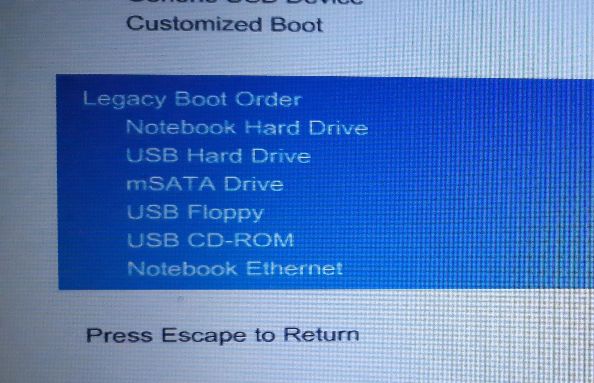
Change Boot Order to make Hard Disk first - Save changes and exit. Check if the error is resolved.
You may also need to adjust your system’s boot mode to match the partition style (MBR or GPT) of your hard disk:
- Go into BIOS Settings again.
- Find the boot settings tab and look for Boot Mode. Here, you’ll see options such as Legacy or UEFI.
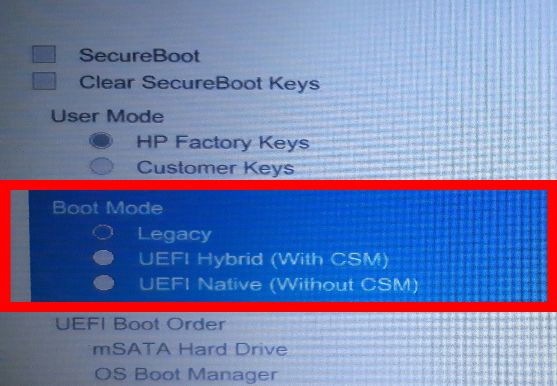
Change Boot Mode - Change the setting to match your hard disk’s partition style (Legacy for MBR, UEFI for GPT), save your changes, and restart your computer to see if that solves the issue.
2. Fix the Boot Loader
For this solution, you’ll need a USB drive prepared as a bootable device with Ubuntu. You can follow this guide to make one. Once you’ve created a bootable Ubuntu USB, do the following:
- Plug the USB into your computer, then boot up and press the key for the boot menu (often F9 or F12, but this can vary). If you’re not sure, find your model online to check.
- Select the USB disk as the boot device to load Ubuntu.
- Click Try Ubuntu and wait for Ubuntu to load. Next, you’ll install the Boot-Repair program.
- Open the terminal by pressing Ctrl + Alt + T.
- Type this command to add Boot-Repair’s repository:
sudo add-apt-repository ppa:yannubuntu/boot-repair
- Update the local repository by typing:
sudo apt-get update
- Install and launch Boot-Repair with this command:
sudo apt-get install -y boot-repair && boot-repair
- If Boot-Repair doesn’t open automatically, type:
boot-repair
- Click on Recommended Repair and wait for the process to complete.
Boot-Repair will generate a log file with information about your hard disk. Review it to make sure there are no other problems.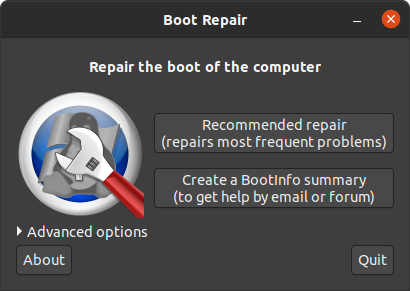
Ubuntu Boot-Repair - Restart your computer (without the USB drive) and check if the error is gone.
3. Install Windows 10 alongside the existing Ubuntu
If the computer can’t find the Ubuntu boot loader or if that partition is corrupt, installing Windows 10 can help. This will set your computer to use the Windows 10 boot loader by default.
- If you don’t already have Windows 10 installed, you’ll need to do a fresh installation. You can follow this guide: installing Windows 10
- After you install Windows, your computer should work as normal, but you may not be able to boot to Ubuntu right away.
- To see the option to choose your Operating System at startup, follow the steps in Solution 2 above.
- If you can boot into Windows 10 but still can’t access Ubuntu after using Solution 2, you may have to reinstall Ubuntu.
4. Replace the Hard Disk
This should be your last resort, as it’s the most expensive and could result in data loss. Before buying a new hard disk, try connecting your disk as an external drive to another computer to see if you can still access your files. If you can access your data this way, you might not need to replace the hard drive.

If this shows how limited my Linux knowledge is, so be it, but I have a question about the second solution. What do I do if I get an error after entering the first command….basically the ppa does not exist? Yet when I go direct to the ppa it shows that it exists.