How to Fix Blurry or Distorted Text on Windows?
Windows uses a feature called DPI scaling to adjust how text and interface elements appear on screens with different pixel densities. When this scaling is not applied correctly, such as when certain applications use outdated rendering methods or ignore DPI awareness, text and visuals may appear blurry or distorted. This issue can also arise after resolution changes, remote desktop sessions, or GPU driver updates that reset your display scaling preferences.
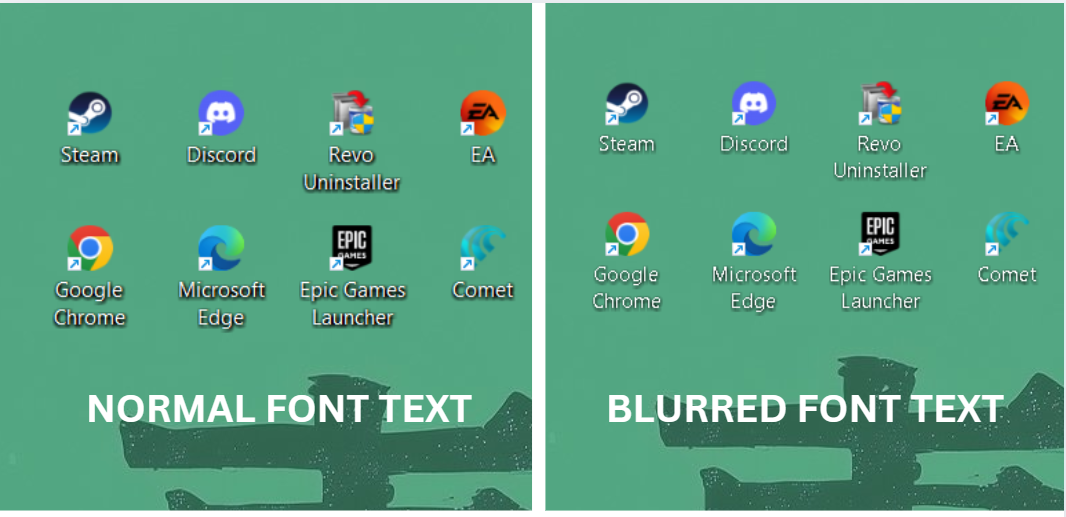
In most cases, correcting the DPI and scaling configuration, resetting the display driver, or using ClearType text tuning restores proper sharpness across all applications.
1. Replug the Monitor’s Power Cable
This issue can sometimes occur due to an unstable or loose power connection. If your monitor’s internal components, such as the display panel or control circuits, are not receiving consistent power, it can cause blurry icons or text. Replugging the monitor’s power cable ensures a stable connection and eliminates any power fluctuations that might be affecting display clarity.
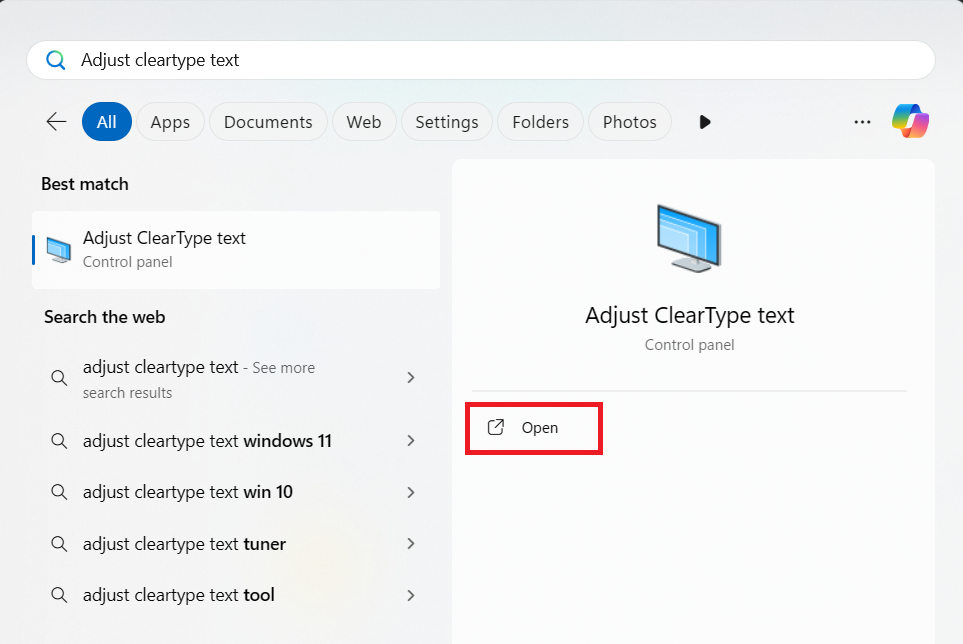
2. Run ClearType Multiple Times
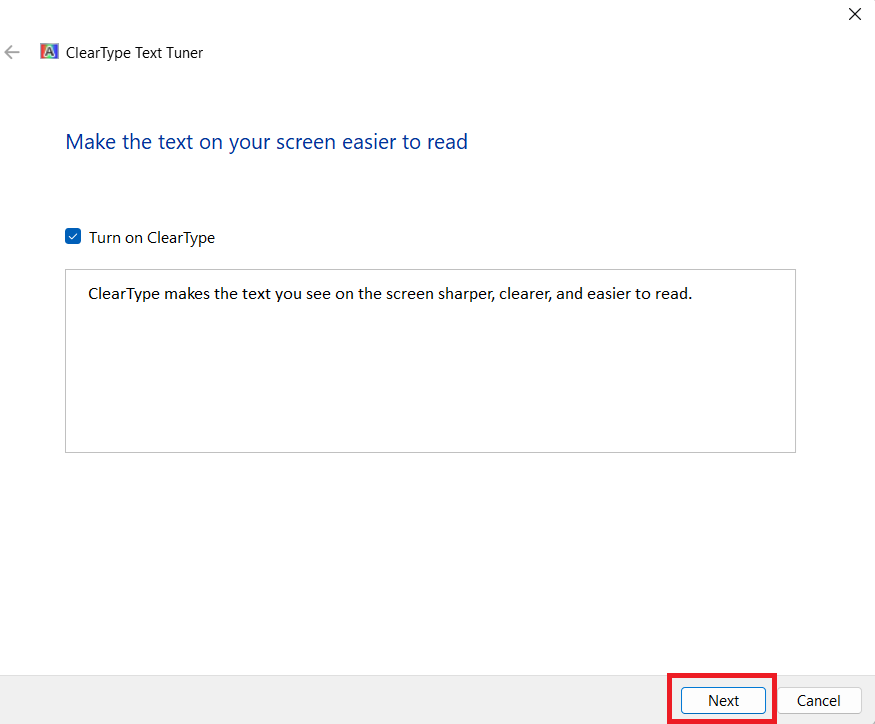
ClearType is a built-in Windows feature that improves text clarity by optimizing how fonts are displayed on your screen. Running the ClearType tuner enhances sharpness and readability by aligning the display output with your monitor’s pixel structure. During the setup, you’ll be asked to choose text samples that appear clearest to you, helping Windows fine-tune how fonts are rendered.
- Press Win + S and type Adjust ClearType Text.
- Click Next to start the tuning process.
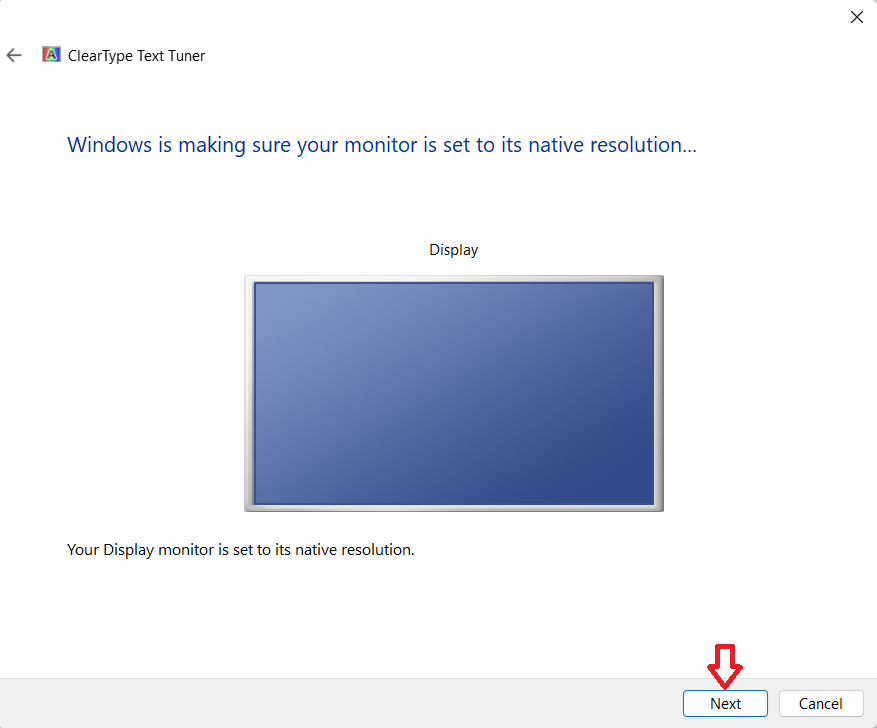
- Allow ClearType to verify your monitor’s native resolution.
- Select the text samples that look clearest to your eyes, then click Finish.
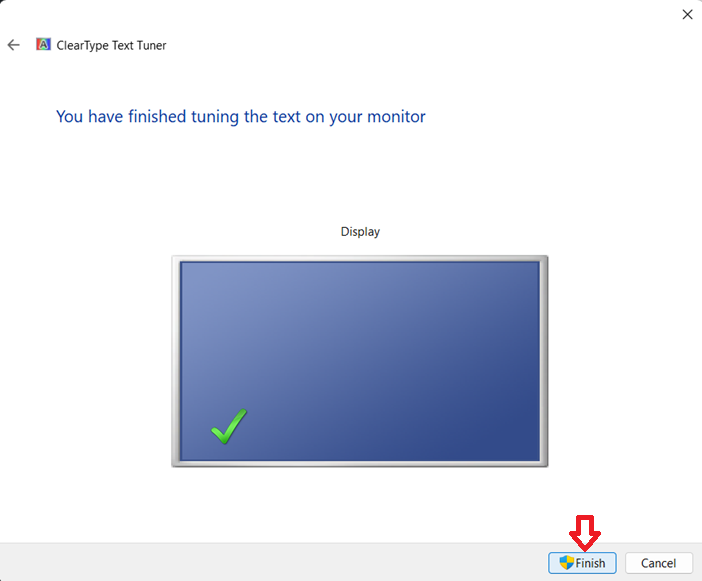
- If the text still appears blurry, repeat the ClearType setup for further fine-tuning.
3. Enable “Smooth edges of screen fonts” in Performance Options
The issue may also occur if the Smooth edges of screen fonts option in the Windows Performance settings is turned off. Some users disable this setting to slightly improve performance, but doing so can make text appear pixelated or rough. Re-enabling it restores font smoothing and improves readability across the system.
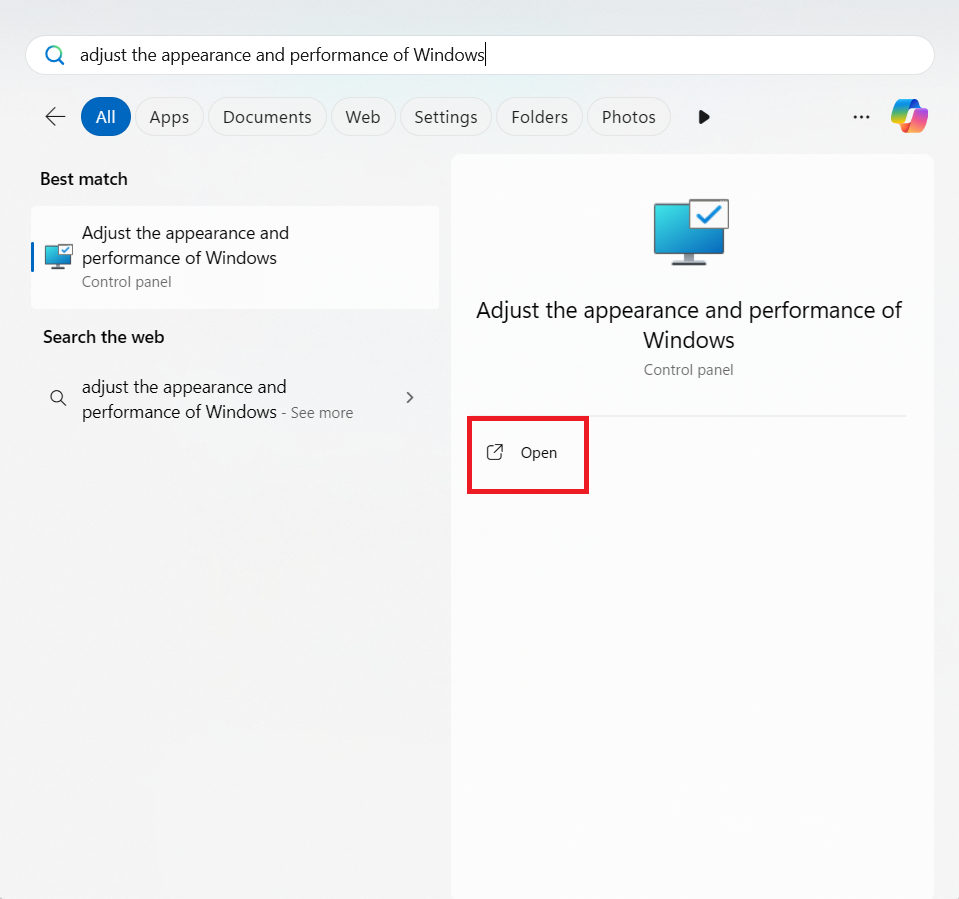
- Press Win + S and type Adjust the appearance and performance of Windows.
- In the new window, check the box for Smooth edges of screen fonts.
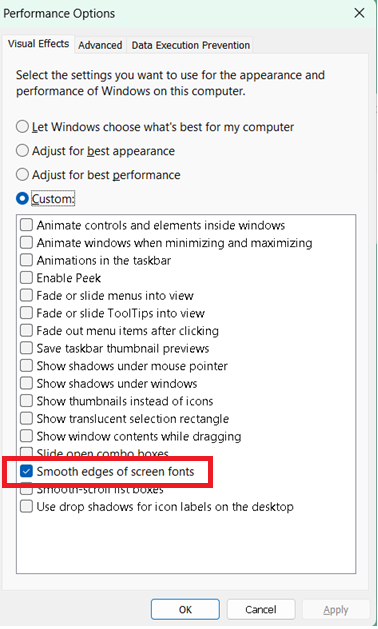
- Click Apply, then restart your computer to apply the changes.
4. Manually Set the DPI Scaling
DPI scaling (Dots Per Inch scaling) controls how text, icons, and interface elements are displayed on your screen. It ensures that everything appears clear and properly proportioned, especially on high-resolution monitors.
Some programs do not support automatic DPI scaling, which prevents them from adjusting to different scale levels like 125%, 150%, or 200%. Manually configuring high DPI settings allows Windows to render those applications with the correct sharpness and proportions.
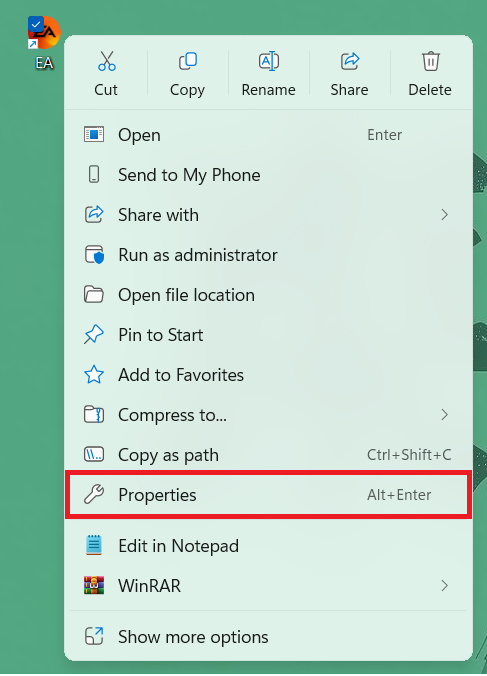
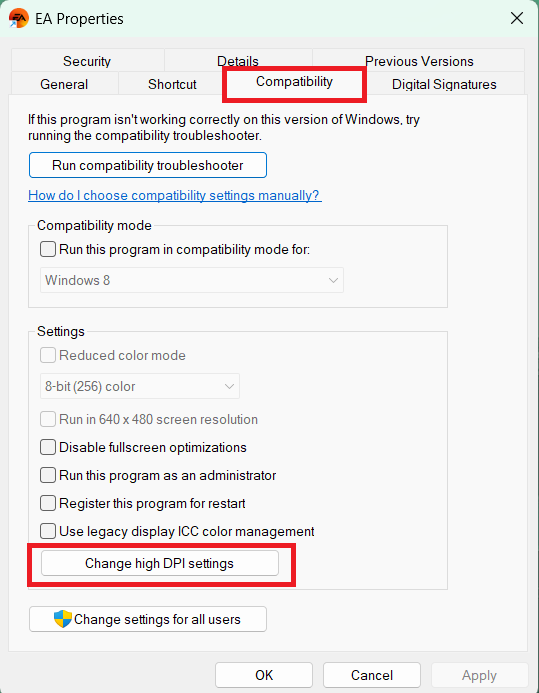
- Right-click the application where text appears blurry and select Properties.
- Go to Compatibility > Change high DPI settings.
- Under “Program DPI,” check the option to use Windows DPI when “I open this program”.
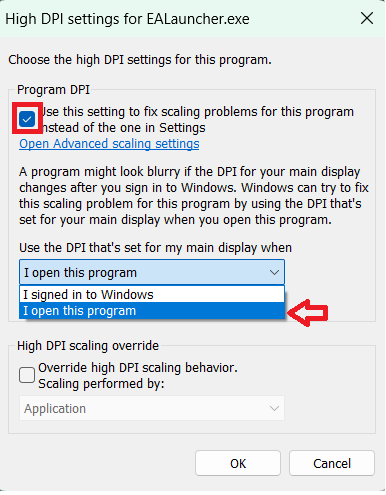
- Under “High DPI scaling override,” select either Application or System (Enhanced).

- Click OK and relaunch the app to check the result.
5. Turn On “Let Windows Try to Fix Apps”
The “Let Windows try to fix apps so they are not blurry” feature automatically detects and corrects scaling issues that make apps appear blurry or pixelated. Enabling this option allows Windows to render those applications at the correct DPI level and maintain consistent text sharpness.
- Right-click on your Desktop and select Display Settings.
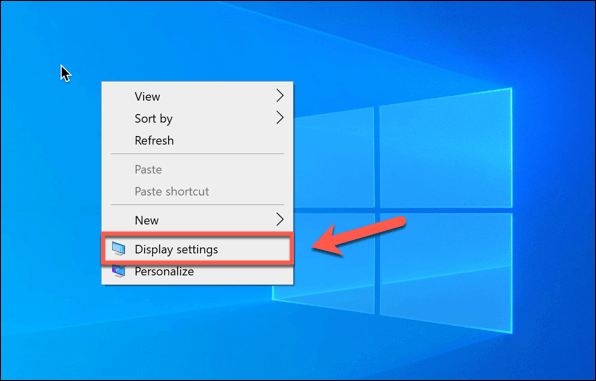
- Click on Advanced scaling settings.
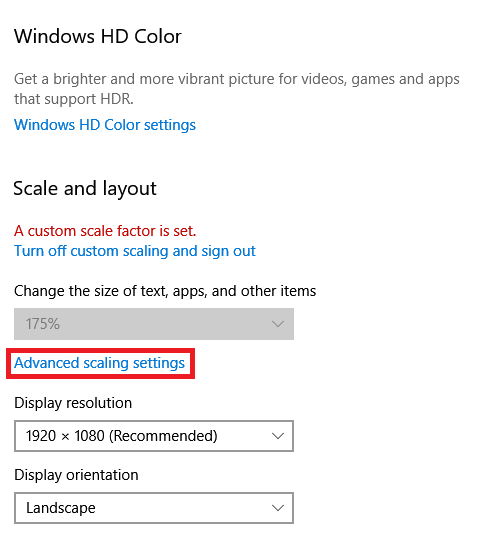
- Enable “Let Windows try to fix apps so they’re not blurry”.
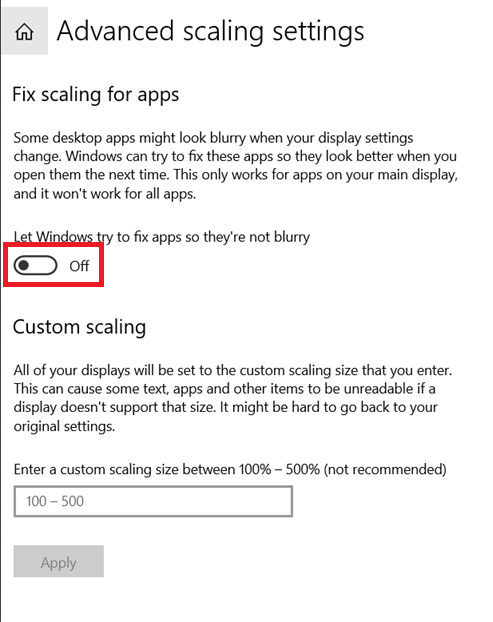
- Check if the text and applications now appear sharp and properly scaled.