Fix: Blue Screen of Death (BSOD) Caused by Windows Update
A Blue Screen of Death (BSOD) can happen right after a Windows Update, usually during the first restart or soon after you log in. This causes your computer to crash or get stuck in a loop. The blue screen shows error messages like CRITICAL_PROCESS_DIED, KERNEL_SECURITY_CHECK_FAILURE, or CLOCK_WATCHDOG_TIMEOUT, which all point to deep system problems.

The main reason is often a conflict with a device driver caused by the update. Other possible reasons include damaged system files, problems with the computer’s firmware, or memory errors.
Below, we’ve listed several troubleshooting methods you can try to fix this issue. Go through the methods and choose the one that best matches your situation.
Before You Begin
The troubleshooting steps in this guide require that you can access your system. If constant crashes are stopping you from accessing Windows at all, you’ll first need to boot into the Windows Recovery Environment.
The Windows Recovery Environment, or WinRE, is a built-in repair tool that helps fix problems with Windows, such as crashes, startup failures, and other issues that prevent the system from working correctly.
WinRE offers several helpful features like System Restore, Automatic Repair, and Command Prompt. You can access it either by booting from Windows installation media (like a DVD or USB drive), or by using the Advanced Startup Options in the Settings app.
Once you’re in the Recovery Environment, proceed through the troubleshooting steps below.
1. Perform a System Restore
Since the BSOD might be caused by a problematic update, the first thing we recommend is to perform a System Restore. This will return your system to an earlier, stable state.
System Restore creates “restore points”—snapshots of your system, including settings, configuration, and installed software. By going back to one of these restore points, your computer returns to the state it was in at that time, which can resolve problems like BSODs caused by updates.
- In the Recovery Environment, go to Troubleshoot > Advanced options.
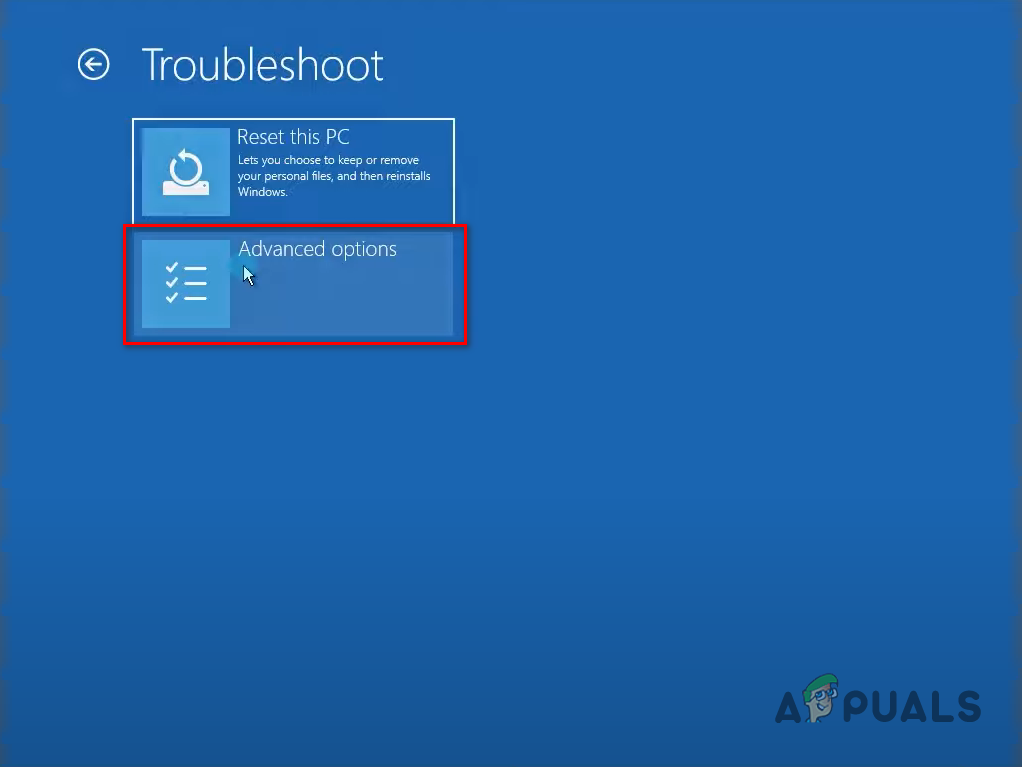
- Choose System Restore from the available options.
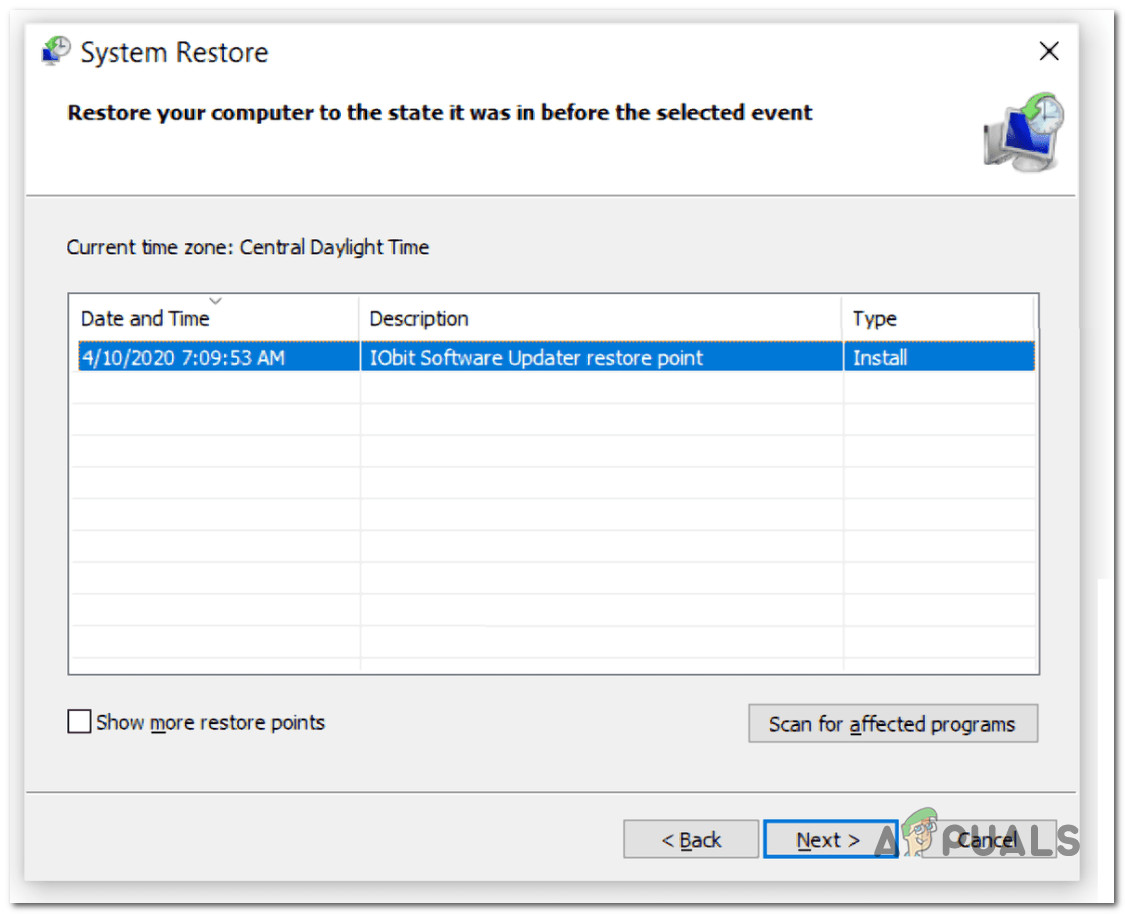
Opening System Restore utility from Windows recovery environment - Click Next in the System Restore window.
- You should now see a list of restore points created on your system. Select a restore point and follow the on-screen instructions to complete the process.
Deploy a system restore
2. Uninstall the Faulty Update
If you’d prefer not to use System Restore and just want to remove the faulty update, you can do that from the Windows Recovery Environment as well.
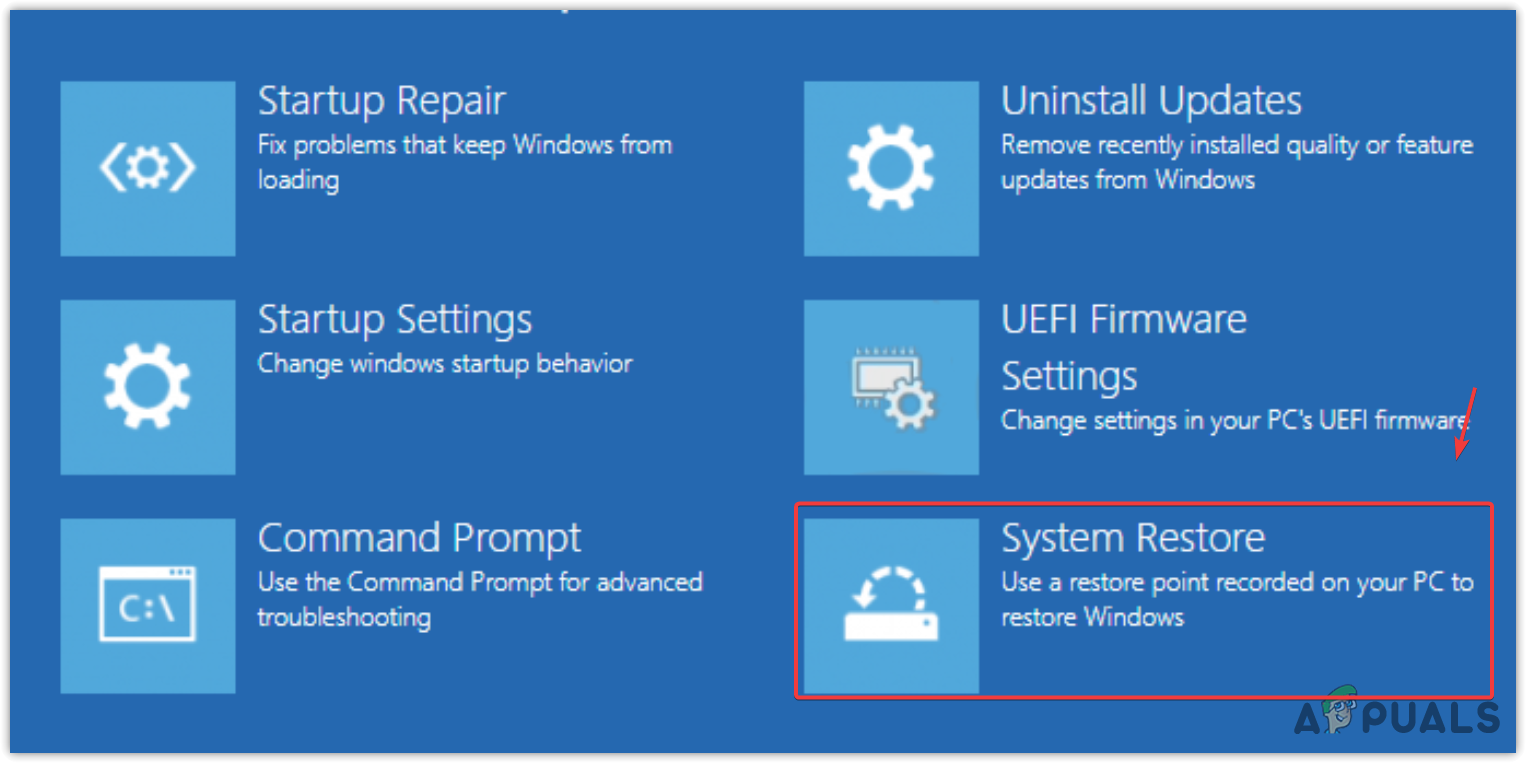
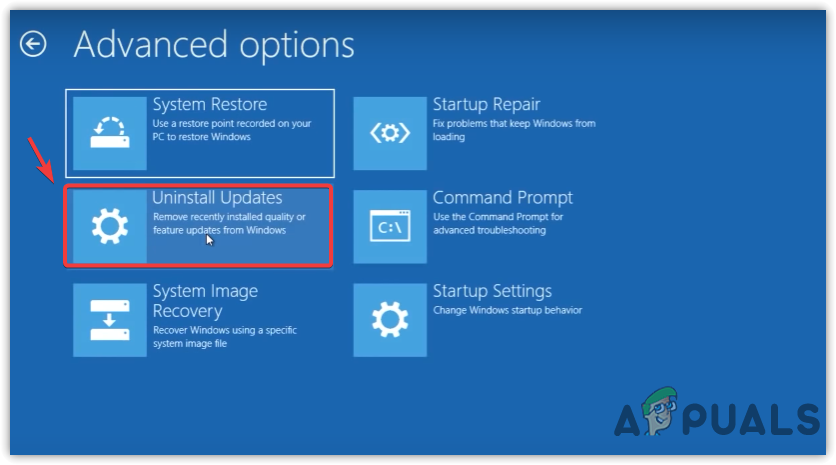
- In WinRE’s Advanced options menu, click on Uninstall Updates.
- You’ll see two options: Uninstall latest quality update and Uninstall latest feature update.
Pick the option that matches the update you think is causing the problem and follow the on-screen prompts.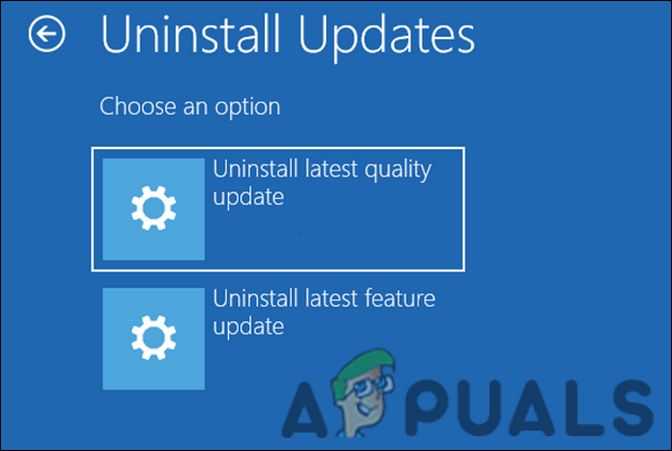
Uninstall an update - Once the update is removed, see if the problem is resolved.
Alternatively, you can also remove the problematic update using the Command Prompt.
- From the Advanced options in WinRE, select Command Prompt.
- Type the following command and press Enter. This will list all Windows updates installed on your computer.
wmic qfe list brief /format:table
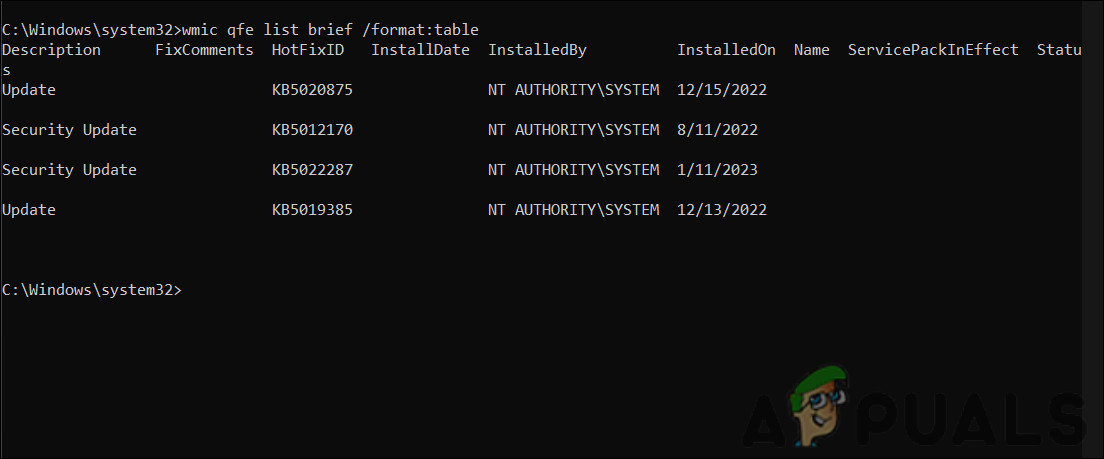
Check the installed updates - Each update will have a ‘HotFixID’. Note the ID for the update you want to uninstall. Then, enter this command, replacing ‘HotFixID’ with the correct numbers or letters from before:
wusa /uninstall /kb:HotFixID
A confirmation box will appear. Click Yes to continue.
3. Run System Scans
Next, we recommend running system scans with System File Checker (SFC) and Deployment Image Servicing and Management (DISM).
SFC will scan all system files on your computer and compare them to its list of good copies. If any files are corrupt or missing, SFC will replace them with healthy versions, which can help fix BSOD errors caused by file corruption.
DISM is used to repair the Windows image itself, which contains system files, drivers, and packages. If the BSOD is triggered by a corrupt system image, DISM can help fix it.
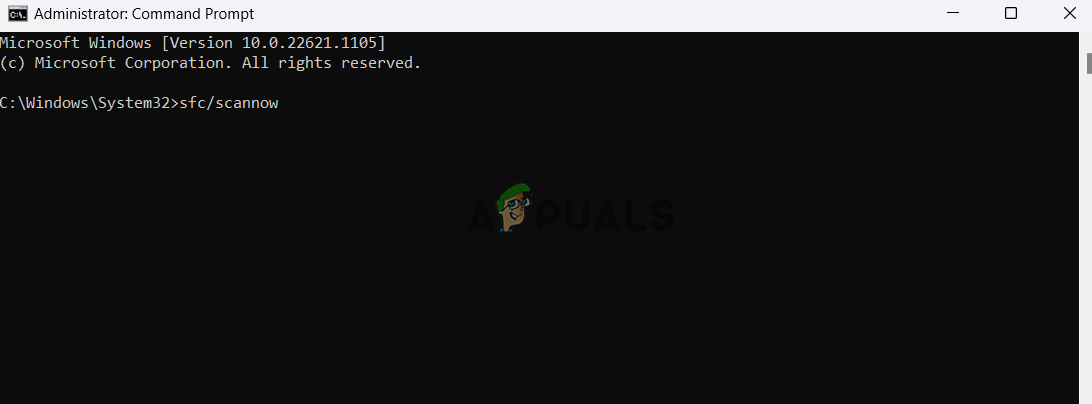
- Choose Command Prompt from the Advanced options in WinRE.
- Type this command and press Enter. The process may take several minutes:
sfc /scannow
Type sfc/scannow command - After SFC finishes, enter this command:
dism /online /cleanup-image /scanhealth
- If DISM finds any problems, run this additional command:
dism /online /cleanup-image /restorehealth

Deploying a DISM scan
The repair process could take several minutes. Once complete, restart your computer and check to see if the BSOD problem has been fixed.
4. Update Drivers
Sometimes, outdated drivers can cause BSODs after a Windows update.
A new update might change how your system works and if your drivers are old, they could have trouble working with these changes. For example, system updates can add new features or change how different parts of your computer communicate, which may cause outdated drivers to become incompatible.
Drivers might also cause issues if they’re designed to respond to certain events, but those events work differently after a system update.
Usually, you can fix these problems by updating your drivers.
- Boot Windows into Safe Mode.
- In the taskbar’s search box, type “Device Manager” and open it.
- Expand each driver category and look for any drivers with a warning icon—this means they might be outdated or not working correctly.
- Right-click the affected driver.
- Select Update driver, then choose Search automatically for drivers. Windows will look for and install any available updates.
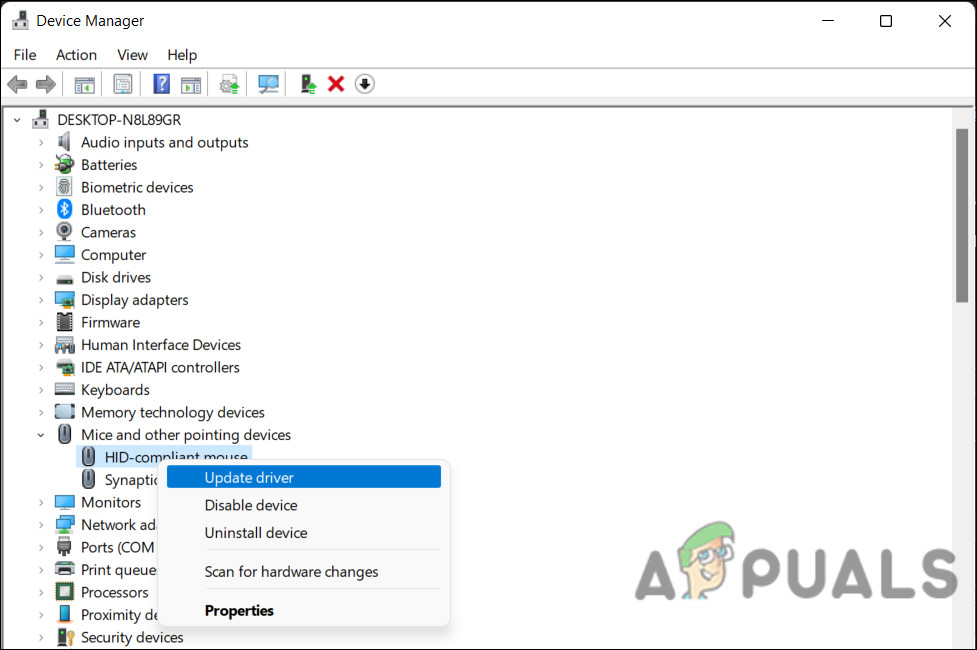
Update the mouse driver - Follow the prompts to finish updating.
- Repeat for all outdated drivers, then restart your computer.
5. Reset Windows
If none of the previous steps have worked, you can try resetting Windows as a last resort.
Resetting brings Windows back to its default state, but keeps your personal files and most settings. Unlike a clean install, this is faster and more convenient because it doesn’t delete your data. Resetting Windows can often resolve problems caused by faulty updates, including BSODs.


