How to Fix Black Line on Lenovo Laptop Screen
 Reviewed by Huzaifa Haroon
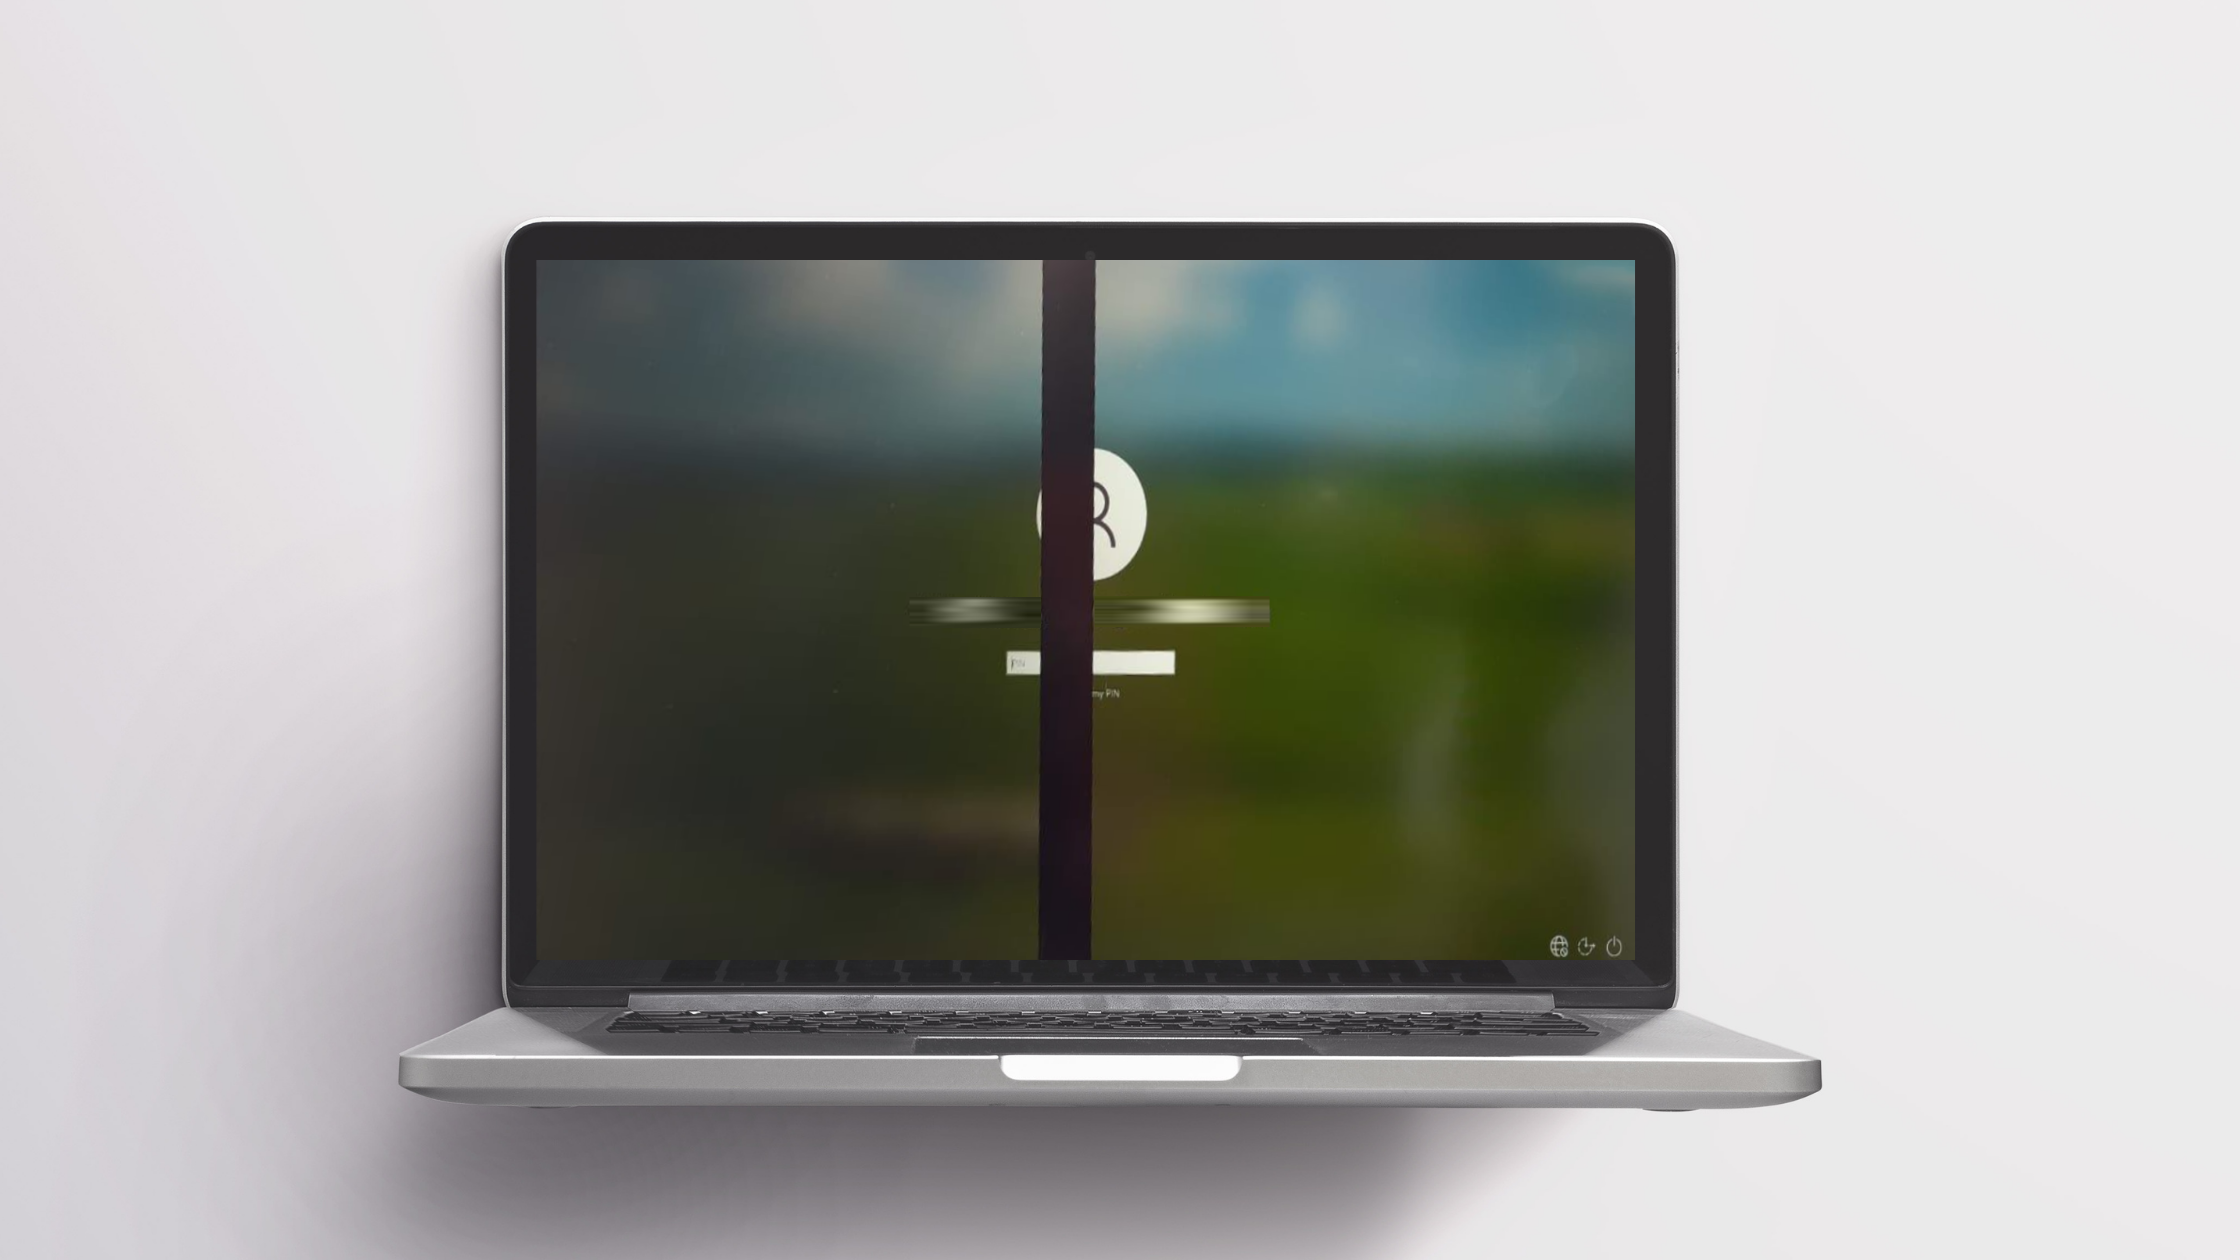
A black vertical or horizontal line on your Lenovo laptop screen usually shows up during startup and stays visible no matter what you do—even in BIOS or safe mode. This usually means there’s a problem with how the screen displays the picture, often because part of the screen or the parts that connect to it are not working properly.
The most common reason is a broken LCD screen. However, sometimes the problem could be a loose or damaged cable that connects the screen, worn hinges, or a problem with the graphics chip.
Start with simple fixes first. Sometimes, a standard restart can clear up minor issues or temporary glitches that might be responsible for the black line on your Lenovo screen.
If that doesn’t work, try the additional steps below to troubleshoot and hopefully solve the problem.
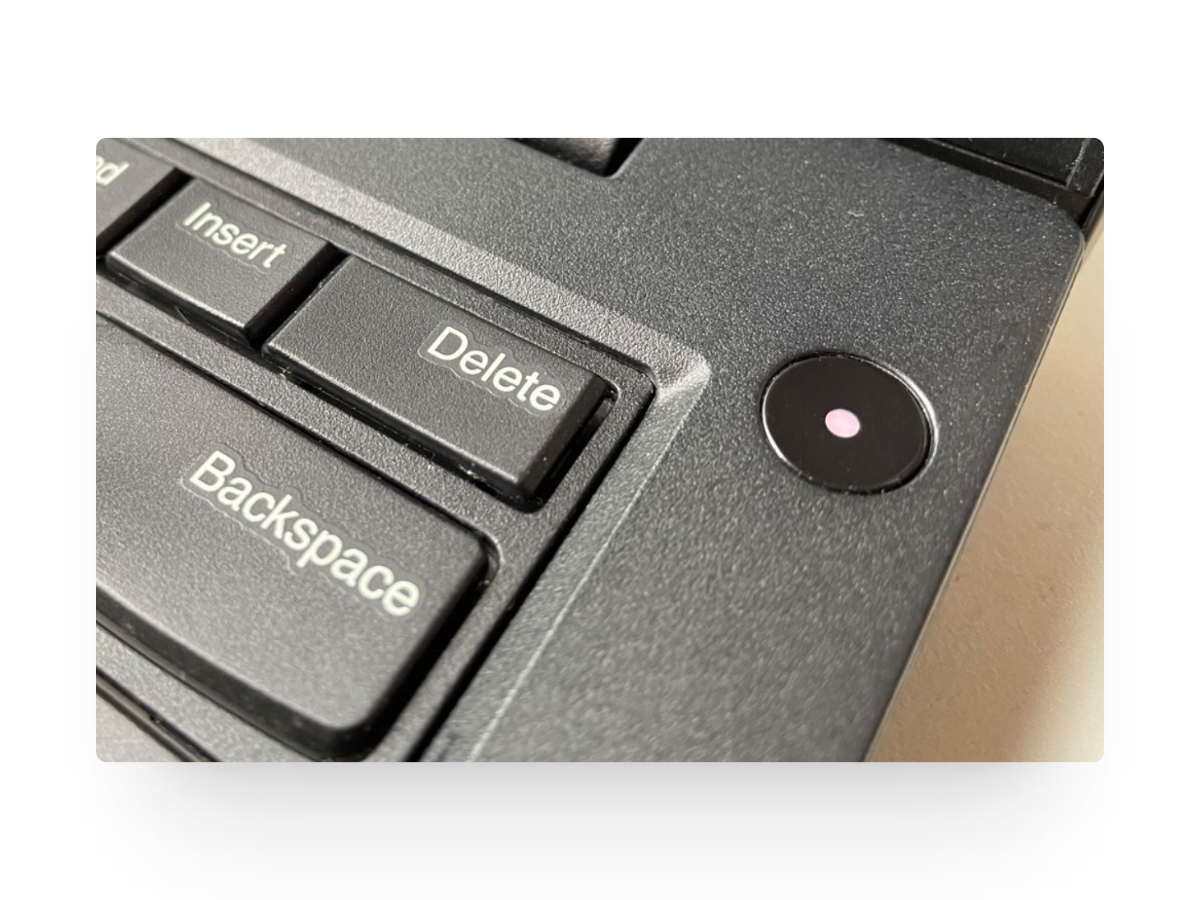
1. Perform Static Discharge
Sometimes, your laptop can build up residual static electricity, even when it’s powered off. This static can interfere with display circuits, disrupting the signal between the motherboard and the screen and creating display problems such as a black line. A static discharge might fix this in many cases.
To do this, power off your laptop and disconnect all external devices, such as HDMI cables, the power cord, mouse, or keyboard cable.
Once your laptop is disconnected from everything, press and hold the Power button for about 60 seconds. After that, reconnect all the cables, plug in the charger, and power on your laptop. Let it charge for a bit, then check if the black line issue is fixed.
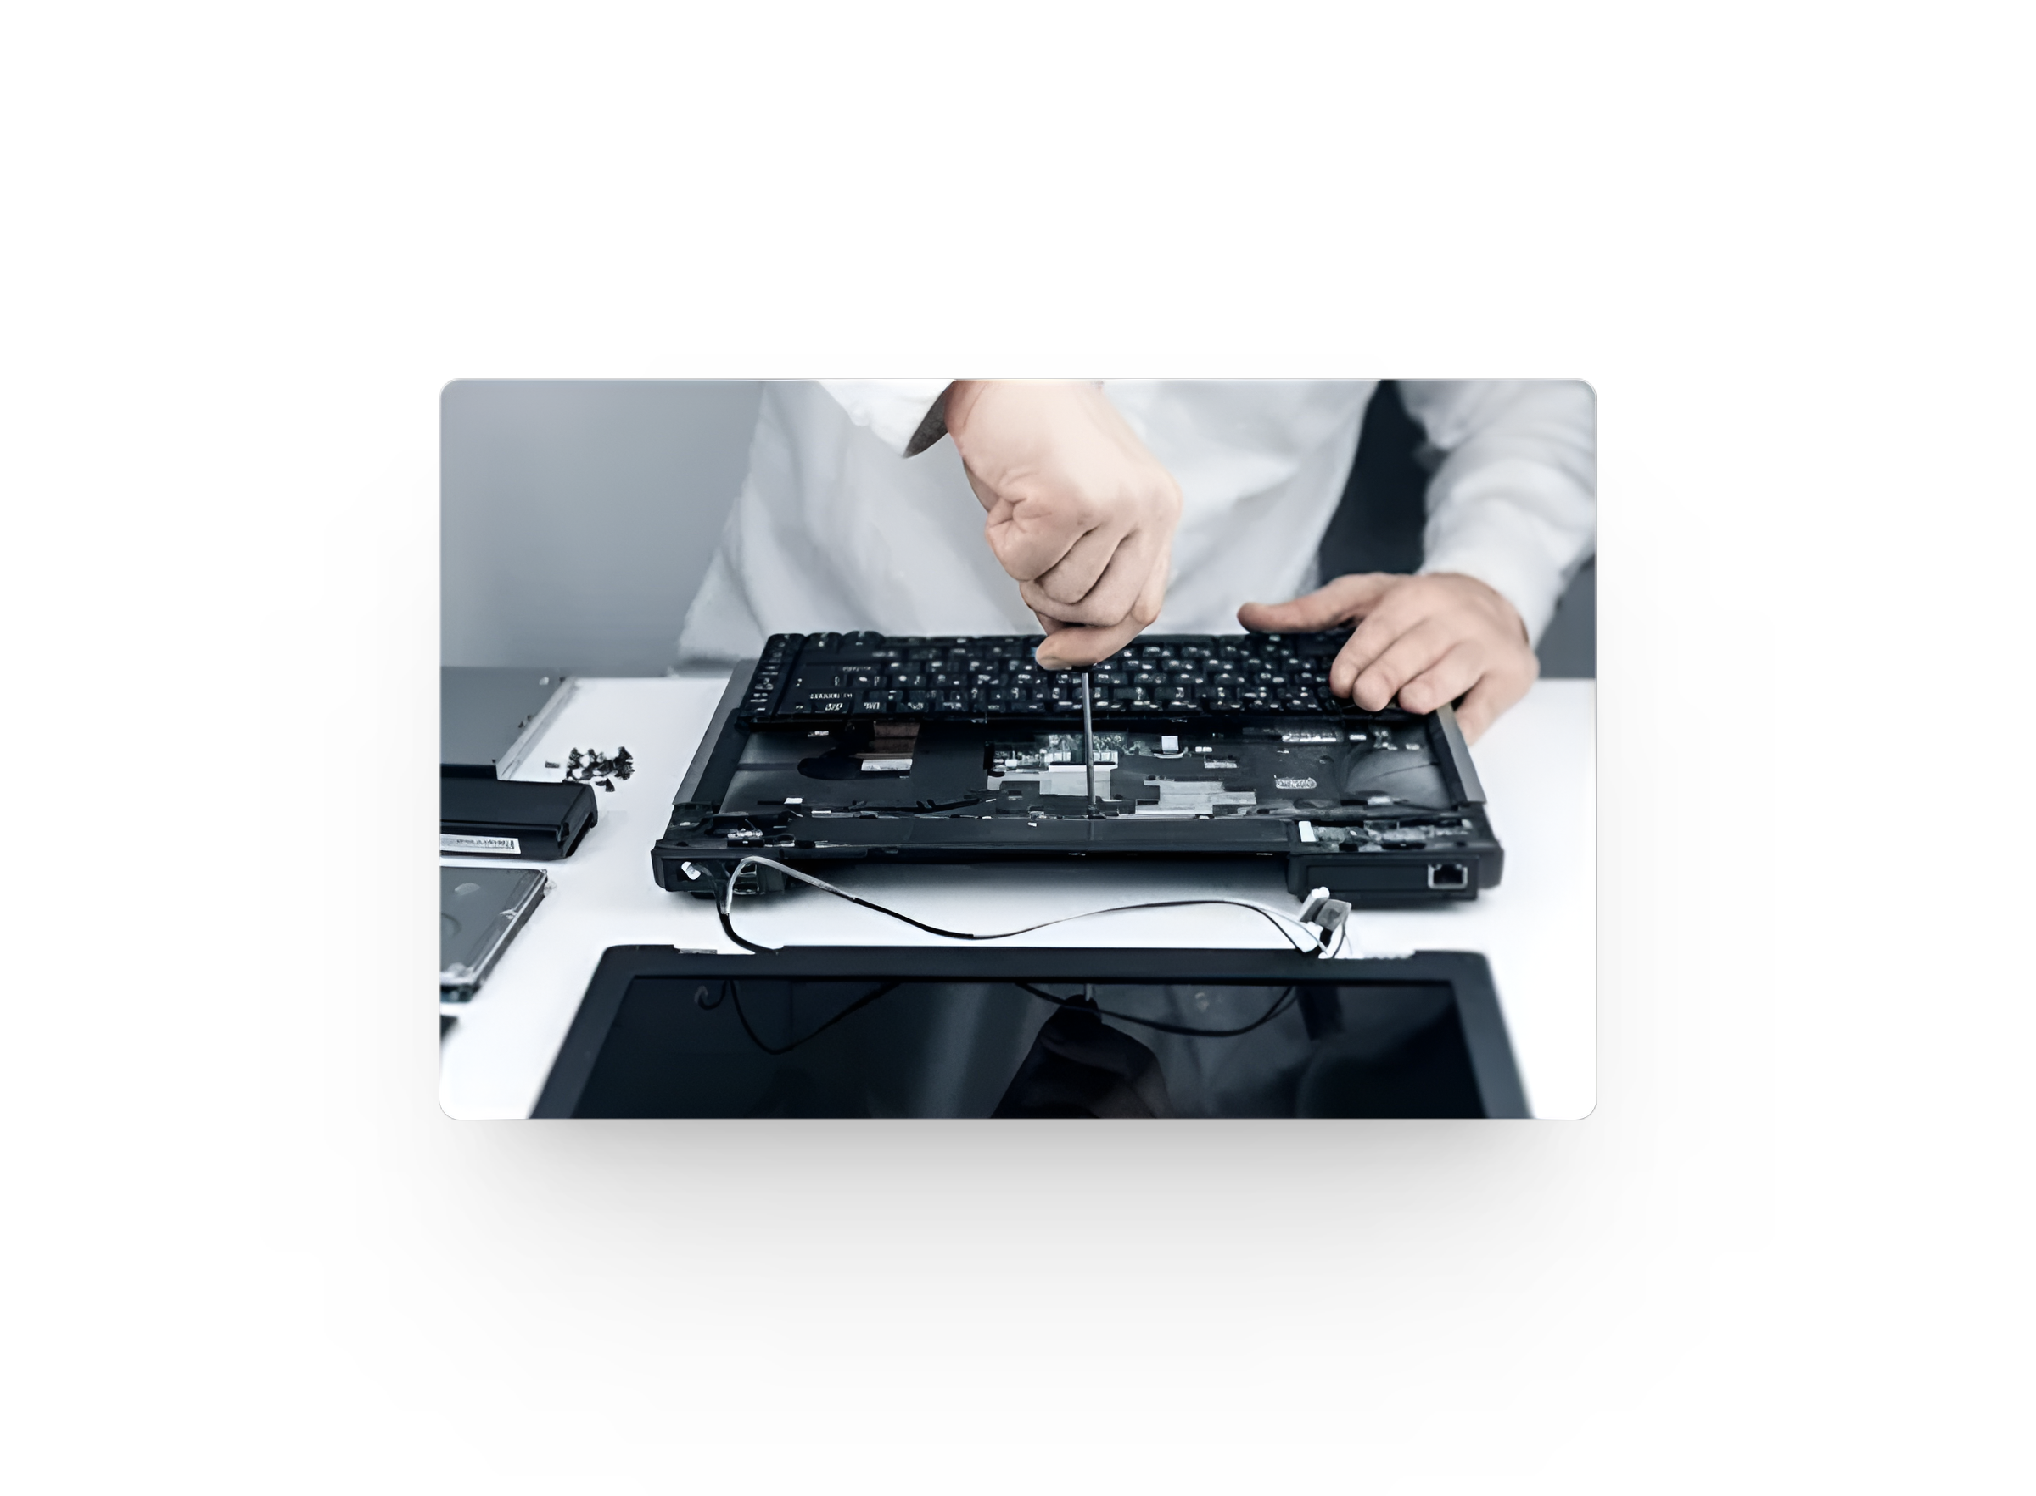
2. Check Cable Connections
Your laptop screen connects to the motherboard using a thin ribbon cable. If this cable becomes loose or damaged—from frequent use, a fall, or even bending—it can cause a weak signal to the screen, leading to dead pixels or black lines.
Inspect the cable for obvious signs of wear, tears, or bends. If it seems loose, gently try reseating or tightening it and then test your laptop. If it’s damaged, it’s best to replace the cable for a lasting fix.
3. Check Display Settings
Often, screen issues happen because of incorrect display settings, like screen resolution, refresh rate, or scaling options. If your resolution is set higher than your screen supports, or if the refresh rate isn’t right, strange problems like black lines can occur—especially when connecting to an external monitor.
Laptops that are older or don’t fully support some display settings are more likely to show issues if values change from the recommended ones.
- Press Win + I on your keyboard to open Settings.
- Go to Display.
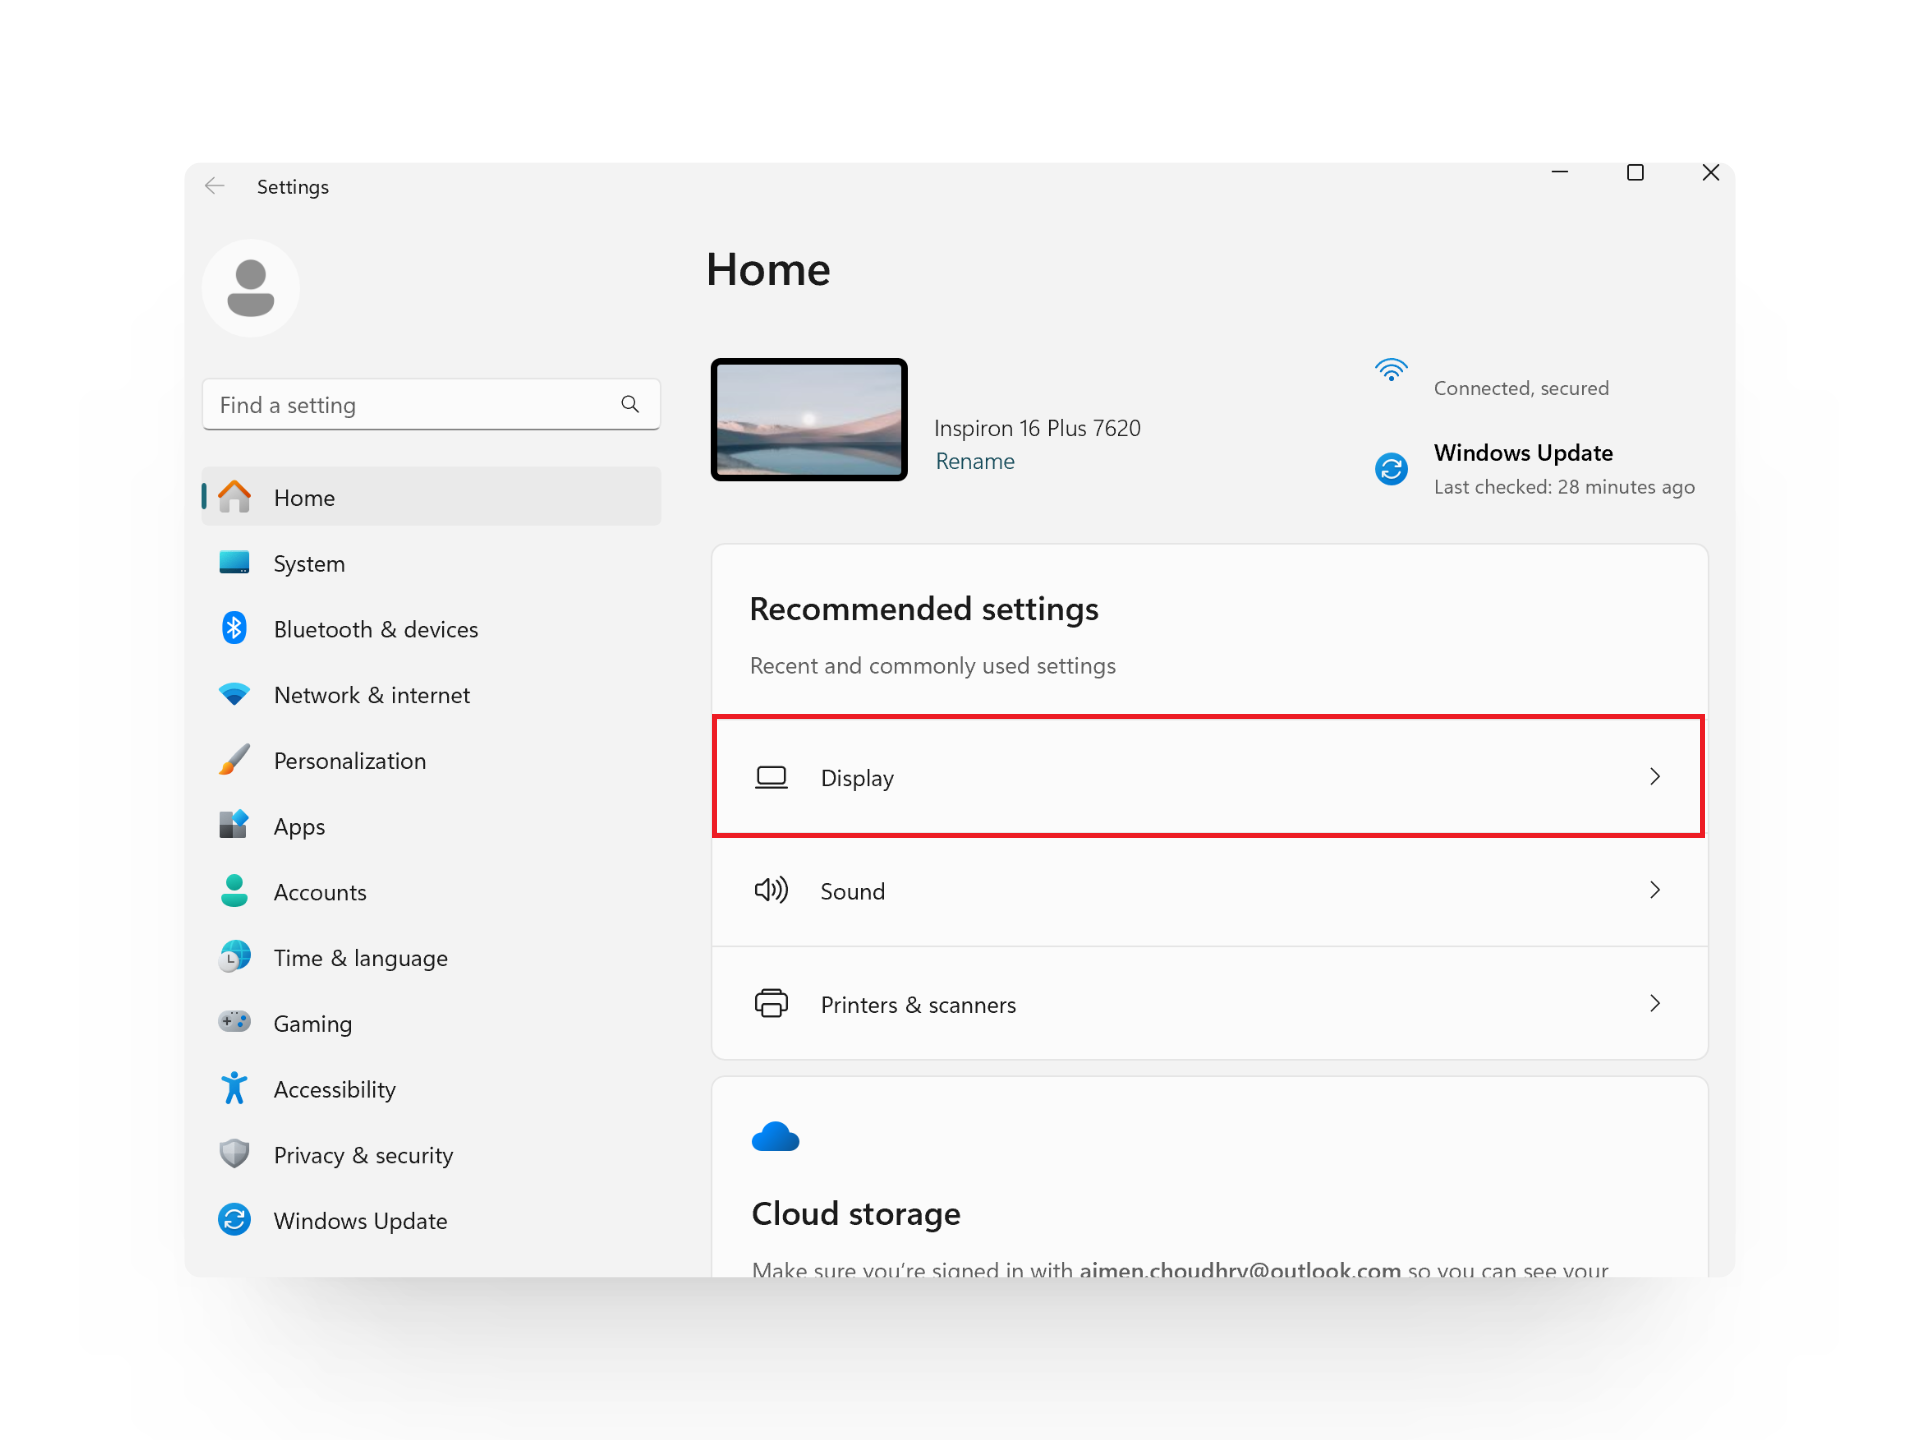
- Set the Display Resolution to its Recommended value.
- Click on Advanced display to set the refresh rate as recommended; this can also help correct black line issues.

4. Update Graphic Drivers
Your graphic drivers are essential for your screen to work properly. They help your operating system communicate with the graphics card. Outdated or corrupt drivers can result in problems like black lines or screen flickering. Updating your drivers keeps your display running smoothly and can resolve a lot of these issues.
Drivers that are old or corrupted may not process images correctly, which can lead to black lines on your screen.
The good news: you can update your graphics drivers at any time—it’s never too late to try this fix!
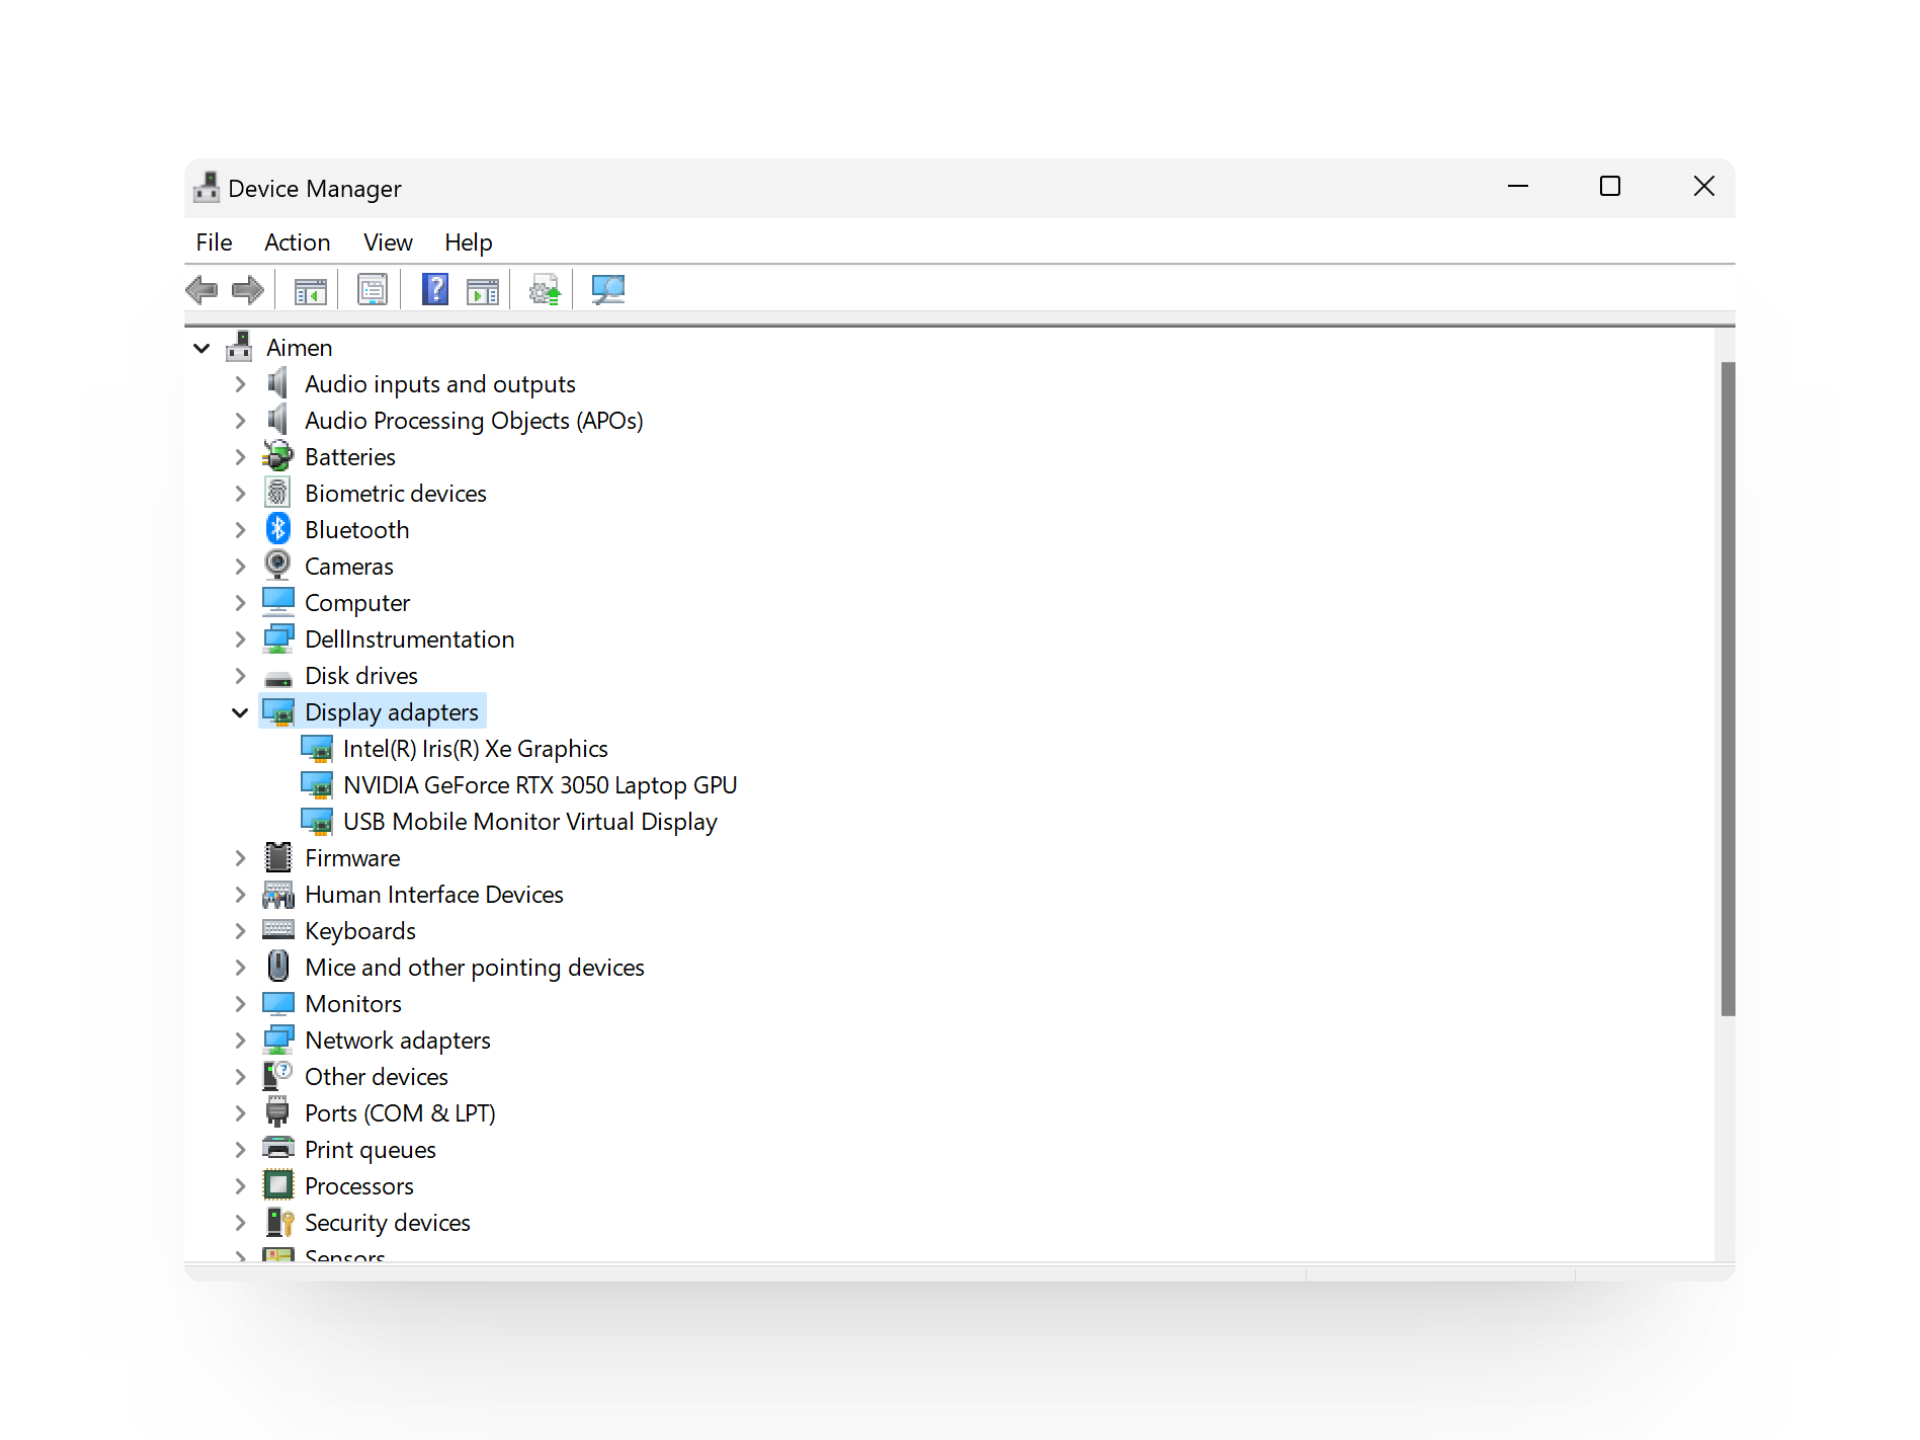
- Press Win + R to open the Run box, type devmgmt.msc, and hit Enter.
- Device Manager will open.
- Double-click Display adapters to show the devices under this category.
- Right-click your graphics driver and choose Update driver.
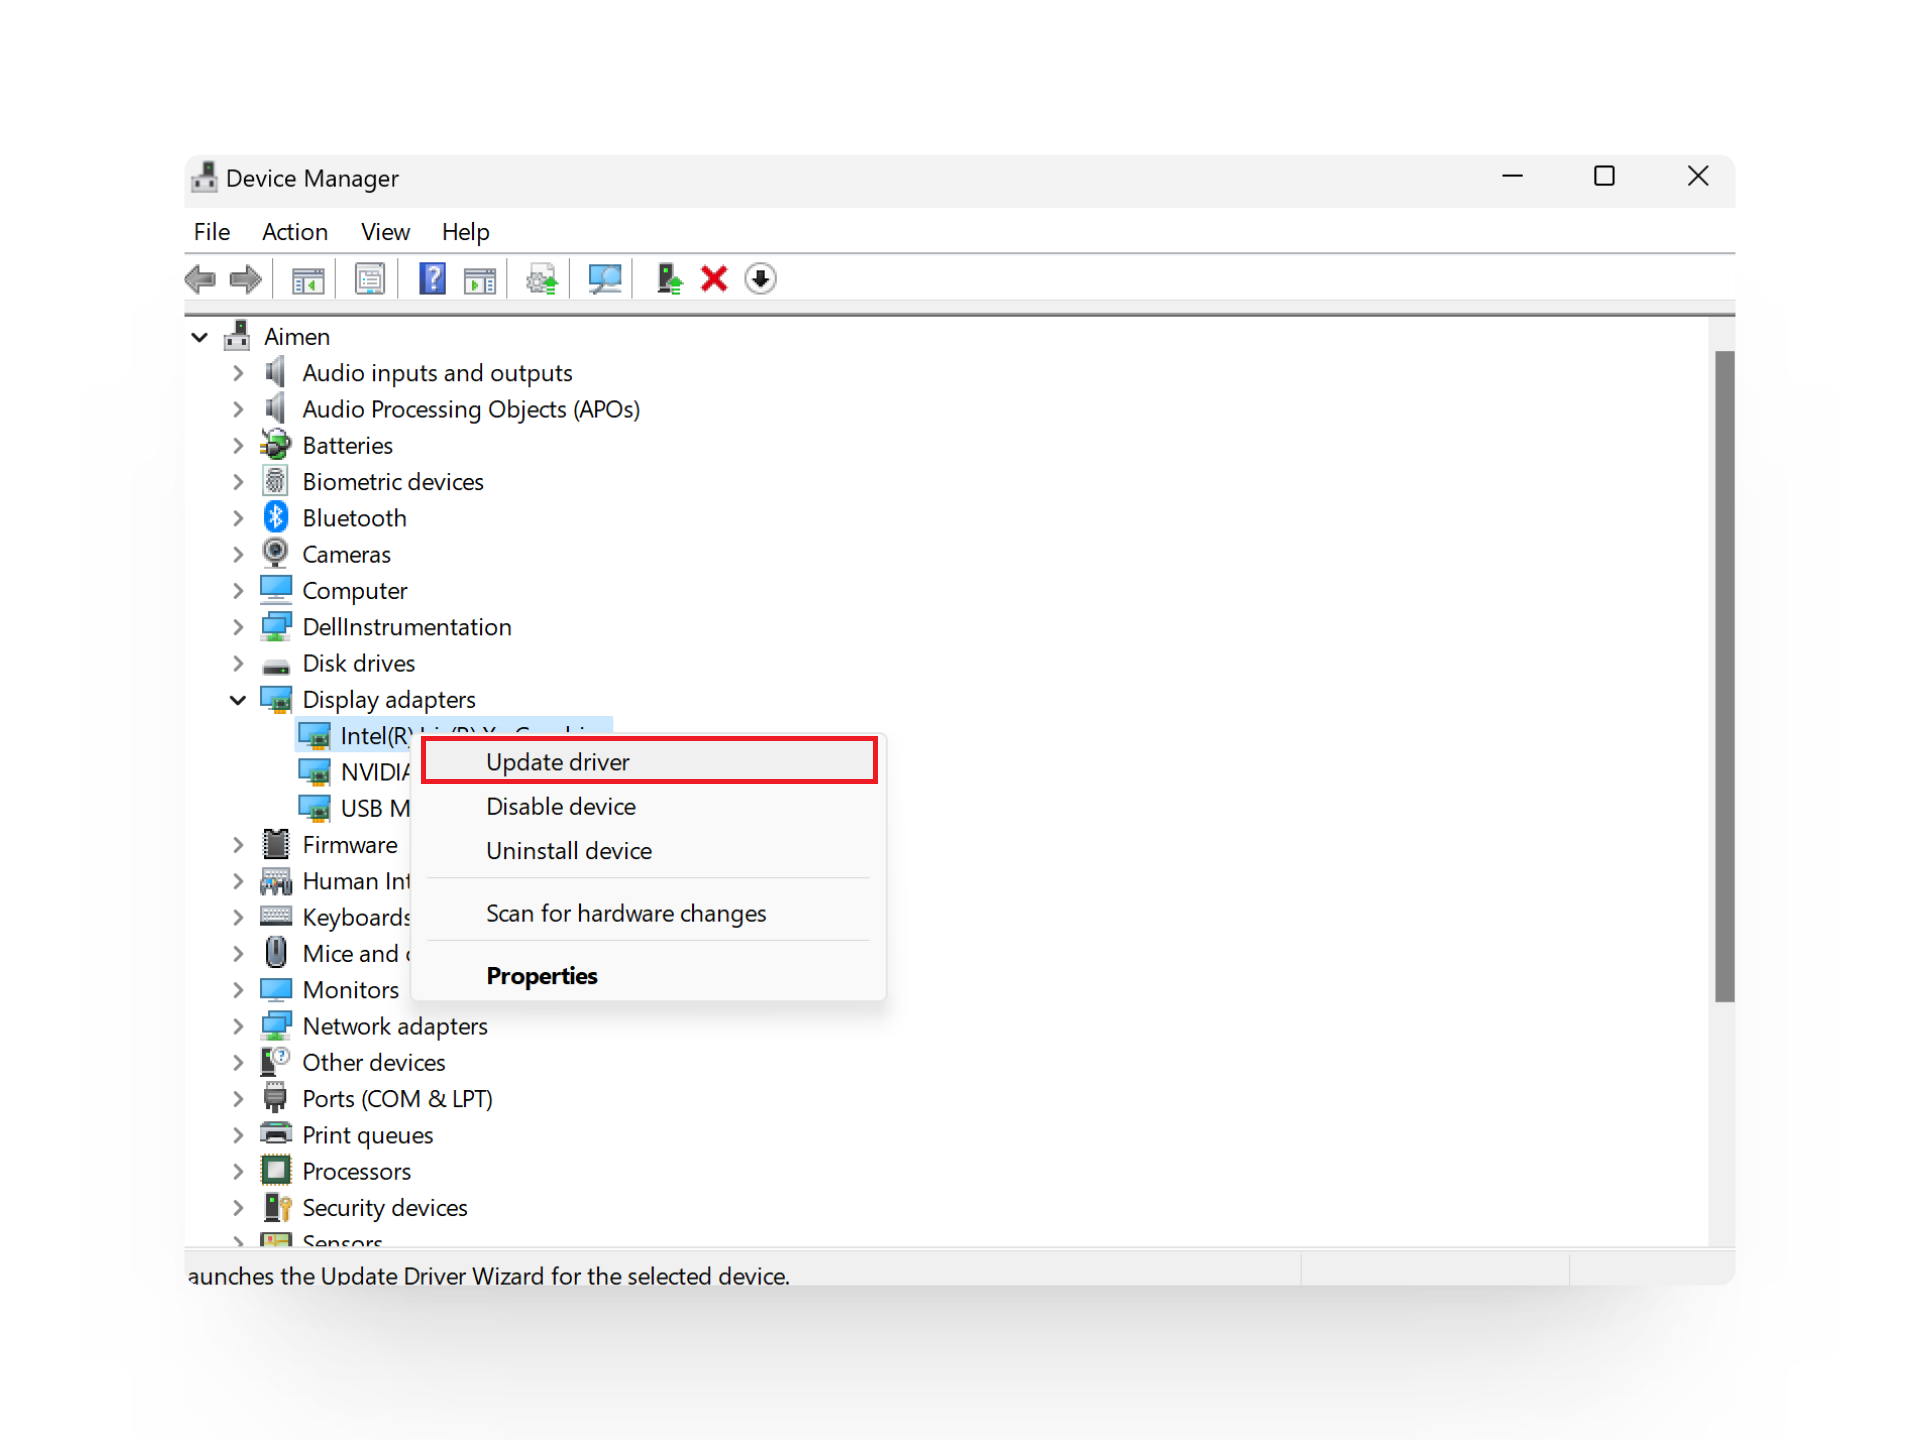
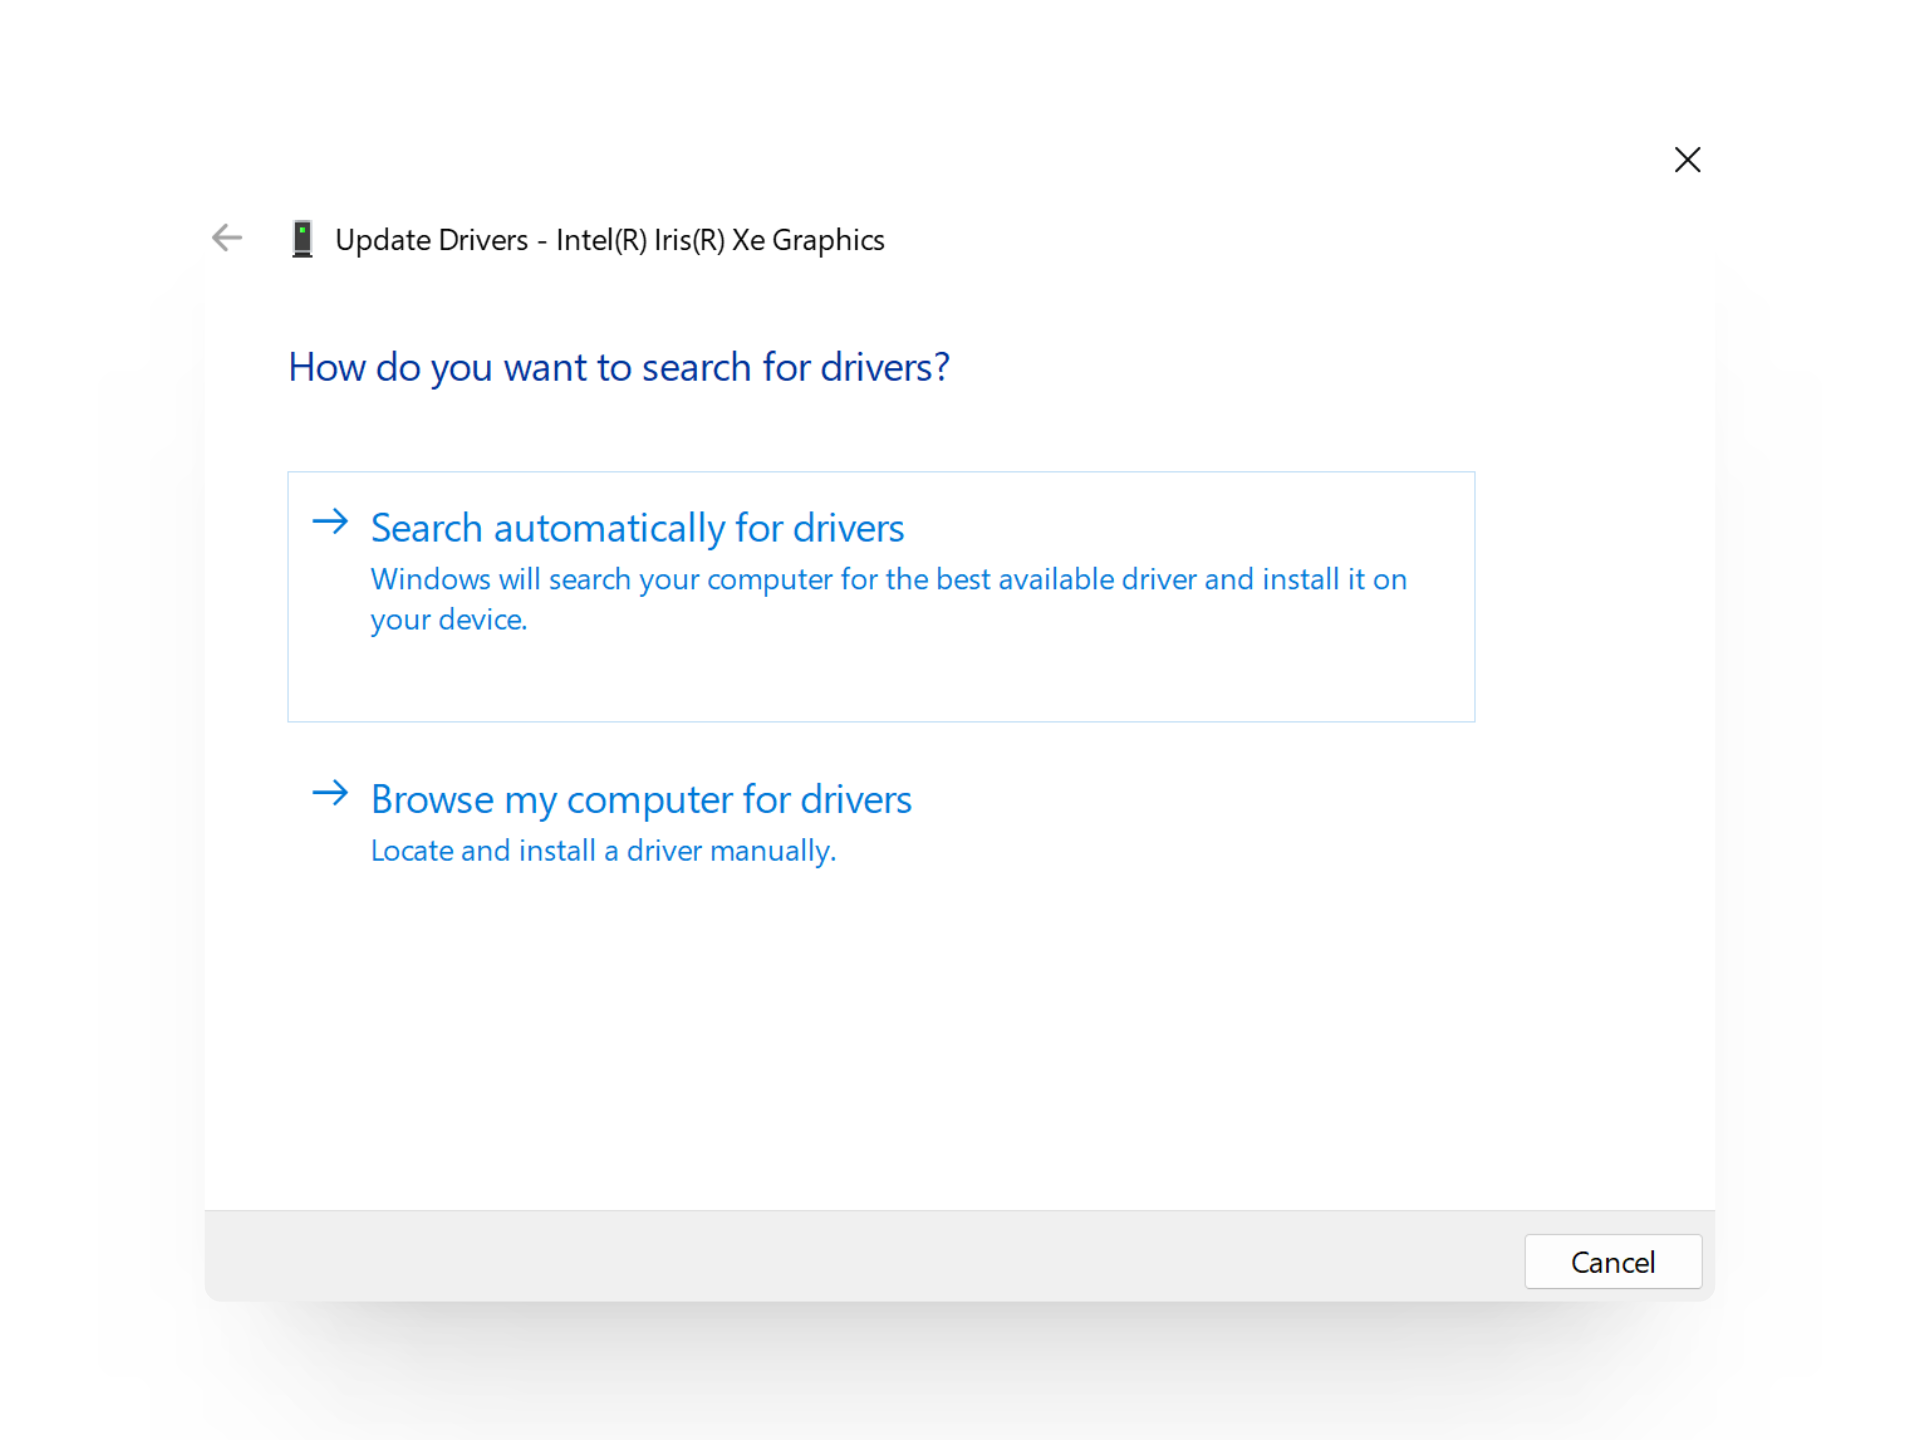
- Choose whether you want to update the driver manually or automatically, then follow the prompts to finish.
5. Boot in Safe Mode
Booting into Safe Mode starts your computer with only the core drivers and programs it needs. This is a common way to troubleshoot issues that might be caused by software conflicts or problematic drivers.
If the black line on your Lenovo screen comes from a software driver, a conflicting app, or incorrect display settings, starting in Safe Mode helps you narrow down the source and find a solution.
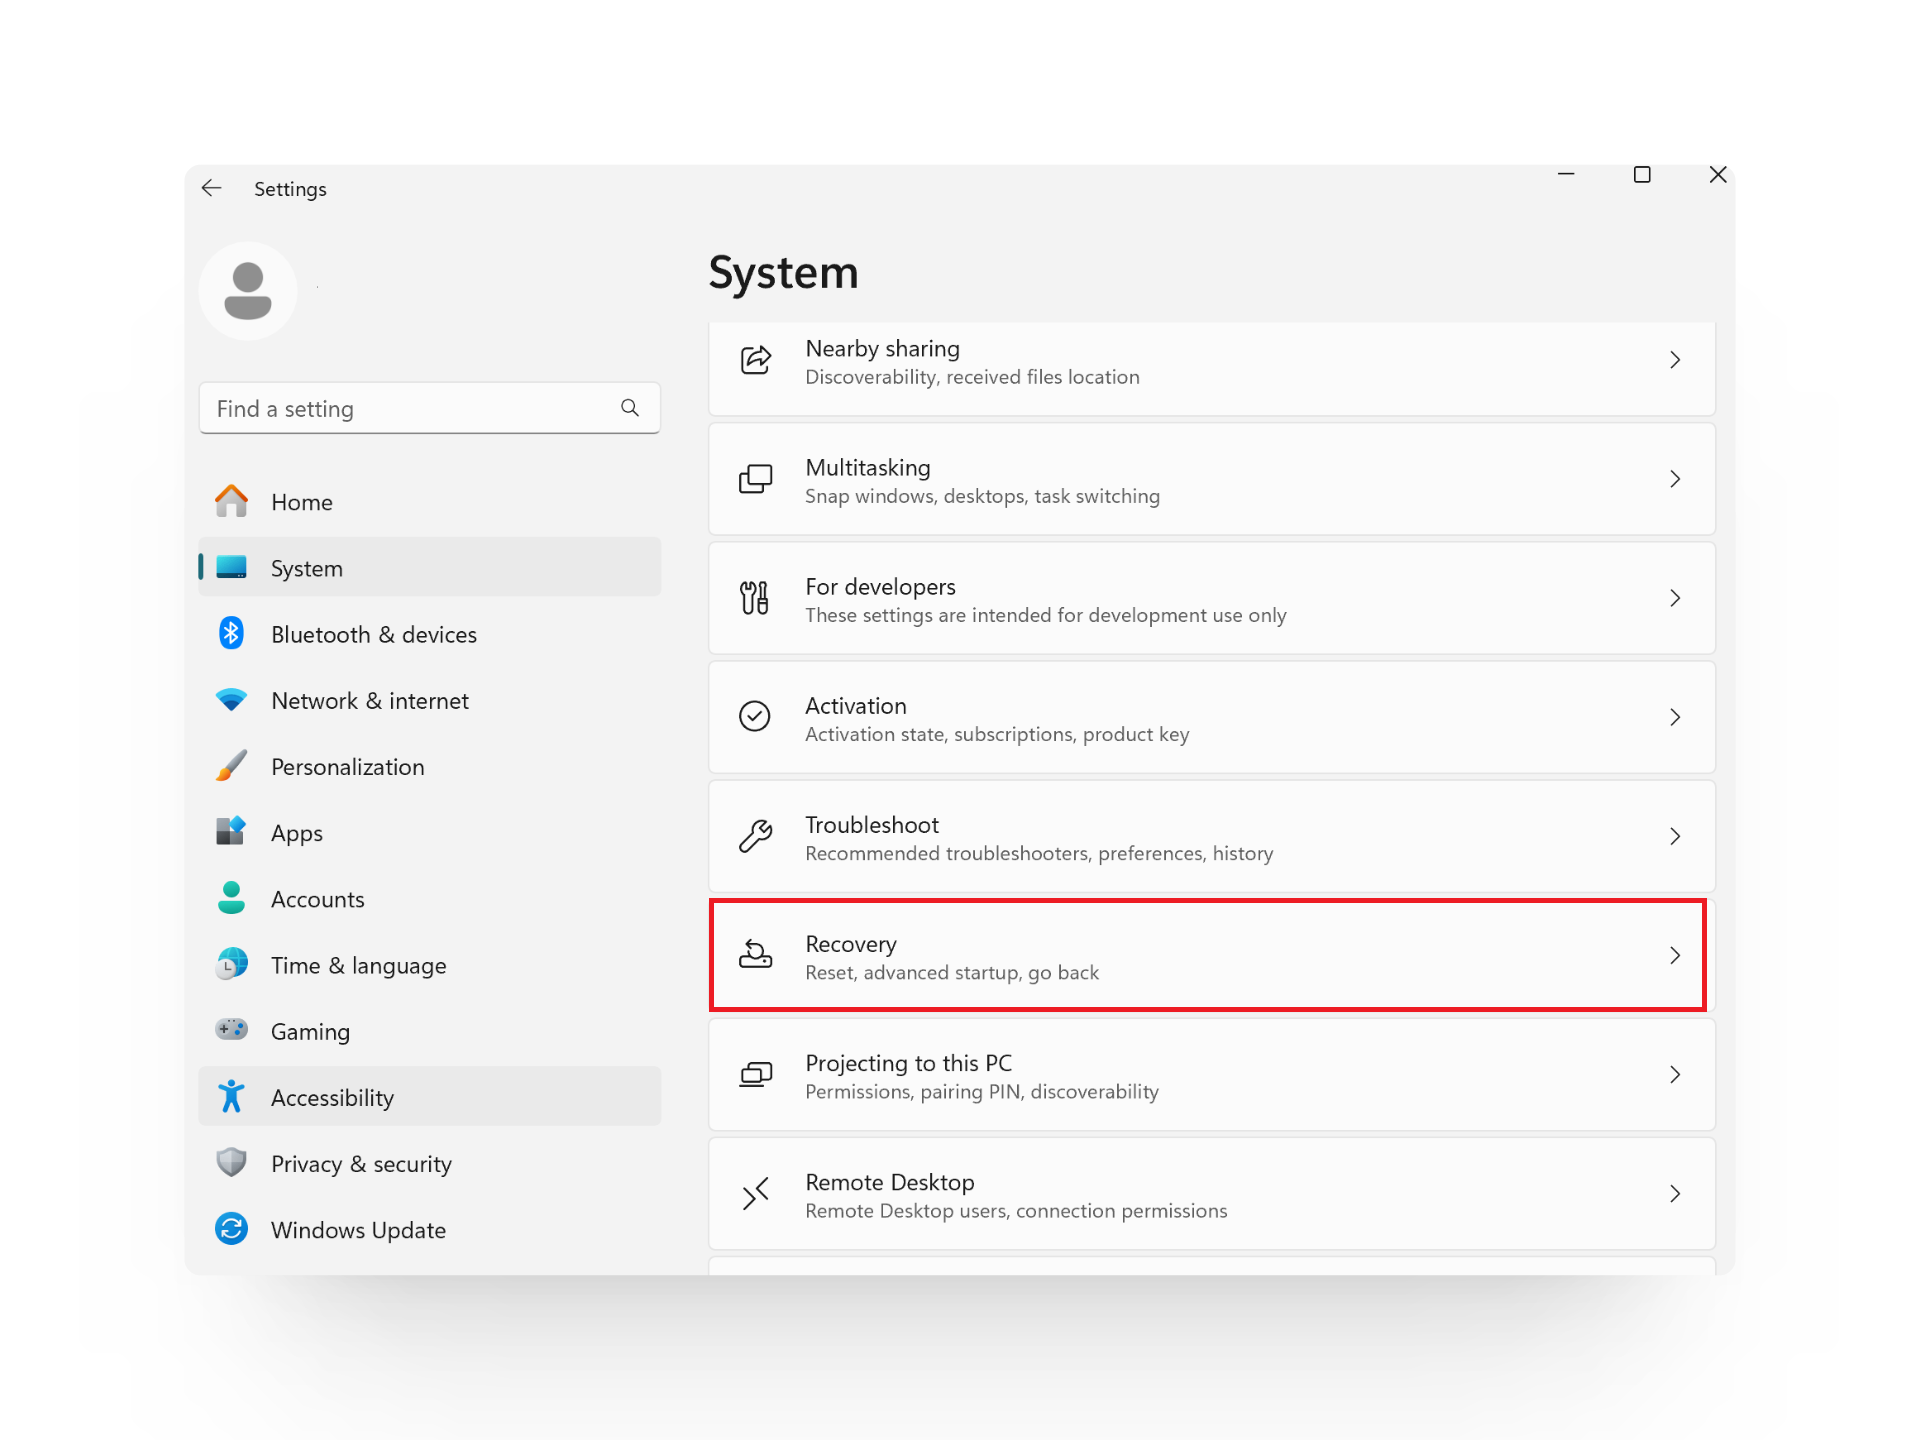
- Press Windows + I to open Settings.
- From the left menu, select System.
- Click on Recovery.
- Under Recovery options, click Restart now next to Advanced Startup.
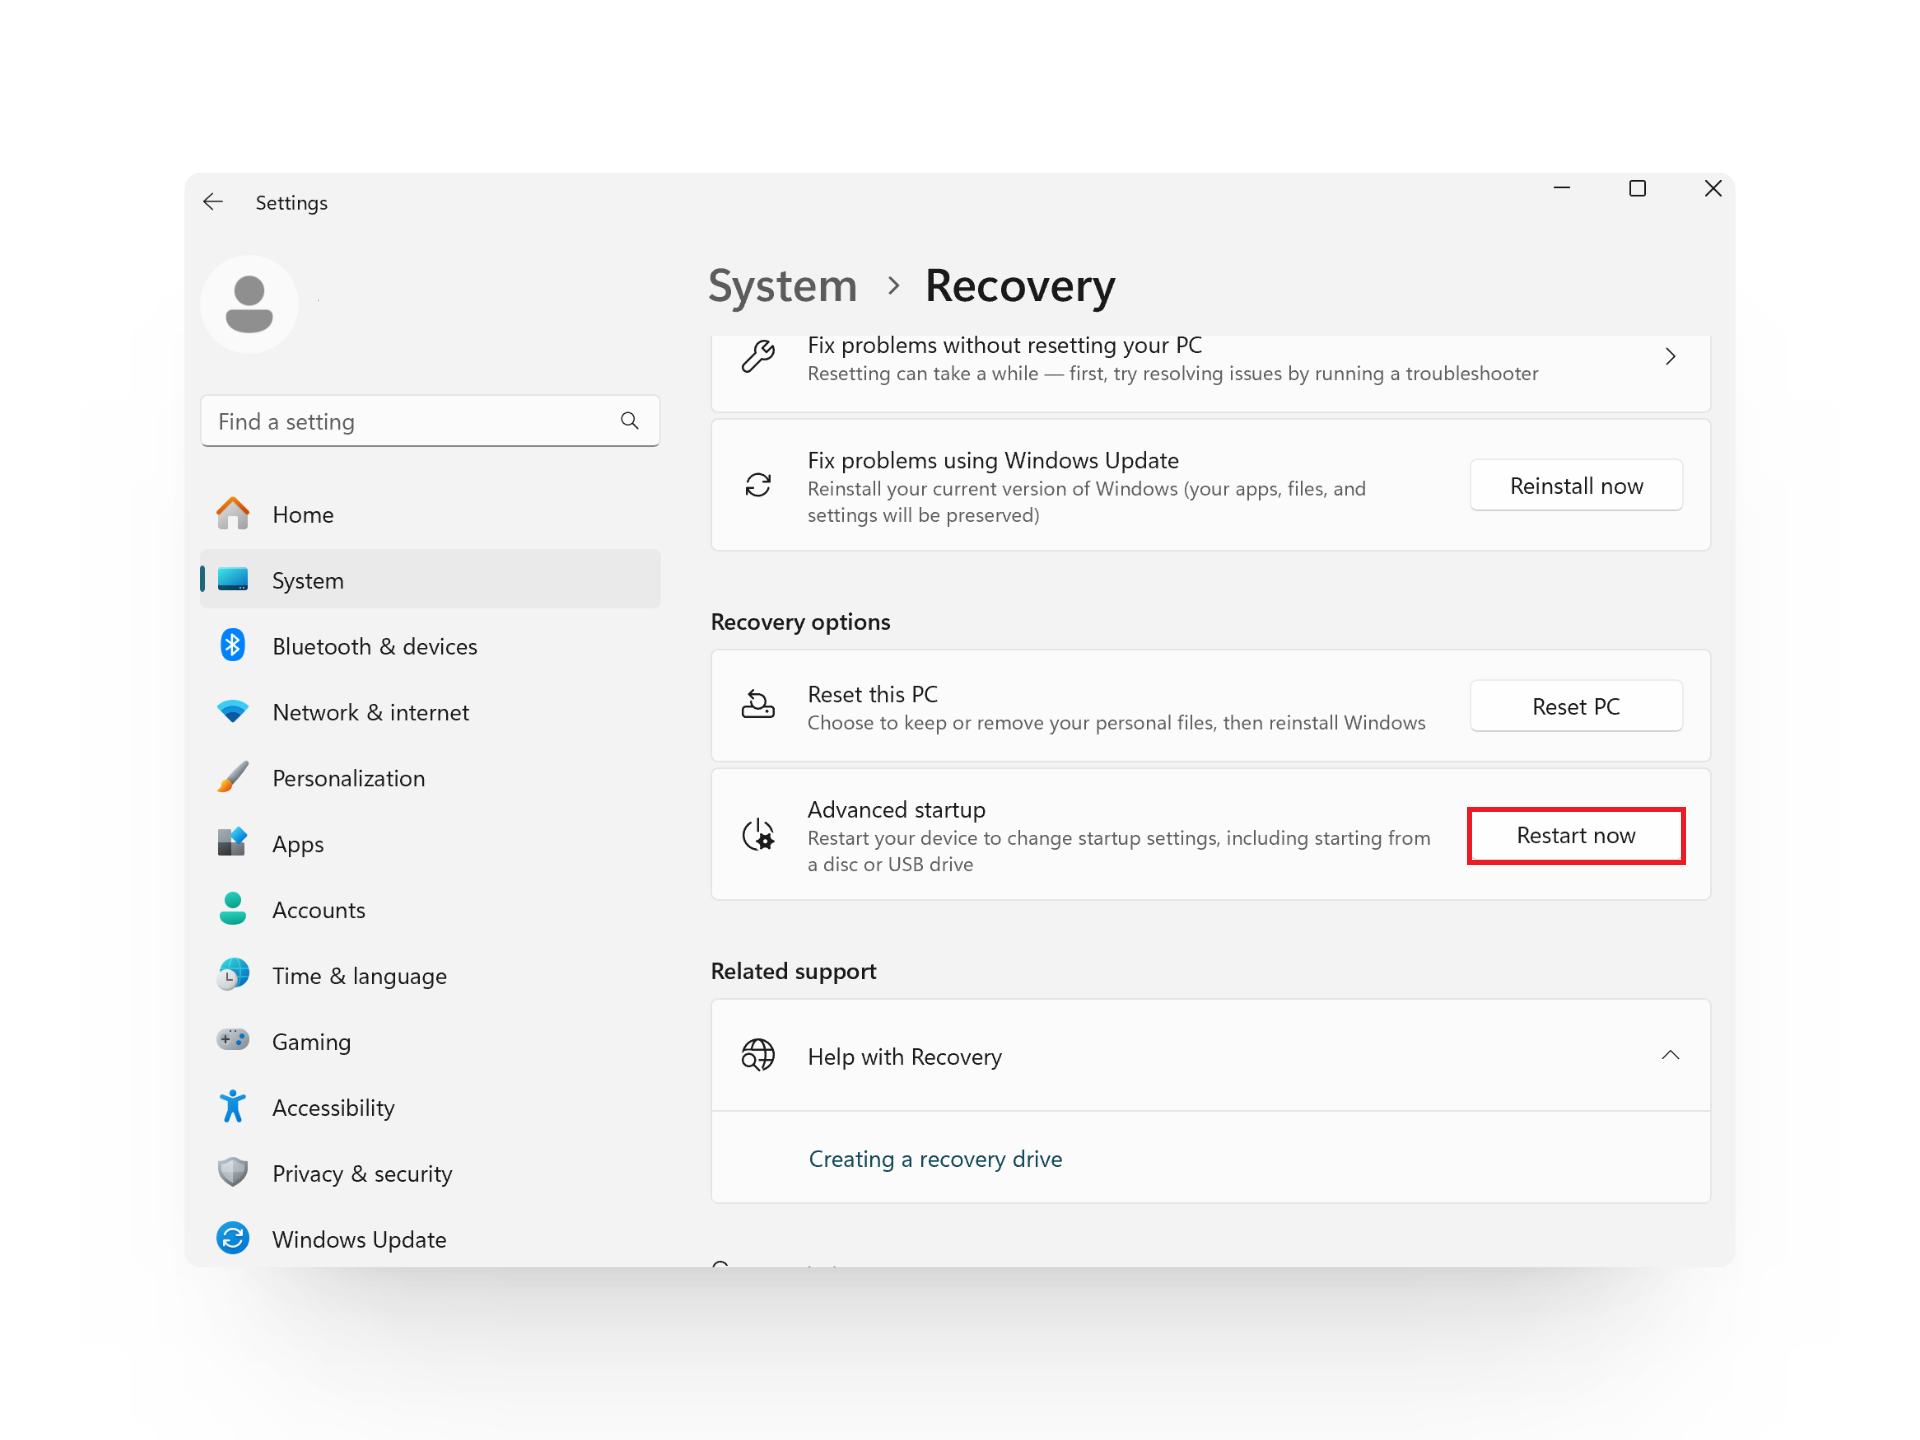
- Click Restart now again when prompted.
- Select Troubleshoot, then choose Advanced options.
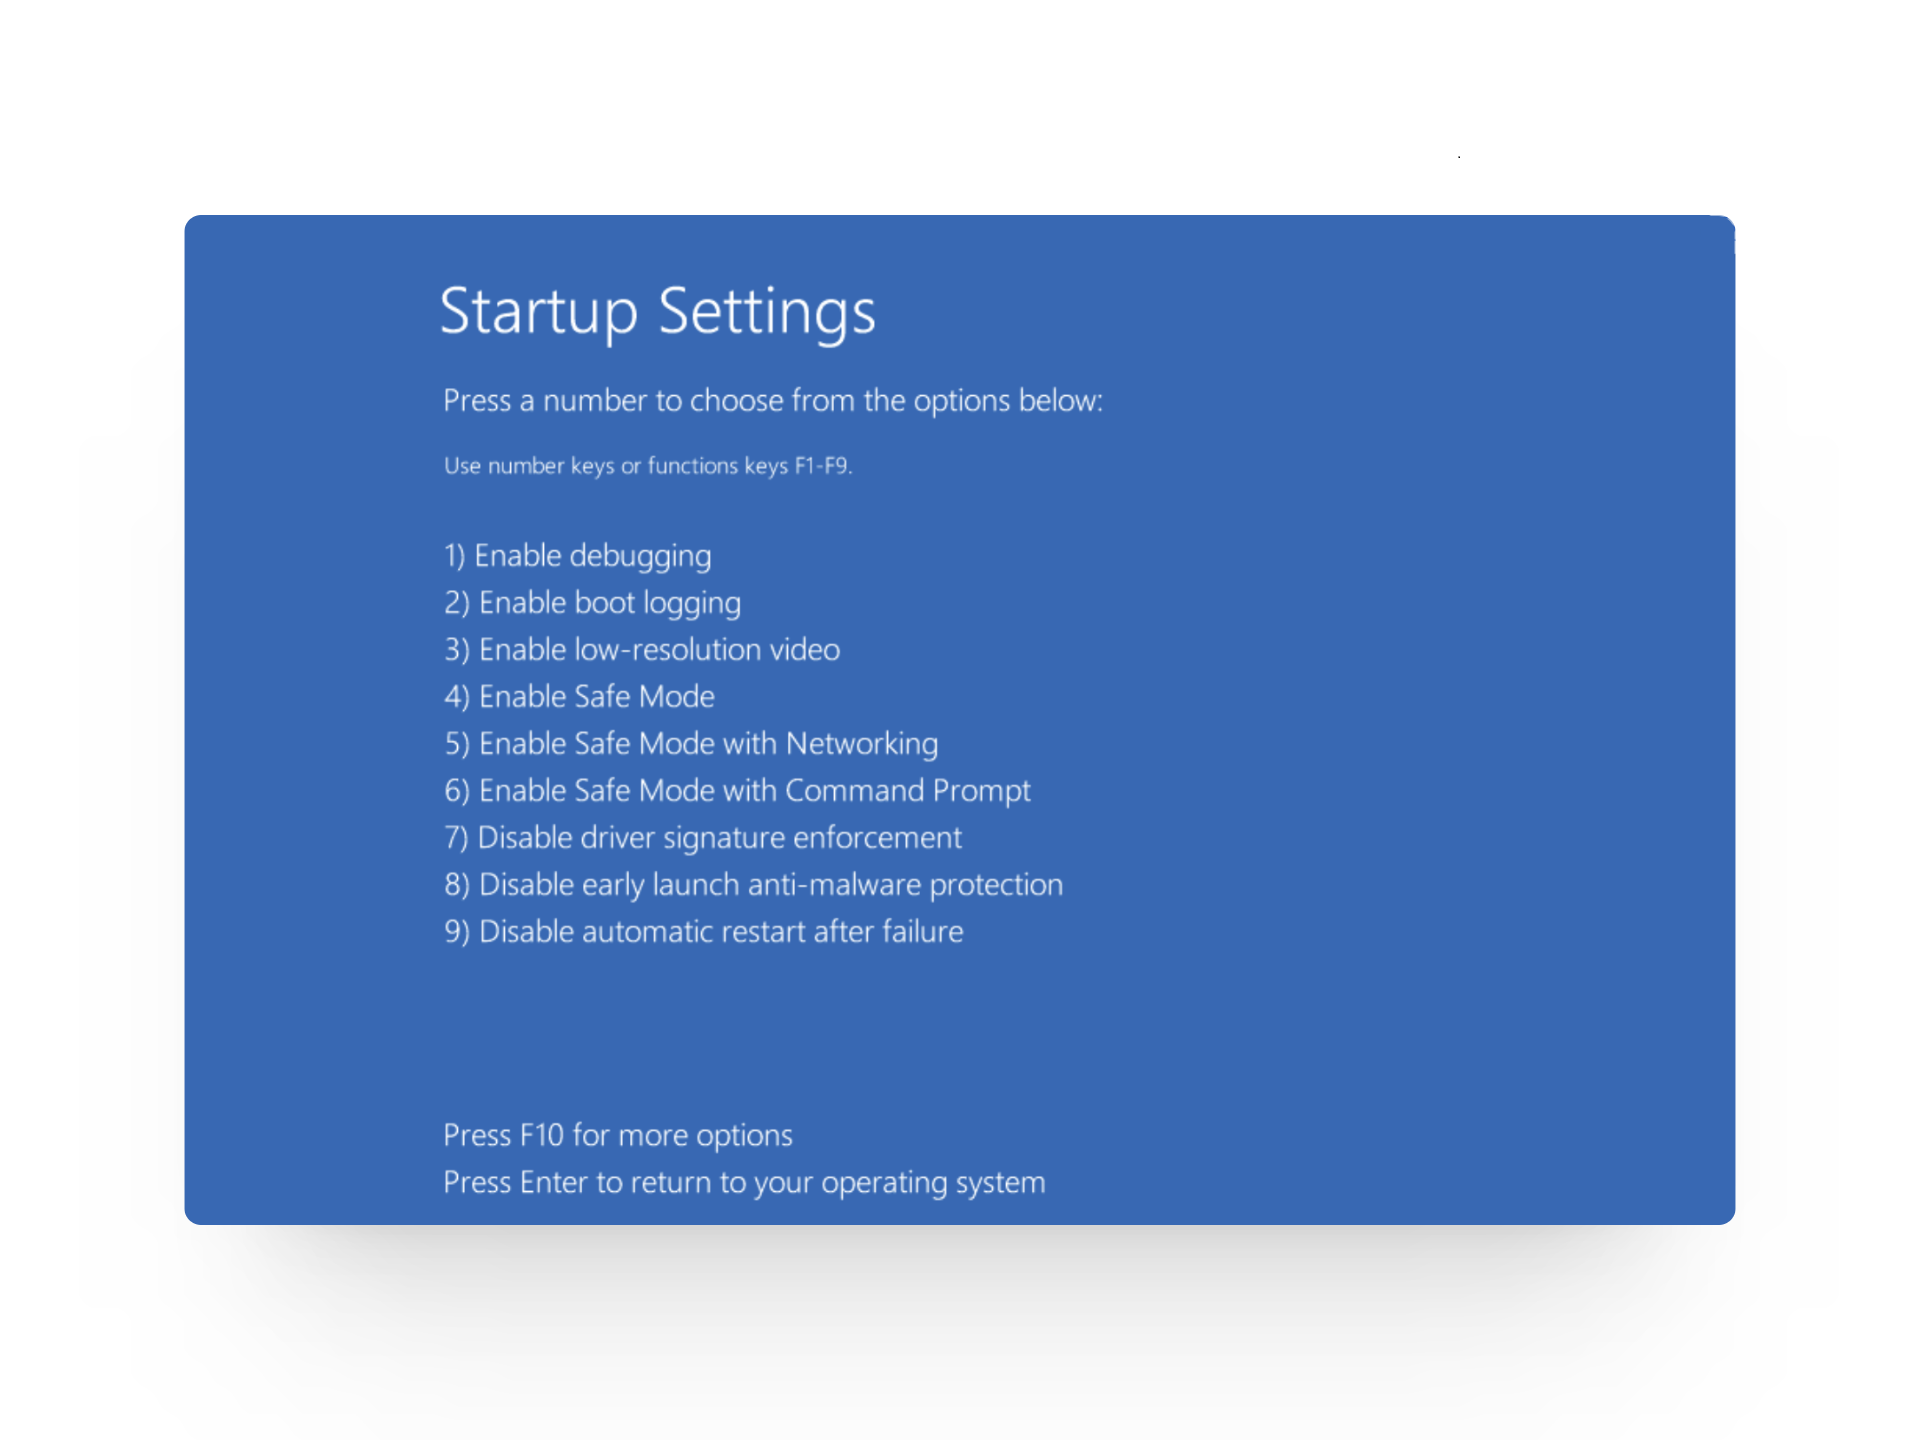
- Click on Startup Settings and then select Restart.
- On the Startup Settings screen, press F4, F5, or F6—your device will start in the selected Safe Mode option.
Once you’ve started your laptop in Safe Mode, check to see if the black line is still there. If it’s gone (or looks different), the issue is probably software-related. Try removing any recently installed apps or updates that could have triggered the problem, or use System Restore (if you have a restore point saved).
6. Seek Professional Help
If the black line on your Lenovo laptop screen keeps growing or the damage appears serious, you’ll most likely need to have your screen replaced. If your laptop is still under warranty, contact Lenovo support as you may be eligible for a free repair. Otherwise, it’s best to take your laptop to a trusted repair shop for a proper replacement or professional repair.
 Reviewed by Huzaifa Haroon


