How to: Replace 5 GHz WiFi Antenna for iPhone 6 Plus
This guide can be used to remove (and replace) the 5 GHz WiFi antenna of an iPhone 6 Plus. The instructions are easy to follow, and anyone can do it. You don’t have to be an expert in this field. I highly recommend people do it by themselves as it cultivates an additional skill and enables you to help others as well. The parts listed here can easily be purchased from Amazon. If you don’t have the required parts, bookmark this page and return to it once you’re ready to proceed.
The total cost of parts should be less than $60, including the replacement antenna. The required parts include a pair of tweezers, pry opening tools, a P2 Pentalobe screwdriver designed for the Pentalobe screws on an iPhone, a small suction cup, and a Phillips #00 screwdriver.
Moreover, if you intend to replace the 5 GHz WiFi antenna in the iPhone 6 Plus with a new one, a replacement 5 GHz WiFi antenna is available (Click Here to View on Amazon).
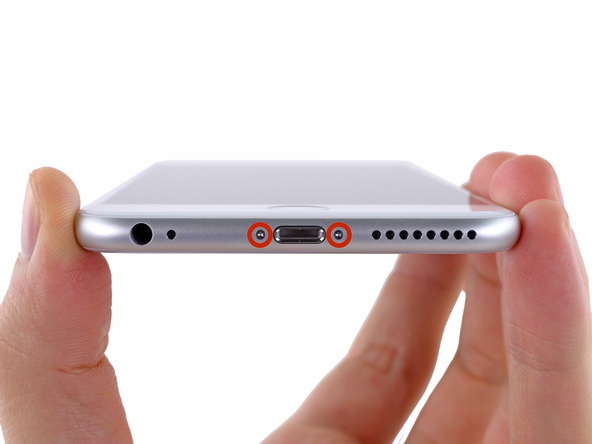
To begin, power off the device. Then, using the P2 Pentalobe screwdriver, remove the two 3.6 mm Pentalobe screws located on either side of the Lightning connector.
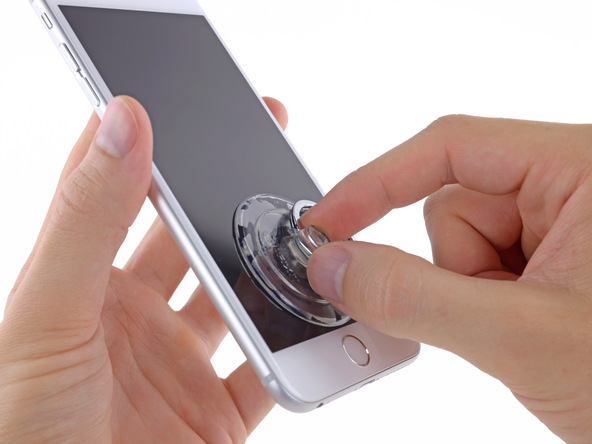
Press the small suction cup onto the screen, secure it and form a tight seal, preferably a little above the Home button.
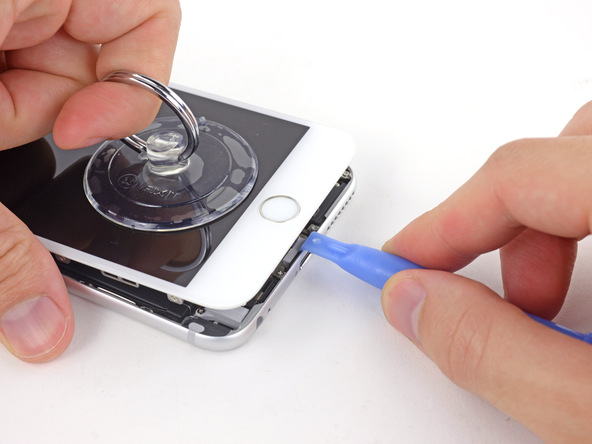
Hold the iPhone down with one hand, and use the suction cup with the other hand to slightly separate the device’s rear case from the front assembly. Once you achieve a little separation between the two halves, hold onto the rear case with a plastic opening tool and then continue to pry the display assembly and rear case apart by detaching the several clips that hold the two halves together. Remember to use a combination of both the plastic opening tool and the suction cup to separate the two halves of the device and to apply firm and constant force.
Remove the suction cup from the display assembly by pulling on the cup’s nub to release the vacuum seal.
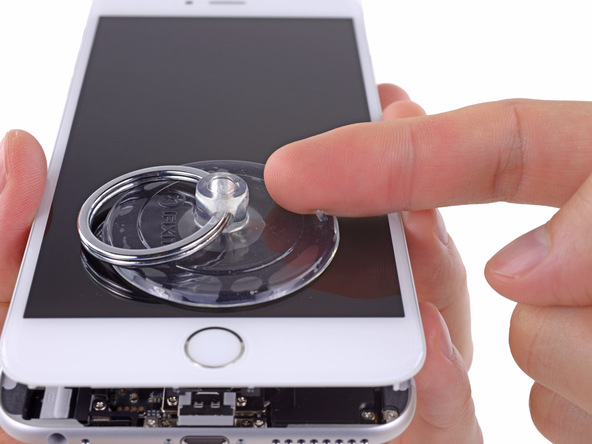
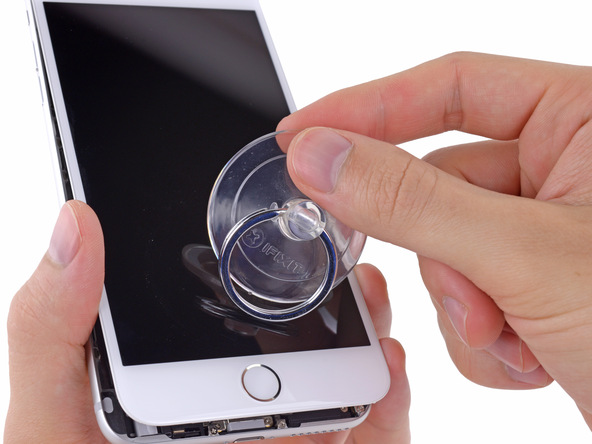
Using the numerous clips along the top edge of the device as a hinge, pull the end of the display assembly with the Home button away from the rear case of the iPhone.
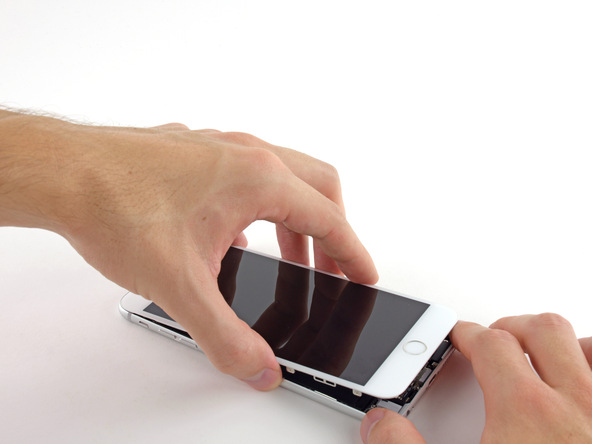
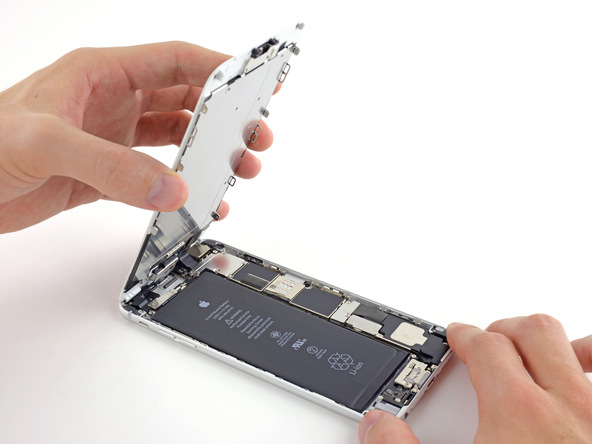
Support the display assembly at a 90° angle in relation to the rear case, and make sure the two halves of the device stay this way until you completely separate the front assembly from the rear case.
While holding the device’s front at a 90° angle, remove the three 1.2 mm Phillips #00 screws, one 1.5 mm Phillips #00 screw and one 2.9 mm Phillips #00 screw that secure the display panel assembly cable bracket.
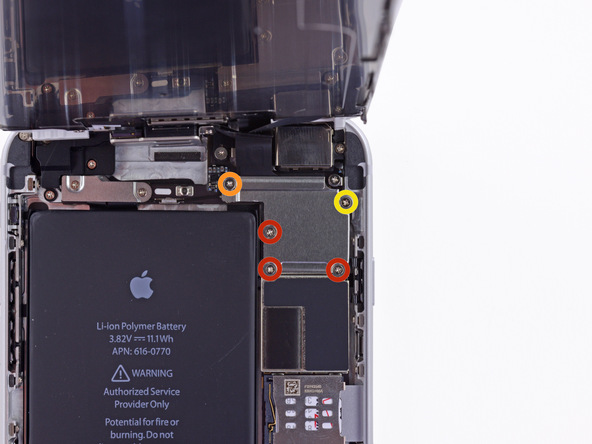
Remove the display panel assembly cable bracket from the iPhone’s logic board.
In the next four steps (and the step where you disconnect the battery connector from the logic board), make sure that you pry up on the cable connectors only and not on their sockets on the iPhone’s logic board.
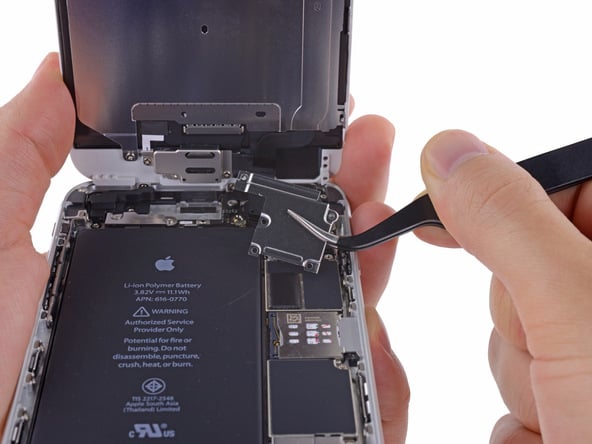
While holding the display assembly at a 90° angle, use a plastic opening tool to gently disconnect the front-facing camera and earpiece speaker cable connector from the logic board.
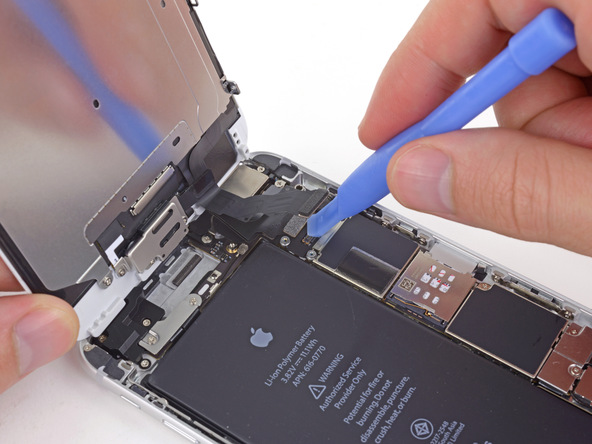
Pry up and disconnect the Home button cable connector from the logic board.
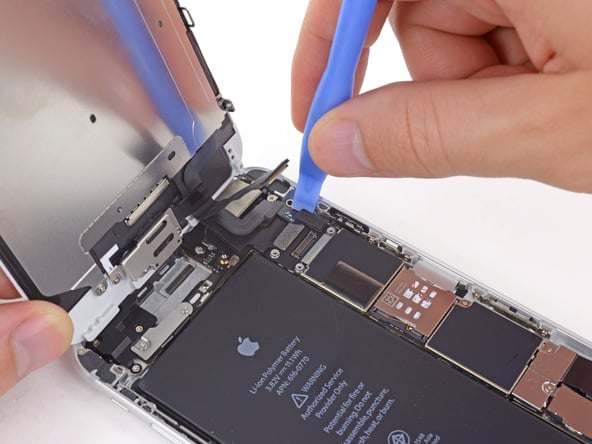
Carefully pry up and disconnect the display data cable connector from the logic board. Lastly, pry up and disconnect the digitizer cable connector from the same logic board.
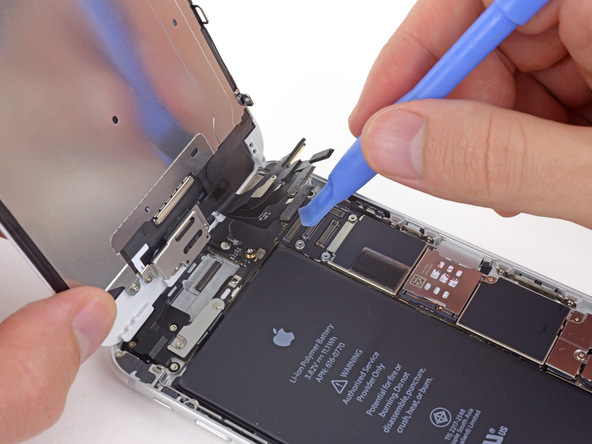
You can now safely remove the display assembly of the iPhone from the rear case.
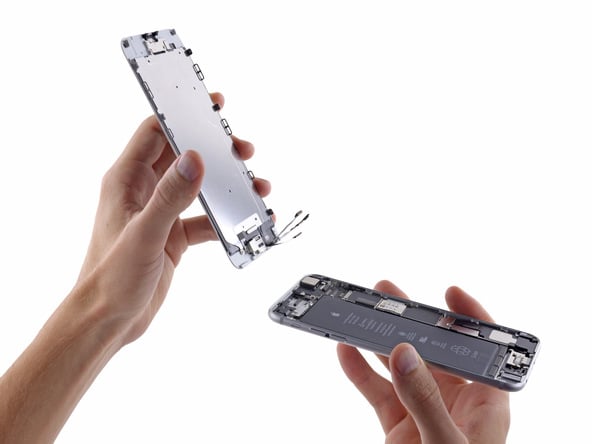
Remove one 2.3 mm Phillips #00 screw and one 3.1 mm Phillips #00 screw from the battery connector bracket located in the rear case a bit below the device’s SIM jack.

Carefully remove the metal battery connector bracket from the rear case.
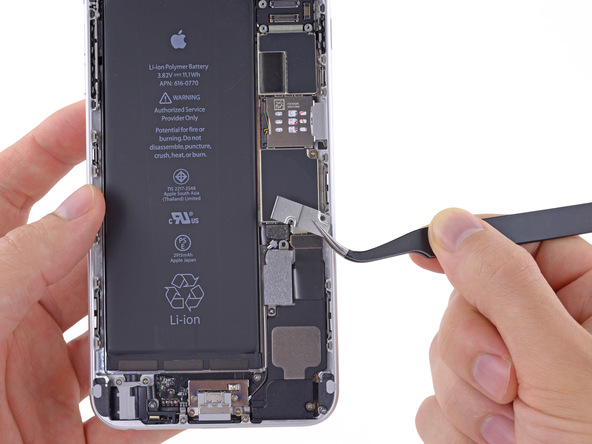
Gently pry up and disconnect the battery connector underneath the bracket from its socket on the logic board using a plastic opening tool.
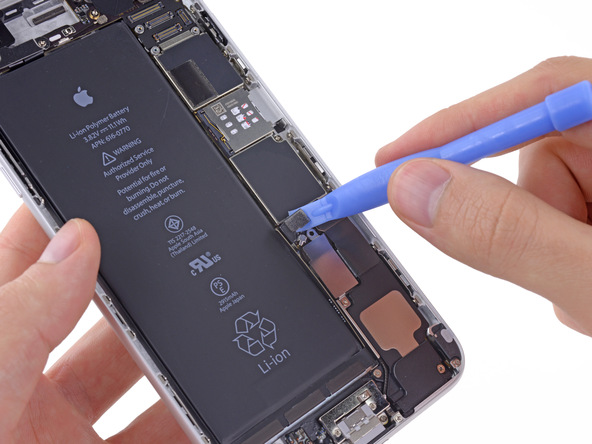
Remove the 5 mm Phillips #00 screw and the 2.8 mm Phillips #00 screw that secure the 5 GHz WiFi antenna bracket to its location on the rear case directly above the battery.
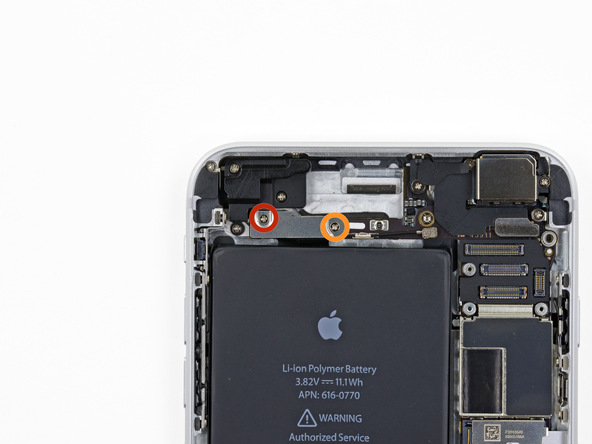
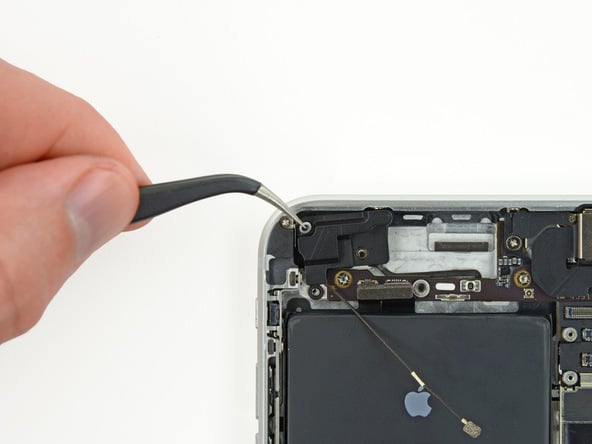
Use a pair of tweezers to lift the 5 GHz WiFi antenna bracket up and off the rear case.
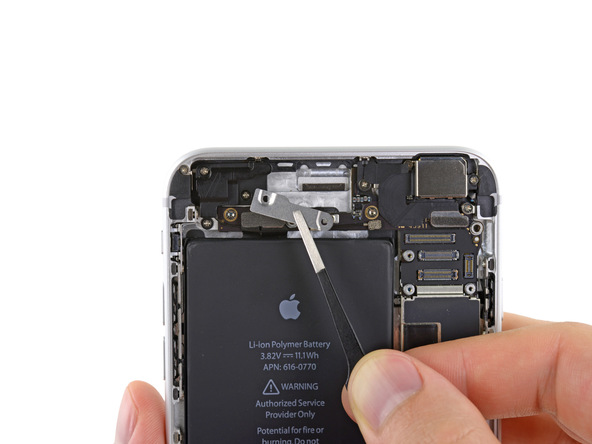
Use a plastic opening tool to gently pry the 5 GHz WiFi antenna connector up off the logic board.
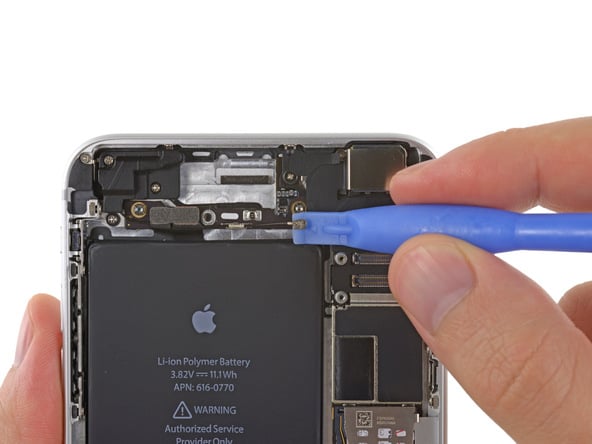
Use a pair of tweezers to carefully lift the 5 GHz WiFi antenna connector out of its retaining clip on the logic board.
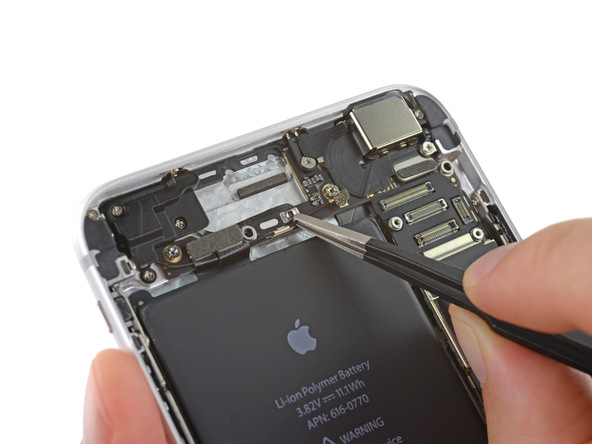
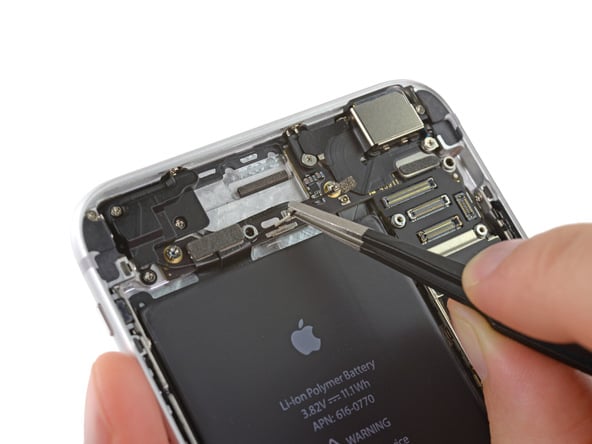
Use a plastic opening tool to disconnect the Power button cable and audio control cable connectors from their respective sockets on the logic board. If the two connectors are bound to one another by a single adhesive tab, they will detach from their sockets as a pair.
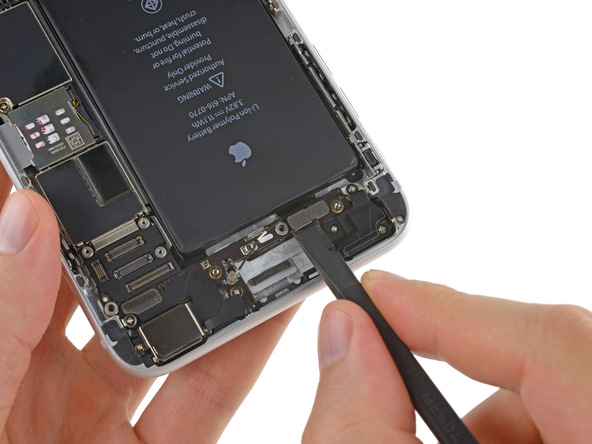
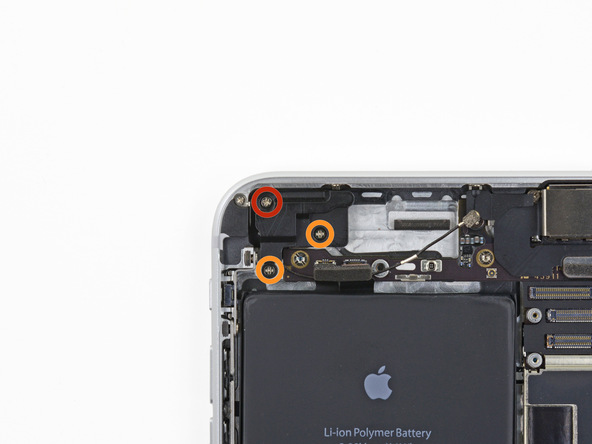
Remove the 8 mm Phillips #00 screw and the two 1.6 mm Phillips #00 screws that secure the 5 GHz WiFi antenna to the rear case of the iPhone.
Lift the 5 GHz WiFi antenna up and then remove it from the iPhone using a pair of tweezers.
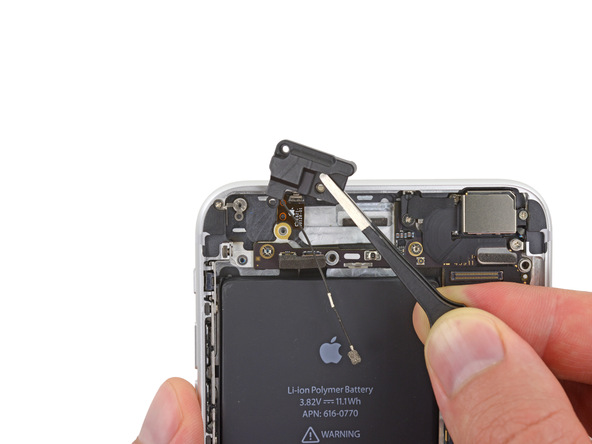
Replace the 5 GHz WiFi antenna, make sure that you place the small washer in the top left corner of the antenna, and then reassemble the iPhone by following the steps listed above in reverse.
