FIX: Windows 10 couldn’t be installed Error 80240031
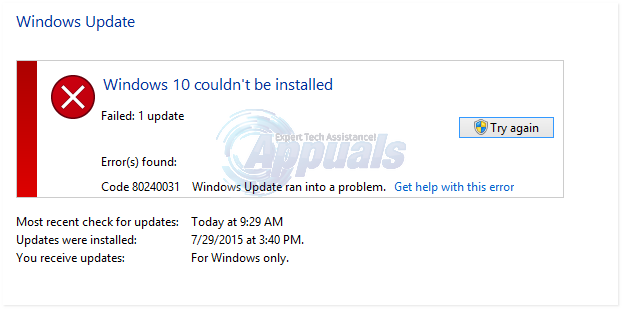
With the availability of the free upgrade to Windows 10, many users rushed to take advantage of this opportunity. Most of them successfully downloaded and installed this new operating system. However, some have reported encountering an error, Code 80240031, after downloading it, and for some, during the download itself.
This error may be caused by corrupted registry entries and system files of the operating system, but a software/hardware conflict can also cause this problem. Follow this guide in the given order to resolve this error and get your Windows 10 up and running.

The Workaround: Using the Media Creation Tool.
We can use this tool to first download the setup of Windows 10 separately, and then use it to upgrade our system.
To download media creation tool, click here
Scroll down until you see the ‘Download Tool Now’ button. Click on it to download the tool.
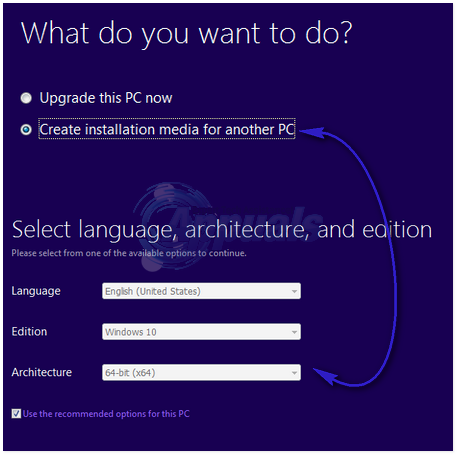
Run it and let the application get ready. When it prompts, ‘What do you want to do?’, select ‘Create installation media for another PC’ and click ‘Next’. Then, select your language and edition.

To know which architecture to select, press Windows key + R, type msinfo32 and press Enter.

In the right pane, if the value for the System type is x64, then you should also select x64 from the architecture dropdown menu. Otherwise, select x86. Click ‘Next’.
Select the ISO file in ‘Choose Which Media to Use,’ then click ‘Next.’ Choose the location for the ISO file and click ‘Save.’ The download will begin and may take some time. When the download is complete, click ‘Finish.’
Locate your ISO file, right click on it and click Mount from the pop up menu. ISO File will be mounted to a virtual drive and opened. Hold Windows Key and Press E. From the Windows Explorer, click on the mounted iso file and open it. Now double click setup to run it. It will prepare the setup. Click Not right now in the Get important updates window, and click Next as you can keep updating your system later.
Accept the agreement and follow the on-screen instructions. It will automatically detect the Activation key and save all your apps and settings.
Solution 1: Scan for updates”
The Windows 10 installer looks for some specific updates on your system and, if it doesn’t find them, it can display an error message. To ensure that you are not missing any updates, press the Windows key and type “check for updates”. Click on “Check for updates” in the search results. Allow your PC to check for any updates and ensure that all of them are installed, focusing most importantly on critical and important updates.
Restart your system. Your Windows 10 installation must work now.
Solution 2: Turn off the Windows Firewall/Antivirus.
The firewall and your antivirus’s real-time protection can restrict the updating service from obtaining the required files for the installation. We will temporarily disable these protections solely for the installation process, so please limit your internet usage during this period.
Turn off your antivirus’s protection by following the instructions on its website. Usually, it’s a one-to-two-click process. The third-party security software places an icon in the taskbar, which you can right-click to disable it.
To turn off Windows Firewall, press the Windows key, type ‘Firewall’ into the search box, and then click on ‘Windows Firewall’.
First, click on ‘Turn Windows Firewall on or off’ in the left pane. When you see the User Account Control warning message, click ‘Yes’. Now, choose the ‘Turn off Windows Firewall (not recommended)’ option for both Public Network Settings and Private Network Settings, then click ‘Ok’. Once you are finished with this guide, you can turn on Windows Firewall through the same method.

Solution 3: Clear App Store Cache
To remove any corrupt files in the Microsoft App Store that can cause this error, hold the Windows key and press R. Type ‘wsreset.exe’ and click OK.
Solution 4 involves running an SFC scan.
SFC can fix corrupt files and repair the component store. We have a separate guide for it here. Although the guide is primarily aimed at Windows 10, it works the same way on all versions of Windows.
Solution 5: Disable Display Adapter
Display or graphic cards were reported to cause issues in the installation of Windows 10 and in Windows 8 too.
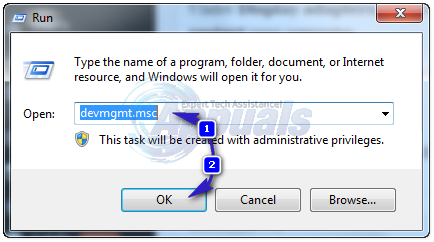
To disable it temporarily, press Windows key + R. Type devmgmt.msc and press Enter. Click Yes if the UAC warning appears.

Double click on Display adapters to expand it.
Under Display adapters, click on each device if more than one, and click Disable. Confirm the warning and restart your computer.

Disconnect all additional hardware, except for the keyboard and mouse. Then, try installing Windows 10. You can re-enable them using the same method, simply by clicking ‘Enable’ instead of ‘Disable’.