FIX: System.Runtime.InteropServices.COMException (0x80070422)
The error “System.Runtime.InteropServices.COMException (0x80070422)” usually stops tasks that need Windows system services, like starting certain apps, running build tools, or using special Windows features. The error code (0x80070422) means: “The service can’t start because it’s either turned off or not set up to work.”

This usually happens if the Windows Management Instrumentation (WMI) or Windows Update service is turned off. It can also happen if other important services, like DCOM Server Process Launcher or COM+ Event System, are disabled.
In this article, we will discuss different ways to solve this error.
1. Run SFC and DISM
Corrupted system files can quietly turn off important services like WMI or Windows Update, causing this error.
Running SFC fixes these files, and DISM repairs missing or broken parts of Windows. These tools help make sure all needed services work correctly.
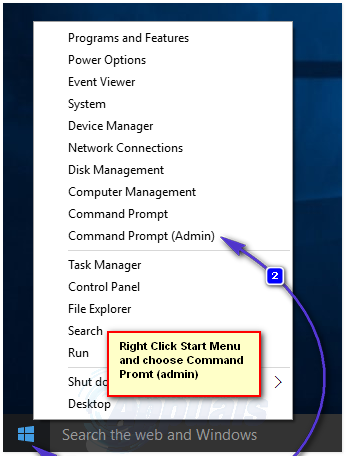
- Right-click the Start Menu button to open the WinX Menu.
- Click on Command Prompt (Admin) from the WinX Menu.

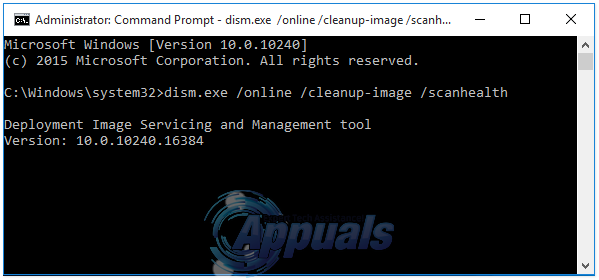
- Type the following command and press Enter:
sfc /scannow
dism.exe /online /cleanup-image /scanhealth
- After that command completes, type this next command and press Enter:
dism.exe /online /cleanup-image /restorehealth

- These commands scan your system image for problems and fix any issues they find.
2. Repair Your Computer Using Installation or Recovery Media
If built-in tools don’t work, there may be more serious problems with startup services.
Using installation or recovery media lets you try advanced fixes like Startup Repair, System Restore, or Command Prompt. These options can restore important service settings that can’t be fixed during a normal startup.
- Get a Windows 10 installation USB, DVD, or recovery media. If you don’t have one already, you can create one by following these steps.
- Insert the installation or recovery media into your computer.
- Restart your computer.
- Access your computer’s BIOS settings (refer to your computer’s manual for the exact steps).
- Set your computer to boot from the inserted USB, DVD, or recovery media.
- As the Windows 10 setup begins, on the Install Windows page, choose Repair your computer instead of Install now. If you’re using recovery media specifically, you might skip this step.
- Follow the on-screen instructions to repair your computer.
By following these steps carefully, most users will be able to fix the System.Runtime.InteropServices.COMExceptions (0x80070422) error and get their Windows 10 system working normally again.