How to Fix Battle.net Slow Download Speed Issue?
The Battle.net slow download speed issue often occurs when you’re trying to download a game or update. This problem usually arises due to how the Battle.net application handles and assigns download speeds to your machine. Typically, the issue occurs because of a bandwidth throttling glitch, where the download speed drops to just a few kilobytes per second, even though you haven’t set any download limits in the application’s settings.
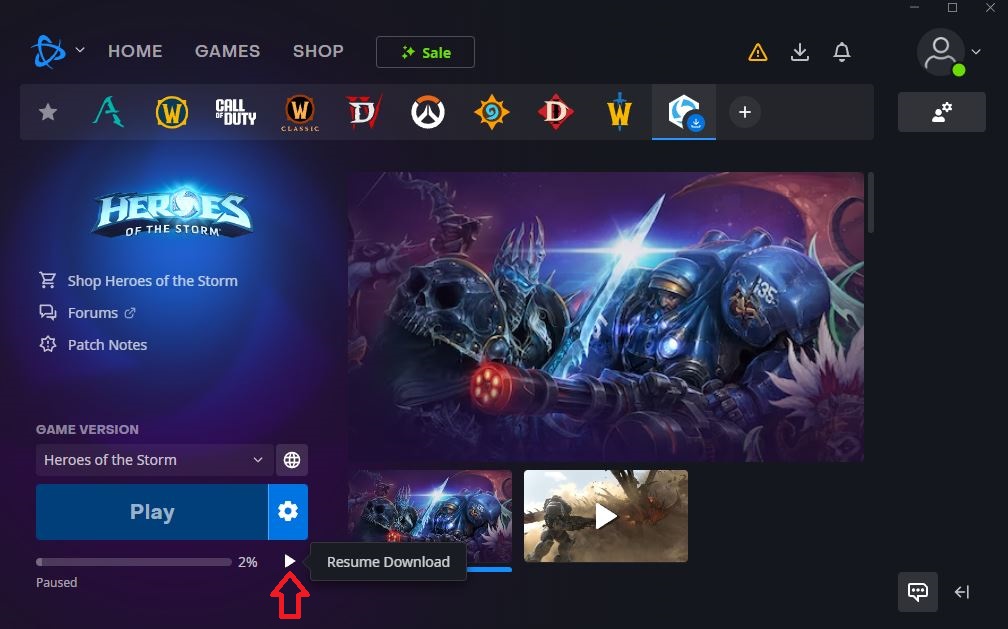
Other factors that could contribute to slow download speeds include server overload in your region during peak hours and suboptimal DNS settings. A simple pause and resume action on your download might fix the problem, as it refreshes the connection with the server. Additionally, checking if Battle.net servers are down or under maintenance can help. You can do this by visiting the webpage.
1. Setting Very High Bandwidth Limit
Due to the throttling glitch, a hidden bandwidth cap may be applied, causing slower download speeds. By setting an unusually high bandwidth limit, you can bypass this slow and buggy default speed cap, which may help resolve the issue.
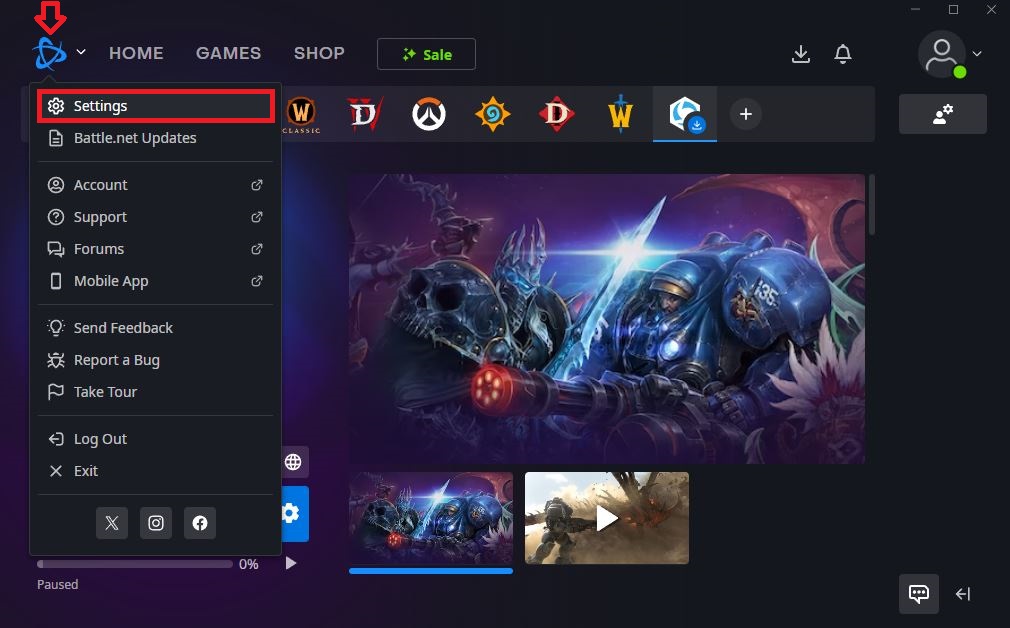
- Launch the Battle.net app and click the Battle.net icon in the top-left corner, then select Settings.
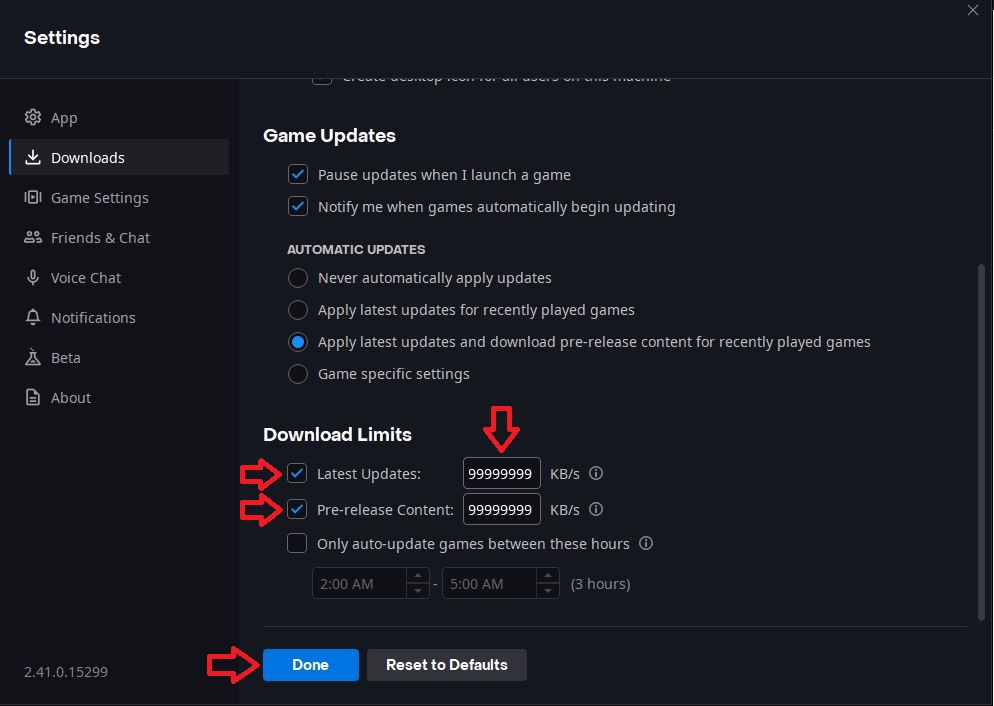
- In the Settings menu, go to the Downloads section and scroll down to Download Limits.
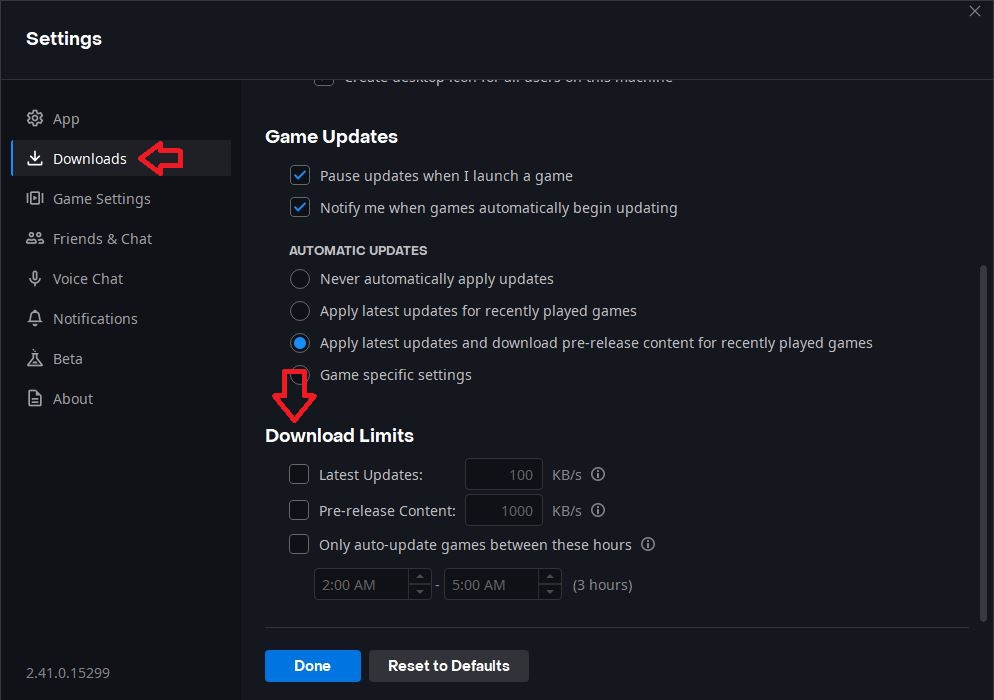
- For both Latest Updates and Pre-release Content, select the option and enter 9999999 in the bandwidth limit field (this effectively removes download speed restrictions). Click Done to save.
- Restart the Battle.net launcher for changes to take effect.
2. Switch and Revert Download Region
When many users are downloading during an update, the Battle.net CDN servers can get overloaded, causing slower download speeds. Changing your download region to a different location and then switching back to your original region can connect you to a less crowded server, which may improve your download speed.
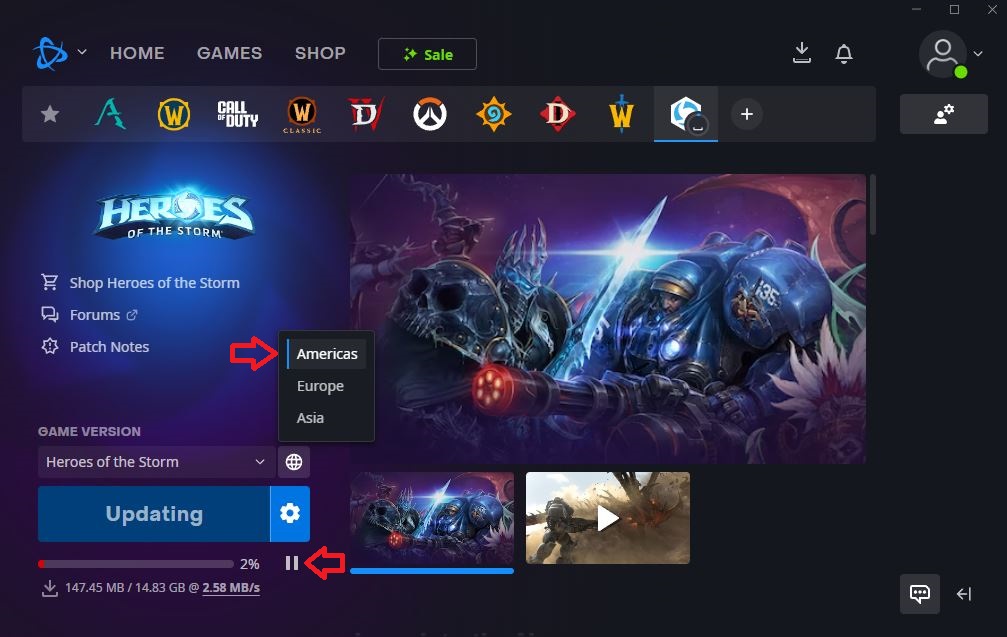
- Open the Battle.net application, pause the downloading data, and click on the Regions button.

- Next, select a different region from the list and resume downloading.
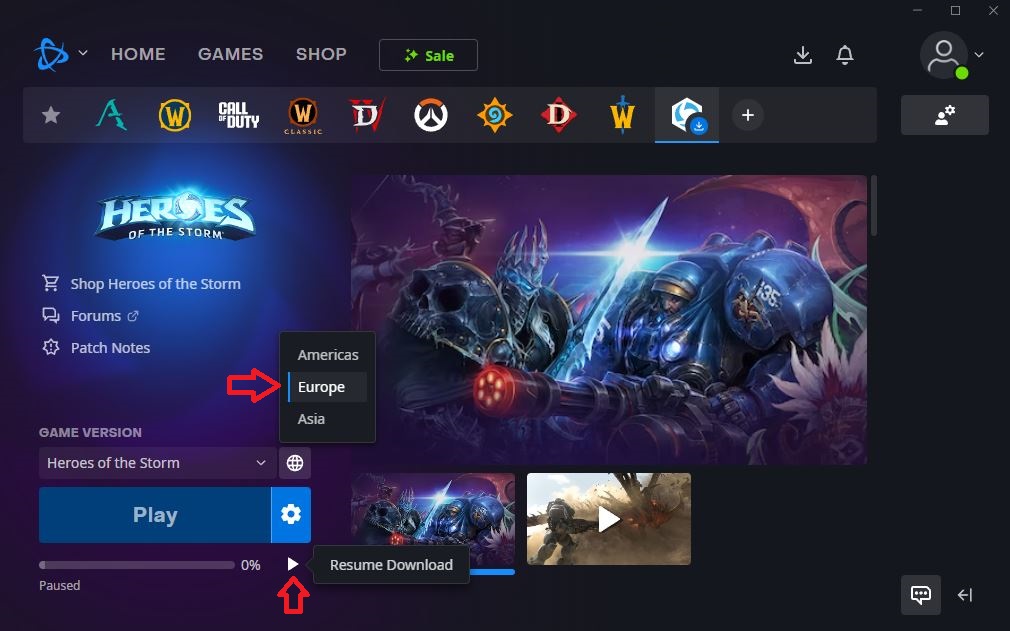
- Once again, pause downloading and revert to your primary region.
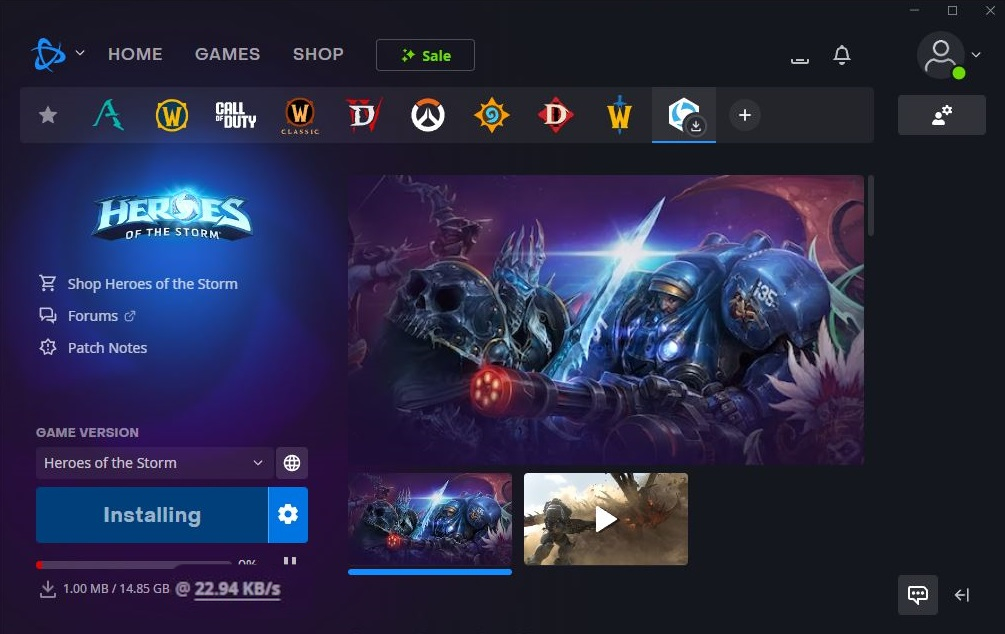
- Lastly, resume downloading and verify if the issue is resolved.
3. Change Your DNS Address
Your ISP’s default DNS might connect you to Battle.net’s CDN servers that are farther away, leading to slower download speeds. Additionally, if the DNS is slow at resolving the server domain to an IP address, it can cause delays and further slow down your download.
Note: Make sure your network supports IPv6 before switching to a new DNS resolver.
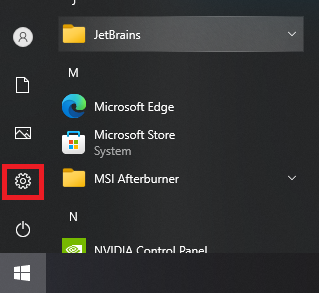
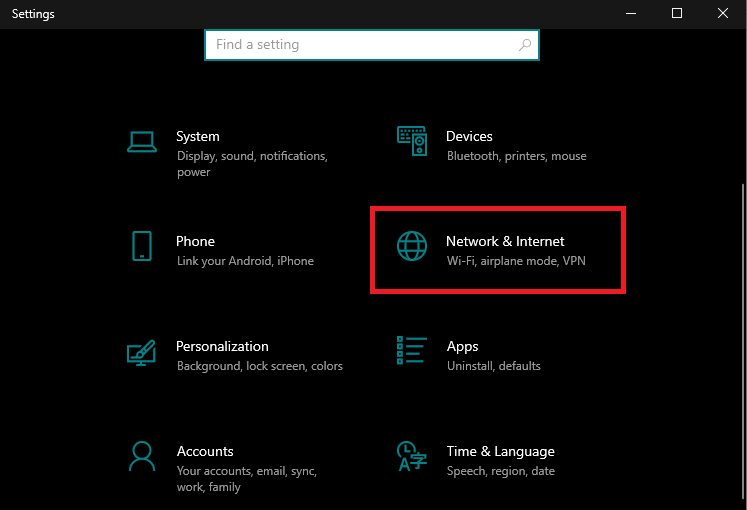
- Click on the Start button and select Settings (the gear icon).
- In the Settings window, navigate to Network & Internet.
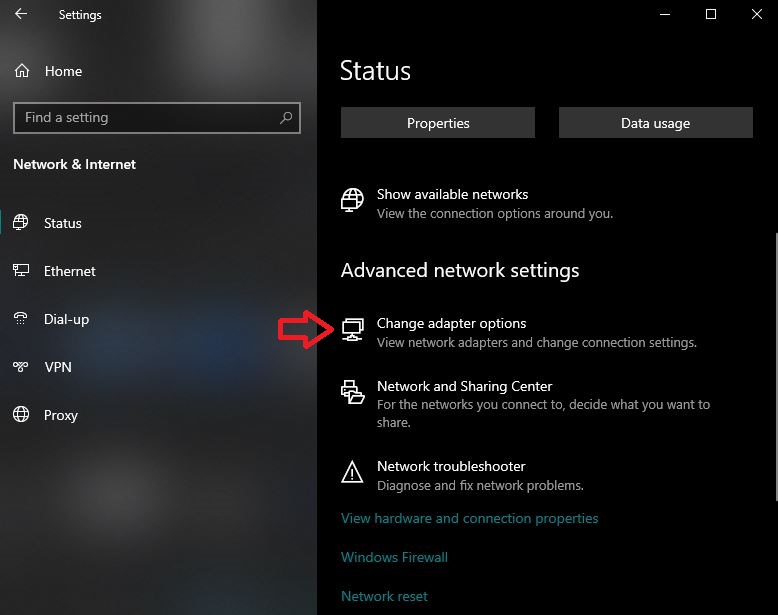
- Scroll down and click on Advanced network settings, then select Change adapter options.
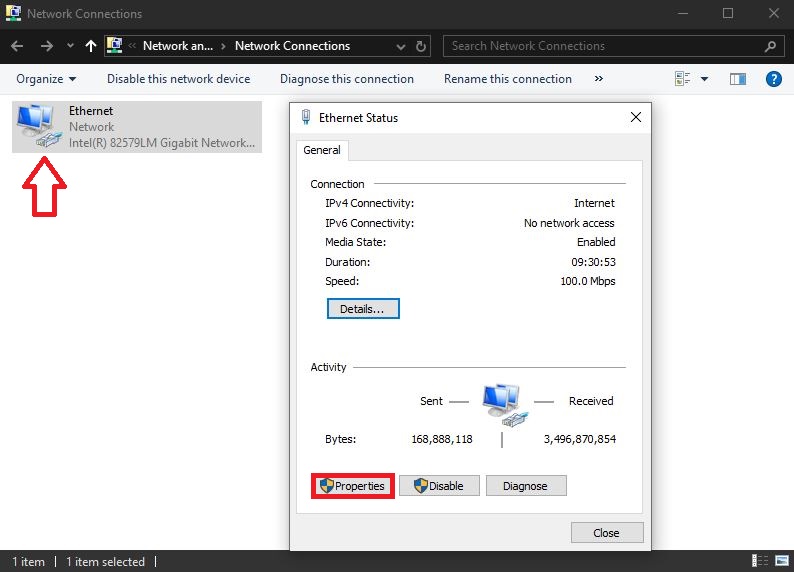
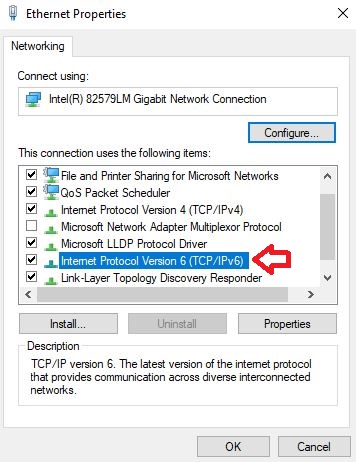
- Right-click your active network connection and select Properties.
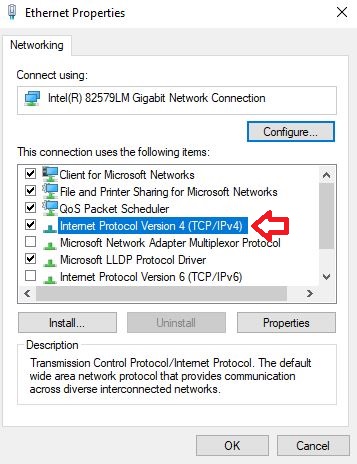
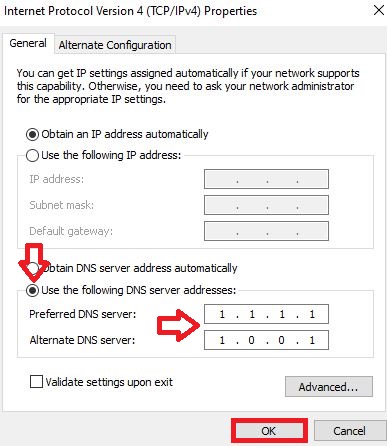
- In the Properties window, locate and double-click Internet Protocol Version 4 (TCP/IPv4).
- Select Use the following DNS server addresses and enter:
- 1.1.1.1 (Cloudflare’s primary DNS) in the Preferred DNS server field
- 1.0.0.1 (Cloudflare’s secondary DNS) in the Alternate DNS server field
Then click OK.
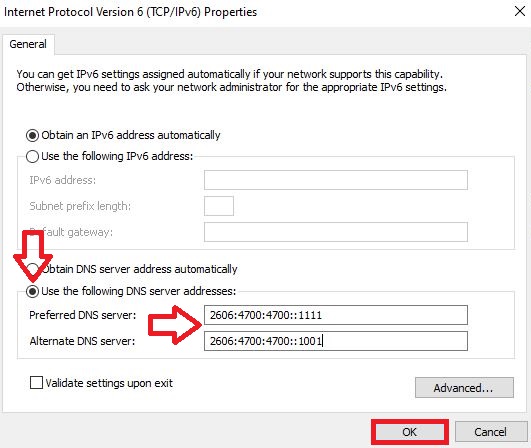
- For IPv6 configuration (if your network supports it), double-click Internet Protocol Version 6 (TCP/IPv6).
- Select Use the following DNS server addresses and enter:
- 2606:4700:4700::1111 (Cloudflare IPv6 primary DNS)
- 2606:4700:4700::1001 (Cloudflare IPv6 secondary DNS)
Then click OK.
- Close all windows and restart your computer for changes to take effect. Then relaunch Battle.net to check if the issue is resolved.
4. Use VPN
Sometimes, your ISP may route your connection to the game’s CDN server through an inefficient path, slowing down your downloads. Using a VPN can help by rerouting your connection through a faster, less crowded path, and bypassing any regional restrictions or ISP throttling.
Note: Free VPNs may not be effective due to routing limitations or speed caps on their servers. For better results, we recommend using a premium VPN with multiple server options and no speed limits.
- Launch your VPN application and connect to an optimal server location. For best results, choose a server geographically close to Battle.net’s data centers—such as Los Angeles (for the Americas region) or Frankfurt (for the European region)—to minimize latency and ensure stable download speeds.
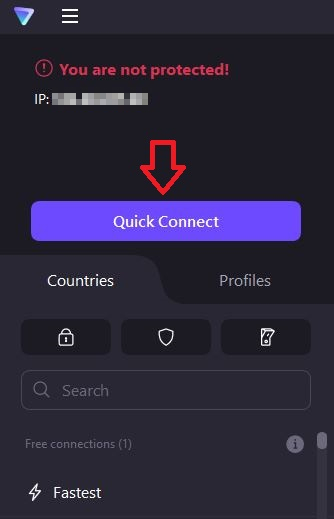
- Once connected, restart the Battle.net application and resume your download. The VPN connection may help bypass any network restrictions or routing issues that were previously interrupting the download process.