How to Fix ‘Battle.net Error #2’ with Blizzard Games
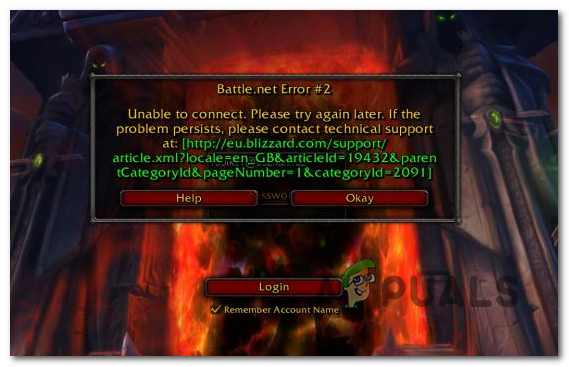
When Error #2 appears, the client quickly says “Unable to connect. Please try again later…” and stops you from accessing Blizzard games or voice chat. This error means the Battle.net app can’t log in or connect to Blizzard’s servers.
The most common reason is a temporary problem or outage with Blizzard’s servers, but it can also happen if your network settings are wrong, the app’s cache is damaged, or if your firewall or antivirus is blocking the connection.
In this article, we will discuss different ways to solve this error.
1. Check the Status of Battle.Net Servers
Before trying any in-depth fixes, first check that the issue isn’t caused by a server problem on Blizzard’s end. If multiple Blizzard games are showing Battle.net Error #2, there may be a service outage or maintenance.
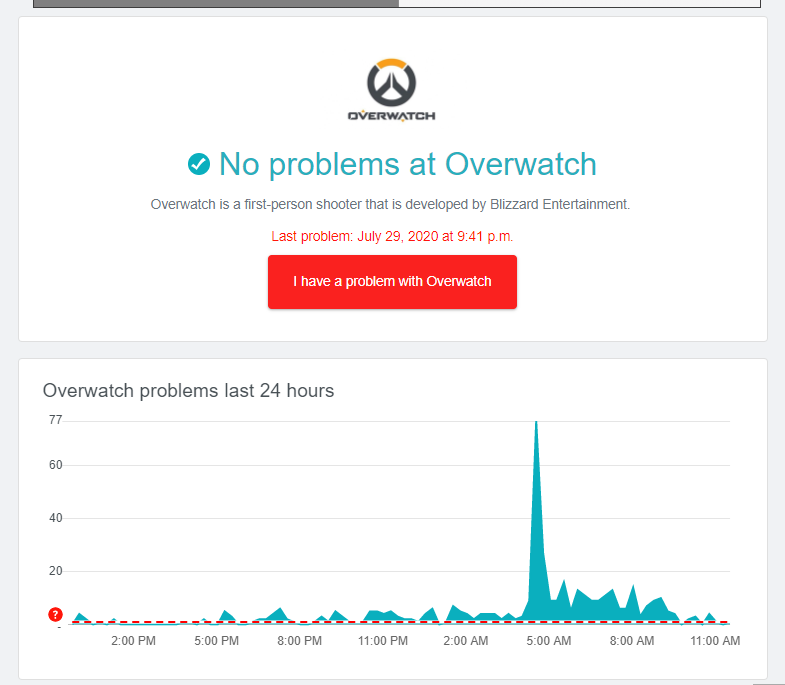
Start by checking if other players are facing similar issues. Websites like DownDetector and Outage.Report let you look up specific games (like Overwatch, Starcraft, World of Warcraft, or Diablo 2) to see if others are also reporting problems in your region.
If you discover a widespread issue, you can check for updates or official statements on the official Blizzard Twitter account where they post information about ongoing problems.
2. Switch Your Region
If Blizzard servers are down in your area, you might be able to get around the problem by switching your region within the launcher. Many users have fixed this error by logging out of their Battle.Net account and then changing their region before logging back in.
This workaround is easy and can help you bypass regional server issues (no matter what game you’re playing) as long as the problem is limited to one region.
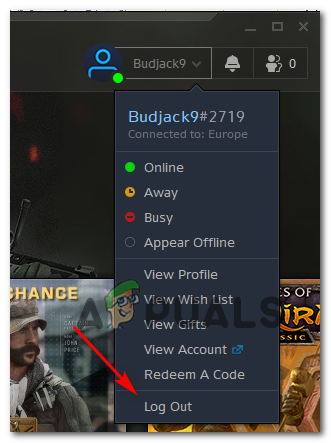
- Open the Battle.Net application. Click the down arrow next to your account name in the top-right corner, then click Log Out.
- Once logged out, you’ll see the login screen.
- On that screen, click the globe icon and choose a region that isn’t affected by the server problem.

Changing the region of Battle.Net app - After selecting a new region, enter your username and password, then click Log in to sign in to Battle.Net.
- Launch the game that was previously giving you Battle.net Error #2 to see if it now works.
3. Disable Antivirus or Uninstall Your Firewall (If Needed)
If you have a third-party antivirus or firewall installed, it’s possible that it is blocking your game’s connection, causing Battle.net Error #2 by mistake.
This issue can occur if your antivirus or firewall moves important Battle.Net files to quarantine. If you think this is the case, first try disabling your antivirus’ real-time protection. There usually is an option for this in the antivirus’ icon menu on your taskbar.

However, if you’ve got a firewall running, just switching off real-time protection might not completely solve the problem because some network rules may remain active. In this situation, it’s best to uninstall your third-party firewall completely, making sure all related files are removed.
- Press Windows key + R to open a Run dialog. Type ‘appwiz.cpl’ and press Enter to bring up the Programs and Features window.

Type appwiz.cpl and Press Enter to Open Installed Programs List - In the list of installed programs, find your third-party firewall software.
- Right-click on it, select Uninstall and follow the prompts to finish uninstalling.
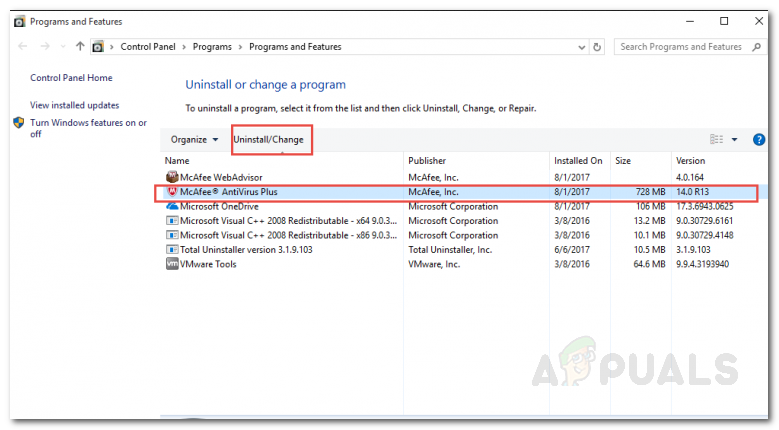
Uninstalling the firewall - After you finish, restart your computer and try launching your game again to see if the error is gone.
4. Use Scan and Repair
Another possible source of this problem is a broken connection with the Battle.Net servers, often caused by corrupted or missing files in your game’s folder. Luckily, the Battle.Net app includes a Scan & Repair tool that can easily handle this.
- Close the Blizzard game you’re experiencing issues with.
- Open the Battle.Net app and go to the Games tab at the top.
- Select the game you want to repair. Then, on the right side, click Options > Scan & Repair.
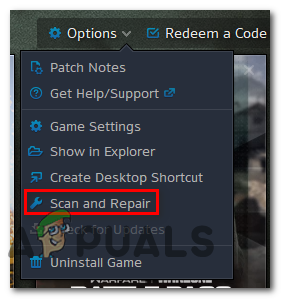
Running a Scan & Repair on Destiny 2 - Click Begin Scan in the confirmation box and wait for the process to complete.

Starting a Scan & Repair procedure using the Battle.Net app - Once the scan finishes, restart your computer. Then, try to launch the game that was showing the ‘Battle.net Error #2‘ and check if it works now.