How to Fix BAD_SYSTEM_CONFIG_INFO on Windows?
The BAD_SYSTEM_CONFIG_INFO error usually shows up as a blue screen when you start or restart your computer. Sometimes, it can make your system keep trying to repair itself or restart over and over again. This error means that Windows couldn’t load important system files, usually because they are damaged or set up wrong.
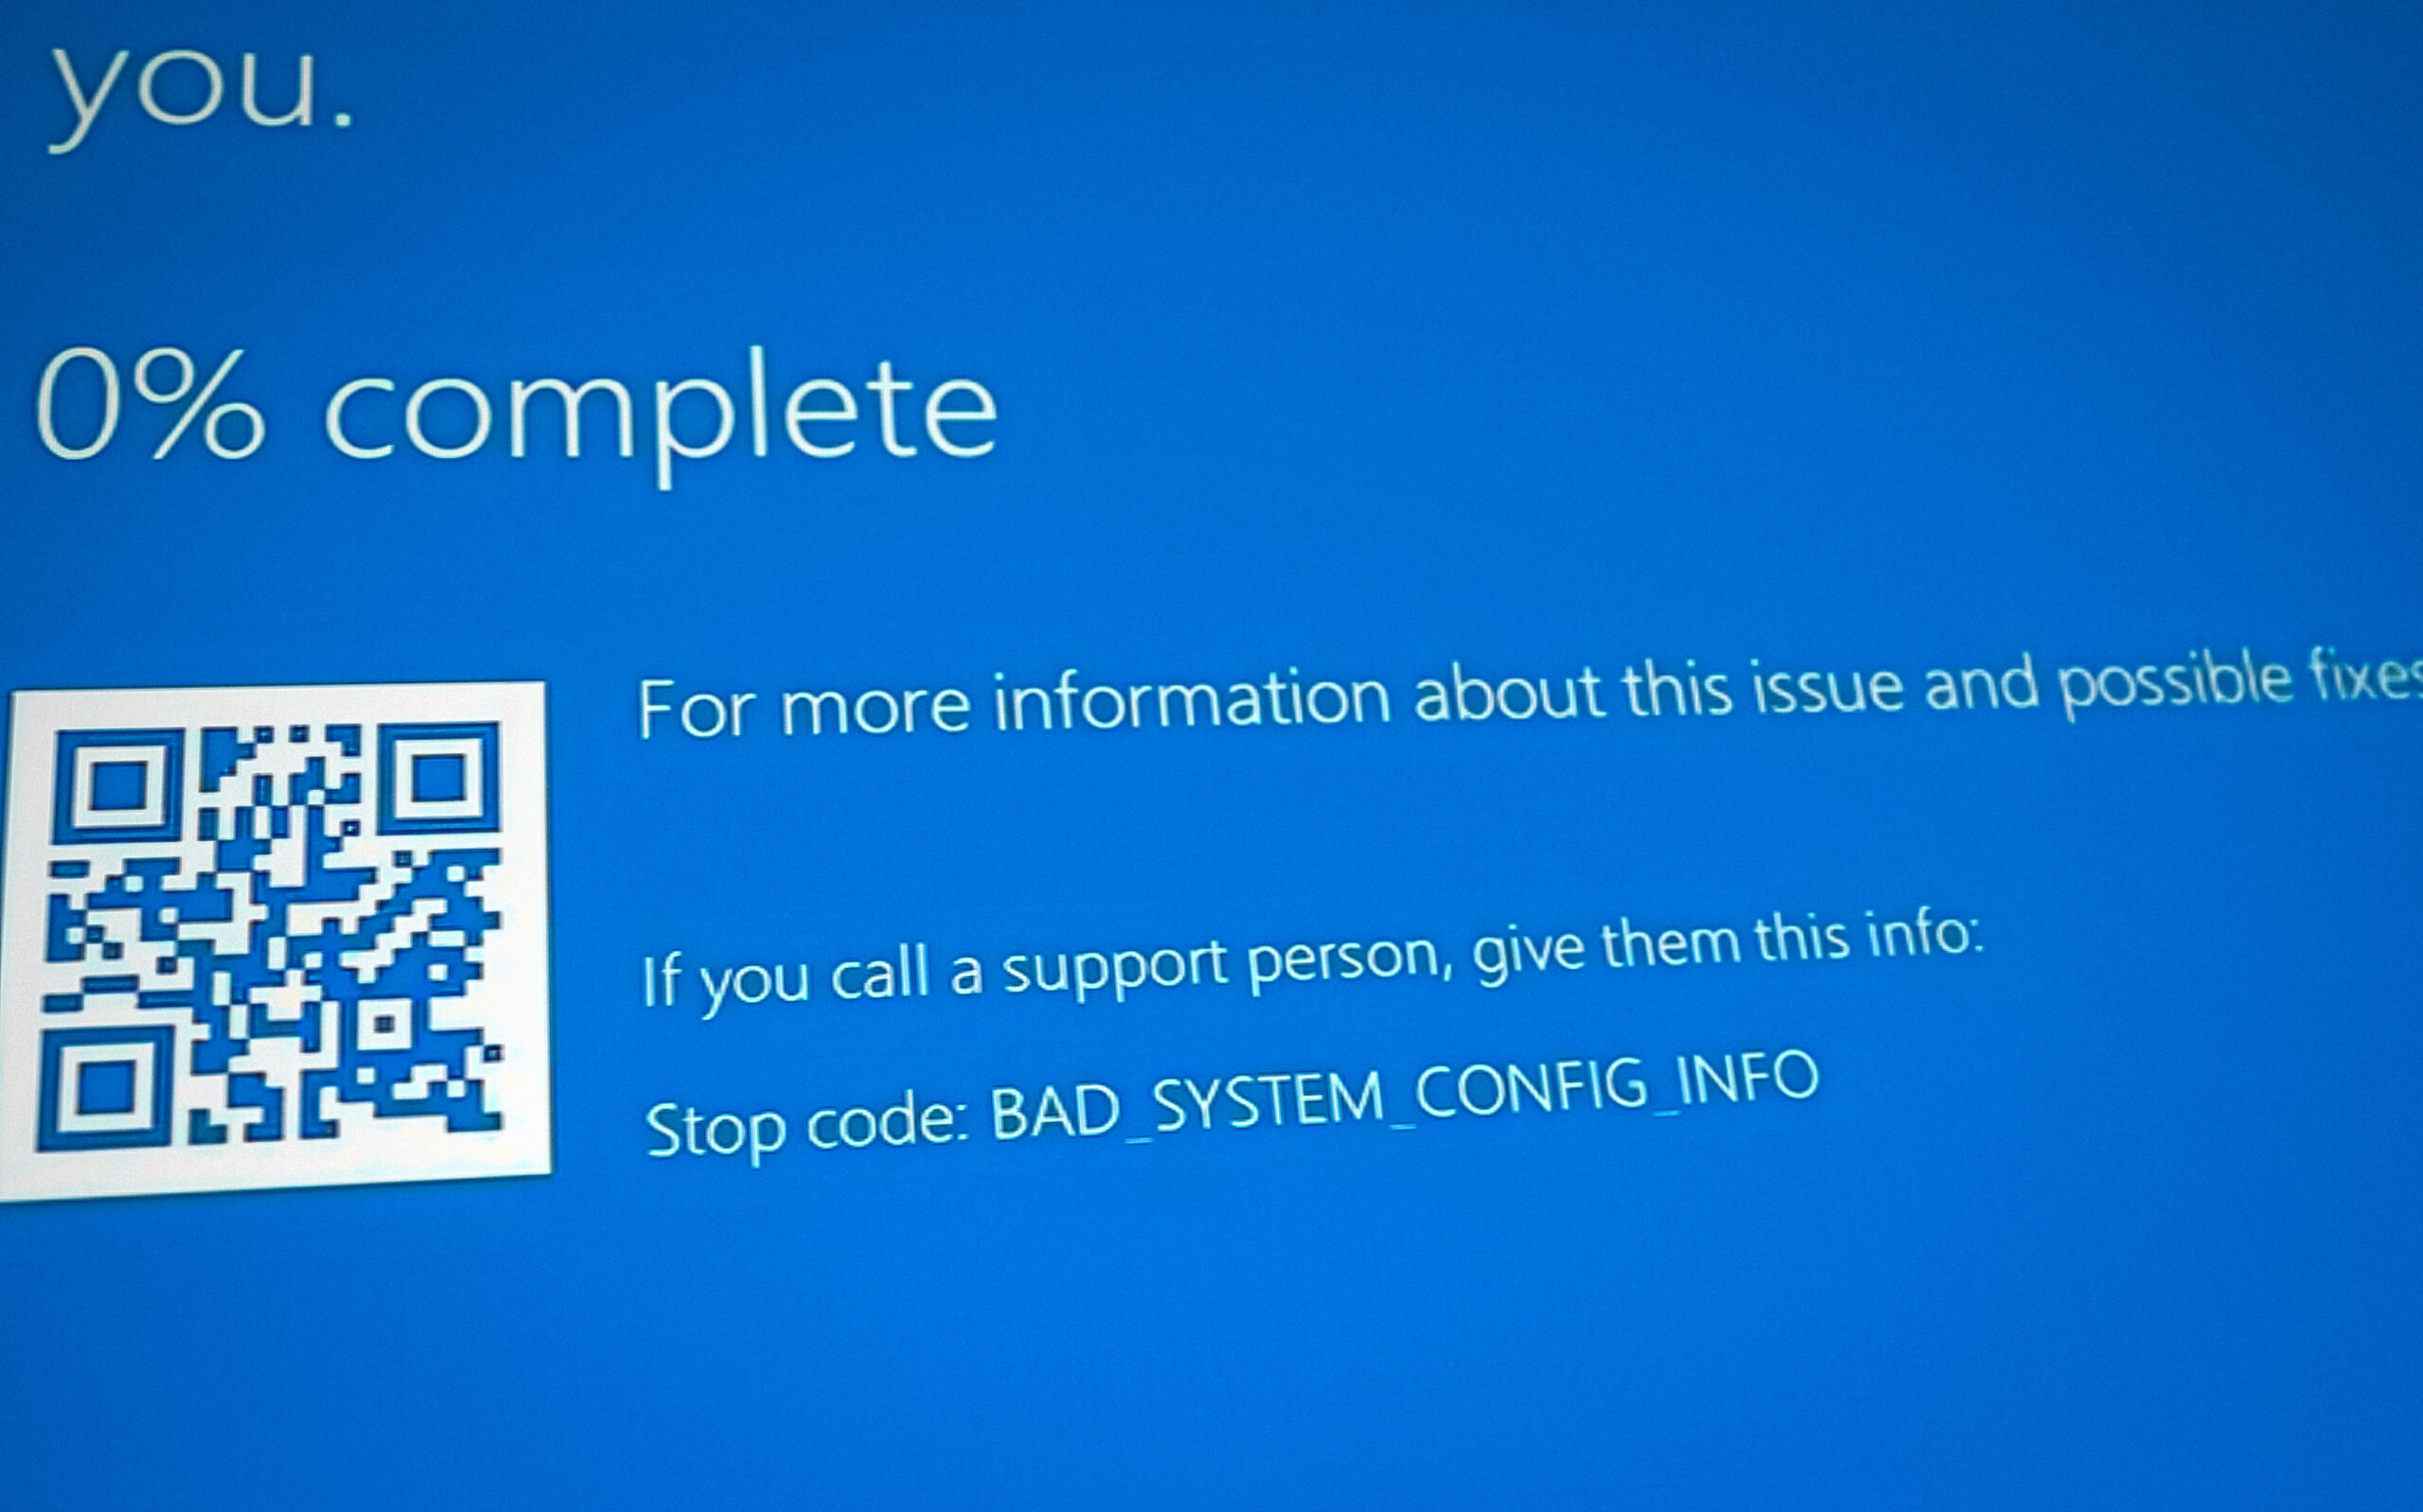
The most common reason for this error is a problem with the system registry file. However, other things like a broken boot configuration file, wrong boot settings, or even faulty RAM can also cause this issue.
Now that you know the causes, let’s discuss the solutions.
1. Restore Registry Files From RegBack
The first method is to restore the registry files. The config folder acts as a database for the registry files and is protected by the system so it can’t be deleted as usual.
RegBack is a special folder where Windows automatically stores backup copies of your registry files. If your main registry files are corrupted, you can restore them from RegBack using Command Prompt in the Windows Preinstallation Environment.
- Completely turn off your computer. Then, turn it on again and, as soon as you see the Windows logo, turn it off again.
- Repeat the above step at least 3 times. This will launch the automatic repair or Recovery Environment.
- When you see Preparing Automatic Repair, let it process, then click Advanced Options > Troubleshoot > Advanced Options.
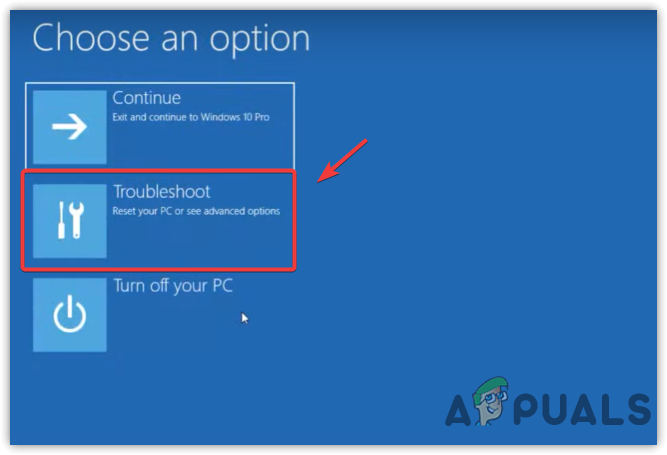
Navigating To Windows Recovery Environment Troubleshoot Settings - Click on Command Prompt to open the terminal.
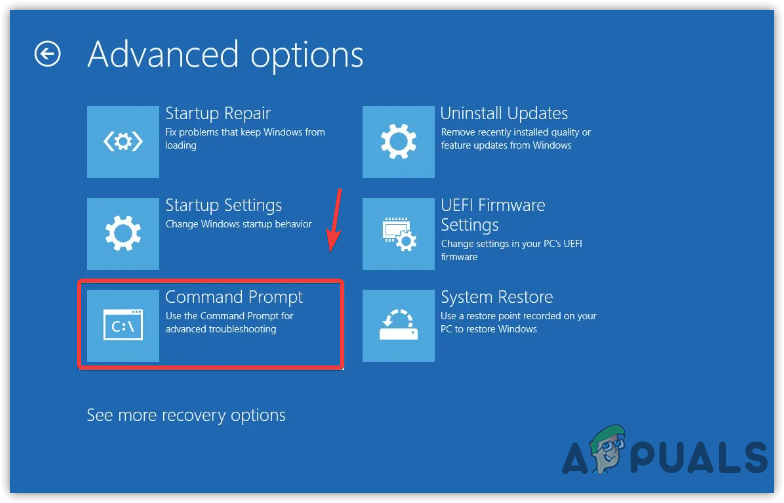
Opening Command Prompt From Windows Recovery Environment - Wait for your computer to restart into the command prompt interface.
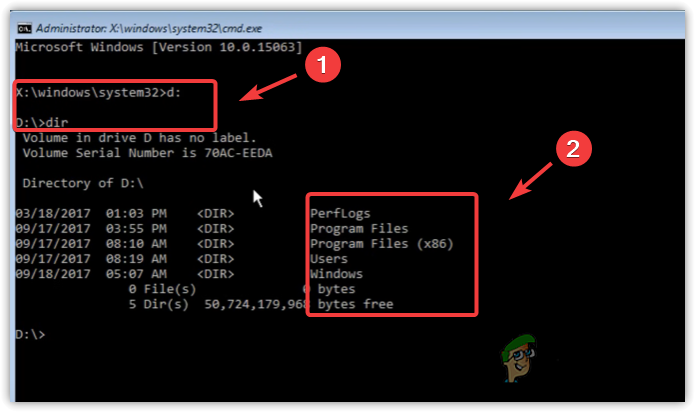
- Next, type C: (or use another drive letter if your system is on a different drive), then press Enter.
- Type DIR and press Enter to list the contents of the drive. If you see the Windows folder, you are on the correct drive. If not, try another drive letter (e.g., D:, E:) and repeat DIR until you find the \Windows folder.
Navigating To OS Disk - After you’ve found the correct system drive, enter this command, replacing X with your system drive letter:
cd X:\Windows\System32\config
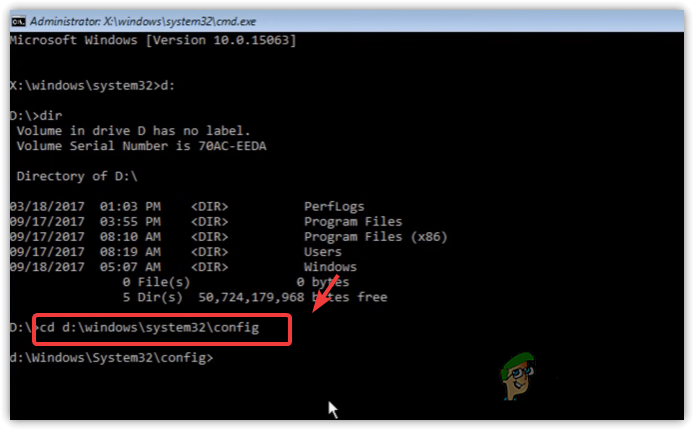
Navigating To Windows Config Folder - Once in the config folder, type the following command to create a backup folder:
md backup
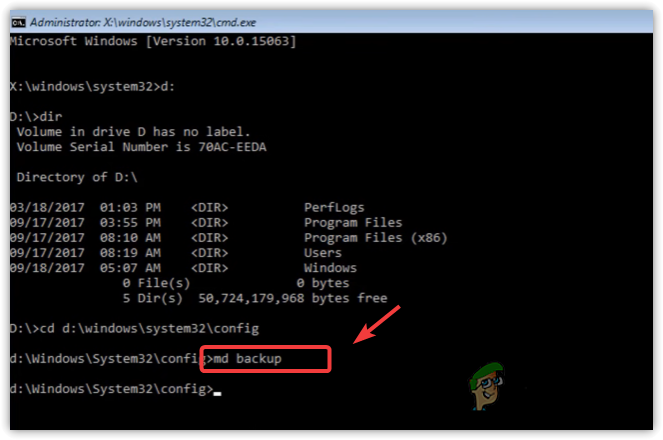
Making A Backup Folder To Copy All The Config Files - Copy all the files in the config folder to your backup folder using:
copy *.* backup
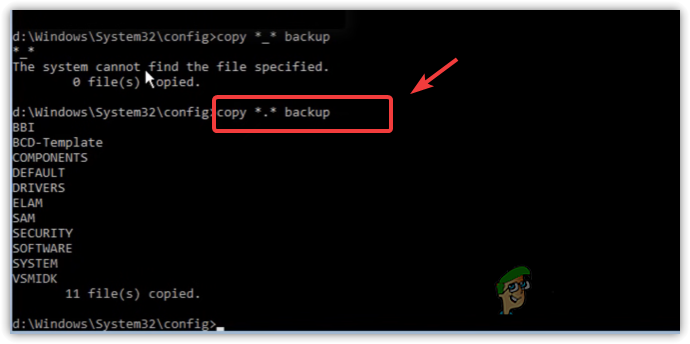
Copying All The Config Files To The Backup Folder - Go to the RegBack folder by typing:
cd regback
- Now, copy all the files from the RegBack folder back to the config folder using this command:
copy *.* ..
- If you are asked for confirmation, type A and press Enter to overwrite all files.
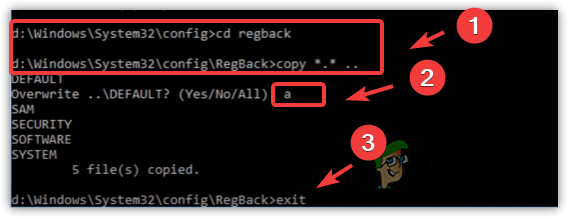
Replacing The Regback Folder Files With The Corrupted Config Files - Type exit, then restart your computer to check if your issue is resolved.
2. Use System Restore (If Available)
You can use System Restore to return your computer to a point before you started having this issue. This only works if a restore point was created before the error appeared.
System Restore takes a snapshot of your system files and settings so you can roll back any changes if something goes wrong. While restore points are usually created manually, some driver update utilities might create them automatically, so it’s still worth checking.
- To use System Restore, turn on your computer and wait for the Windows logo to appear.
- When you see the logo, turn off your computer again.
- Repeat this process three times to force Windows to enter the Recovery Environment.
- If Startup Repair doesn’t resolve your issue, choose Advanced options > Troubleshoot > Advanced Options.
- Click System Restore and then Next.
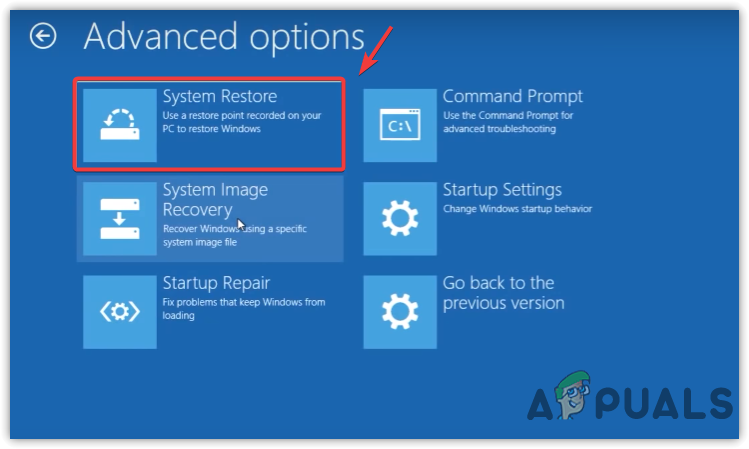
Using System Restore Utility From Windows Recovery Environment - Select a restore point and click Next.
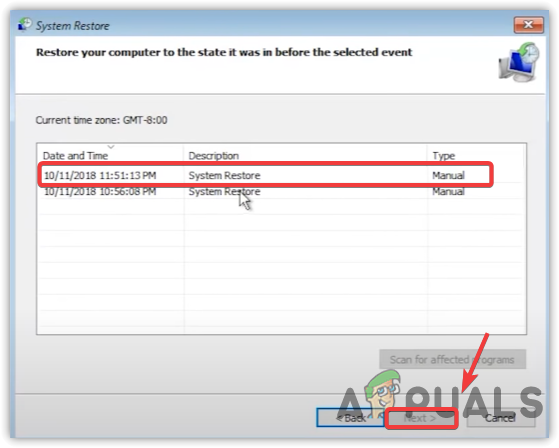
Selecting Recently Created Restore Point - Click Finish to begin the restoration process.
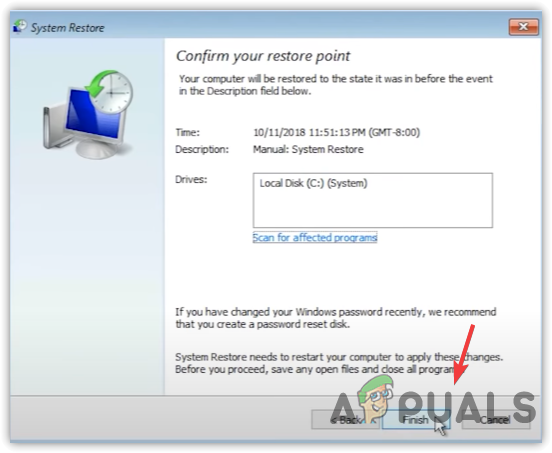
Restoring Windows To A Previous State Using System Restore - Once the restoration is complete, the issue should be resolved.
3. Repair the Bootloader
The bootloader is the software that starts up your computer and loads Windows. If the bootloader is corrupted, Windows might not start correctly.
- When automatic repair fails, click Advanced Options.
- Select Troubleshoot > Advanced Options.
- Click Command Prompt to open the terminal.
- Your computer will restart, and you’ll be prompted to sign in with your local or Microsoft account if needed.
- Type the following commands one at a time, pressing Enter after each one:
bootrec /fixmbr
bootrec /fixboot
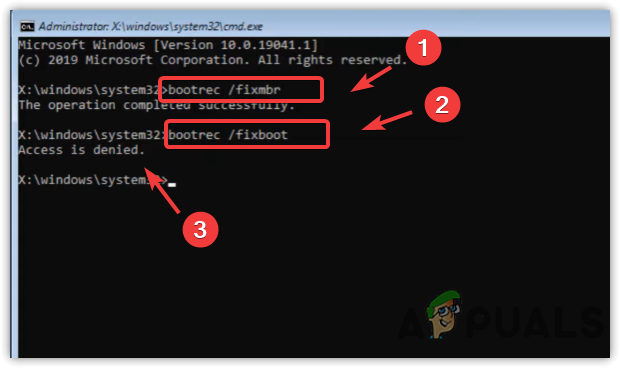
Executing Bootrec Commands - If you see an “Access is Denied” error, enter this command instead:
bootsect /nt60 sys
If you want to learn more about this command, please refer to our article explaining what bootsect.exe is and how it works. - Then, continue with these commands:
bootrec /fixboot
bcdedit /export c:\bcdbackup
attrib c:\boot\bcd -h -r -s
ren c:\boot\bcd bcd.old
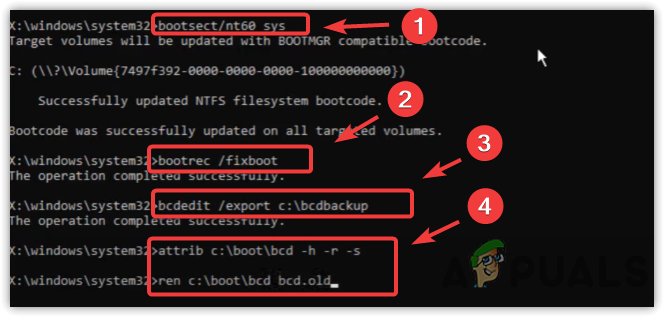
Fixing Bootloader - To finish, rebuild the bootloader by typing:
bootrec /rebuildbcd
- If prompted, type A to add the Windows installation to the boot list.
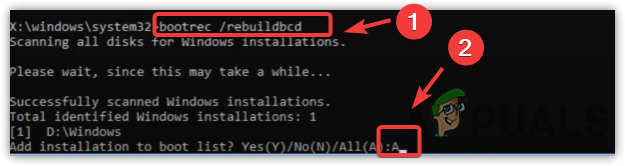
Rebuilding Bootloader - Finally, restart your computer to see if the issue has been fixed.
4. Reinstall Windows
If none of the above methods work, your final option is to reinstall Windows, as your system files may be damaged beyond repair. Usually, resetting Windows can fix most software-related issues, but sometimes the reset option may also fail due to this error. If so, try reinstalling Windows by following the step-by-step guide in our article to remove this error for good.


