Fix: Bad_Pool_Header on Windows 10
Windows 10 can suddenly crash and show a blue screen with the “Bad_Pool_Header” error. This often happens when you start your computer, update Windows, or use virtual machines. The error code (0x00000019) means there is a problem with how Windows handles your computer’s memory.
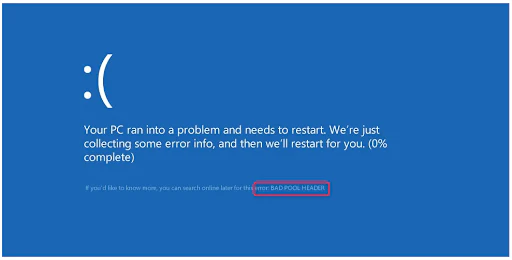
The most common reason for this is a bad or outdated driver, especially for network, storage, or virtual machine devices. However, problems with your computer’s RAM or hard drive can also cause this error. Now that you know the causes, let’s discuss the solutions.
1. Disable or Uninstall Your Antivirus
Some antivirus programs are known to cause this issue. Your first step should be to disable or uninstall your antivirus. While this may not be the most common cause, it helps to quickly rule out antivirus conflicts.
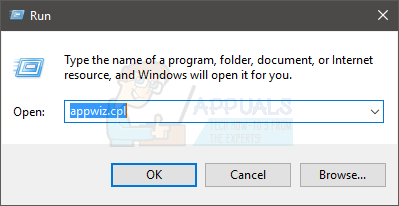
- Hold the Windows key and press R.
- Type appwiz.cpl and press Enter.

- Find your antivirus program in the list, select it, and click Uninstall. Follow any on-screen instructions.
Once you’re finished, restart your computer and check if you still get the BSOD.
Note: You don’t have to uninstall your antivirus; you can simply disable it from the system tray (bottom right corner). Right-click the antivirus icon and select the Disable option. If you don’t see that, double-click the antivirus icon and look for the Disable option in the antivirus menu. This location can vary by brand, but every antivirus should have this setting.
If you can’t uninstall the antivirus because the BSOD keeps appearing, you’ll need to go into Safe Mode to remove the program.
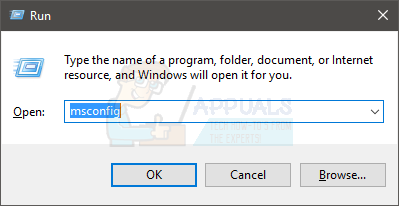
- Hold the Windows key and press R.
- Type msconfig and press Enter.

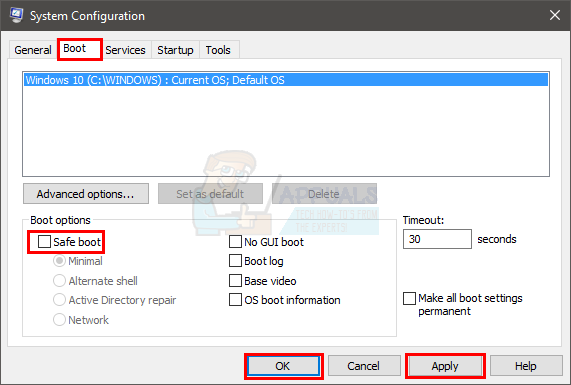
- Select the Boot tab.
- Check the box next to Safe Boot.
- Click Apply, then OK.

- Restart your PC if it doesn’t restart automatically.
- After your computer boots into Safe Mode, uninstall the antivirus program as described earlier.
- Hold the Windows key and press R.
- Type appwiz.cpl and press Enter.
- Find and uninstall your antivirus program. Follow any additional instructions.
Once done, follow these steps to exit Safe Mode:
- Hold the Windows key and press R.
- Type msconfig and press Enter.
- Select the Boot tab.
- Uncheck Safe Boot.
- Click Apply, then OK.
Restart your PC if it doesn’t restart automatically. After restarting, your system should return to normal mode and your issue may now be resolved.
Note: Antivirus software is important for your computer’s safety. If uninstalling your antivirus solves the problem, consider switching to a different antivirus product. Not all antivirus programs cause this issue, so you should be able to use another one without any worries.
2. Turn Off Fast Startup
Turning off Fast Startup solves the problem for many users. Fast Startup is a Windows feature designed to make boot times faster. However, sometimes it doesn’t give drivers or programs enough time to load correctly, which may cause issues.
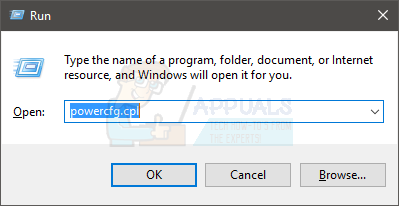
- Hold the Windows key and press R.
- Type powercfg.cpl and press Enter.
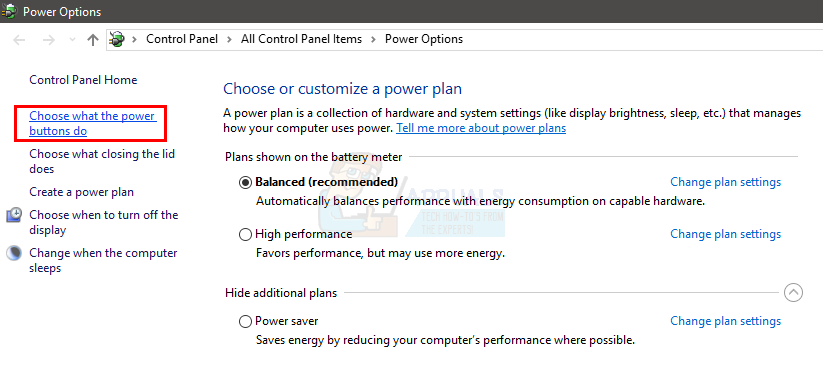
- Click Choose what the power buttons do.
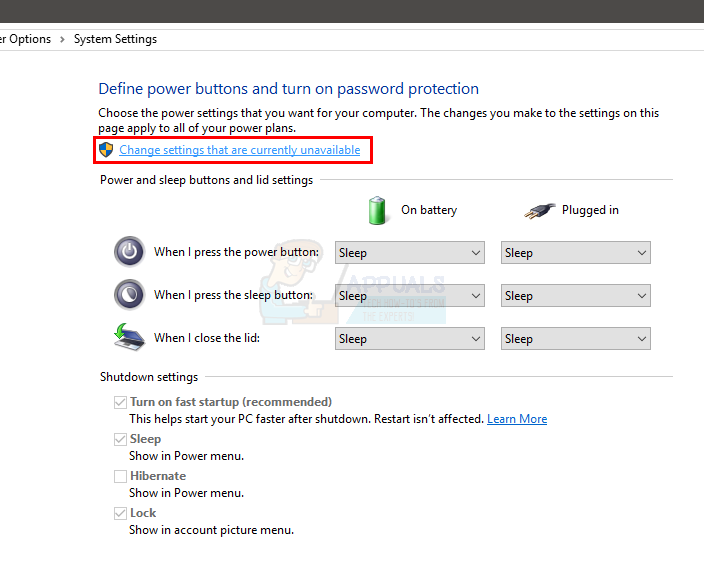
- Click Change settings that are currently unavailable.
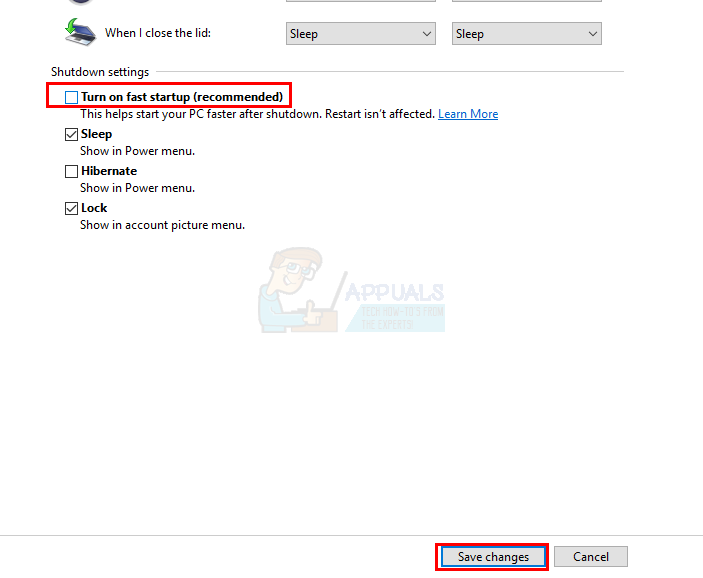
- Uncheck Turn on fast startup (recommended) under Shutdown Settings.
- Click Save Changes.
Restart your PC and see if the error is gone.
3. Update or Reinstall Problematic Drivers
Drivers are one of the leading causes of this error. If you recently upgraded or updated Windows, your drivers may now be incompatible or incorrectly configured. Windows sometimes installs generic drivers, or new versions during upgrades that may not work well with your system.
Troubleshooting drivers can be a bit involved, so we recommend these steps for all your devices. However, if you’ve noticed a pattern—such as the BSOD appearing when you connect to the internet—focus on the drivers directly involved (like Ethernet or Wi-Fi card drivers).
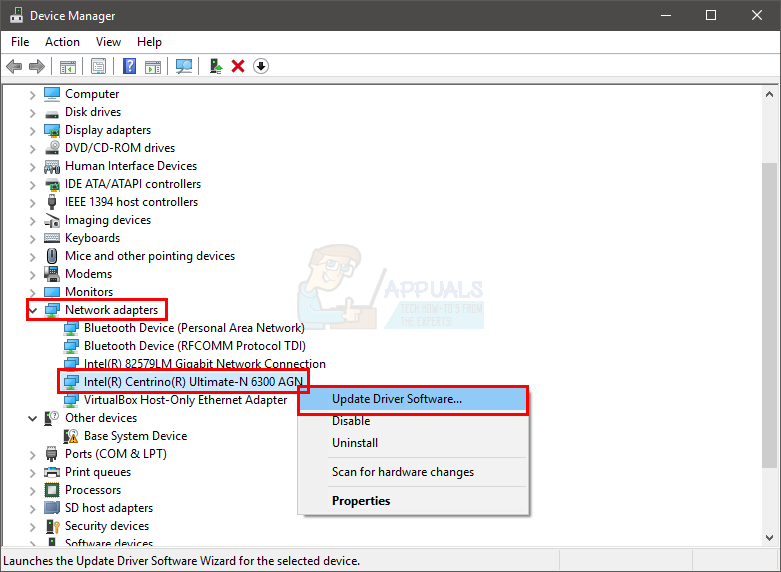
Below are steps for checking network adapter drivers. Repeat these for other devices if needed.
Note: These steps show how to update network adapter drivers. Repeat them for any device you suspect may be causing the BSOD.
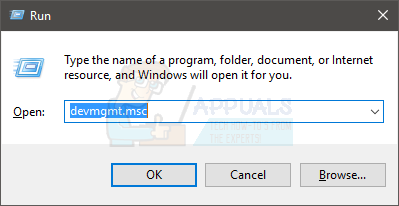
- Hold the Windows key and press R.
- Type devmgmt.msc and press Enter.
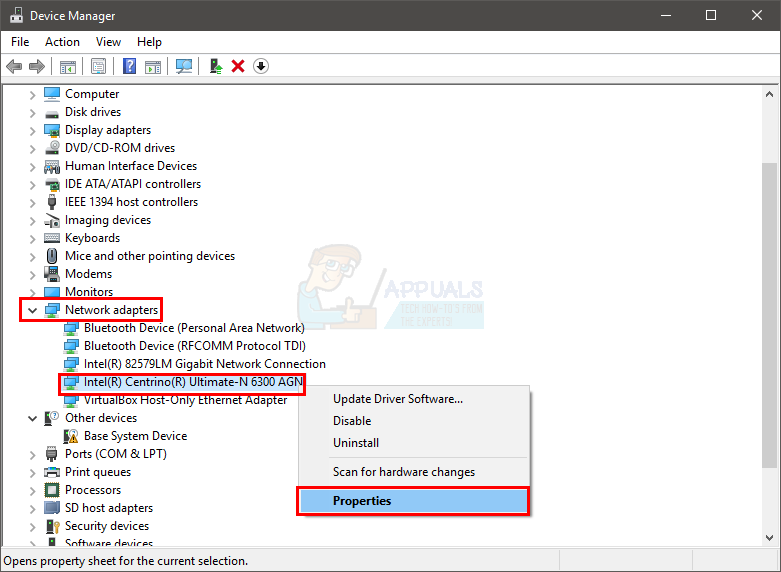
- Find and double-click Network Adapters.
See if any devices have a yellow warning sign (which means something is wrong). A red sign means Windows cannot communicate with that device.
If you see these warnings on any card, follow these steps. Also, check other devices in Device Manager and repeat the process for those as needed.
If you see a yellow warning sign:
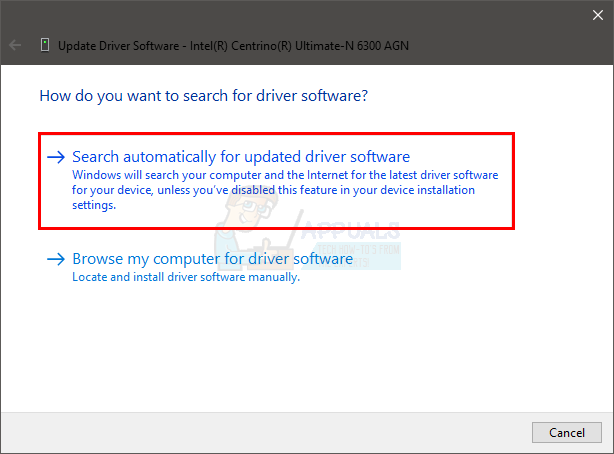
- Right-click the device/adapter and choose Update Driver Software…

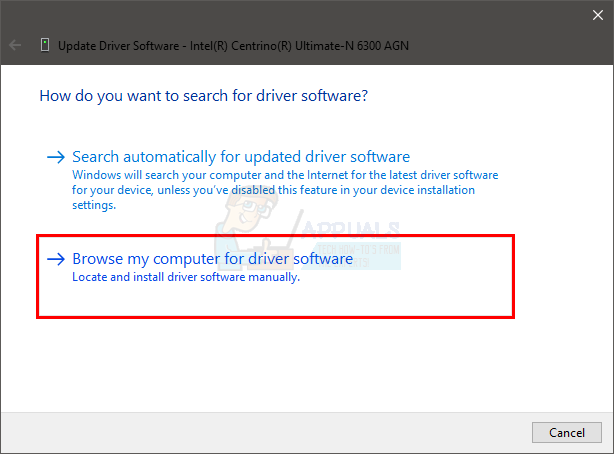
- Select Search automatically for updated driver software.
If Windows can’t find an updated driver, visit your device manufacturer’s website and download the latest version. Save it somewhere easy to find. Then:
- Hold the Windows key and press R.
- Type devmgmt.msc and press Enter.

- Double-click Network Adapters.
- Right-click your device and select Properties.
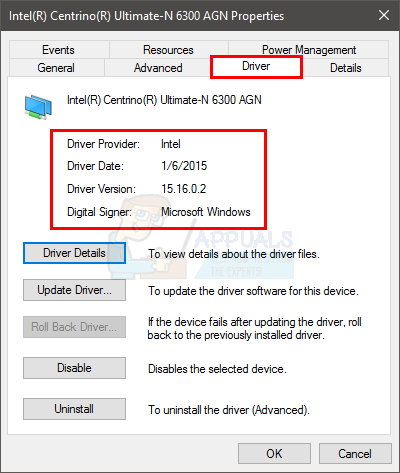
- Select the Driver tab and check if the version matches what you downloaded. If not, close the properties window.
- Right-click the device again and select Update Driver Software….
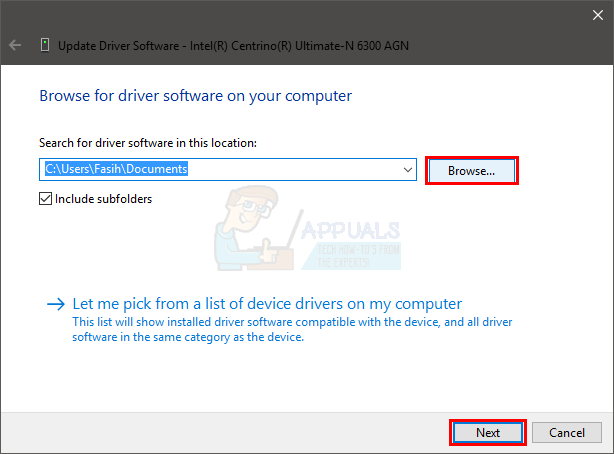
- Choose Browse my computer for driver software.
- Click Browse, find the driver you downloaded, select it and click Open.
- Click Next and follow any on-screen instructions.
If this doesn’t solve the problem, uninstall the driver and allow Windows to install a generic one. This usually resolves compatibility issues.
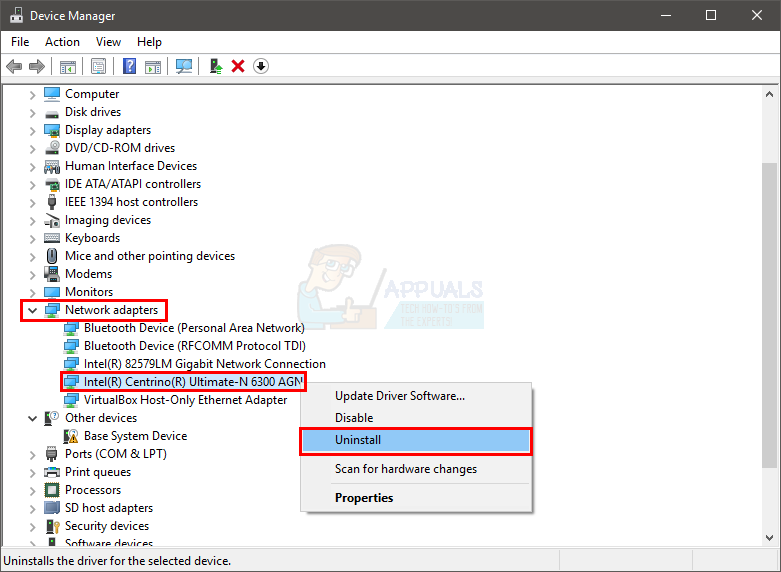
- Hold the Windows key and press R.
- Type devmgmt.msc and press Enter.

- Double-click Network Adapters.
- Right-click your device, choose Uninstall, and follow any instructions.
- Restart your computer.
After your computer restarts, Windows should automatically install a compatible generic driver for your device. This usually resolves the issue.
4. Check Your RAM
Problems with RAM (your system’s memory) can also cause this error. This might result from a poorly seated stick of RAM or dust in the RAM slots, but more often it happens because the RAM is actually faulty.
First, power off your computer, remove the RAM modules, clean them carefully, and clean the RAM slots if there’s dust. Make sure the RAM is firmly and properly reinserted. Power the system back on and see if the problem still happens. If this works, your issue was just minor and you’re good to go. If the problem continues, you’ll want to check your RAM using diagnostic tools.
4.1. Windows Memory Diagnostic
Windows has a built-in memory checking tool. While it’s not the most thorough, it’s easy to use and helpful for a quick diagnostic. If you don’t want to use third-party programs like Memtest right away, this is a good first step.
- Hold the Windows key and press R.
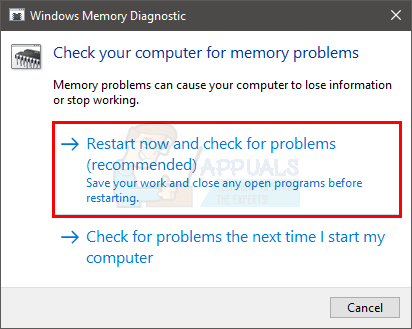
- Type mdsched and press Enter.

- Click Restart now and check for problems (recommended).
Note: If this tool doesn’t work or gives errors, try these steps:
- Press the Windows key once.
- Type Memory diagnostic tool into Start Search.
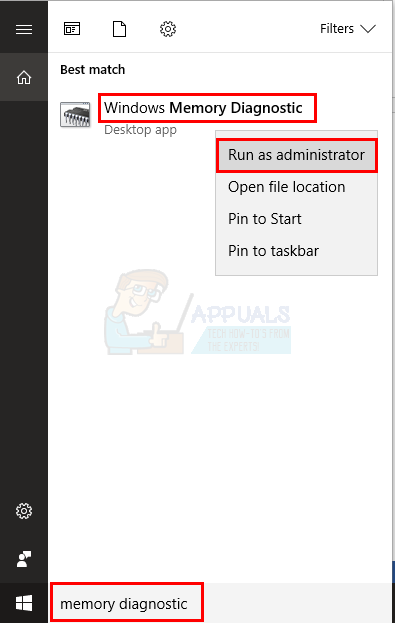
- Right-click Windows Memory Diagnostic in the search results and choose Run as administrator.
- Click Restart now and check for problems (recommended).

Windows will restart and begin the memory test. You’ll see the results on screen. When it’s finished, your computer will automatically restart again and you’ll see results in Windows. From these results, you can decide if you need to replace your RAM.
4.2. Memtest
Memtest is a powerful free tool that provides a thorough check of your RAM. It takes longer to run, but it’s more accurate. Go here and follow the steps in Method 1 to use Memtest.
4.3. Manual Testing
If you have an extra RAM stick (or one from another computer that you know works and is compatible), you can swap it in and see if the error goes away. If your PC works fine with the replacement RAM installed, your original memory is likely faulty. You can also still use Memtest to be extra sure.
If tests show the RAM is faulty, replace it with a new one or a working spare.