Fix: Autopilot.dll WIL Error Was Reported on Windows
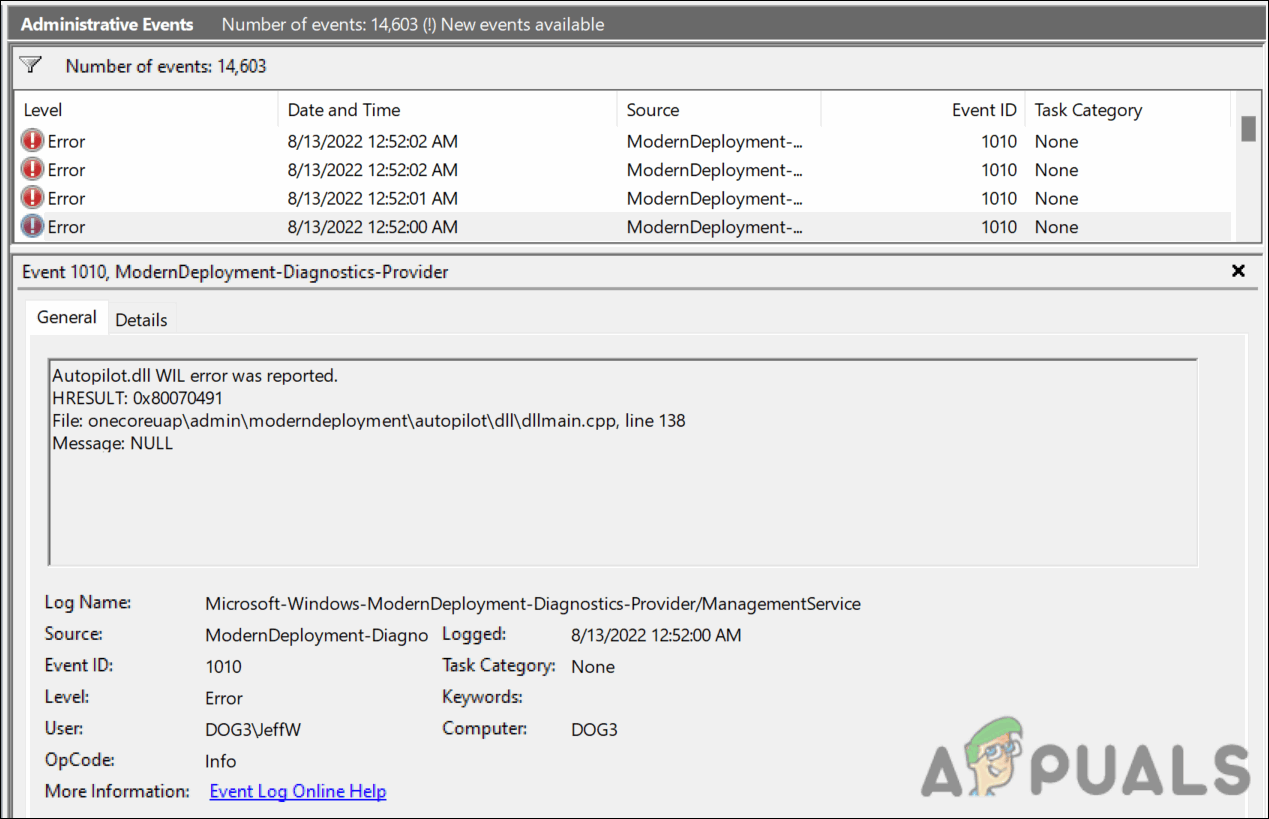
The Autopilot.dll WIL error results in frequent crashes and reboots on both Windows 10 and 11. This error is caused by a certain event, known as the Autopilot.dll WIL in the Windows Event Viewer.
There are quite a few potential causes that might be resulting in the said error. Here are the most common ones:
- Outdated Windows – An outdated operating system is often subjected to frequent system crashes, application errors, and other similar issues. If you haven’t updated your system for quite some time, installing the pending updates can help fix the problem.
- Microsoft Account Sign-in Assistant service – This service is considered to be directly related to the Autopilot.dll WIL error, and disabling it can fix the problem.
- Overclocking – In some cases, overclocking the system memory can also lead to crashes caused by the said file. If this scenario is applicable and you are using such a machine, disable it to fix the problem.
Now that we know what might be causing the issue, let’s take a look at the troubleshooting methods that can help you get rid of the problem for good.
1. Disable the Microsoft Account Sign-in Assistant Service
Another fix that helped users resolve the Autopilot.dll WIL error was disabling the Microsoft Account Sign-in Assistant service.
If you do not know already, the Microsoft Online Services Sign-In Assistant is a software program that permits you to sign in to a variety of Microsoft online services, such as Office 365. When you head over to the Details tab of the error in the Event Viewer, you will notice that the only service associated with the event is the Microsoft Account Sign-in Assistant service.
The exact reason why this service is related to the error at hand is unknown, but we suggest that you try disabling this service to see if doing so helps you fix the problem.
However, please note that disabling this service will prevent you from using certain Windows features or programs like the Phone Link app and the Outlook Calendar widget.
If you wish to proceed, here is all that you need to do:
- Press Win + R together to open a Run dialog.
- Type services.msc in Run and click Open.
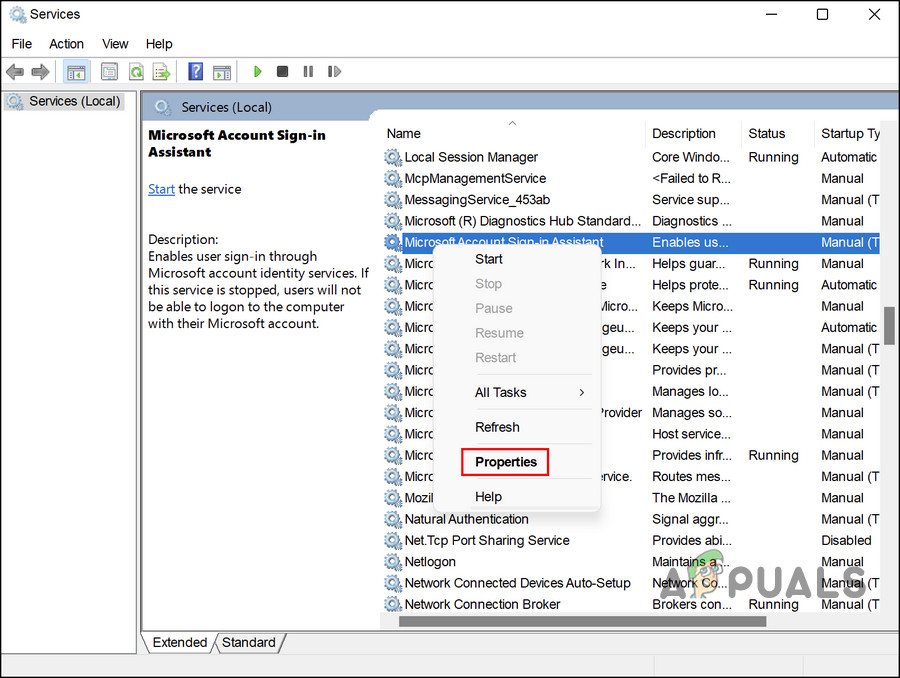
- In the following window, locate the Microsoft Account Sign-in Assistant service.
- Right-click on it and choose Properties from the context menu.
Launch the service’s properties - Now, expand the dropdown for Startup type and choose Disabled from the list of options.
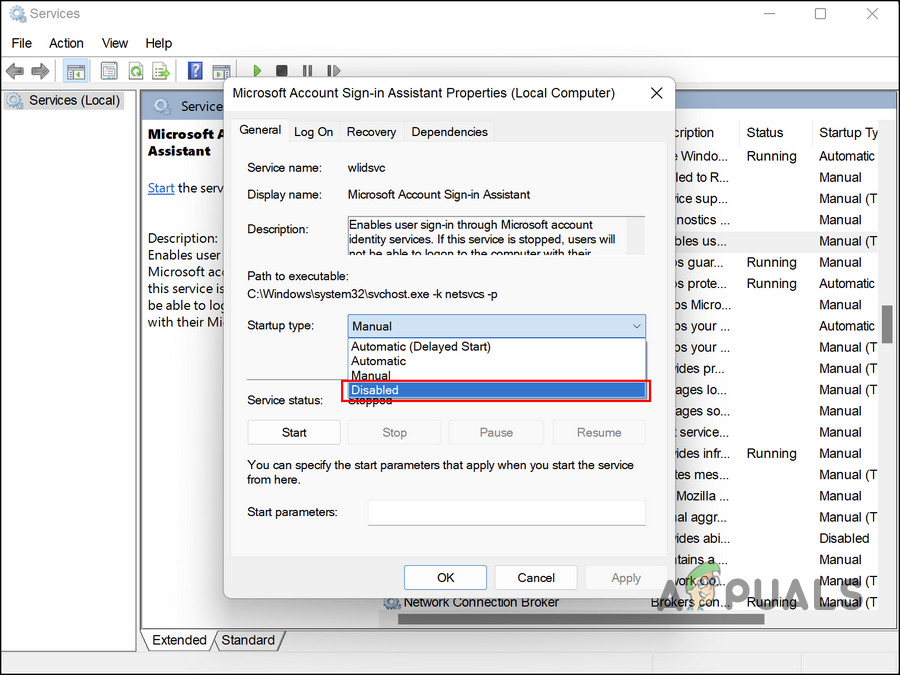
Choose to disable the service at startup - Finally, click Apply > OK to save the changes.
Hopefully, this will resolve the issue in no time.
2. Update Windows
Another thing that we recommend you do after encountering the Autopilot.dll error is to install the pending updates that may be available on your system.
In quite a few instances, the error was caused by an outdated operating system and the affected users were able to resolve the issue by installing the available system updates.
Here is how you can update your Windows os to its latest version:
- Press Win + I to open Windows Settings.
- In the following window, choose Windows Update from the left pane.
- Click on the Check for updates button and wait for the system to scan for pending updates.
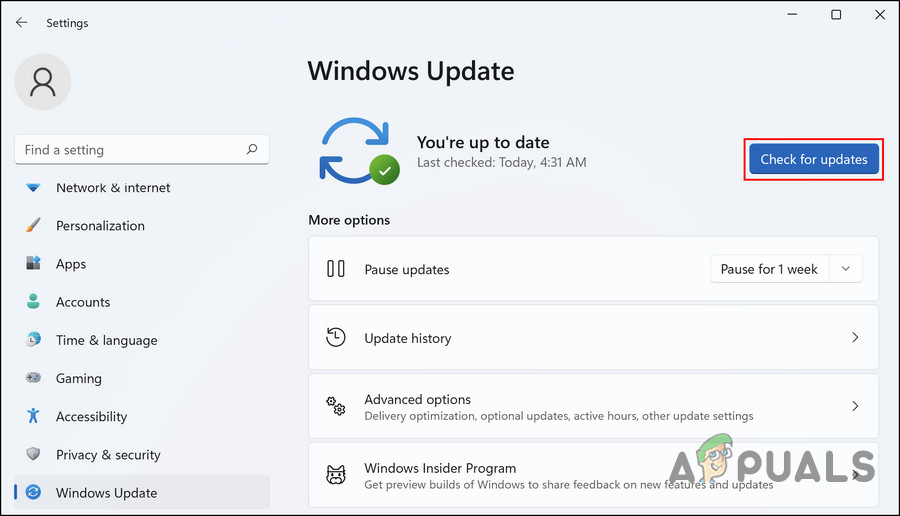
Check for updates button - If any updates are found, install them one by one.
Once done, restart your PC and check if the issue is resolved.
3. Disable Overclocking (XMP)
You might also be facing the problem if you are using a machine that offers the XMP feature. XMP profiles are used to set up your system for high-performance RAM that exceeds industry DDR specifications.
However, it is important to know that in any case, overclocking comes with an instability risk. Several users managed to fix the error at hand by disabling XMP, which is why we recommend you give it a shot if you are using it.
Here is what you need to do:
- Restart your PC and boot into BIOS. The steps of booting into BIOS can be different, depending upon the manufacturer, so you can visit the manufacturer’s official website for this purpose.
- Once you have booted into BIOS, check the Overclocking settings to find XMP.
- Disable this feature and check if the issue is resolved.
4. Perform an In-Place Upgrade
In the case that none of the above troubleshooting methods work for you, the problem may be more serious and is not likely to be resolved by conventional troubleshooting.
In this case, you can go ahead and perform an in-place system upgrade. On a PC, an in-place upgrade involves replacing all the operating system files of Windows using the Windows OS installer. Essentially, you are reinstalling the same OS over itself with setup.exe.
This is your last option before performing a complete reinstall. Keep in mind that this is a time-consuming process, and you may lose some of your customized settings during the process.
5. Report the Issue to Microsoft
If you do not wish to proceed with an in-place upgrade just yet, then you can also try reporting the issue to the official Microsoft team. Hopefully, they will be able to pinpoint the exact cause of the issue and suggest relevant steps to take.
Can you please let me know what are the services apart from Phone Link app and the Outlook Calendar widget that I will not be able to use after disabling the
Microsoft Account Sign-in Assistant Service?
I am facing the issue of frequent
shutdowns and disabling this service has done the job. However I want to
know what Windows Features will I miss if I keep this disabled.
Thank you 🙂