[FIX] AutoIt Error ‘Line 0: Error Opening the File’ on Windows 10 / 11
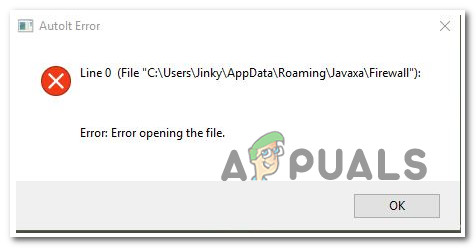
Some Windows 10 and Windows 11 are experiencing one or more startup errors like this one: “AutoIt Error Line 0 file C:\Users\65875\AppData\Roaming\ServiceGet\vapihas.dat”. This is just one variation, but there is a multitude of files that might be triggering this startup error every time the PC is started.
After investigating this issue, we discovered that there are actually several different underlying causes that might be at the root of this startup error. Here are several scenarios that you should consider:
- Remnant autoruns – One of the most common scenarios where you might see this type of error is when your PC contains one or more autoruns keys that are left behind by an application that no longer exists. In this case, the easiest way to resolve the issue is to use the Autoruns utility to identify and remove the problematic autorun file.
- Virus infection – A possible malware or virus infection that has infiltrated your Windows files is another item you should take into account. Start a security scan with your antivirus program to see if it can find and get rid of any virus infections.
- 3rd party program interference – The “AutoIt Error Line 0” error code may be the consequence of a conflict between a startup service or application and Windows. To check if this is the case, you can force Windows to boot with only the essential startup programs and drivers. Finding any program incompatibilities that can be the cause of this particular issue will be made easier with the use of this startup method (clean boot).
- System File corruption – files can result in issues with Windows like this one. This can occur at any time for unidentified reasons, but they are small ones that are simply fixable by running DISM and SFC scans. In more serious circumstances, you might need to go for a clean install or repair install.
Now that we went over every potential culprit with the possibility of triggering this issue, let’s go over every verified fix that other affected users have successfully used to get to the bottom of this issue.
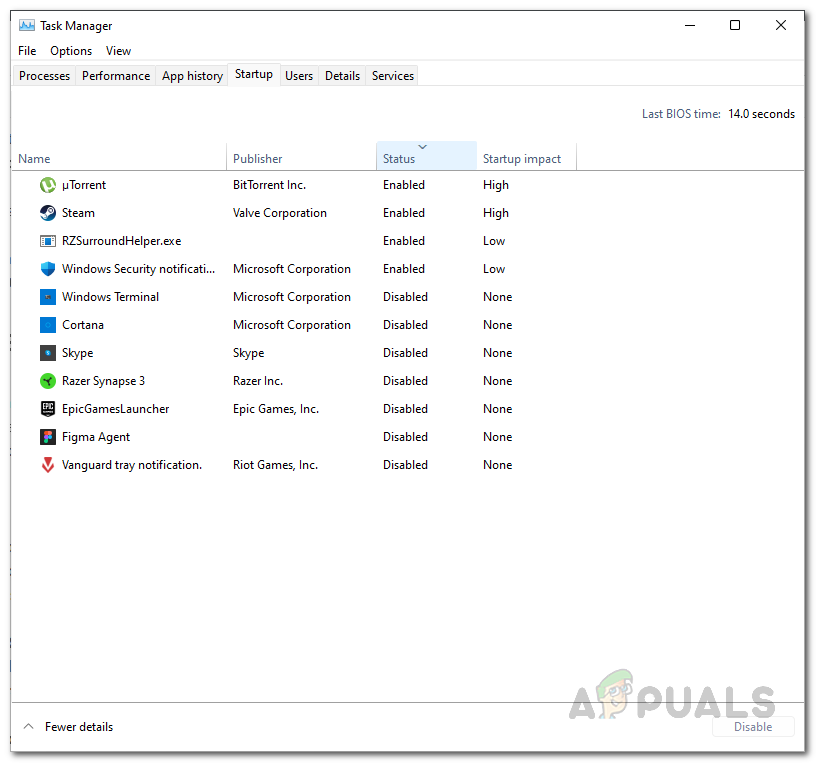
1. Delete the Autorun key via Autoruns
If you’re experiencing startup errors linked to a particular file, your security suite may have deleted the malicious file that was a component of the infection, or there may be a remnant file that keeps getting called during startup even though the parent application is no longer installed on the computer.
Note: When dealing with infections, it’s not uncommon for some security suites to miss some files. Even though a malicious file has been destroyed by a security program, startup items and registry keys can occasionally still be found on the system and cause the malicious file to run. Windows will automatically display a pop-up error whenever this occurs.
There are a few approaches you can take in order to resolve an AutoIt Error ‘Line 0: Error, but let’s choose the simplest one.
Note: Microsoft-approved software called Autoruns can locate, group, and remove unnecessary runonce, run, startup directories, and registry keys.
In our situation, we may use it to find and delete the startup items (or registry keys) that are still using the deleted file. Here is a basic tutorial on how to set up and use Autoruns to fix Line 0 startup errors:
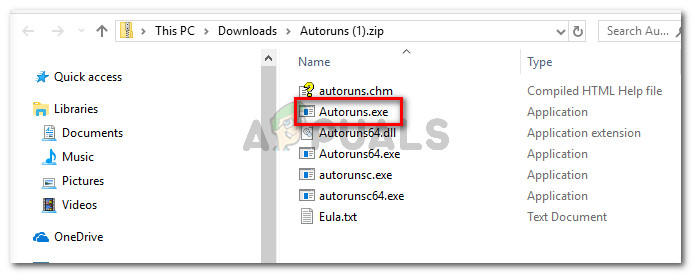
- Let’s start by downloading the most recent version of the Autoruns tool.
- To start the download, go to the Autoruns download page from any browser.
- After landing on the relevant website, select Download Autoruns and Autorunsc.

Downloading Autoruns - After the download is finished, unzip the file, then double-click the Autoruns executable to launch it.
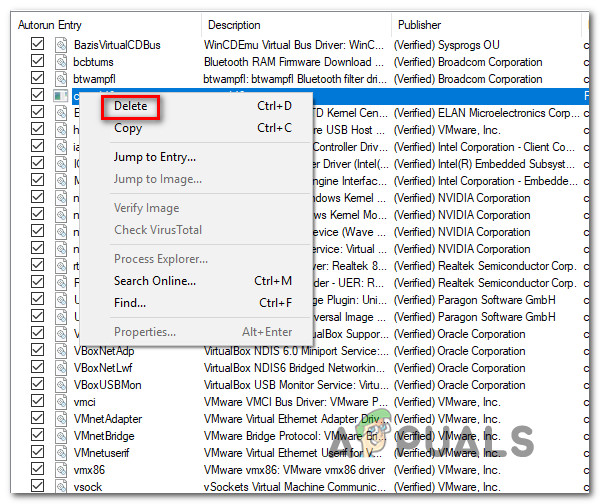
Extracting Autoruns - After Autoruns has been launched, wait until the Everything list has been filled out. Then, scroll down the list of accessible Autorun entries and find the file that is specified at the conclusion of the error.
Note: For example, if your error is “AutoIt Error Line 0 file C:\Users\65875\AppData\Roaming\ServiceGet\vapihas.dat”, look for the vapihas.dat. You can either look for this manually or make use of the search functionality at the top of the app. - To stop the executable from being launched when the system boots, right-click on it and select Delete from the context menu.
Downloading the AutoRun key - Restart your computer to check whether the same class of startup problem still appears.
Continue to the next method below if the problem is still unresolved or if you want to try an alternative strategy.
2. Eliminate a potential virus threat
Another thing that you should consider is a potential malware or virus infection that has successfully made its way among your Windows files. If you have an Antivirus, trigger a security scan and see if it manages to pinpoint and eliminate a virus infection.
Additionally, you should also take the time to deploy a Malwarebytes scan in order to go after pesky adware programs that are able to camouflage themselves as legitimate system processes.
As an extra security layer, you can also try running the Microsoft Safety Scanner in Safe Mode. By doing this, you can use the most potent virus-removal tool Microsoft has created without worrying about meddling from third parties.
The following is a fast guide for using Safe Mode to launch the Microsoft Safety scanner:
- Start your computer (or restart it if it’s currently running) and wait until the login screen appears.
- When the initial login window appears, select the power icon (bottom right corner).
- When the power contact menu appears, choose Restart while holding down the Shift key to force your computer to start in Safe Mode.

Boot in Safe Mode - Your computer will restart once you do this, enforcing the new state.
- Eventually, the Troubleshooting menu will appear on your computer. Click Troubleshoot when you see it.
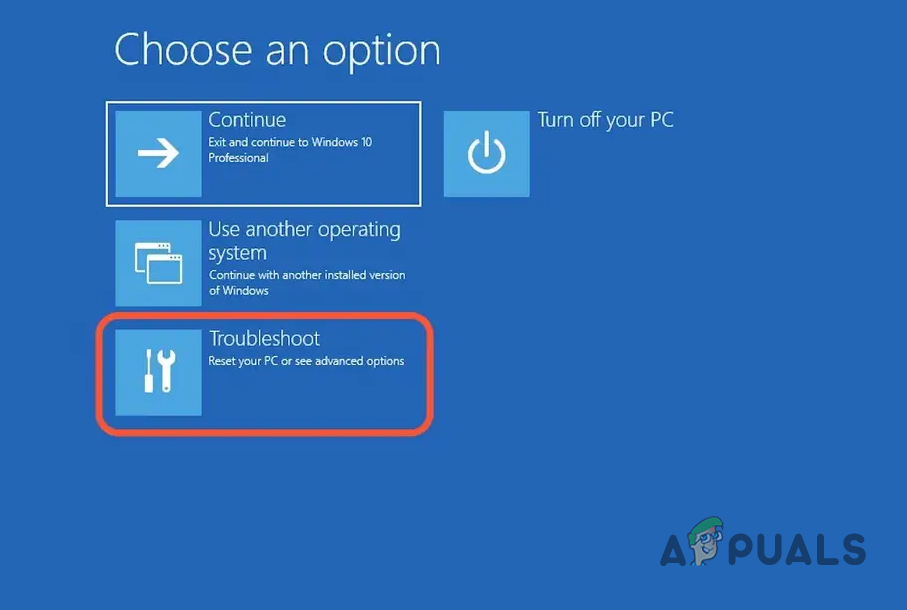
Accessing the Troubleshoot menu - Select Startup Settings from the lengthy list of possible options once you’re within the Advanced Options screen.
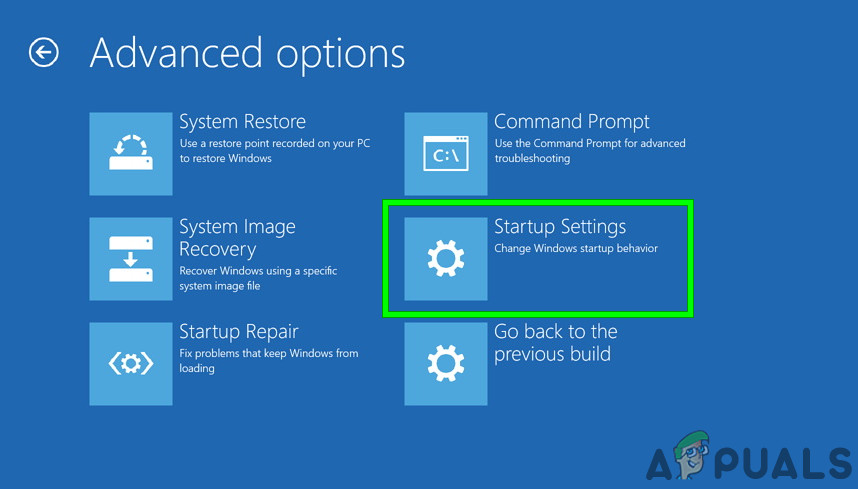
Accessing the Startup Settings menu - To start the computer in Safe Mode with Networking, hit F5 in the Startup Settings window.

Accessing the Startup Settings menu Note: It’s crucial that you start your computer in Safe Mode with Networking so that it can access the Internet later on when we download and run the WindowsSafety Scanner tool.
- Download the most recent Microsoft Safety Scanner for your Windows bit version when your computer successfully boots into Safe Mode with Networking.
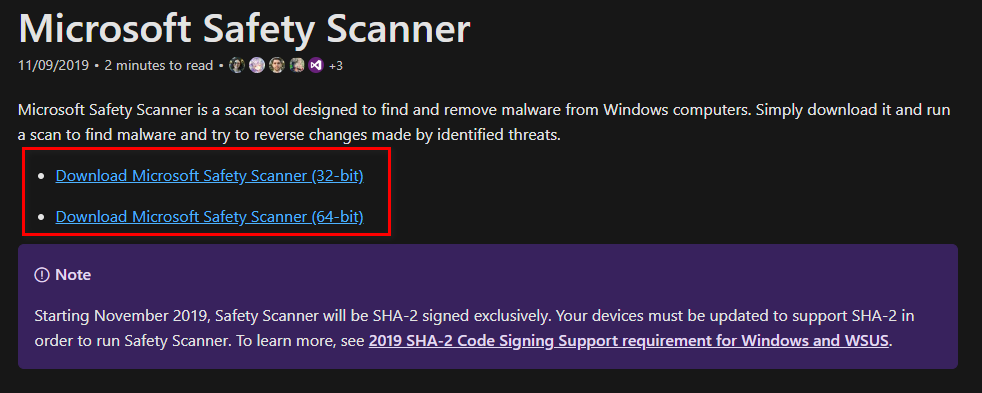
Download the Microsoft Safety Scanner - Following the successful completion of the download, double-click the MSERT.exe file to launch Microsoft Safety Scanner. Click Yes to provide administrative access if the UAC (User Account Control) prompt appears.
- Complete the remaining instructions to run a Microsoft Safety Scanner scan.
- Be patient and wait till the procedure is finished.
- After the procedure is finished, restart your computer to start it in normal mode and check to see if the issue startup error has been eliminated.
If this approach wasn’t successful for you, try the next method below.
3. Perform a clean boot
The “AutoIt Error Line 0” error code could be a result of a disagreement between an application or service and one or more Windows startup process.
You can force Windows to boot with only the necessary startup apps and drivers to see if this is the case. This kind of startup (clean boot) will assist you in finding any software conflicts that may be the root of this specific problem.
Here are the steps to follow in order to clean boot Windows and determine whether a third-party startup item or service is to blame for the startup error:
- Ensure that you are logged in with an administrative Windows account.
- To launch the System Configuration window, press Windows key + R to bring up the Run dialog box, type “msconfig,” and then press Enter.
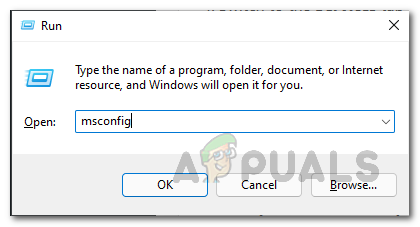
Opening MsConfig
Note: If the User Account Control (UAC) asks you to grant administrator privileges, select Yes. - Next, Select the Services tab in the System Configuration window, then check the box next to Hide all Microsoft Services. This will ensure that you are not turning off any essential operating system functions.
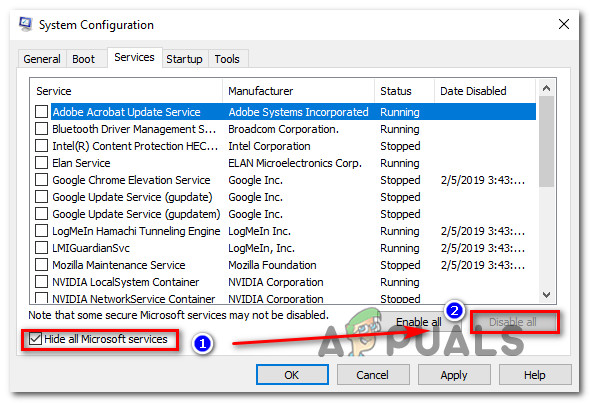
Disable non-essential startup services - Click the Disable all button to immediately stop all remaining services.
Note: This action will prevent any built-in or third-party services that are not absolutely necessary from triggering an app conflict that could result in the starting issue. - After all services have been turned off, click Apply changes, then click Open Task Manager under the Startup tab.
- To stop a service from starting up automatically, pick each one separately in Task Manager’s Status tab, then click Disable.
Disabling Non-Essential apps - After disabling all third-party services, quit Task Manager and restart your computer in Clean Boot mode.
- Check Microsoft Store to see whether you can download the program or game that was previously failing when the subsequent startup sequence is finished.
Note: If not, systematically re-enabling each item that was deactivated one at a time while performing regular reboots will help you figure out which conflicting software or service is the source of the problem.
Move on to the next technique below if this method has established that no application, service, or procedure from a third party is the source of the problem.
4. Deploy SFC and DISM scans
Affected people advise you to examine the faulty system files to discover if any malicious files are there. Corrupted files can result in issues with Windows like this one. This can occur at any time for unidentified reasons, but they are small ones that are simply fixable.
By checking your computer for damaged files using the Command Prompt with administrator rights, you can resolve this. Pasting some commands that will complete the task will make it easy to accomplish this.
Run SFC (System File Checker) and DISM (Deployment Image Servicing and Management) scan quickly one after the other to do this. You need to restart your computer after the procedure is finished to finish it.
Make sure you are linked to a reliable internet connection before moving on to the procedures of this approach.
Here are the procedures you need to do in case you don’t know how to scan your system for corrupted files:
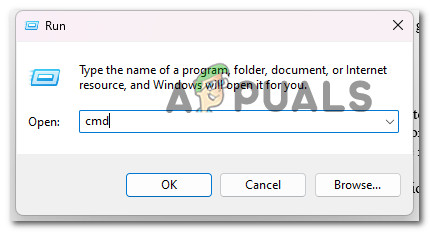
- You must first launch the Command Prompt with administrative rights. You must open the Run dialog box, type “cmd” into the search field, and then press CTRL + Shift + Enter to accomplish this.
Open up a Command Prompt window - The User Account Control (UAC) will then ask you to confirm that you want to grant the administrator privileges. You must select Yes in order to move further.
- Once the Command Prompt is shown on your computer, you must copy and paste the following command before pressing Enter to execute it:
sfc /scannow
- The scan will begin after this. Depending on the components of your computer, it may take some time and in some cases only a few minutes. Await the conclusion of the scan.
- To finish the operation, you must enter the next command after the SFC scan is finished:
DISM /Online /Cleanup-Image /RestoreHealth
- Once you’ve finished with it as well, either type exit to close the Command Prompt or just do it.
- You must now restart your computer to ensure that any modifications are put into effect.
- Check to see whether the File Explorer search box is still not returning any results once the machine has rebooted.
Continue to the next potential solution below if this strategy didn’t resolve your problem.
5. Clean install or Reinstall Windows
If you’ve read this far and you’re still getting the same ‘Line 0: Error Opening the File’ error, you obviously have a serious corruption problem that can’t be fixed in the usual way.
To ensure that all instances of faulty system files are eliminated in this situation, you must reset all Windows components.
The radical option, a clean install, which accomplishes the task but also deletes all personal data, including programs, games, media, and documents, is the one most users opt for.
You should choose a repair install if you wish to take a less drastic action that will allow you to update your Windows components without harming any of your personal stuff (games, apps, images, papers, etc.). You’ll be able to keep all of your personal information via this process.
If you want to carry out a repair install, go to this document for detailed information on how to do so.


