How to Fix ‘Failed to Authenticate your connection’ Error in Minecraft?
The “Failed to Authenticate Your Connection” error appears when attempting to join a Minecraft server, blocking access to multiplayer gameplay. This error typically points to a bug within the Minecraft server itself and is common on servers like Hypixel, where connectivity issues are more frequent. The solutions provided below will also apply to Hypixel servers.

The error is primarily caused by connectivity glitches on either Minecraft’s servers or an unstable internet connection. A stable and continuous network connection is essential for Minecraft to handle data flow properly, so interruptions on either end can trigger this error.
1. Power Cycle the Internet Router
Before trying anything complicated, restarting your router can often fix this issue. Power cycling clears temporary network errors or IP problems that might be blocking Minecraft’s connection. Just turn off the router, wait a few moments, then turn it back on to refresh your internet connection and get stable access to the server again.
- Unplug your internet router from the wall socket.

Unplugging the power from the wall socket - Hold down the power button on the back of the router for at least 15 seconds.
- Plug the router back in and press the power button to turn it on.
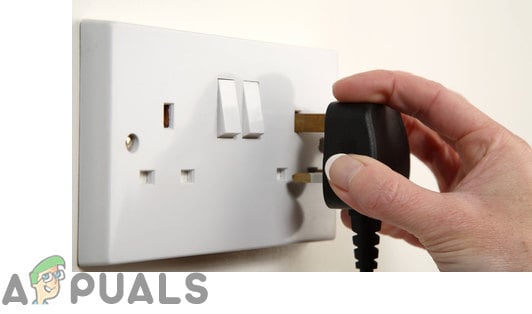
Plugging the power cord back in - Wait for internet access to restore and check if the issue persists.
2. Restart Launcher
Restarting your game launcher can fix minor connection problems. By relaunching Minecraft, it refreshes the link to the server, resolving temporary login or session issues. This simple step can help the server recognize your account correctly.
- Right-click the taskbar and select “Task Manager”, or press Ctrl + Alt + Del and choose “Task Manager”.
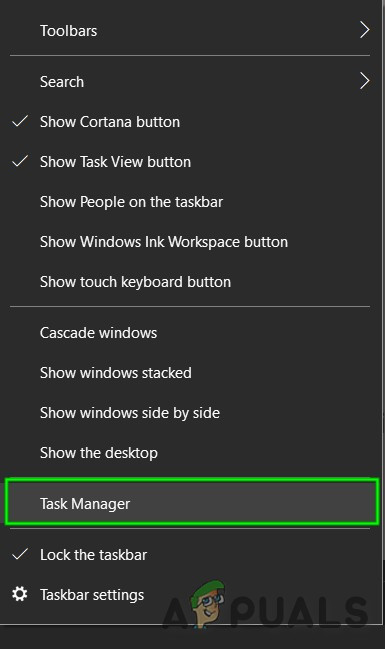
Open Task Manager - Scroll through the “Processes” tab to find anything labeled “Minecraft”.
- Click on the process and choose “End Task” to close it completely.
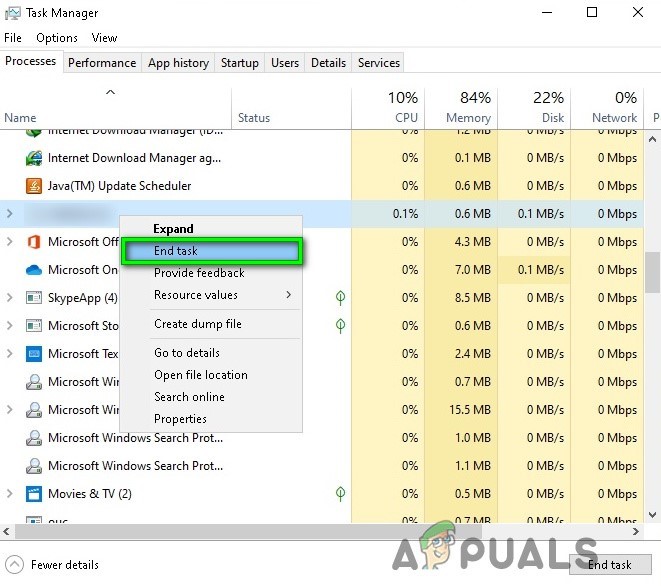
End Task in Task Manager - After closing, wait a moment, then restart the launcher.
- Launch Minecraft, attempt to connect to the server, and check if the issue persists.
3. Use Direct Connect
Sometimes, using Direct Connect instead of the server list can help connect to the server more easily. By entering the server IP directly, you might avoid temporary authentication problems associated with the normal connection method. This approach often bypasses connection issues and provides a straightforward link to the server, offering a quick solution for authentication errors.
- Launch the Minecraft launcher and go to the server list screen.
- Click on “Direct Connect” at the bottom.

Clicking on the “Direct Connect” button inside the launcher - In the direct connect box, enter “stuck.hypixel.net” and click “Connect”.
- Wait for the connection to establish and check if you can connect to the game.
- If connected, it’s likely a bug with the Minecraft launcher causing issues with server list connections.
- You can either reinstall the game or continue using the direct connect feature until the issue is resolved.
4. Log Out and Log Back into the Minecraft Launcher
Sometimes, simply refreshing your login can fix the connection to Minecraft’s servers. Logging out and back into the Minecraft launcher removes old or broken data. This step helps the game check your account again and make a new, stable connection.
- Quit Game in the Minecraft Launcher and close the launcher. Ensure all related processes are ended in the Task Manager.
- Reopen the Minecraft launcher and click on your user’s name at the top right.
- Select Logout, then close the launcher, ensuring no related processes are running.

Log Out of the Minecraft Launcher - Reopen the launcher and log in with your credentials to see if the Hypixel issue is resolved.
- If the issue persists, log out again and open a web browser.
- Go to the Mojang website and select Login.
- Click Forgot Password, then enter your registered Mojang email.

Click on the Forgot Your Password Link on the Mojang Website - Select Request Password Reset and follow the email instructions to reset your password.

Request Password Reset on the Minecraft Website - After resetting your password, launch the Minecraft launcher and log in with the new credentials to check if the ‘failed to authenticate’ issue is resolved.
5. Rejoin the Hypixel Server
Sometimes, leaving and rejoining the Hypixel server can reset your connection and fix temporary access issues.
- Exit the Minecraft launcher, making sure to Quit Game and end all related processes in the Task Manager.
- Reopen the Launcher and choose Single Player.
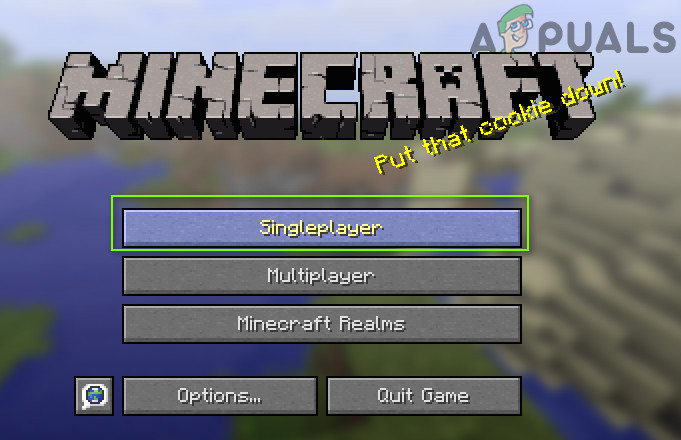
Play a Single Player Game - Play in the single-player world for 2 to 3 minutes, then exit the world.
- Choose Multiplayer and click on Add Server.
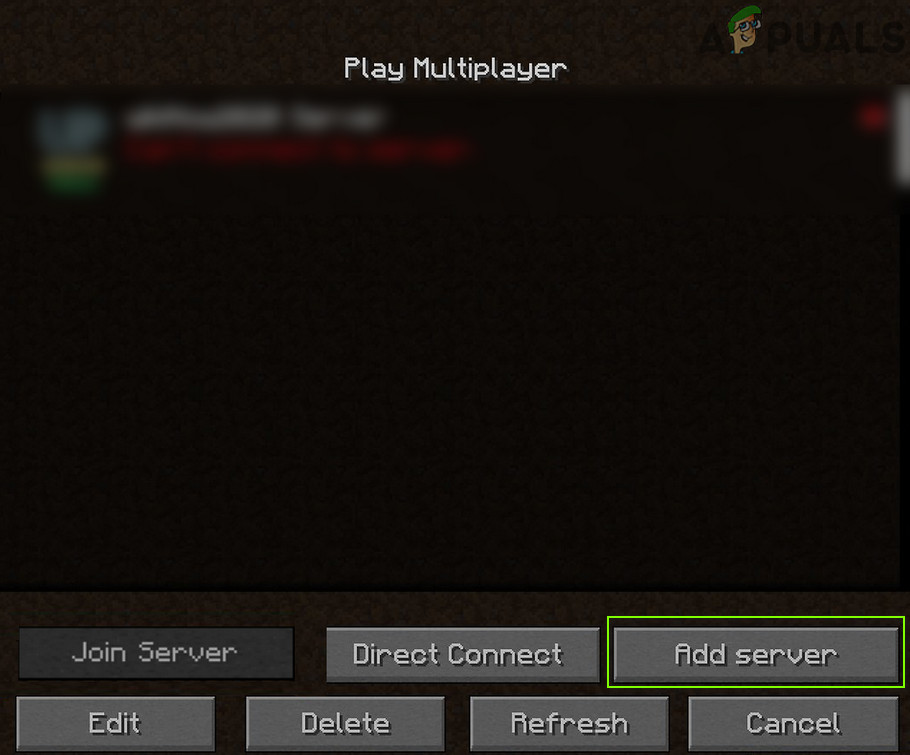
Click on Add Server in Multiplayer Menu of Minecraft - Enter:
mc.hypixel.net
and click Done.
- Check if the launcher is free of the authentication issue.
- If the issue persists, try these addresses one by one in the Server box:
hypixel.net

stuck.hypixel.net
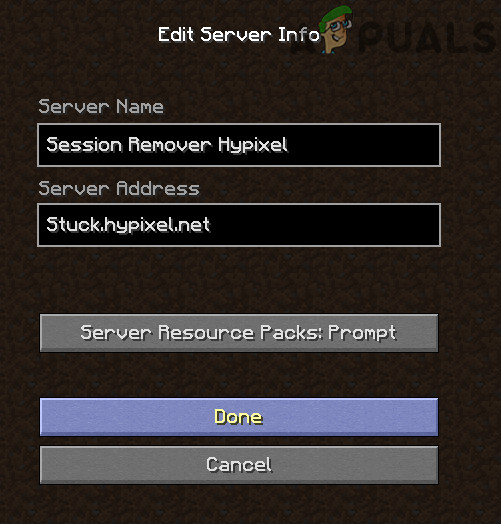
Connect to the Stuck Hypixel Server in Minecraft - If successful, retry with “mc.hypixel.net” in the Server Address box.
- If issues persist, restart your system or internet equipment and try again.
6. Edit the Hosts File
Adjusting the Hosts file can improve connectivity by linking IP addresses directly. This helps Minecraft connect more easily to its servers. By making this change, you can avoid network issues, ensuring the game connects properly without problems.
- Uninstall MCLeaks (or similar applications) via Apps & Features, then run a thorough system scan with an antivirus/antimalware like Malwarebytes.
- Click Windows, type Notepad, right-click it, and select Run as Administrator.
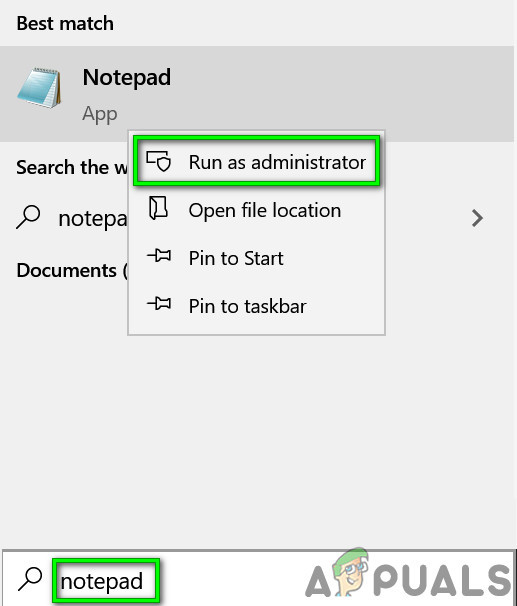
Open Notepad As Administrator - Go to File and choose Open.
- Paste this path in the address bar:
\Windows\System32\drivers\etc
- Change the file type to All Files, then double-click the Hosts file.
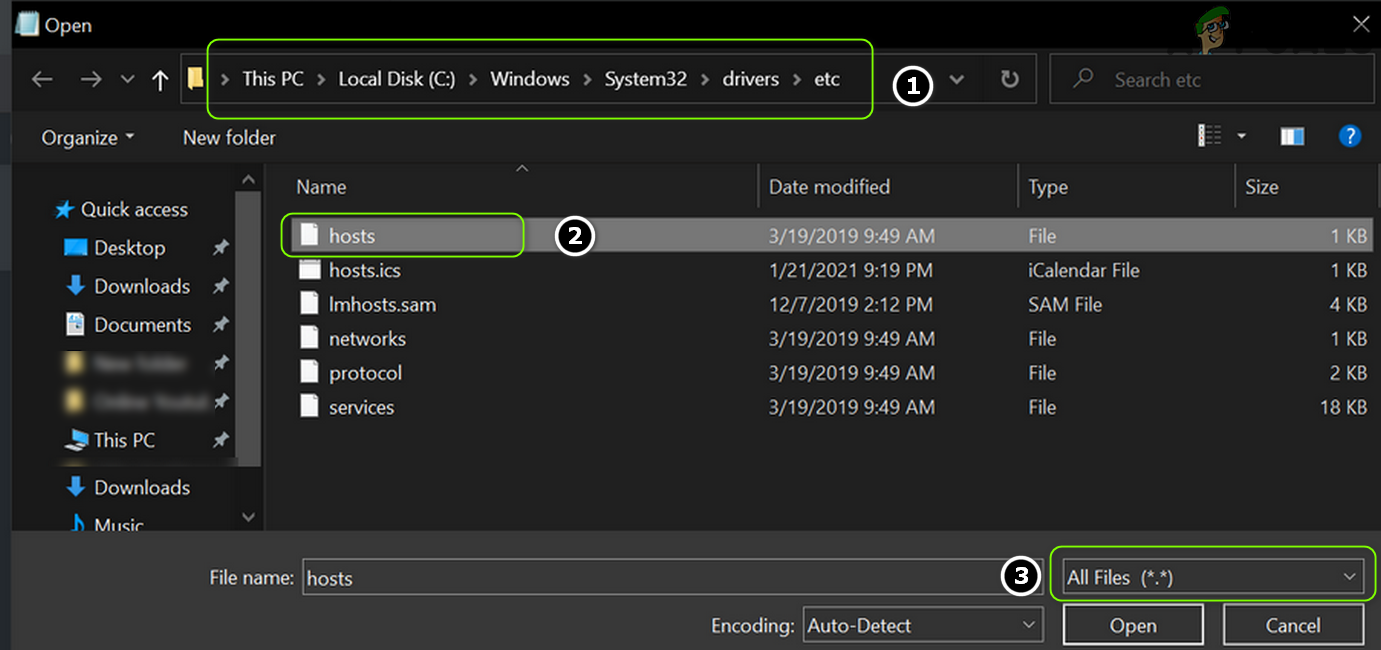
Open the Hosts File in Notepad - In the Edit menu, click Find.
- Search for Mojang and remove all entries related to it.
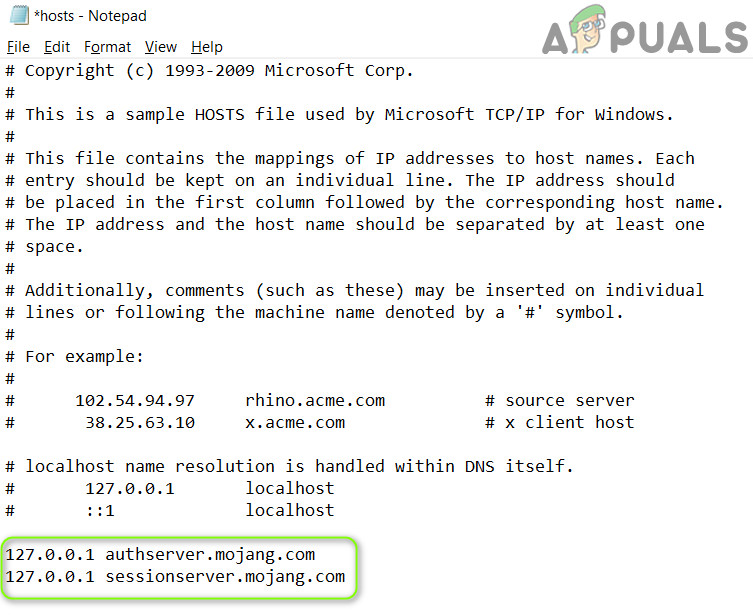
Delete Mojang Entries from the Hosts File - Save the changes and verify if the ‘Hypixel failed to authenticate’ issue is resolved.
7. Allow Minecraft Traffic in the System’s Firewall
Allowing Minecraft through your firewall lets the game’s data move freely between your device and the server, preventing connection blocks and ensuring smooth authentication.
Warning: Proceed at your own risk as editing the firewall settings is a proficient task, and if done incorrectly, you may expose your system/data to threats.
- Quit the Game and exit the Minecraft launcher. Ensure all related processes are closed using the Task Manager.
- Click Windows, type Firewall, and open Windows Defender Firewall with Advanced Security.
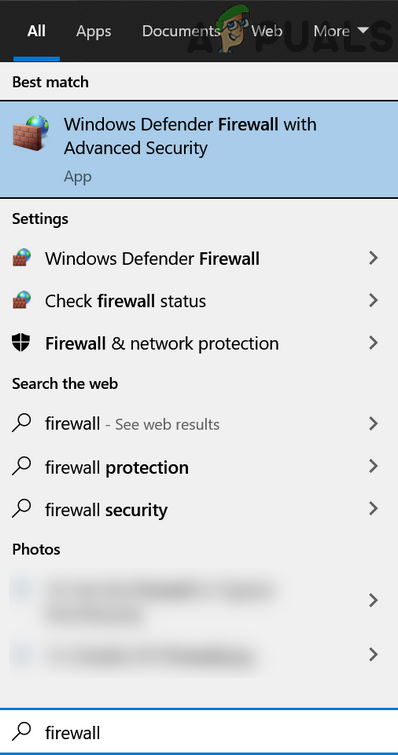
Open Windows Defender Firewall - In the left pane, click Inbound Rules and ensure all Minecraft/Java rules are set to Allow the Connection.
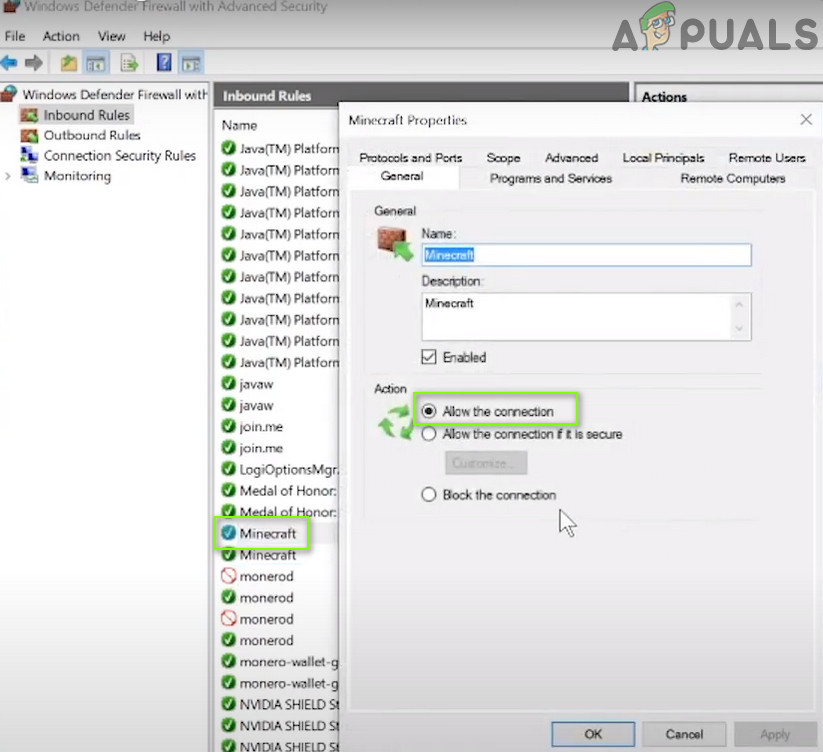
Allow the Minecraft Connection Through the Windows Defender Firewall - Select New Rule in the right pane and choose Program.

Create a New Inbound Rule - Click Next, then Browse in the This Program Path section.
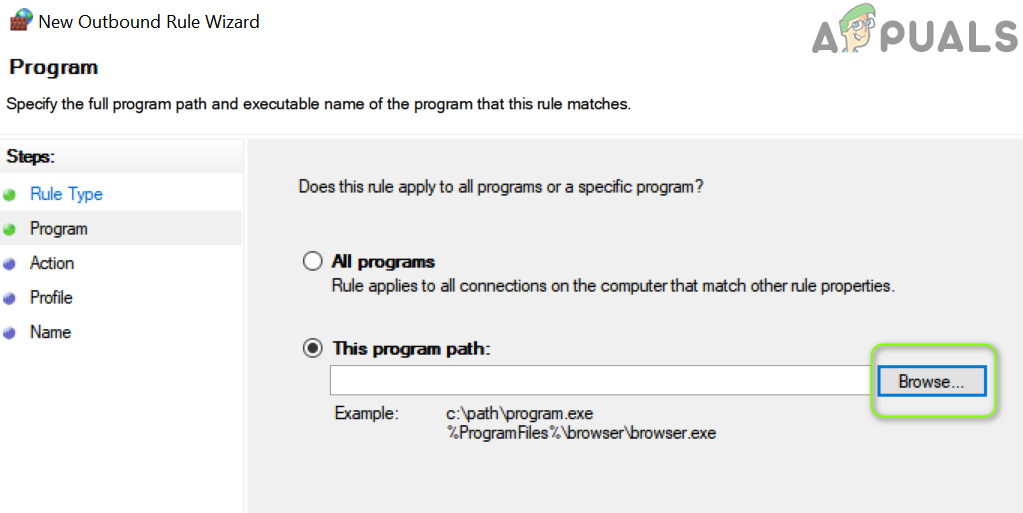
Open Browse and Navigate to The Installation Directory of Minecraft - Navigate to the Minecraft installation directory, typically:
C:\Program Files (x86)\Minecraft\runtime\jre-x64\
- Open the folder with the Java version number and double-click on the Bin folder.
- Double-click javaw.exe and click Next.
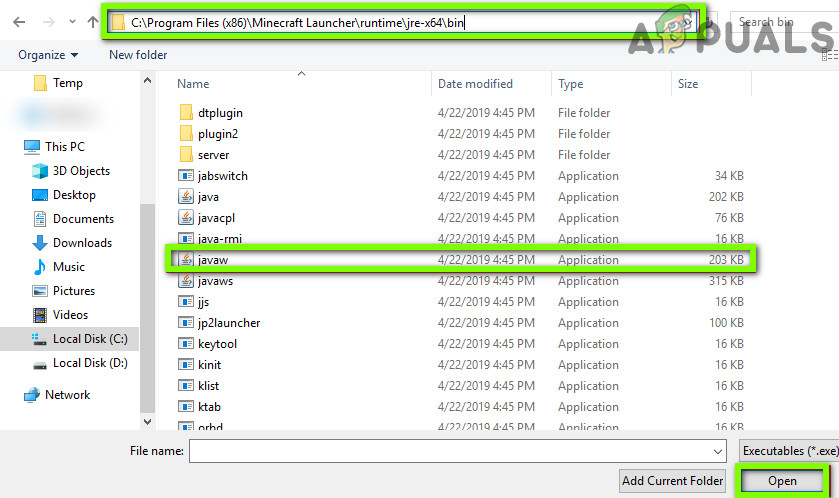
Add Javaw.exe of the Minecraft Installation Directory to the Firewall - Select Allow the Connection and choose all three profiles (Domain, Private, Public).

Select Allow The Connection in New Rule Window - Name the rule and repeat for Java.exe in the Bin folder if needed, adding rules for any separate Java installations.
- Repeat the process in the Outbound Rules tab and check if the issue is resolved.
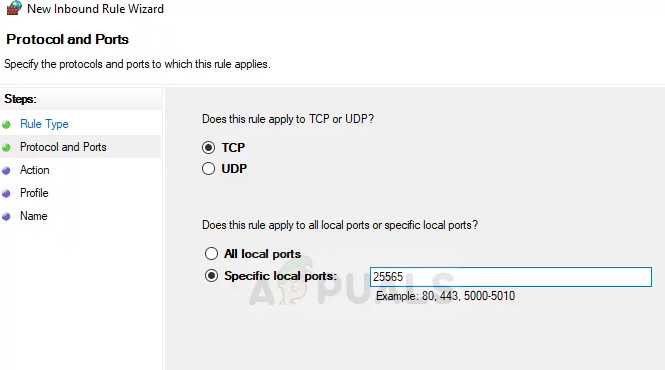
If the issue persists, check if allowing the port 25565 in the Firewall settings (Action>> New Rule>> Port) resolves the issue. If that did not do the trick, ensure the router’s (or corporate) Firewall is not blocking access to port 25565.
