How to Fix “Adobe Fill & Sign Not Working”?
These solutions are tested & working for users facing the problem
 Reviewed by Muhammad Zubyan
Adobe Fill & Sign might suddenly stop working, show a greyed-out toolbar, or display an “operation failed” error when you try to open a PDF. This usually means the tool can’t work with the file because of unsupported content or permission issues.
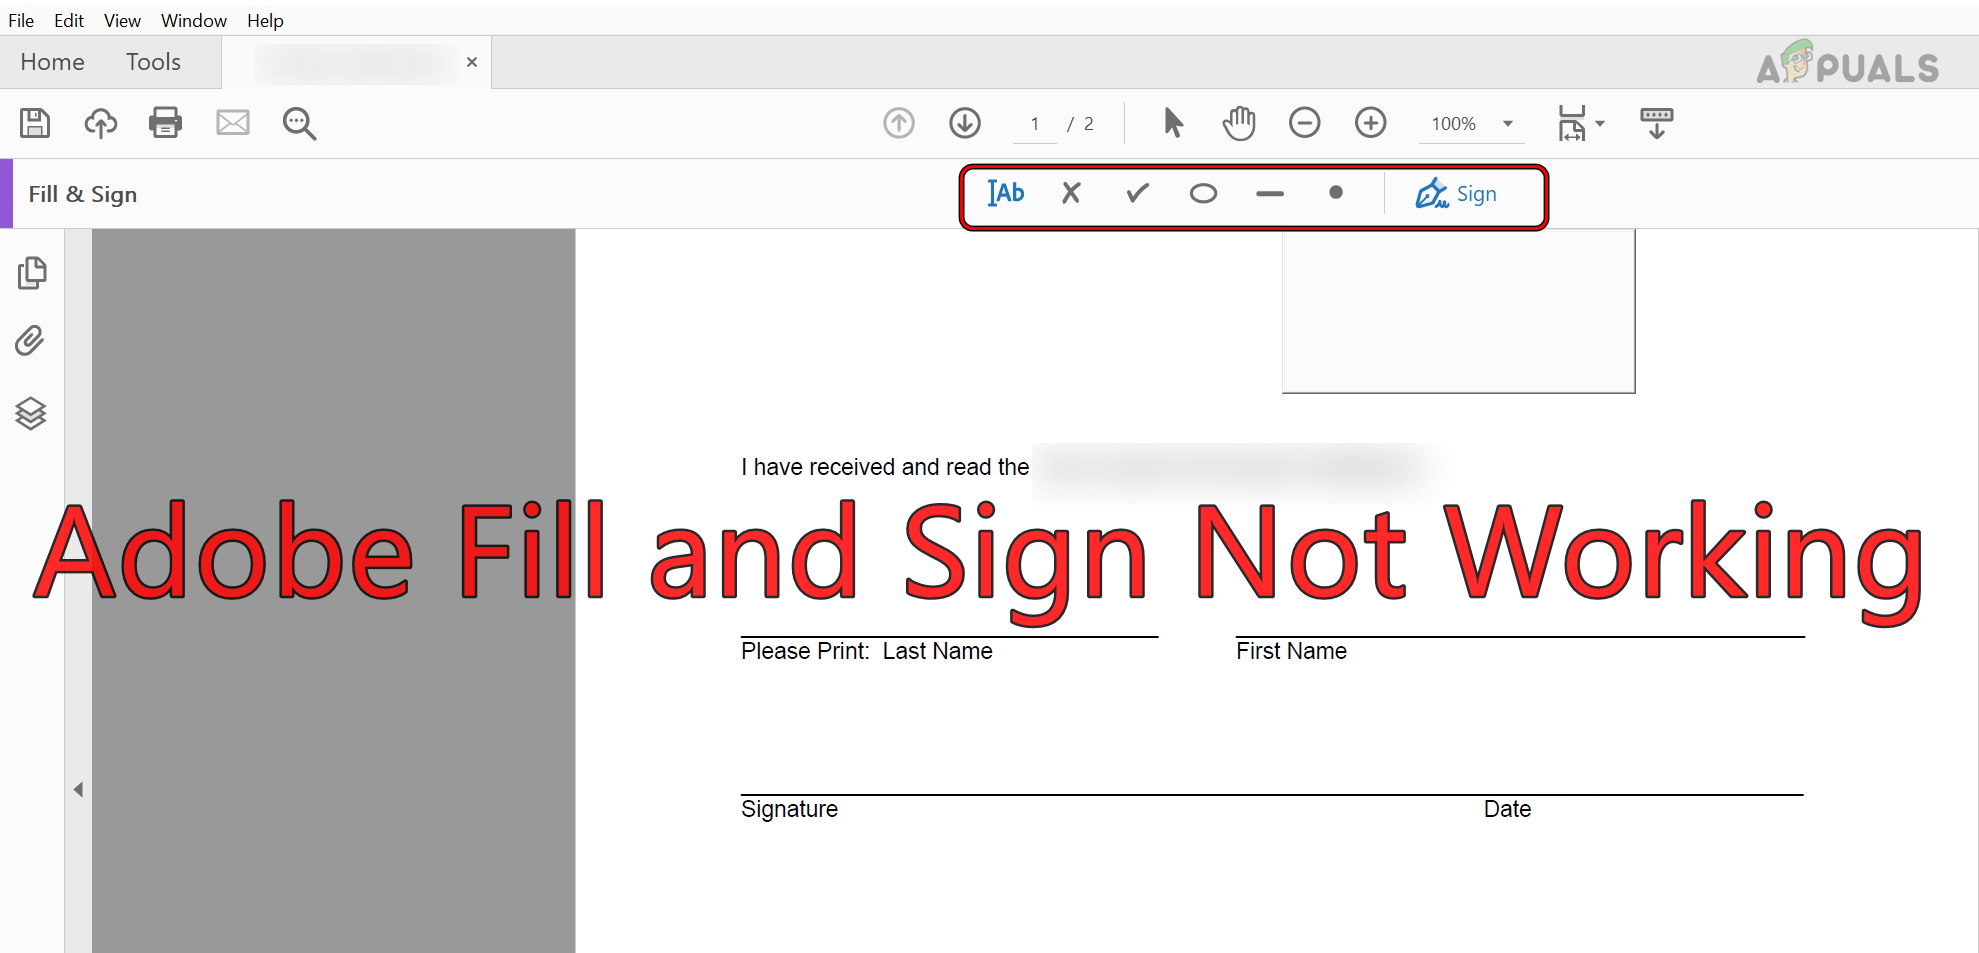
Most of the time, this happens because the PDF doesn’t have fillable form fields or has security settings that prevent editing. Other common reasons include a damaged PDF, using a format like PDF/A that isn’t supported, or having an old version of Adobe Reader.
In this article, we will discuss different ways to solve this error.
Troubleshooting Prerequisites
- Check if the problem happens on just one file or across multiple files. Try creating a new document and use the Fill and Sign feature on it.
- If you’re using Adobe Reader (free version), remember that it doesn’t work with files that have metadata attached.
- If you opened your PDF directly from an email, it will be read-only. Download the file first, then try using Adobe Fill and Sign.
- For a form, the Fill and Sign tool works differently depending on how the form is structured. If the document has active fields, the sign option might only work after you fill in all the required fields (such as clicking a ‘Check Form’ button).
- If you can’t delete a signature from a document, simply right-click (or long-press on mobile) on the signature and then click the Minus sign.
- If you’re trying to use a Digital Signature Certificate (DSC), make sure you have your USB dongle plugged in.
1. Restart Your Device and Router
Adobe Fill and Sign may stop working if your device is experiencing errors, or if the app is having trouble communicating with its servers. Restarting your device and your router (for the online version) can often resolve this.
- Power off your device and router.
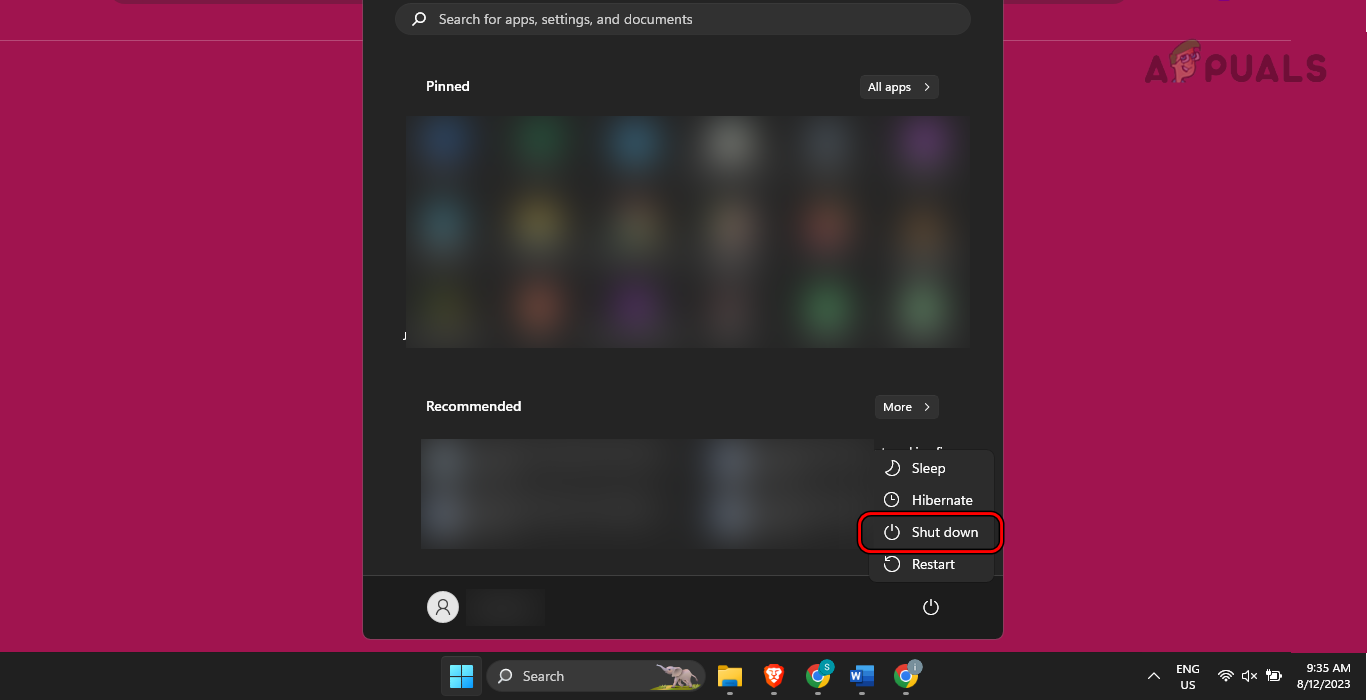
Shut Down Your PC - Wait for a minute, then power on the router first.
- Turn on your device and check if Adobe Fill and Sign is working properly.
2. Sign Out and Back In to Adobe Fill and Sign
You might not be able to use Fill and Sign if your profile isn’t being properly authorized by Adobe. To fix this, sign out of the app and then sign back in with your Adobe credentials. This allows the app to refresh your profile data from Adobe’s servers.
- Open the problematic app (e.g., Adobe Acrobat).
- Click on Help, then select Sign in/Sign Out.
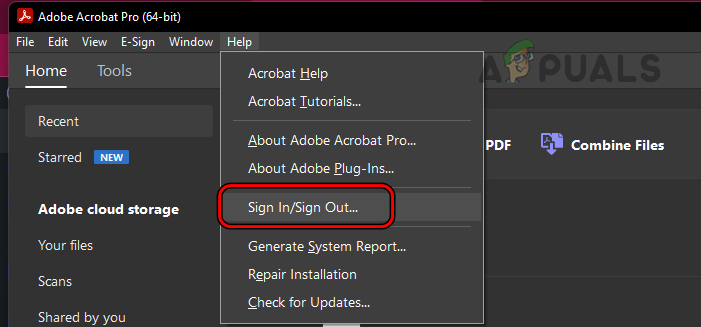
Open Sign in/Sign Out in the Help Menu of Adobe Acrobat - Log out of your account and restart your device.
- Open the app again and sign in. Check if the issue is fixed.
3. Update Your Device’s OS and the Adobe App
If either your operating system or your Adobe app (like Adobe Acrobat) is outdated, Fill and Sign may not work due to compatibility issues. To fix this, update both your operating system and your Adobe app to the latest version.
3.1. On Pc
- Open Adobe Acrobat and go to the Help menu.
- Select Check for Updates and install any updates that are found.
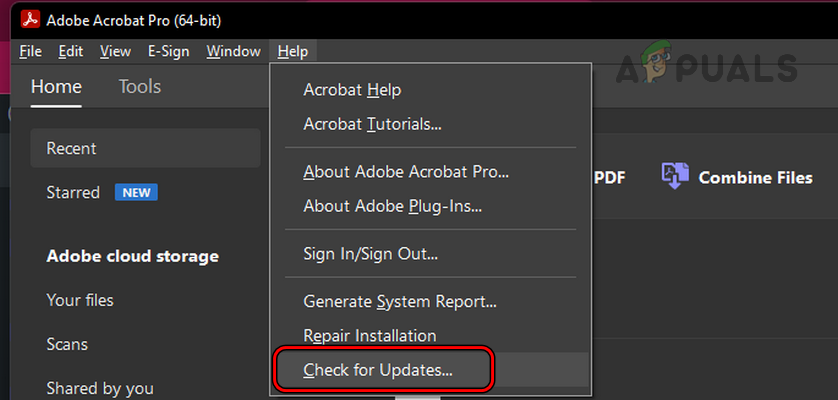
Check for Updates on Adobe Acrobat - Restart your device and see if Fill and Sign is now working.
3.2. On Mac
- Open System Settings and go to General > Software Update.
- Check for updates and install any available updates.
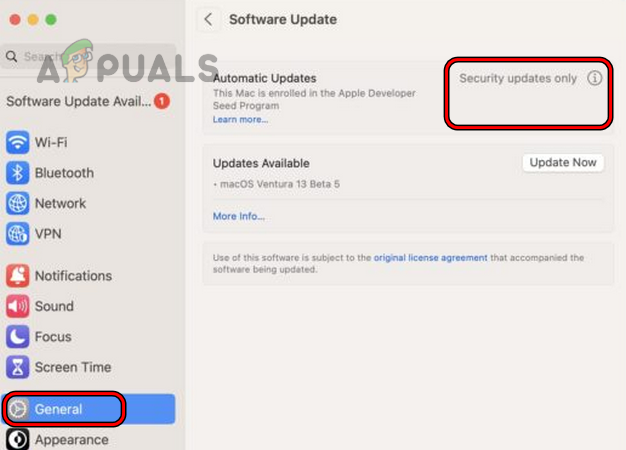
Check for macOS Updates - Restart your Mac and check if Fill and Sign is working again.
4. Use ‘Print to PDF’
If the document has structural issues (like active form fields), the Fill and Sign tool may not work. To fix this, use ‘Print to PDF’ to create a new, flattened copy of the document so you can fill or sign it.
4.1. On Windows
- Fill in any fields you can, then click File.
- Select Print and choose Microsoft Print to PDF as the printer.
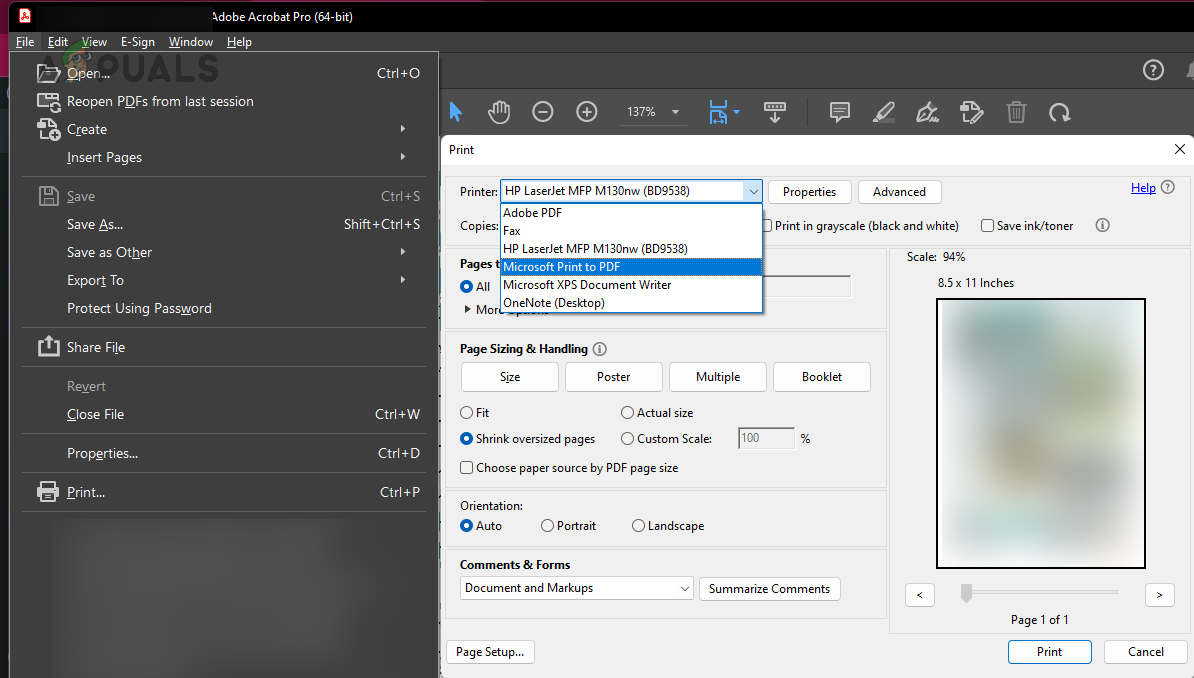
Use Microsoft Print to PDF - Save the file, then open the new document and check if Fill and Sign works.
4.2. On a Mac
- Right-click the PDF and select Open With > Chrome.
- In Chrome, select Print and then choose Print to PDF or Save as PDF.
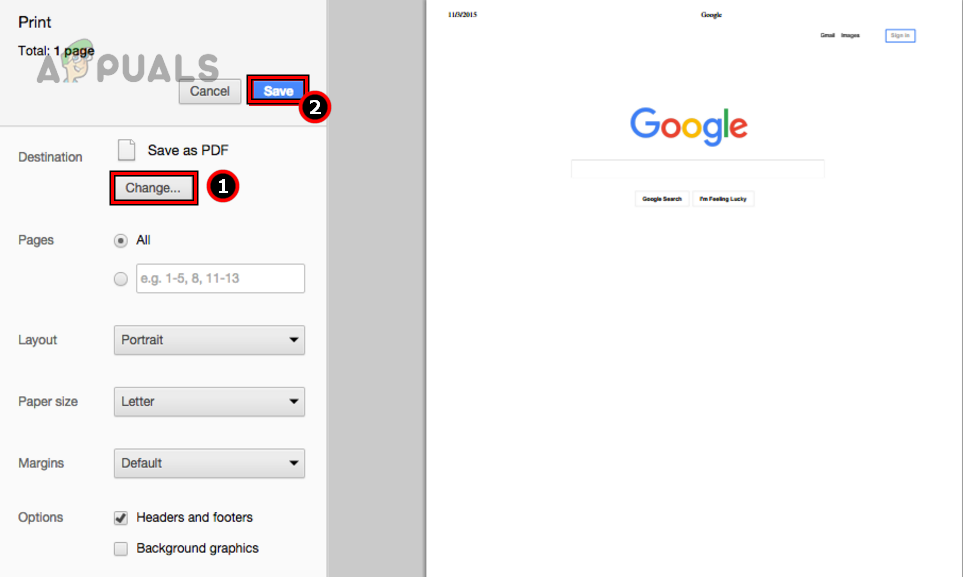
Save the File as a PDF by Using Chrome on a Mac - Save the file, then open it with Adobe Acrobat and test if Fill and Sign works.
If Print to PDF doesn’t work, try converting the file to Word, then print it as a PDF again.
4.3. Export to Postscript
- Open the problematic file in Adobe Acrobat.
- Go to File > Export to > Postscript.
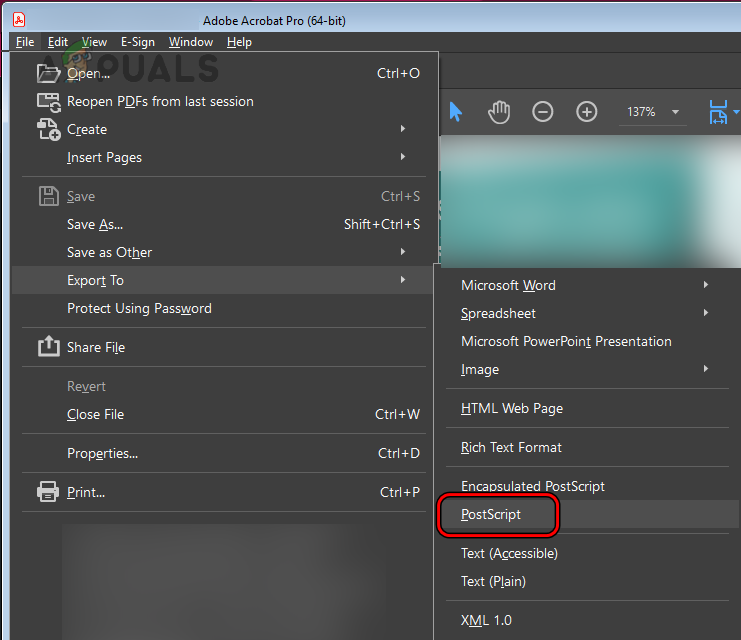
Export the File as a PostScript - Save the file, open it in Adobe Acrobat, and save it as a PDF.
- Open the new PDF and check if Fill and Sign works now.
5. Edit Adobe Product Preferences
Sometimes, certain preferences in the Adobe app can interfere with Fill and Sign. Here’s how to change the relevant settings.
5.1. Disable Modern User Interface
- Open Adobe Acrobat and go to Edit > Preferences > Signatures.
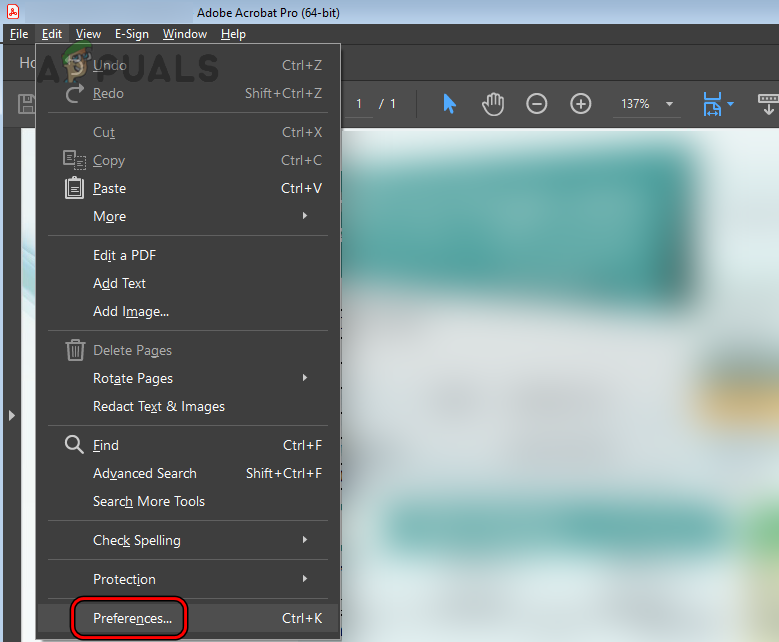
Open Adobe Acrobat Preferences - In the right pane, click More under Creation and Appearance.

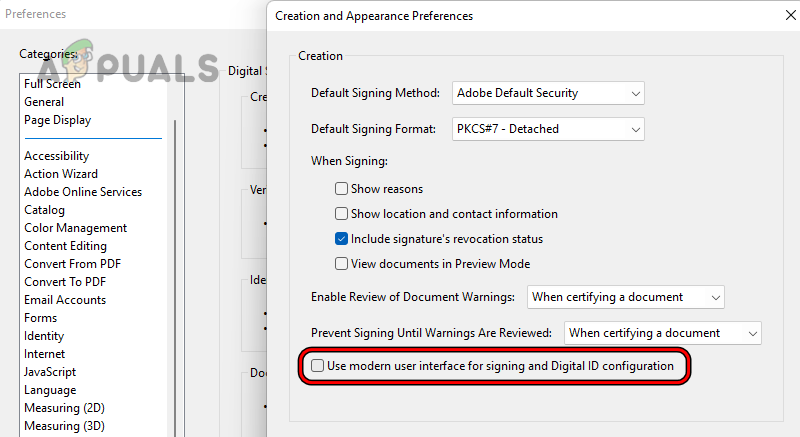
Open More for Creation & Appearance in the Signatures Tab of Adobe Acrobat - Uncheck Use Modern Interface for Signing and Digital ID Configuration.
Uncheck Use Modern Interface for Signing and Digital ID Configuration in the Adobe Acrobat Preferences - Click OK and check if Fill and Sign works.
5.2. Disable Protected Mode at Startup
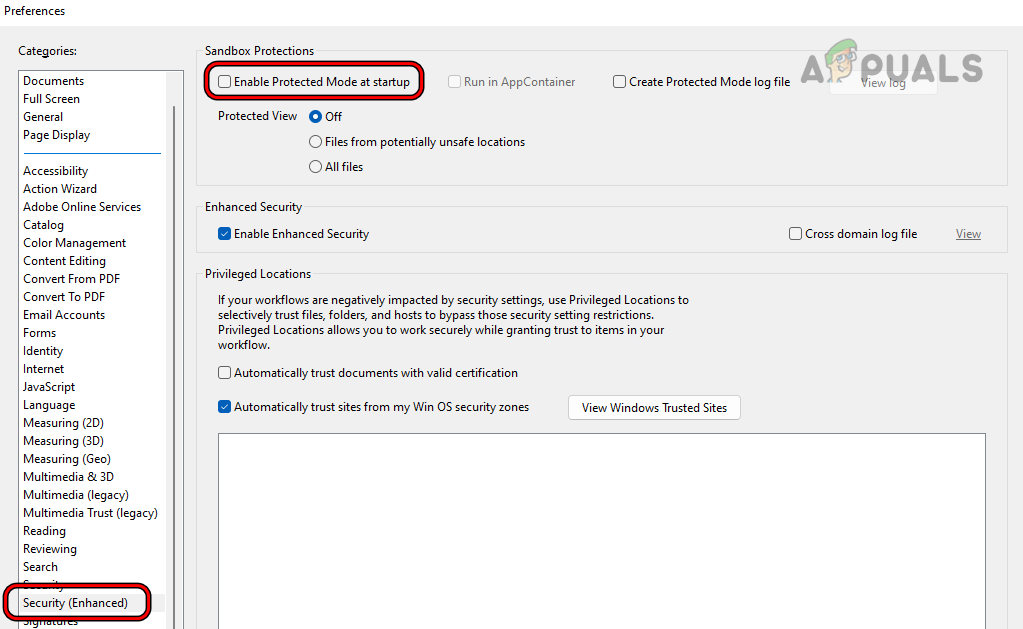
- In Adobe Acrobat Preferences, go to the Security (Enhanced) tab.
- Uncheck Enable Protected Mode at Startup and click OK.
Uncheck Enable Protected Mode at Startup in the Adobe Acrobat Preferences - Restart your computer and see if Fill and Sign works.
5.3. Change Application Language
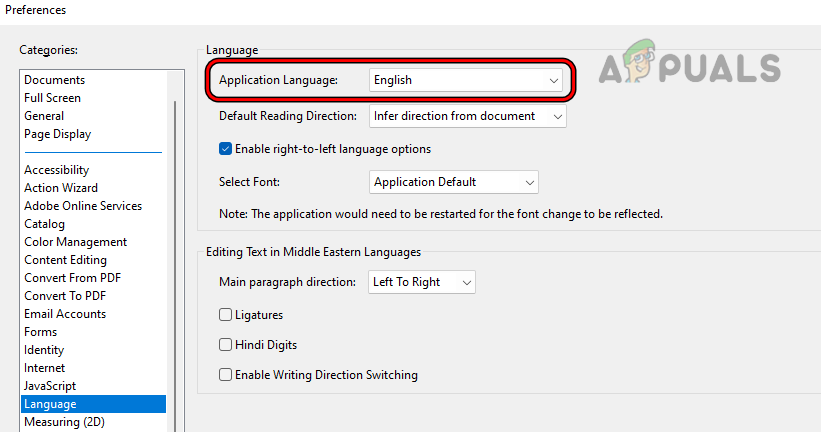
- Open Adobe Acrobat, go to Edit > Preferences > Language.
- Set Application Language to English and click OK.
Change Application Language to English in the Adobe Acrobat Preferences - Restart your system and try Fill and Sign again.
- If it still doesn’t work, change the Application Language to Same as the Operating System and try again.
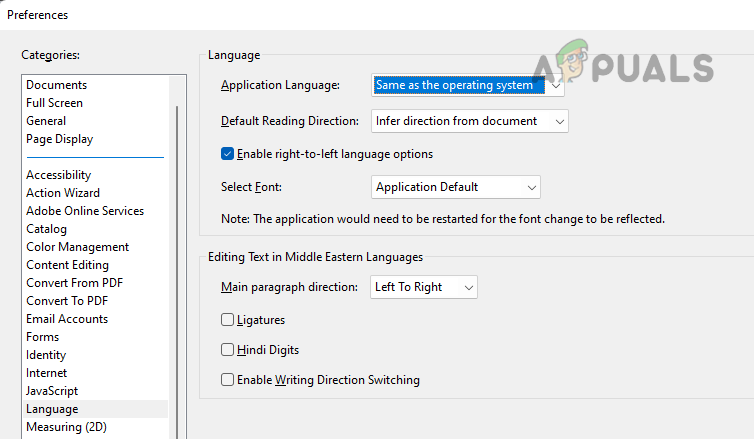
Change Application Language to Same as The Operating System in the Adobe Acrobat Preferences - If none of these help, go to Windows Apps & Features, find Adobe Acrobat, and click Modify. During the setup, make sure English (not English with additional language support) is chosen.
- Restart your system and see if Adobe Fill and Sign works.
5.4. Change Signing Warning Preferences
- Open Adobe Acrobat and go to Edit > Preferences > Signatures.
- Click More under Creation and Appearance.
- Set Enable Review of Documents Warning to Always.
- Set Prevent Signing Until Warnings Are Reviewed to Never.
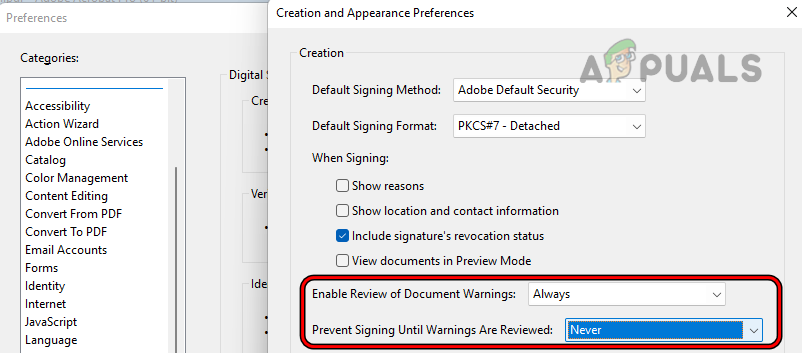
Change Warning Preferences of Adobe Acrobat - Click OK, restart the app, and test Fill and Sign.
5.5. Check Document Security Settings
- Open Adobe Acrobat and click File.
- Select Properties, then go to the Security tab.
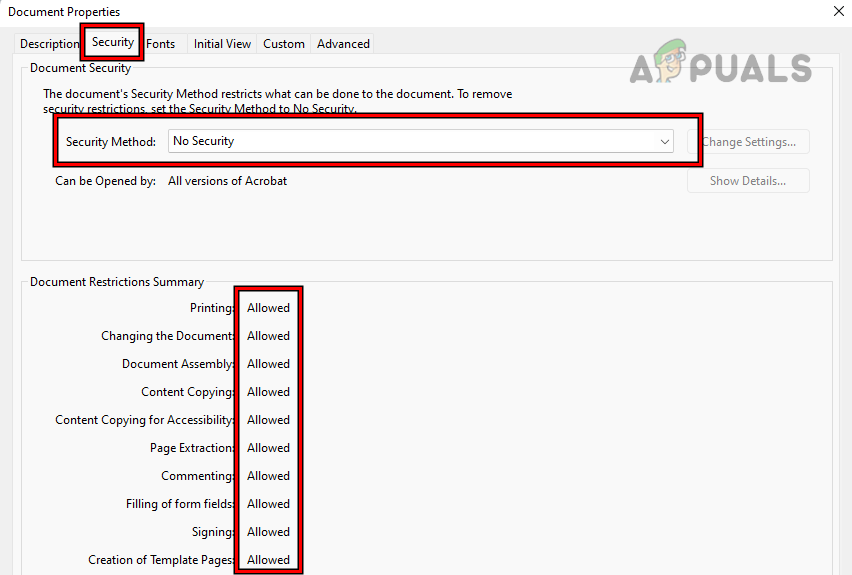
Check the Security of the Document in Adobe Acrobat - Check if signing is allowed or if the document is password protected. If it’s restricted, contact the creator to change the security settings.
5.6. Use the Certificates Tool
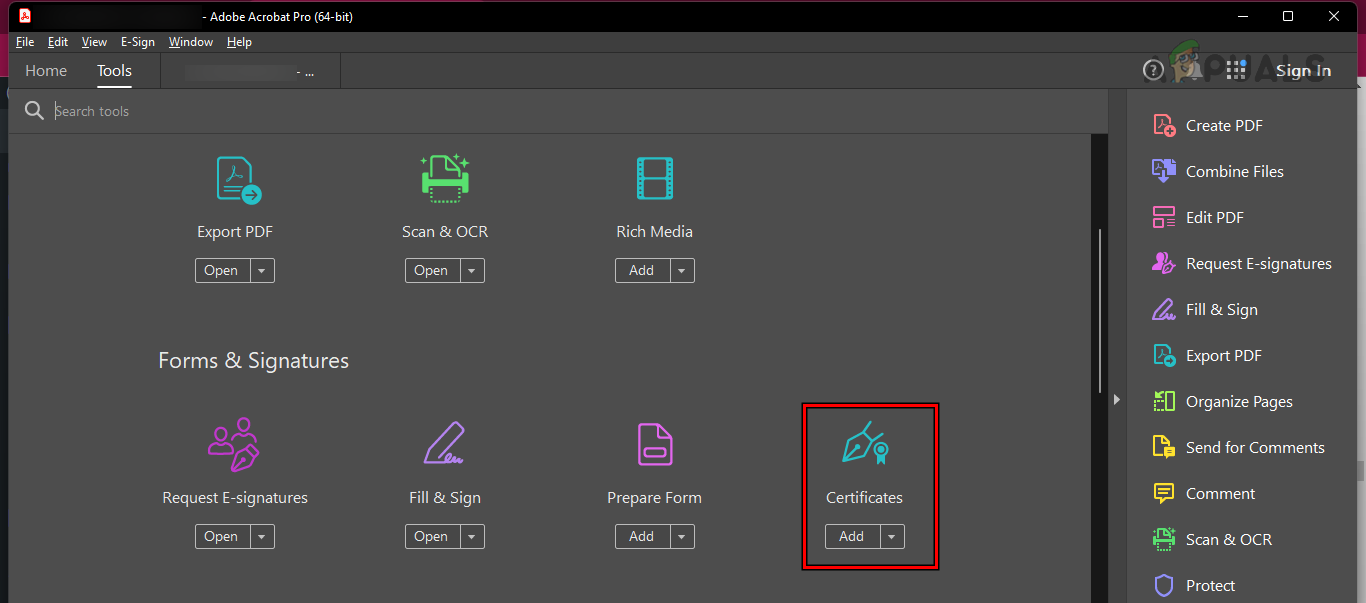
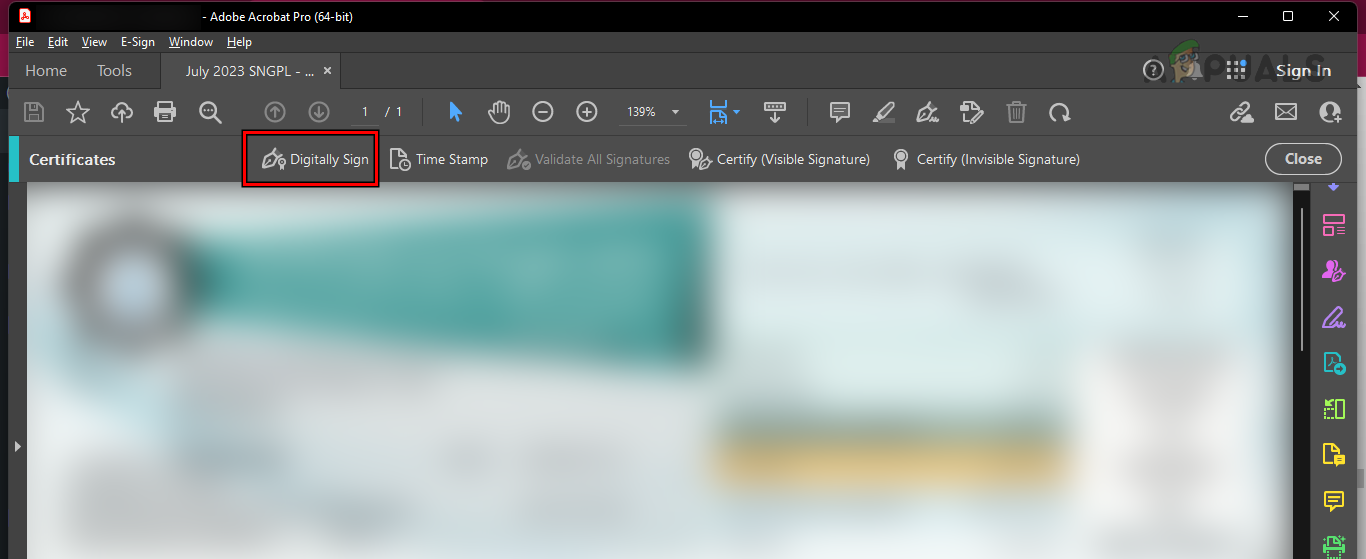
- Open the document in Adobe Acrobat.
- Go to Tools then select Certificates.
Open Certificates in the Adobe Acrobat Tools - Choose Digitally Sign and follow the prompts. Make sure to use the same email address as your Adobe account. You can later change it in Preferences > Identity.
Use Digitally Sign Option in Certificates
5.7. Reset Preferences
- Restart your device. Before launching any Adobe app, in the Run box, go to:
%appdata%\Adobe\Acrobat\DC\
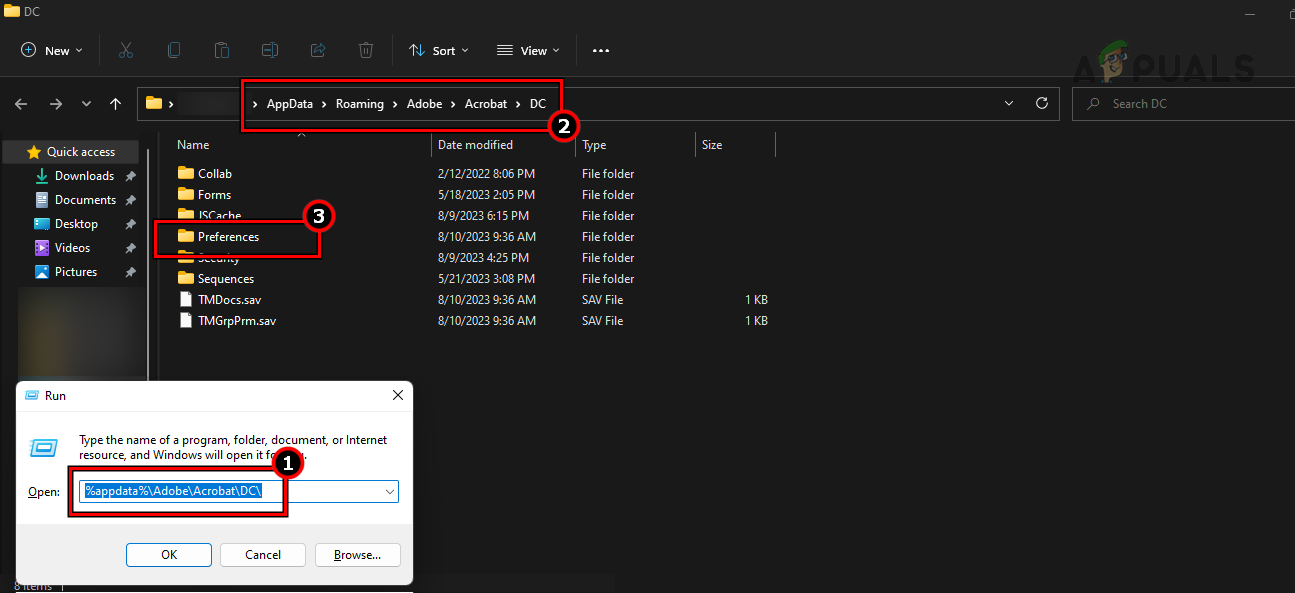
Delete the Preferences Folder in the App Data Directory of Adobe Acrobat - Delete the Preferences folder (you can save a backup first, just in case).
- Restart your computer, open Adobe Acrobat, and check if Fill and Sign now works.
6. Disable or Uninstall Conflicting Applications
Other apps, like your antivirus or firewall, may interfere with Adobe Fill and Sign. Temporarily disabling or removing these apps can identify if they’re causing the issue.
6.1. Disable Security Software
- Find the ESET icon in the system tray and right-click it.
- Select Pause Protection and repeat for Pause Firewall. Then check if Fill and Sign works.
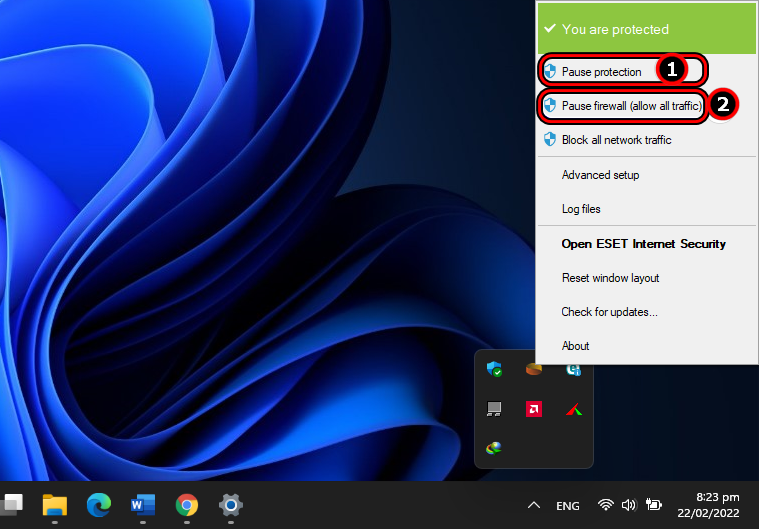
Pause ESET Protection and Firewall
6.2. Uninstall Security Software
- Right-click on Windows and select Apps & Features.
- Find ESET, expand its options, and click Uninstall.
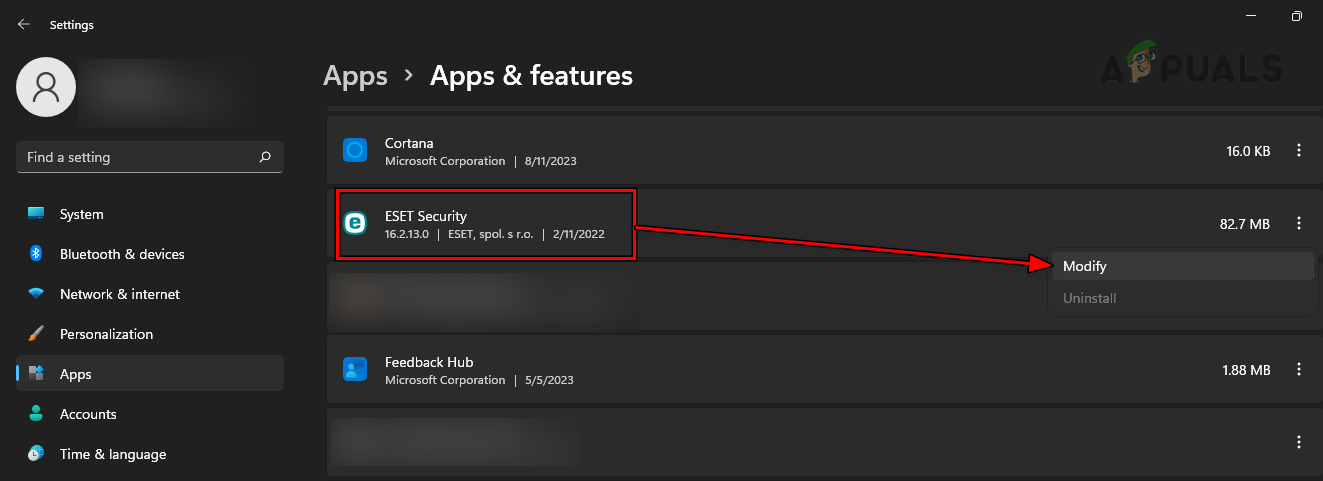
Uninstall ESET on Windows - Follow the instructions to remove it, then restart your PC. Test Fill and Sign.
7. Clear Adobe App Cache
The Adobe app’s cache holds important settings for features like Fill and Sign. If these files become corrupted, the feature may stop working. Clearing the cache can help.
7.1. On Windows
- Restart your computer and, before opening any Adobe app, use the Run box to go to:
%userprofile%\appdata\Local\Adobe\
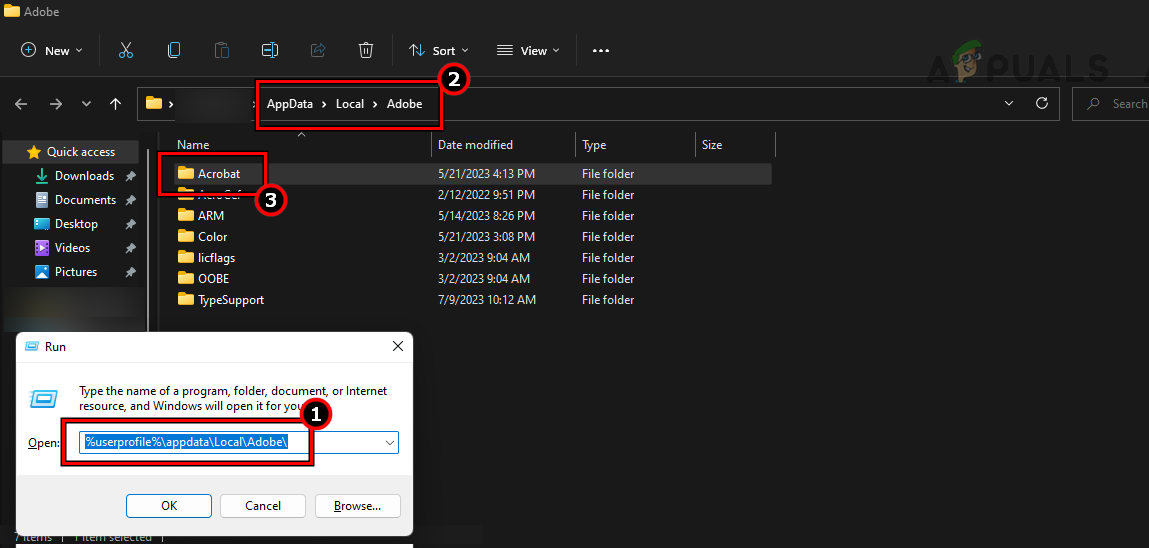
Delete Acrobat Folder from the Local App Data Directory - Delete the Acrobat folder, then go to:
%userprofile%\appdata\LocalLow\Adobe\
- Delete the Acrobat folder, then go to:
\%userprofile%\appdata\Roaming\Adobe\
- Delete the Acrobat folder again and start Adobe Acrobat. These folders will be recreated automatically.
- Test if Fill and Sign now works.
7.2. On a Mac
- Restart your Mac and open Finder.
- Go to:
~/Library/Preferences/
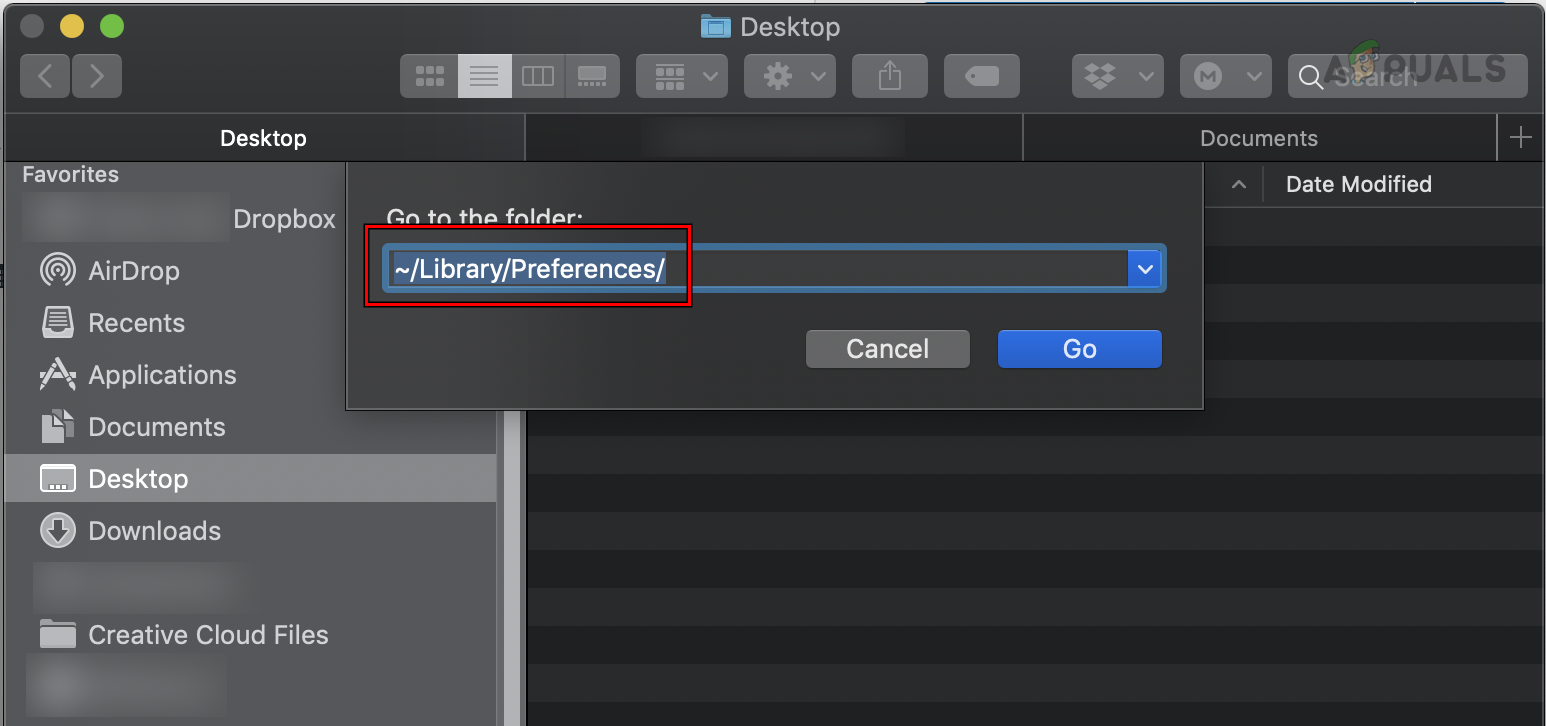
Open the Preferences Directory of the Mac - Delete the following files:
adobe.Reader.plist
com.adobe.Acrobat.plist
- Start the Adobe app and check if you can sign documents now.
8. Use Adobe Document Cloud
If the problem seems related to your local setup, using Adobe Document Cloud online can sometimes let you use Fill and Sign, though with some limitations.
8.1. Use Fill and Sign Online
- Open a web browser and go to Adobe Document Cloud.
- Log in and open Fill and Sign to see if you can add text or a signature.
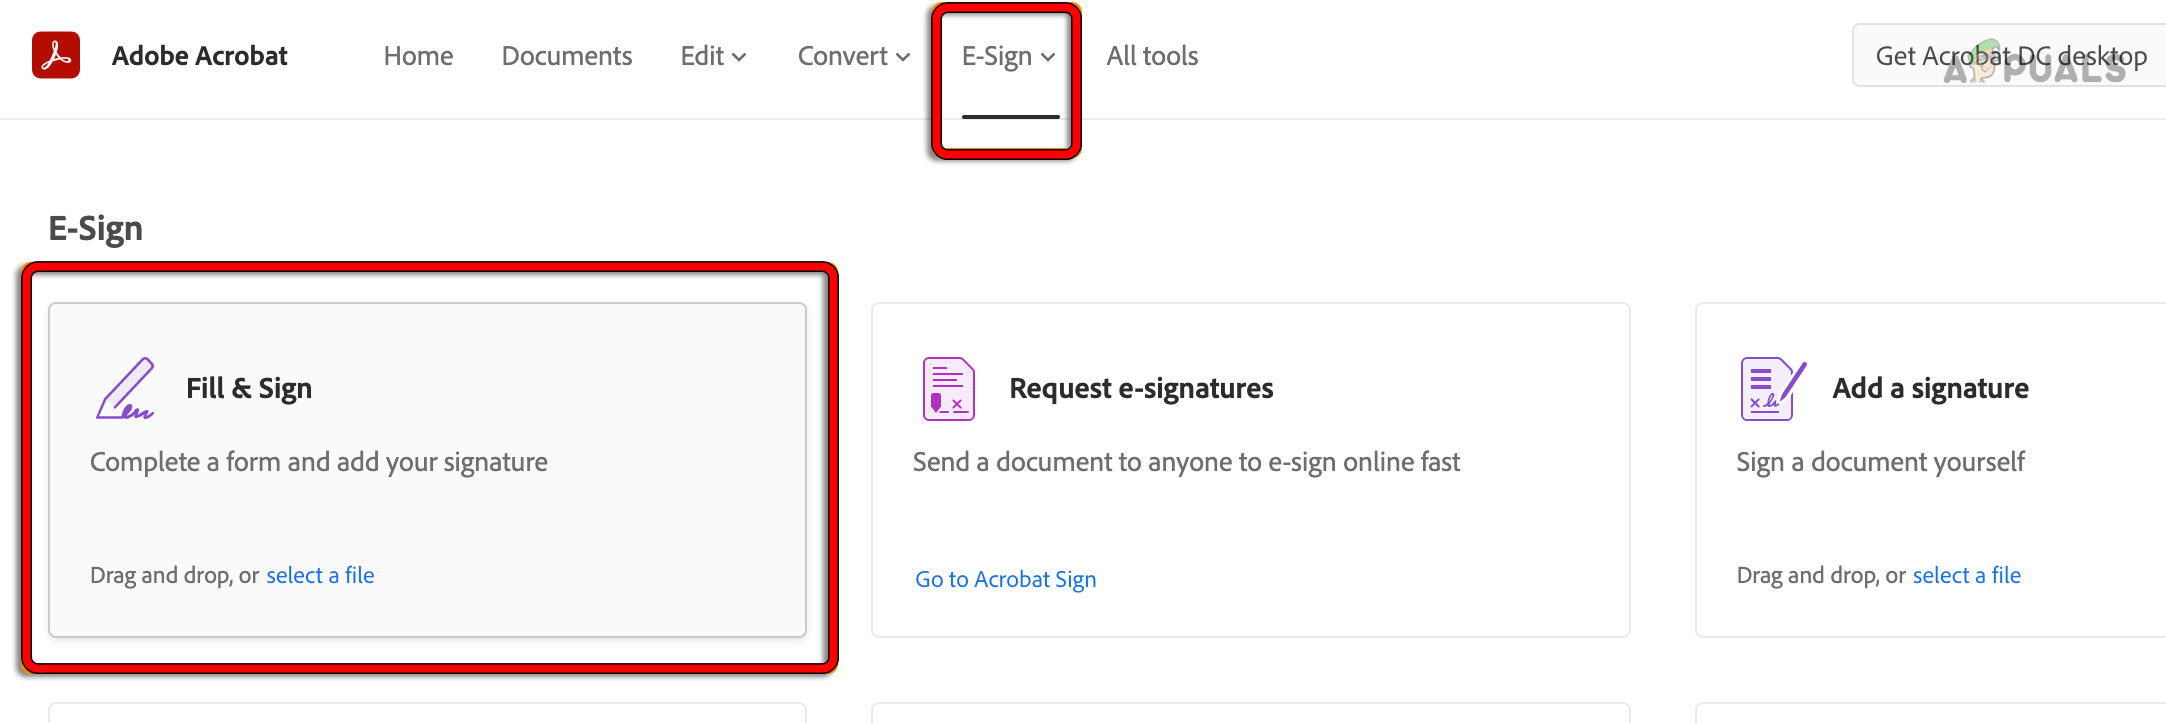
Use Adobe Fill and Sign in the Adobe Document Cloud - If it still doesn’t work, try a different browser or a different network to see if that helps.
8.2. Manage Your Online Signatures
- Go to Adobe Document Cloud, then head to Adobe Online Services > E-Signing Settings.
- Click Personal Preferences and choose My Signatures.

Remove Signatures in the Adobe Document Cloud - Change or remove signatures as needed. If you accidentally created a blank signature, delete it as well.
9. Reinstall the Adobe App
If key parts of the Adobe app are corrupted, Fill and Sign may not work until you reinstall the program.
9.1. Uninstall in Windows Settings
- Go to Apps & Features in Windows.
- Find Adobe Acrobat, expand its options, and click Uninstall.
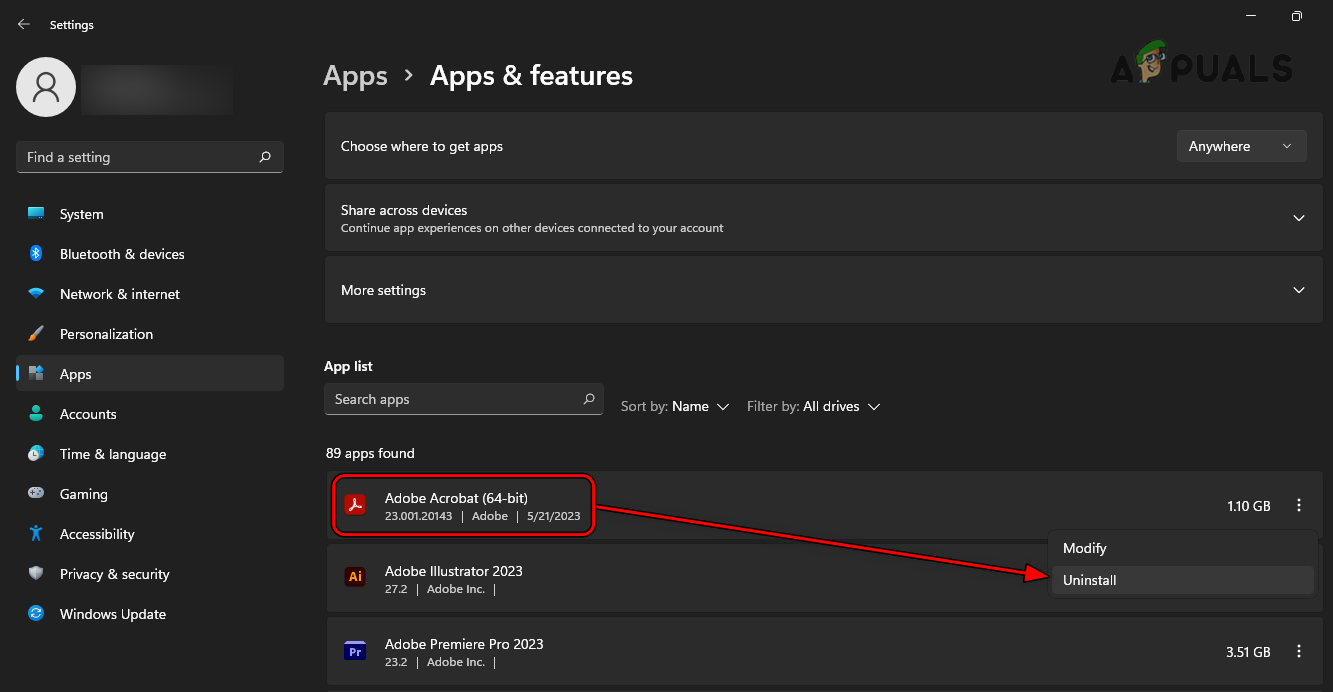
Uninstall Adobe Acrobat on Windows - Follow the prompts to remove Acrobat, restart your computer, and then reinstall Adobe Acrobat.
- Open the app and check if Fill and Sign works now.
9.2. Uninstall Using the Official AcroCleaner Tool
- If issues persist, uninstall Adobe Acrobat using the official AcroCleaner tool.
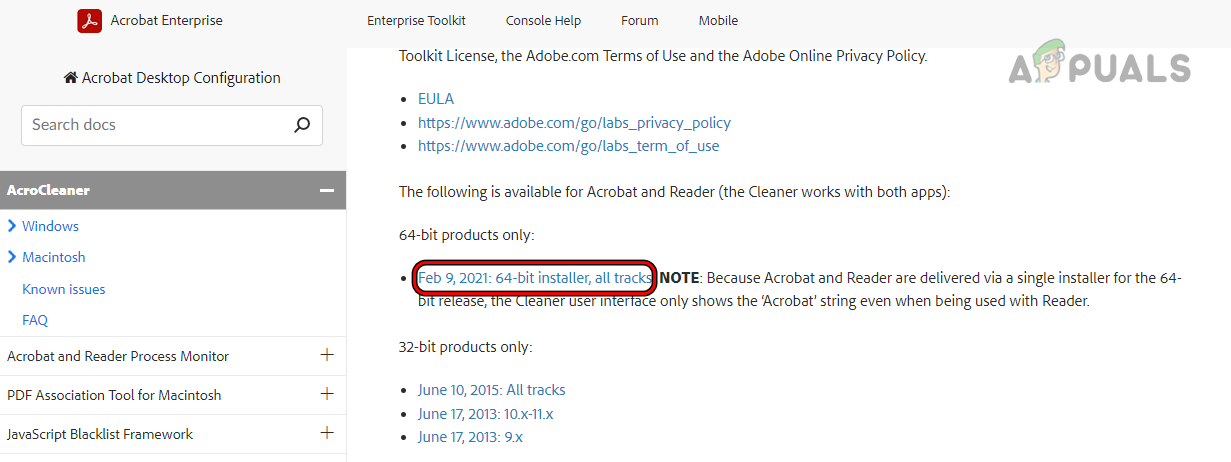
Download Adobe AcroCleaner - Restart your PC and reinstall the application.
- Launch it and check whether Fill and Sign is working.
9.3. Install the 32-bit Version of Adobe
- If needed, uninstall the current version of Adobe using any of the steps above.
- Download and install the 32-bit version of Adobe Acrobat.
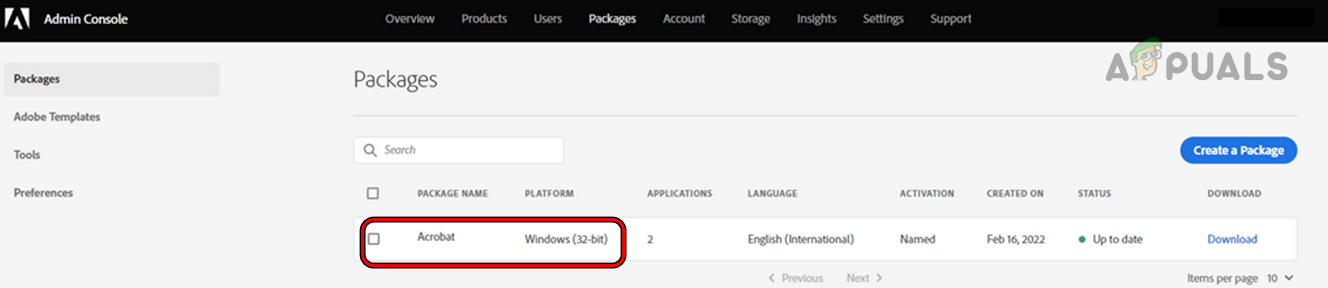
Download Adobe Acrobat 32-bit Version - Open it and see if the problem is gone.
- If you’re still having trouble, try uninstalling this version and installing an older version of Acrobat to see if that works.
If nothing works, try resetting or reinstalling your device’s operating system. If the problem remains, contact Adobe Support for help—they may need to remove and re-add your profile for you. Meanwhile, you might want to try a different Fill and Sign app as an alternative.
Reviewed by Muhammad Zubyan


