How to Add the Cast Icon to the Toolbar in Microsoft Edge?
The Cast icon in Microsoft Edge lets you stream what’s on your browser to devices like smart TVs or Chromecast. You can find this feature in the “More tools” menu. Just click “Cast media to device” and you’ll see the option to pin the Cast icon to your toolbar.
If you’re using Microsoft 365, your IT administrator can set a rule in the Admin Center to always show the Cast icon in the Edge toolbar. Keep in mind, the Cast icon might not show up by default—you may need to turn it on yourself or ask an admin to set it up. Also, some people have noticed the Cast icon doesn’t appear on certain websites, like YouTube, when using Edge.
1. Use the Browser Settings
Most customization options for Microsoft Edge can be found in the browser’s settings, including adding the Cast icon to the toolbar. Unlike some options, this one requires a few extra steps. The option to add the Cast icon only appears after you search for available devices. Once you do, you can right-click on the icon and select the option to pin it to the toolbar.
- Open the Microsoft Edge browser by double-clicking its shortcut or searching for it in the Windows search bar.
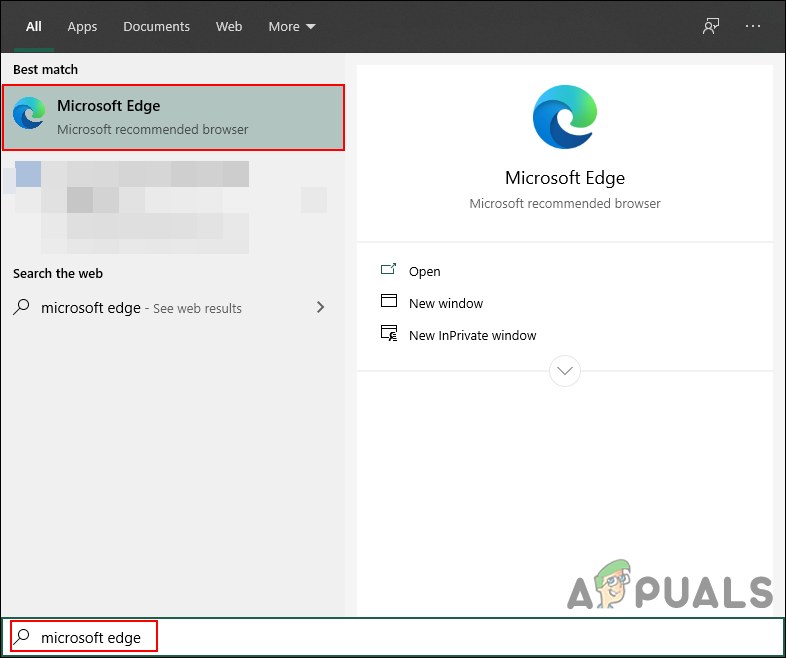
Opening Microsoft Edge - Click the Settings and more (Alt+F) button at the top right corner. Go to More tools in the menu, then click Cast media to device.
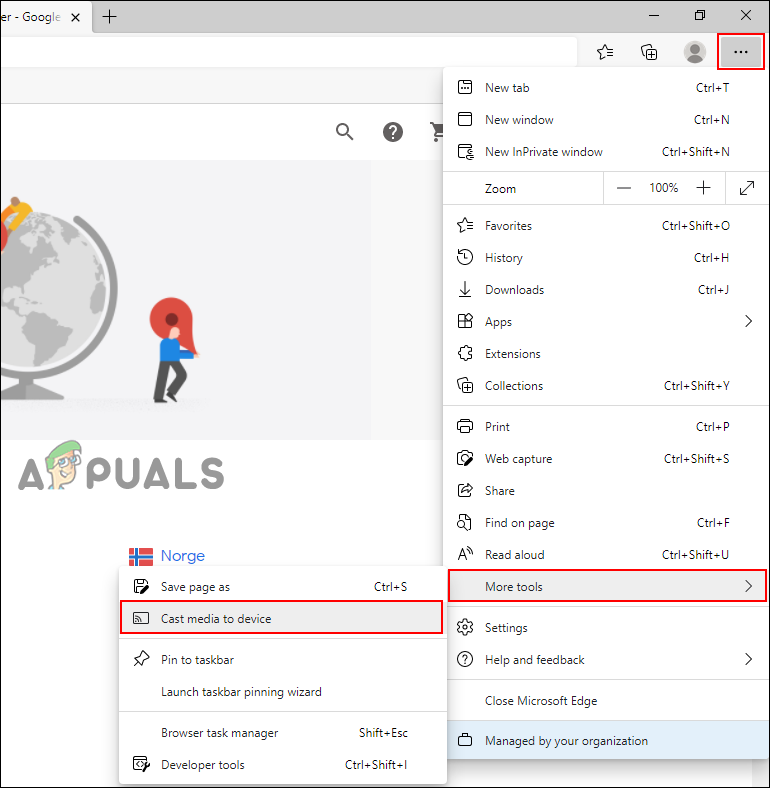
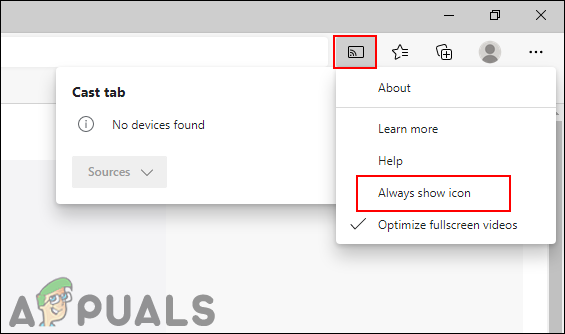
Opening Cast feature in Microsoft Edge - The Cast icon will appear in the toolbar and Edge will begin searching for compatible devices. Right-click the icon and choose Always show icon.
Pinning Cast icon to toolbar - The Cast icon will now remain in the Microsoft Edge toolbar for easy access.
2. Use the Registry Editor
You can also use the Registry Editor to add the Cast icon to the Edge toolbar. This method is usually intended for administrators, because standard user accounts can’t access the Registry Editor without permission. Using this method, you can prevent other users from changing this setting via the browser. If you enable the Cast icon from the Registry, it will stay in the toolbar until you disable it again through the Registry.
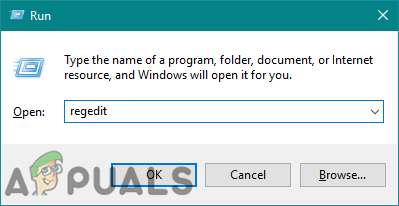
- Press Windows + R to open the Run dialog. Type “regedit” and press Enter to open the Registry Editor. If prompted by UAC (User Account Control), click Yes.
Opening the Registry Editor - It’s a good idea to back up the Registry before making changes. Go to the File menu, select Export, choose where to save your backup, enter a name, and click Save.
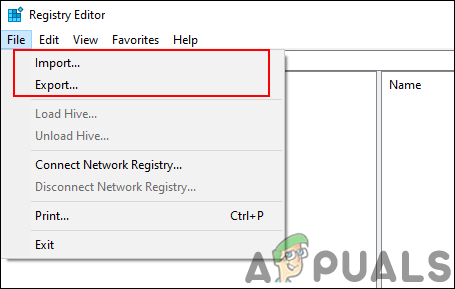
Creating a registry backup Note: To restore your backup, go to File > Import and select your saved file.
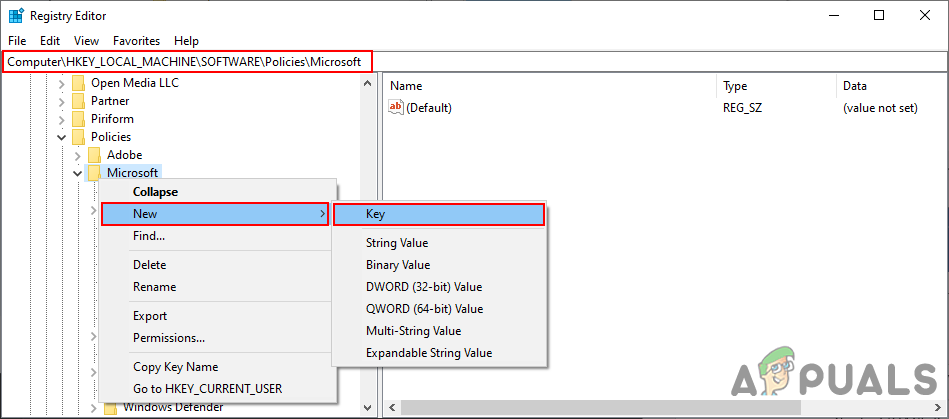
- In Registry Editor, navigate to this location:
HKEY_LOCAL_MACHINE\SOFTWARE\Policies\Microsoft\Edge
- If the Edge key doesn’t exist, right-click on the Microsoft key, select New > Key, and name it “Edge“.
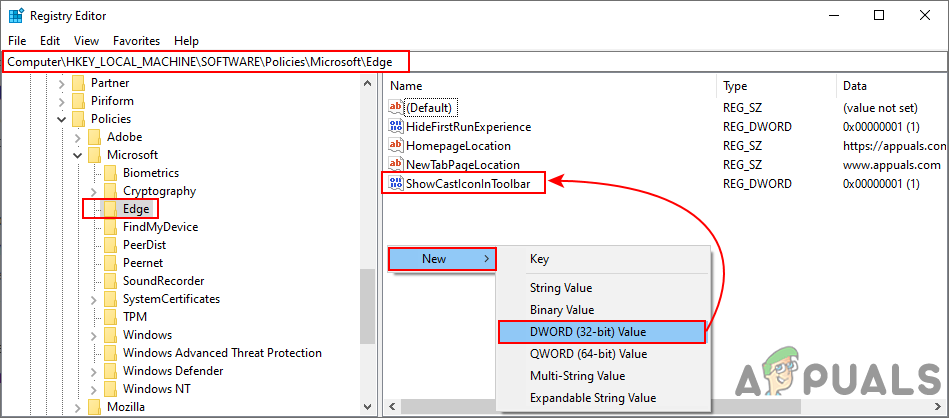
Creating the missing Edge key - Select the Edge key. In the right pane, right-click and select New > DWORD (32-bit) Value. Name it “ShowCastIconInToolbar“.
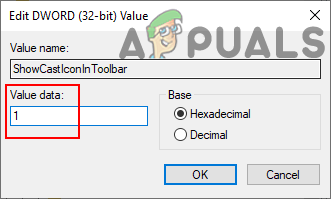
Creating a new value - Double-click on ShowCastIconInToolbar. In the dialog box that appears, set the value data to 1 to add the Cast icon, or set it to 0 to remove it.
Changing the value data - If the changes don’t appear right away in Edge, restart your computer for the settings to take effect.
- To undo this, simply delete the ShowCastIconInToolbar value from the Registry Editor.
3. Use the Local Group Policy Editor
This method works similarly to the Registry Editor method but is only available on Windows Pro, Enterprise, or Education editions (the Local Group Policy Editor isn’t available in Windows Home). Also, some systems may have outdated policy files for Microsoft Edge. The new Chromium-based Edge browser requires up-to-date policy files to configure these settings.
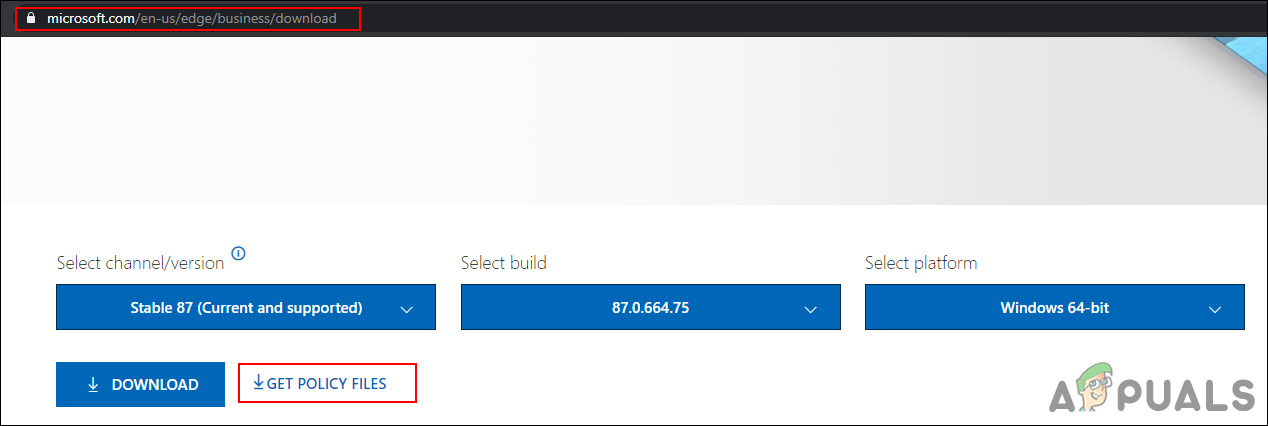
- Open any browser and navigate to the official Microsoft website for Edge enterprise downloads. Choose the version details for your Microsoft Edge and click the GET POLICY FILES button.
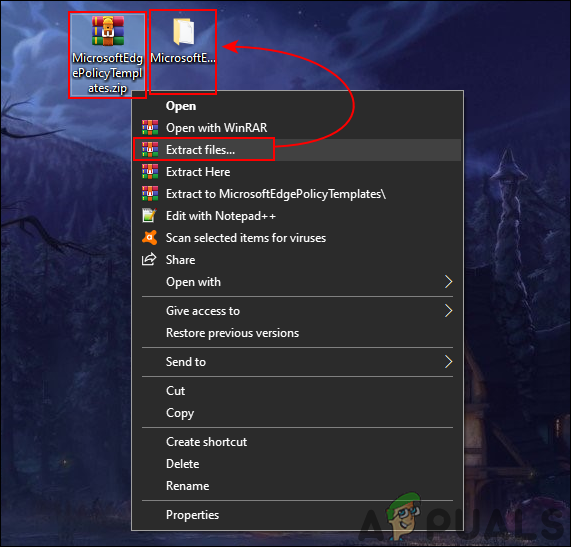
Downloading the policy files - Extract the downloaded .zip file using WinRAR or a similar tool.
Extracting the zip file - Open the extracted folder and go to the “MicrosoftEdgePolicyTemplates\windows\admx” folder. Copy the “msedge.admx” and the appropriate “msedge.adml” language file, then paste them into the “C:\Windows\PolicyDefinitions” folder.
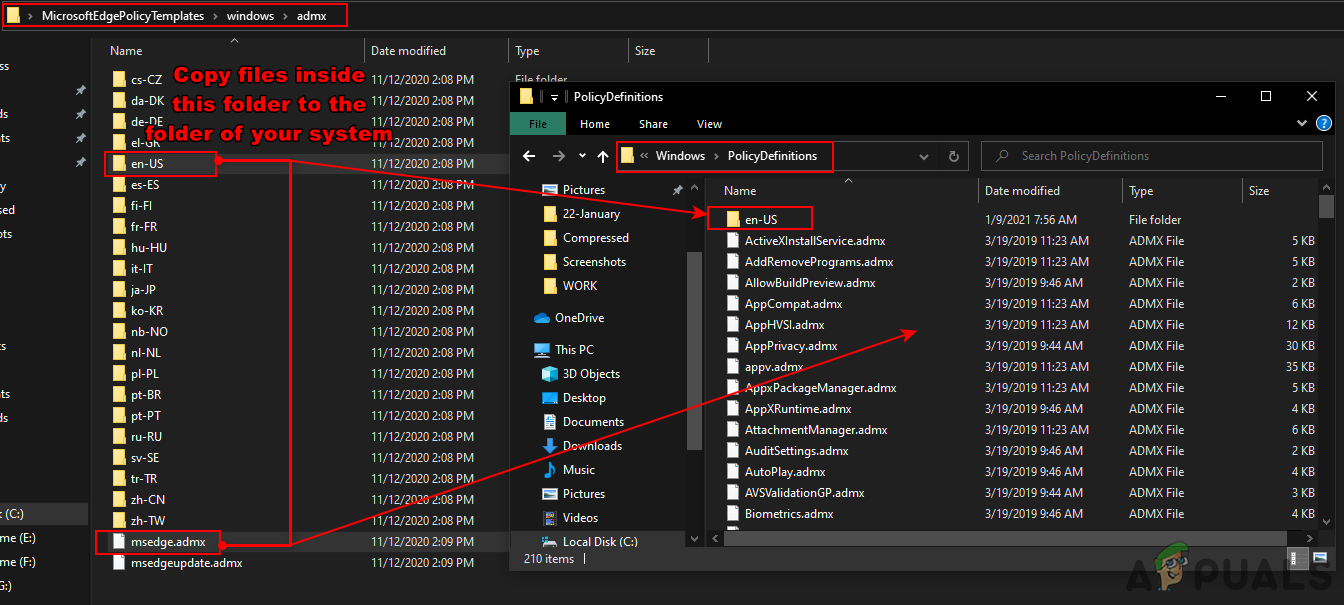
Copying the latest policy files Note: You’ll find the language file (ADML) in the correct language folder inside the extracted files.
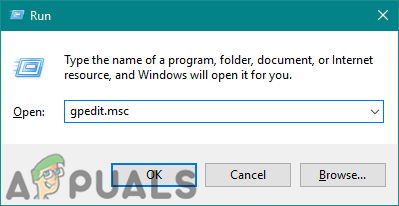
- Press Windows + R, type “gpedit.msc“, and press Enter to open the Local Group Policy Editor.
Opening the Group Policy Editor - Navigate to:
Computer Configuration\ Administrative Templates\ Microsoft Edge\ Cast\
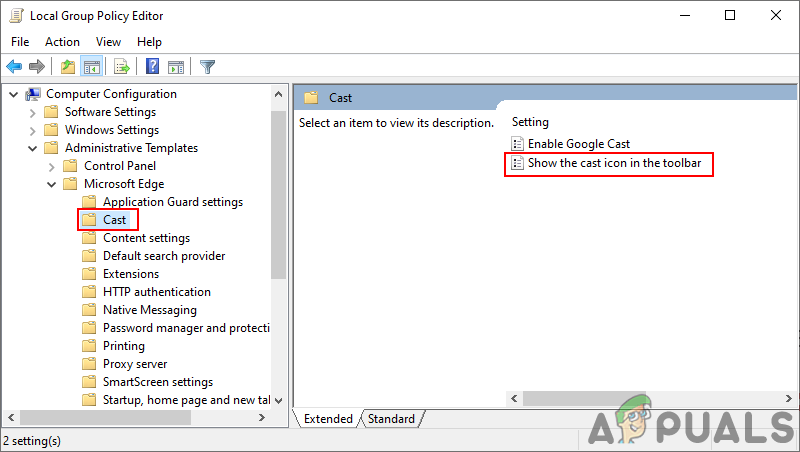
Navigating to the setting - Double-click on “Show the cast icon in the toolbar“. In the new window, select Enabled to show the Cast icon. To remove it, select Disabled.
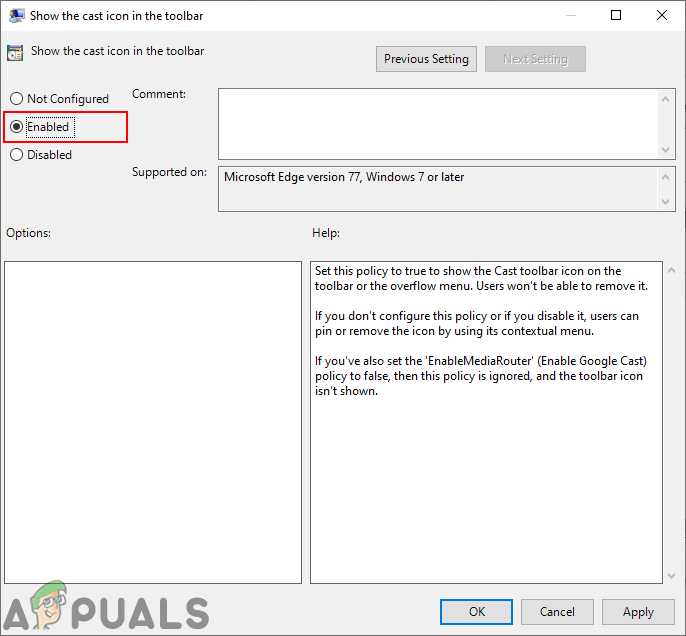
Configuring the setting - Click Apply or OK to save your changes.
- To revert to the default setting, change the toggle to Not Configured in step 6.


The icon does not appear on the Toolbar. With any of these.