How to Add Custom Lockscreen Widgets to Android
Many Android users often wonder how to add widgets to their lockscreen. While this was possible in Android 4.0, the feature was removed starting with Android Lollipop. To bring widgets back, some users install third-party lockscreen apps. However, these apps can make your phone less secure and are often unstable—they can even be disabled quite easily.
The default Android lockscreen is much more secure, but it doesn’t have all the extra features of third-party apps. That’s why, in this guide, we’re going to show you how to get the best of both worlds by adding widgets to the stock Android lockscreen!

In this step-by-step guide, I’ll show you how to add widgets to your default Android lockscreen and how to easily create your own custom widgets. Let’s get started!
Requirements:
- A rooted phone (you can search Appuals for Android root guides if you need help)
- Xposed Framework (see “How to Completely Theme Android with Xposed Modules”)
- Lock Screen Widgets (an Xposed module)
- KWGT Kustom Widget Maker (a free app from the Play Store)
- Some basic photo-editing skills (using PhotoShop, GIMP, or a similar program)
Getting Your Phone Ready
First, you’ll need to install the Xposed Framework. The link above will take you to a guide for installing Xposed with Magisk Manager (which allows for systemless root). The installation steps might be different depending on your device, so be sure to find an Xposed guide that matches your specific phone model if you’re unsure.
Once you have Xposed running, look for the Lock Screen Widgets module in the modules section, or download it directly from the link above and save it on your phone. After installing, enable the module and reboot your device.
Next, install KWGT from the Play Store and open it. KWGT lets you design your own widgets using an easy drag-and-drop interface—no coding needed! There are many options you can customize, but a good place to start is the Settings menu. Most importantly, set your “Preferred Music Player”—for example, I use Spotify, and will share the string code for displaying Spotify’s album artwork later in this guide.
Now, I’ll show you how to create a music controller widget for your lockscreen. This widget will display the album artwork, artist name, song title, and have Next, Previous, Play, and Pause buttons. Here’s an example screenshot of what my custom widget looks like:
Launch Xposed and Open the Lock Screen Widgets Module
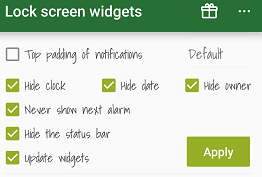
You can tailor the widget’s appearance as you like, but if you want it to fill the whole screen, be sure to select these options: Hide clock, Hide date, Hide owner, Never show next alarm, Hide the status bar, and Update widgets. Then press Apply.
Press the green + icon in the bottom-right to add a new widget. In the “Choose Widget” menu, scroll down until you see KWGT widget sizes and select KWGT 4×4 (this will use the entire screen, but you can choose a different size if you prefer).
At the bottom of the Lock Screen Widgets app you’ll now see a gray box that says “Click to Setup or Long Press to Resize.” This is a placeholder for your new KWGT widget. Tap it to enter the Widget Configuration menu—note that you don’t need to tap the gray box again on this screen.
Under “Size and Gravity,” set Width to “Match parent” and Height to “Min height.” Next, scroll down and turn on “Make the widget clickable.” Finally, press the green checkmark.
To activate your new widget, turn off your phone’s screen, then wake it up again. You’ll see the gray placeholder on your lockscreen; go ahead and press it, then unlock your phone. KWGT will automatically open so you can start customizing your widget.
For this example, I’ll use the Appuals logo as my widget’s artwork, but feel free to use your own image. You can create your own artwork in a program like PhotoShop or GIMP—just remember to save it as a PNG file to keep transparent backgrounds.

And here’s a helpful tip: you can use any custom font in KWGT by placing .TTF font files in /kustom/fonts/ on your device. For images, you can put them anywhere you like, for example /Pictures/Kustom_Art/ on your SD card.
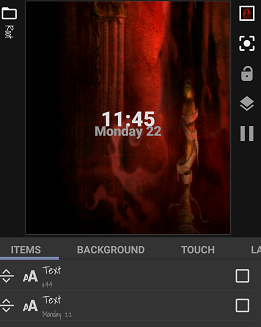
Inside KWGT, you’ll see that two widget elements (Items) have been added automatically for displaying time and date. You can delete them, but for now, let’s edit these to fit our purpose. Tap the first text item and it will bring up the Item configuration menu.
Tap the first menu item (a-z Text) to open the formula editor. Look for the “mi” section which has the formulas for showing information about your currently playing music.
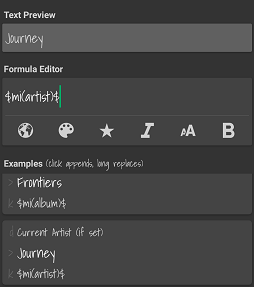
Change the formula to the “Current Artist” option, then go back to the Item configuration menu and adjust the text’s appearance—choose your font, size, position, and even use an image as the background for the text if you’d like.
Repeat this process for the second text item, but this time change its formula (under “mi”) to “Current Track Title.”
Tip: If you have music playing while customizing this widget, KWGT will update in real time. This makes it easy to see how your widget looks with different artist or song name lengths and helps you fine-tune your text size.
You can also change the background of the KWGT preview window—set it to your current home screen wallpaper, or a solid color, to get a better idea of how your widget will look on your lockscreen.
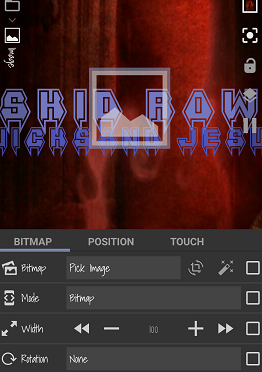
Now let’s add some artwork. Tap the + icon at the top-right in KWGT, select “Image,” and then tap your new image in the Items list. Next to “Bitmap,” tap “Pick Image” and KWGT will open your gallery.
I’m using the Appuals logo for this example, but you can add any image you like. Resize and move it to your preferred spot.
KWGT works with layers, similar to how PhotoShop does—on the main screen, you can drag items above or below each other. I usually place the text below the image layer so the text appears on top of the artwork.
Now let’s add the album artwork. KWGT doesn’t have a built-in formula for updating Spotify album art, so I’m providing a custom one here. If you’re using a standard media player like Google Play Music, you can use the default album art option in KWGT.
$if(mi(state) = playing & mi(package) = com.spotify.music, mi(cover))$
Add a new Shape item. You can change the shape if you want, but keep in mind that any shape other than square may crop the album art.
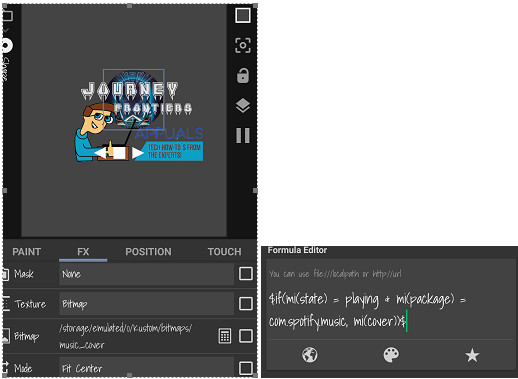
Go to the “FX” tab, and set the texture to “Bitmap.” Check the box next to “Bitmap – Pick Image,” and tap the calculator icon in the top right. Here you can add a formula as the image source. Paste the Spotify formula given above, or choose “Current Cover Image” under “mi” if you’re using a different player.
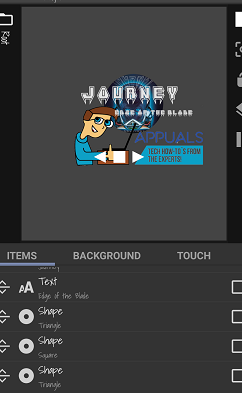
Finally, let’s add music controls. Add three shapes—two triangles and a square, or use your own custom button images if you prefer. Adjust their look, then go to the “Touch” tab for each one. Tap the + icon in the top right of KWGT and assign each button a function: Music Controls > Play/Pause, Next, and Previous.

Feel free to continue customizing however you like, or start over now that you know the basics. But first, check out how your new widget looks on your Android lockscreen!