How to Completely Theme Android with Xposed Modules
Theming and customizing an Android device can be a disappointing experience with stock apps. Manufacturers’ theme stores often have a limited amount of available themes that change the entire system GUI, whereas you may want to only theme your notifications bar or Settings menu. Creating your own theme from scratch is a massive project that involves decompiling and editing files in the /system partition. So how can an average user completely customize their Android device as painlessly as possible?
The answer is within a combination of dedicated Xposed modules. Xposed is an overlay framework that can enable you to change nearly every aspect of your Android phone with modules (plug-ins), individually. There are even apps to customize and theme specific apps like WhatsApp, Facebook Messenger, and other apps that ordinarily would not allow the user to customize their experience.
This guide will walk you through installing Xposed via systemless root, and show the various modules to achieve maximum customizing potential for your device. Please note that Xposed is currently not available for Nougat, but the developers are working on a release for Nougat support.
Warning: Samsung devices running TouchWiz ROM should not install Xposed, but AOSP-based Samsung devices should be fine.
Some Sony devices may bootloop after installing Xposed due to a number of Sony ROMs being shipped with corrupted services.odex – the Xposed developer is unable to fix this.
Author’s Note: I did not include any modules for changing your system font in this guide, because Appuals has a comprehensive guide on the absolutely best way to change your system font without using any 3rd-party apps or modules. See “How to Change Android System Font without Apps”.
Installing Xposed – Systemless MagiskSU Root Method (Android 5.1 – 6.0)
Xposed Material Design Installer
These steps assume you are already rooted with Magisk – if not, please search Appuals for an Android root guide for your device.
- Launch the Magisk Manager and head to the “Downloads” section. Scroll down and install the Xposed Framework module for your device architecture. It will be saved as a .zip file on your SD card (or wherever you’ve set your download path in Magisk).
- Download the Material Design Xposed Installer APK from the links above onto your device and install the app.
- Reboot your device into custom recovery and flash the Xposed Framework .zip, then reboot your device.
Installing Xposed Modules for Customizing your Android Device
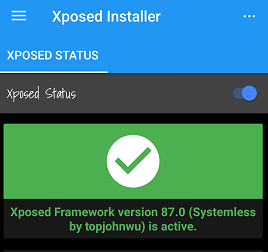
In the Xposed Installer app, first make sure that Xposed Status has a green checkmark. If so, you may continue.
Go to the “Download” section in Xposed Installer. You’ll be greeted with a huge list of available modules. However, there are a key few that we want for Android customization, and you can search for them from the search bar.
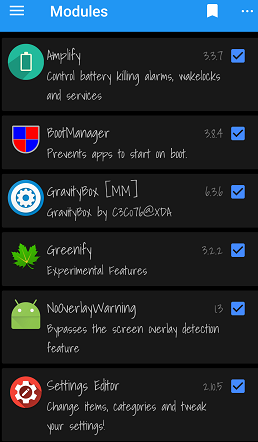
After downloading a module, you will need to head into the “Modules” section of Xposed Installer, tap the checkbox to enable it, and reboot your device. But you can enable or disable multiple modules at the same time before rebooting.
The most useful Xposed modules for Android customization
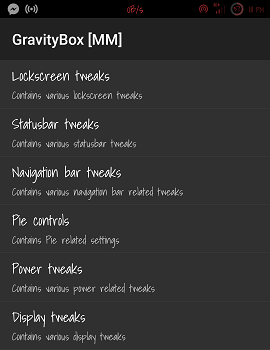
GravityBox
GravityBox allows you to customize a huge amount of things in your Android device, and in fact it is the most popular Xposed module for this purpose.
It allows you to customize the appearance of your lockscreen, statusbar, navigation bar, and many other useful features, like long-pressing your Volume buttons to skip or rewind music tracks.
Settings Editor
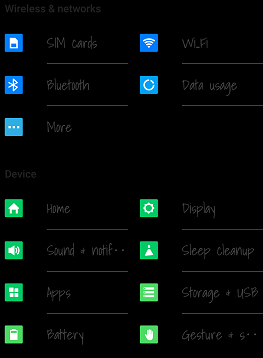
Settings Editor allows you to completely customize your Android Settings menu. You can add or remove icons and sections, change the background color, and change the amount of columns.
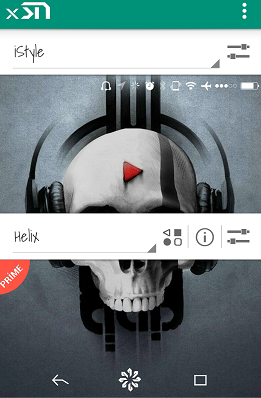
XStana
If GravityBox doesn’t offer enough statusbar and navigation button customization for you, XStana allows you to change those icons to ones from other manufacturers, and a few custom ones as well.
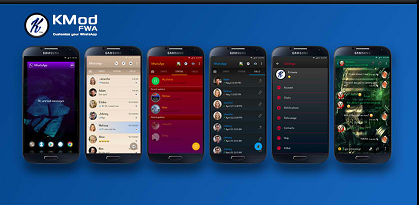
KMOD FWA for WhatsApp
This module allows you to customize WhatsApp appearance to your liking. It offers options for backgrounds, fonts, icons, and a direct access button to the module from within WhatsApp itself.
NoOverlayWarning
This isn’t necessarily a theming module, but it’s worth mentioning and highly useful if you are using a lot of theming modules. Often in Android, whenever you try to allow permissions for certain apps (Google Drive for example), you’ll receive a warning that you’ll need to disable screen overlay. You’ll then need to disable all of your app overlays (Facebook talking heads, blue light filters, etc) before you can grant the permissions to the app requesting them.
NoOverlayWarning will allow you to completely bypass this procedure, and thus its incredibly useful for any Android user that uses a lot of overlays in their apps and themes. There are no settings to adjust – you simply install it and forget it!