How to Fix “Active Partition Not Found” Error on Windows?
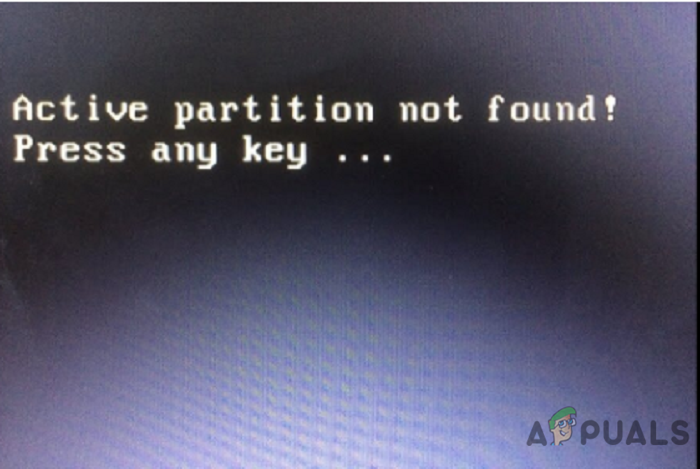
The “Active Partition Not Found” error usually shows up when you start your computer, stopping it from loading with a message saying there is no active partition to start the operating system. This problem means that your computer’s firmware can’t find a bootable partition marked as “active” in the Master Boot Record (MBR).
The most common reason for this is that the system partition was accidentally made inactive, often after using tools like DiskPart or other partition managers. Other possible reasons include hard drive problems, missing boot files, or the wrong drive being set as the main boot device in BIOS.
Now that you know the causes, let’s discuss the error.
1. Verify that BIOS Detects the Windows Installation Hard Drive
Before trying any fixes, it’s important to check if your BIOS can see your system drive. If your BIOS doesn’t detect the drive, Windows won’t be able to start at all. This step makes sure your disk is properly connected and recognized by your computer’s hardware, and helps you rule out any problems with the drive or the port it’s plugged into.
- Restart your computer and keep pressing the key that opens BIOS. This key is usually listed on the first screen you see and could be Esc, Del, F2, F8, F10, or F12.
- Navigate to the Advanced tab and look for options like Primary IDE Master, Primary IDE Slave, Secondary IDE Master, and Secondary IDE Slave. Check to see if your hard drive is detected here.
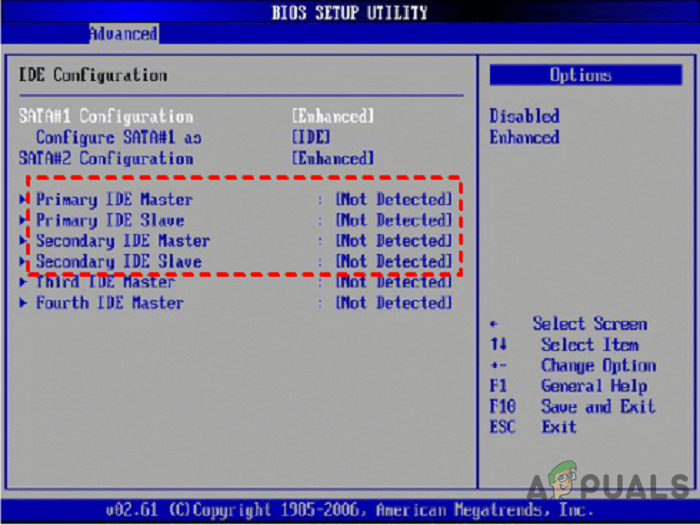
Bios setup utility - If your hard drive is listed as None/Not Detected, change it to Auto and restart your computer to check if the problem is solved. If the hard drive is shown after IDE Master/Slave, your BIOS has detected it, and you can continue to the next steps below.
2. Set BIOS to Default Settings
Sometimes, a simple reset can fix hidden problems. Restoring the BIOS to its default settings will clear any custom boot order or changes to disk modes that might stop your system from finding the active partition.
- Restart your computer and enter the BIOS.
- Look for a line, often at the bottom, that says Setup Defaults — F9. Press the corresponding key (such as F9) to reset BIOS to its factory defaults and confirm by selecting OK or Yes. On some systems, the default settings option may be under the Security, Initialize, or Exit tabs. Look for options like Restore Factory Defaults or Reset All Settings.
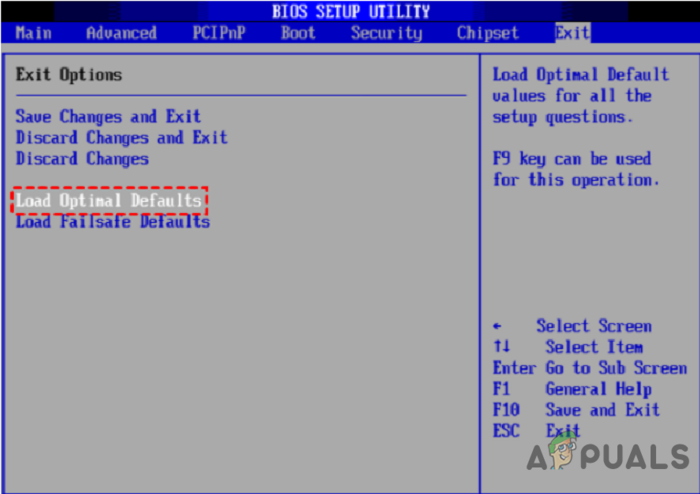
Setup defaults 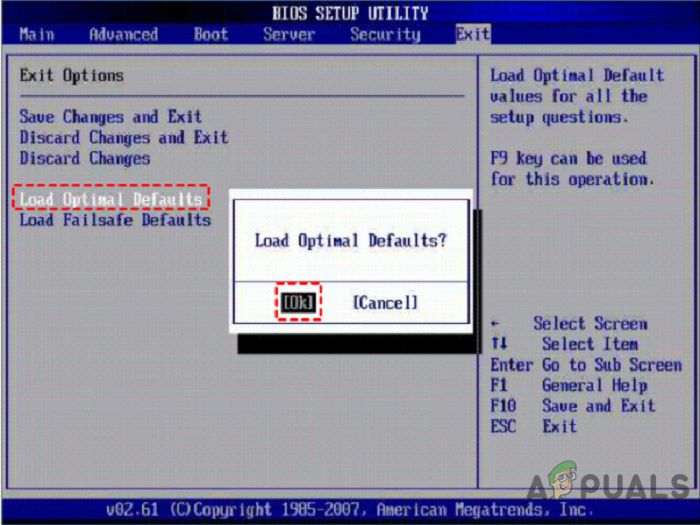
Optimal defaults - To save your settings and exit BIOS, press F10. Restart your computer to see if the ‘active partition not found’ error has been resolved.
3. Repair System Files with Startup Repair
A damaged boot environment can’t guide Windows to the right partition, even if it’s set as active. Startup Repair fixes missing or broken system files, boot configuration data (BCD), and important services needed to start up your computer. It restores the connection between your computer’s firmware and the Windows loader.
- Boot your computer from the Windows 10 installation media.
- Choose your language, time, and keyboard preferences, then click Next.
- Select Repair your computer on the following screen.

Startup repair - Now go to Troubleshoot > Advanced options > Startup Repair. Allow the tool to finish diagnosing and repairing your system.
4. Make the System Partition Active
Marking the correct partition as “active” tells your computer where to look for the files it needs to start up. This step makes sure the BIOS passes control to the right part of your hard drive, where the bootloader is stored, so Windows can load properly.
- Boot from the Windows 10 installation DVD or USB.
- Select Repair your computer > Troubleshoot > Advanced options > Command Prompt.
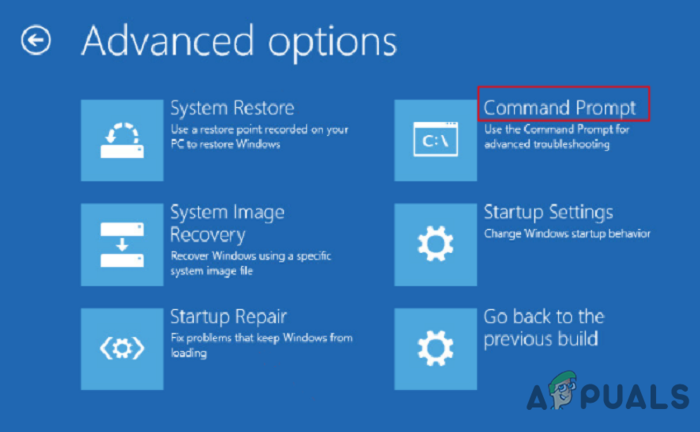
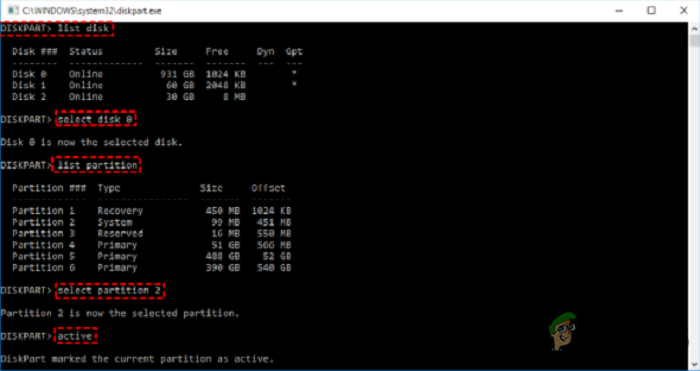
Advanced options - In the Command Prompt window, type the following commands and press Enter after each line:
diskpart

list disk

select disk 0 (replace 0 with the number corresponding to your primary disk)

list partition

select partition 1 (replace 1 with the number of your system partition)

active

exit
Restart your computer and check if the issue is resolved.
4. Repair MBR
A damaged boot map leaves your computer confused about where to start—repairing the MBR (Master Boot Record) puts the important startup instructions back in place. This helps your PC find the right area on your hard drive and load Windows correctly.
- Boot from your Windows installation CD or USB, and open the Command Prompt as shown in the previous section.
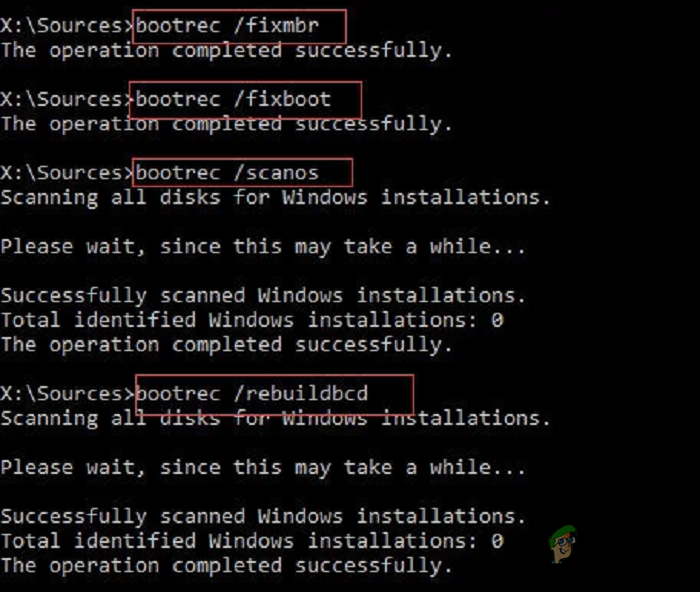
- Type these commands, pressing Enter after each one:
bootrec.exe /fixmbr

bootrec.exe /fixboot

bootrec.exe /scanos

bootrec.exe /rebuildbcd
If you receive an error during MBR repair, such as:
The selected disk is not a fixed MBR disk.
The ACTIVE command can only be used on fixed MBR disks.
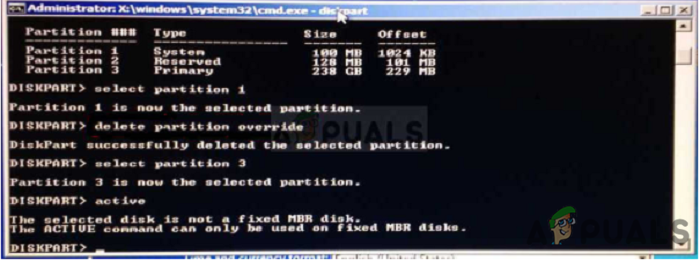
You can refer to the Fix: The Selected Disk is not a Fixed MBR Disk article to know more.


