5 Ways Increase your Download Speed in Google Chrome
Google Chrome is long known for the issues while downloading such as failed network error, and other downloading issues. Fortunately, after a lot of requests from users google have released some solutions for these issues. In this article, we are going to talk about increasing the download speed in Google Chrome. This should help everyone, however, keep in mind this article is for increasing speed if there are any issues on your Windows or Chrome. If the server you are downloading from is not closer to you or it is a slow server this article won’t help you in that case. It’s also suggested to check with your ISP to confirm that there aren’t any issues going on with your router or connecting. There are several reasons for your file to download slowly following are the most common reasons:
- Network Configuration — Incorrect Network Configurations can lead your files to download slowly on Google Chrome as sometimes Google will have a hard time delivering data to your client properly.
- Slow Servers — Sometimes everything from your end is working fine and it’s possible that the servers you are trying to download files from are slow/overloaded which results in slow download speed.
- QoS Packet Scheduling — Your Windows reserves some packets and doesn’t let some applications use all of your network data as it can result in instability of your overall computer network. However, this setting is for old routers and can be easily disabled.
- Firewall Issue — Windows Firewall or any 3rd party firewall you have installed on your computer can also be the culprit, they can actually block some of the server ports to contact your Computer properly which leads to slow download speed issues.
Method 1: Using Google’s parallel downloading flag
After public demand, Google has released a flag that you can use on your Google Chrome client. It’s still in experimental mode and not available to everyone yet. However, if you are using a fully updated Google Chrome client you can actually use this parallel downloading flag without any issues. This flag basically allows Chrome to download the file in chunks (Like other downloaders) which results in faster downloading speeds on Chrome. To enable this flag, follow the steps below:-- Open Google Chrome.
- In the URL box above, type the following address and press enter.
chrome://flags/#enable-parallel-downloading
- Now change the value of the highlighted option to “Enabled” from “Default”.
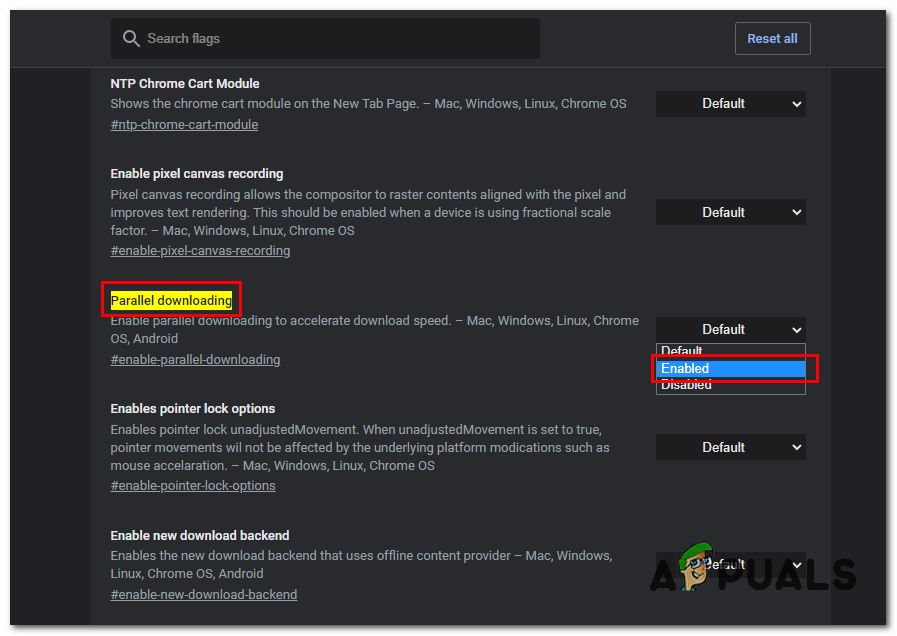
Changing The Flag’s Value - Restart your Chrome.
Check to see if the issue is resolved. If you are still facing slow download speeds try re-downloading the file as Parallel downloading will take effect on your next download.
Method 2: Switching to Google DNS
Changing to Google’s DNS will actually result in better performance for your Network overall that potentially helps your Google Chrome’s download speed to increase. We will tell you exactly how to change your DNS and flush the old DNS cache to ensure the best results possible. To change your DNS properly follow these steps below:-- Press and hold the Windows Key and Press I. This shortcut should open Windows Settings app.
- Once Windows Settings are opened Navigate to “Network & Internet”
- Press the option named “Change Adaptor Settings”

Changing DNS - Now right-click on your Network Adaptor and press go to “Properties”
- Double-click on “Internet Protocol Version 4 (TCP/IPv4)”
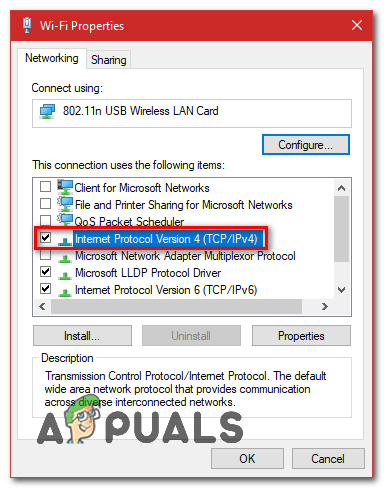
IPv4 - Select option “Use the following DNS server addresses”
- Now Simply put “8.8.8.8” in the preferred DNS server and “8.8.4.4” in the alternate DNS server.
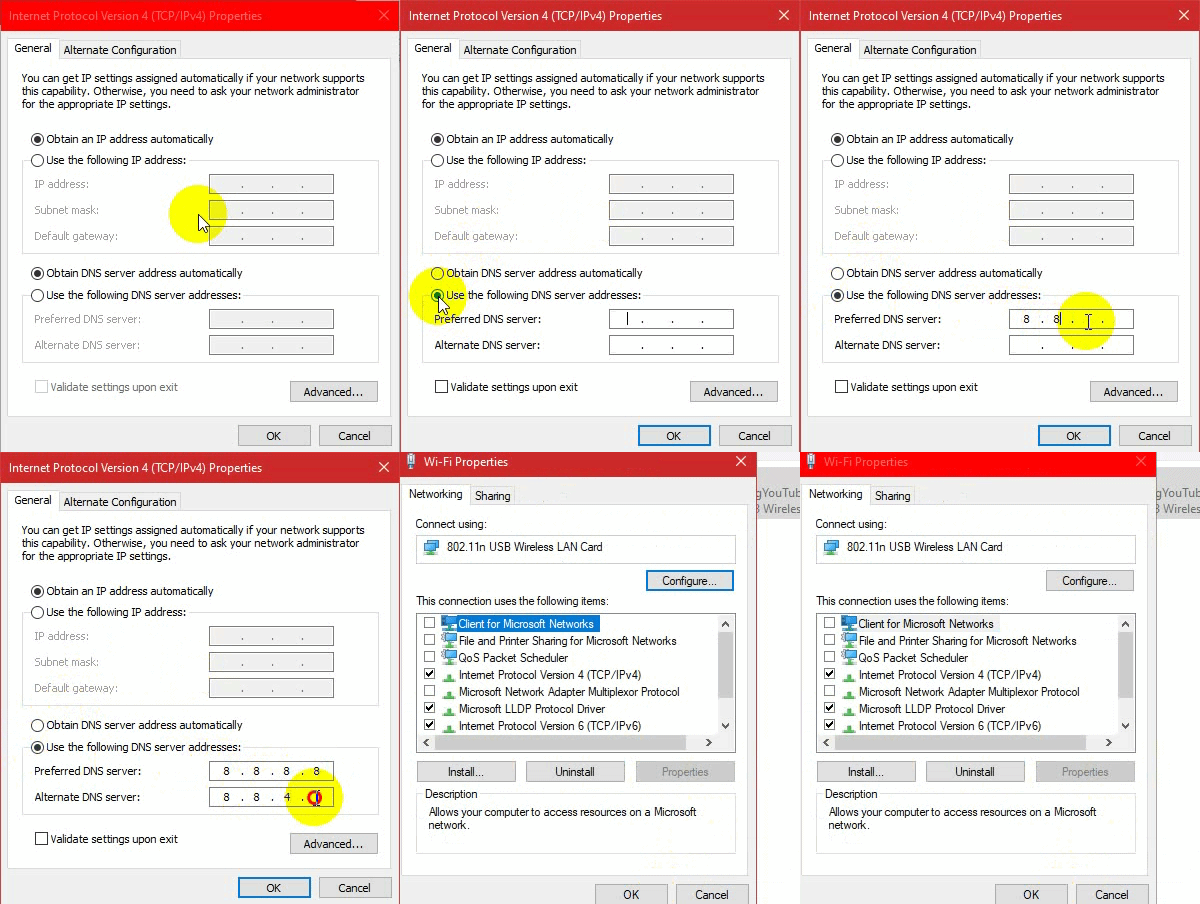
Changing the DNS Server
Now we are going to flush the old DNS Cache on both your Windows and Google Chrome.
On Windows
- Hold the Windows Key and Press X. Choose Command Prompt (Admin) or PowerShell (Admin)
- Type the following command to refresh DNS Servers:-
ipconfig /flushdns
- Check if the issue persists.
On Google Chrome
- Open your Google Chrome.
- In the URL Section put this URL and press Enter.
chrome://net-internals/#dns
- This should open Google Chrome‘s Host resolver cache page. Click “Clear Host Cache”
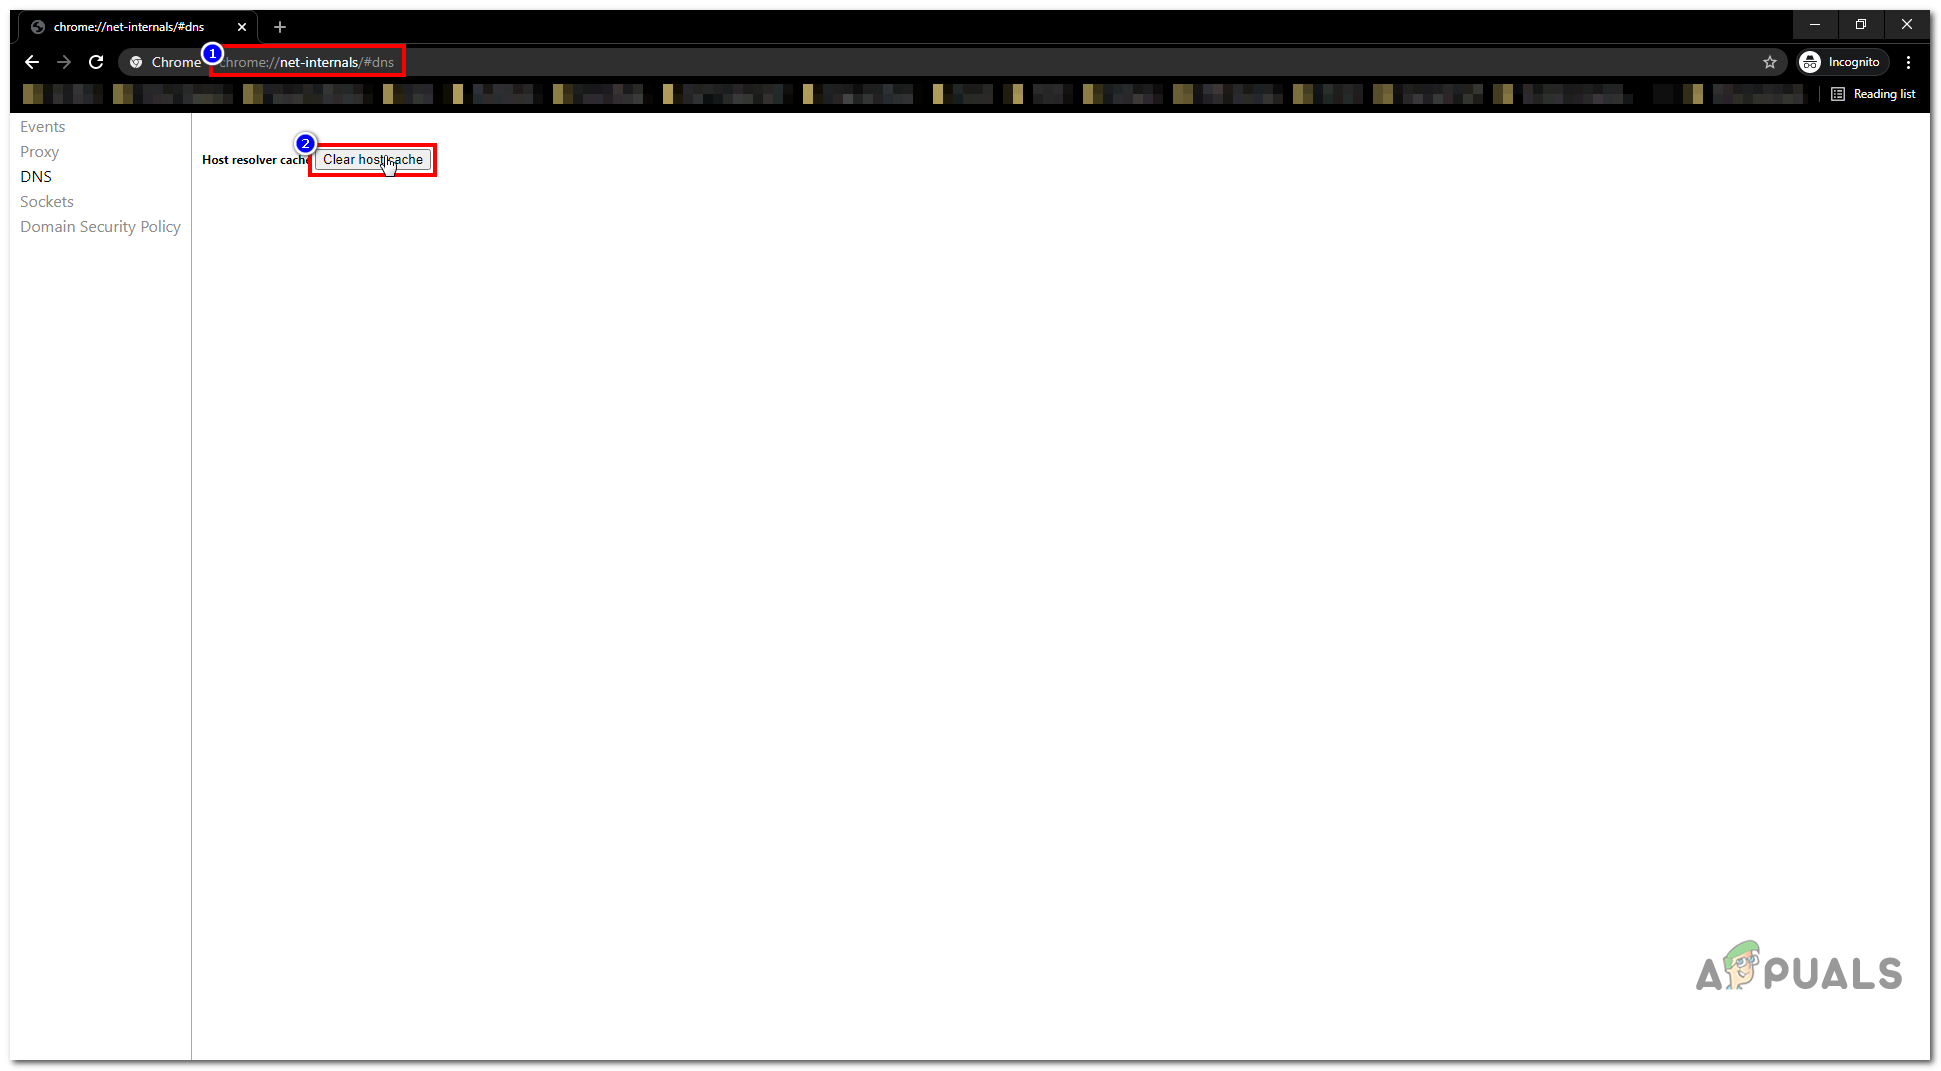
Clearing Host cache - Restart your Google Chrome and your computer.
Method 3: Disable Auto Proxy settings
Your Proxy settings can also be a culprit in this situation as sometimes the proxy provided by your router can affect the actual download speed overall by blocking some ports. To disable automatic proxy settings, follow these steps:-- Press and hold the Windows key and press the R key. This should open the Run program.
- Type “inetcpl.cpl” and press the enter key to open the Internet Properties.
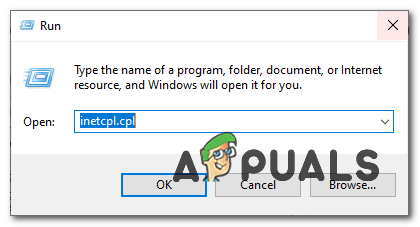
- Now, wait for the Window to open then head over to the “Connections” tab and press “LAN Settings”.
- Now make sure to un-check all the options and press OK.
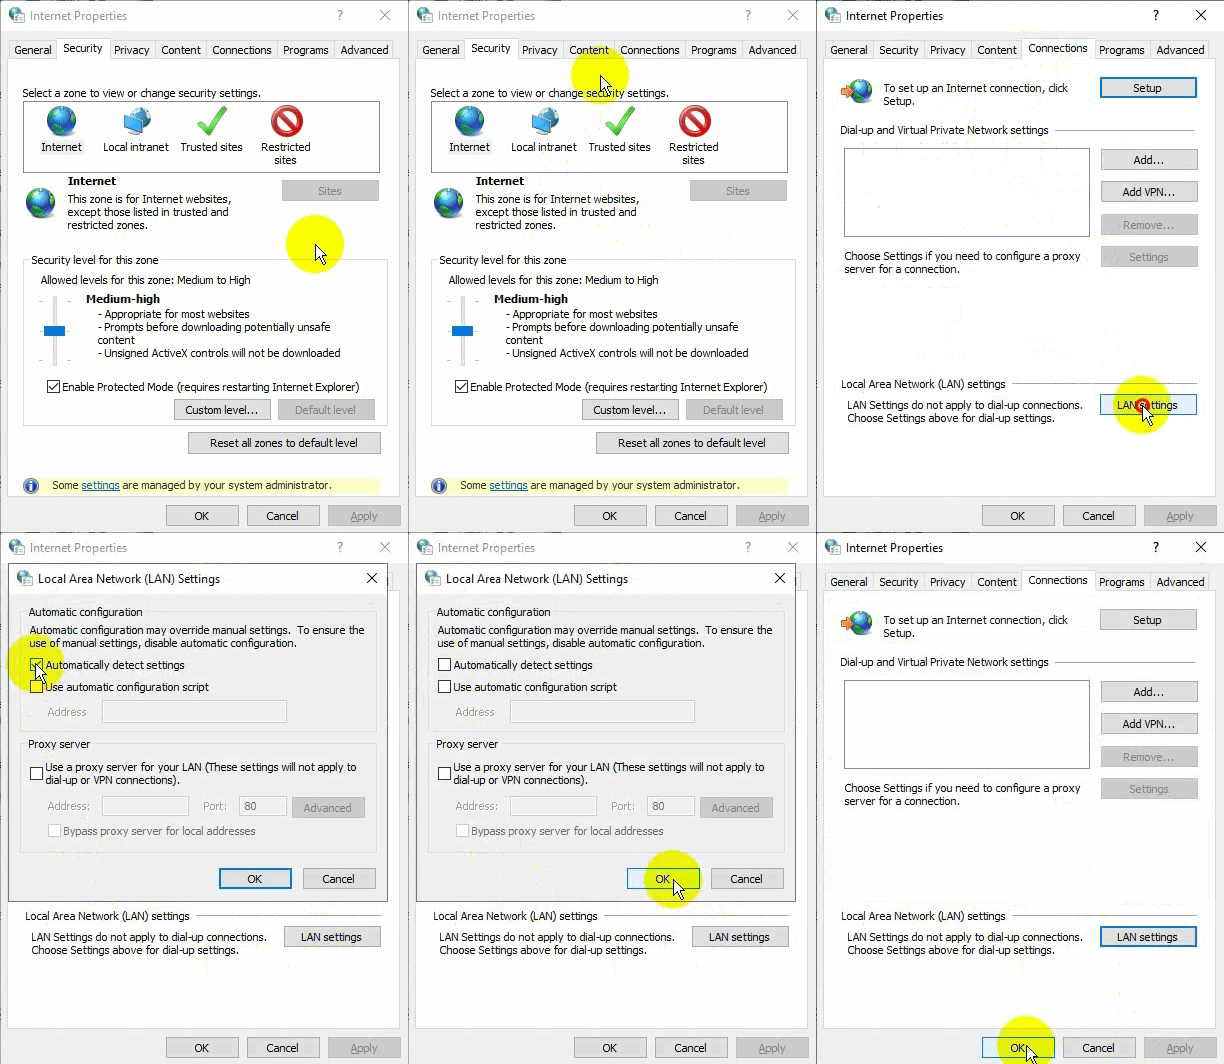
Unchecking Proxy Settings - Restart your computer and check to see if your downloading speeds improved on chrome or not.
Method 4: Disabling QoS Packet Scheduler
Windows actually reserves some bandwidth of your internet to save your bandwidth and keep some data available for other programs to keep everything working smoothly. This feature is basically for older computers and routers and can be disabled if you have a good router and at least speeds of 2MB/s. To disable the QoS packet scheduler, follow these steps below:-- Press and hold the Windows key and press the R key. This should open the Run program.
- Once the run is opened type “gpedit.msc” on the type box.
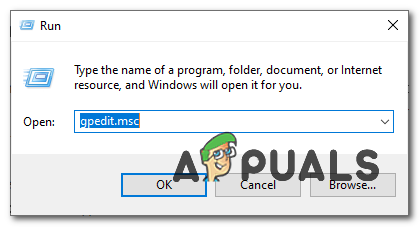
Opening GPedit.msc - Now navigate to “Computer Configuration > Administrative Templates > Network > QoS Packet Schedular”.
- Double-click on “Limit reservable bandwidth”.
- Press “Disabled” then press “apply”.
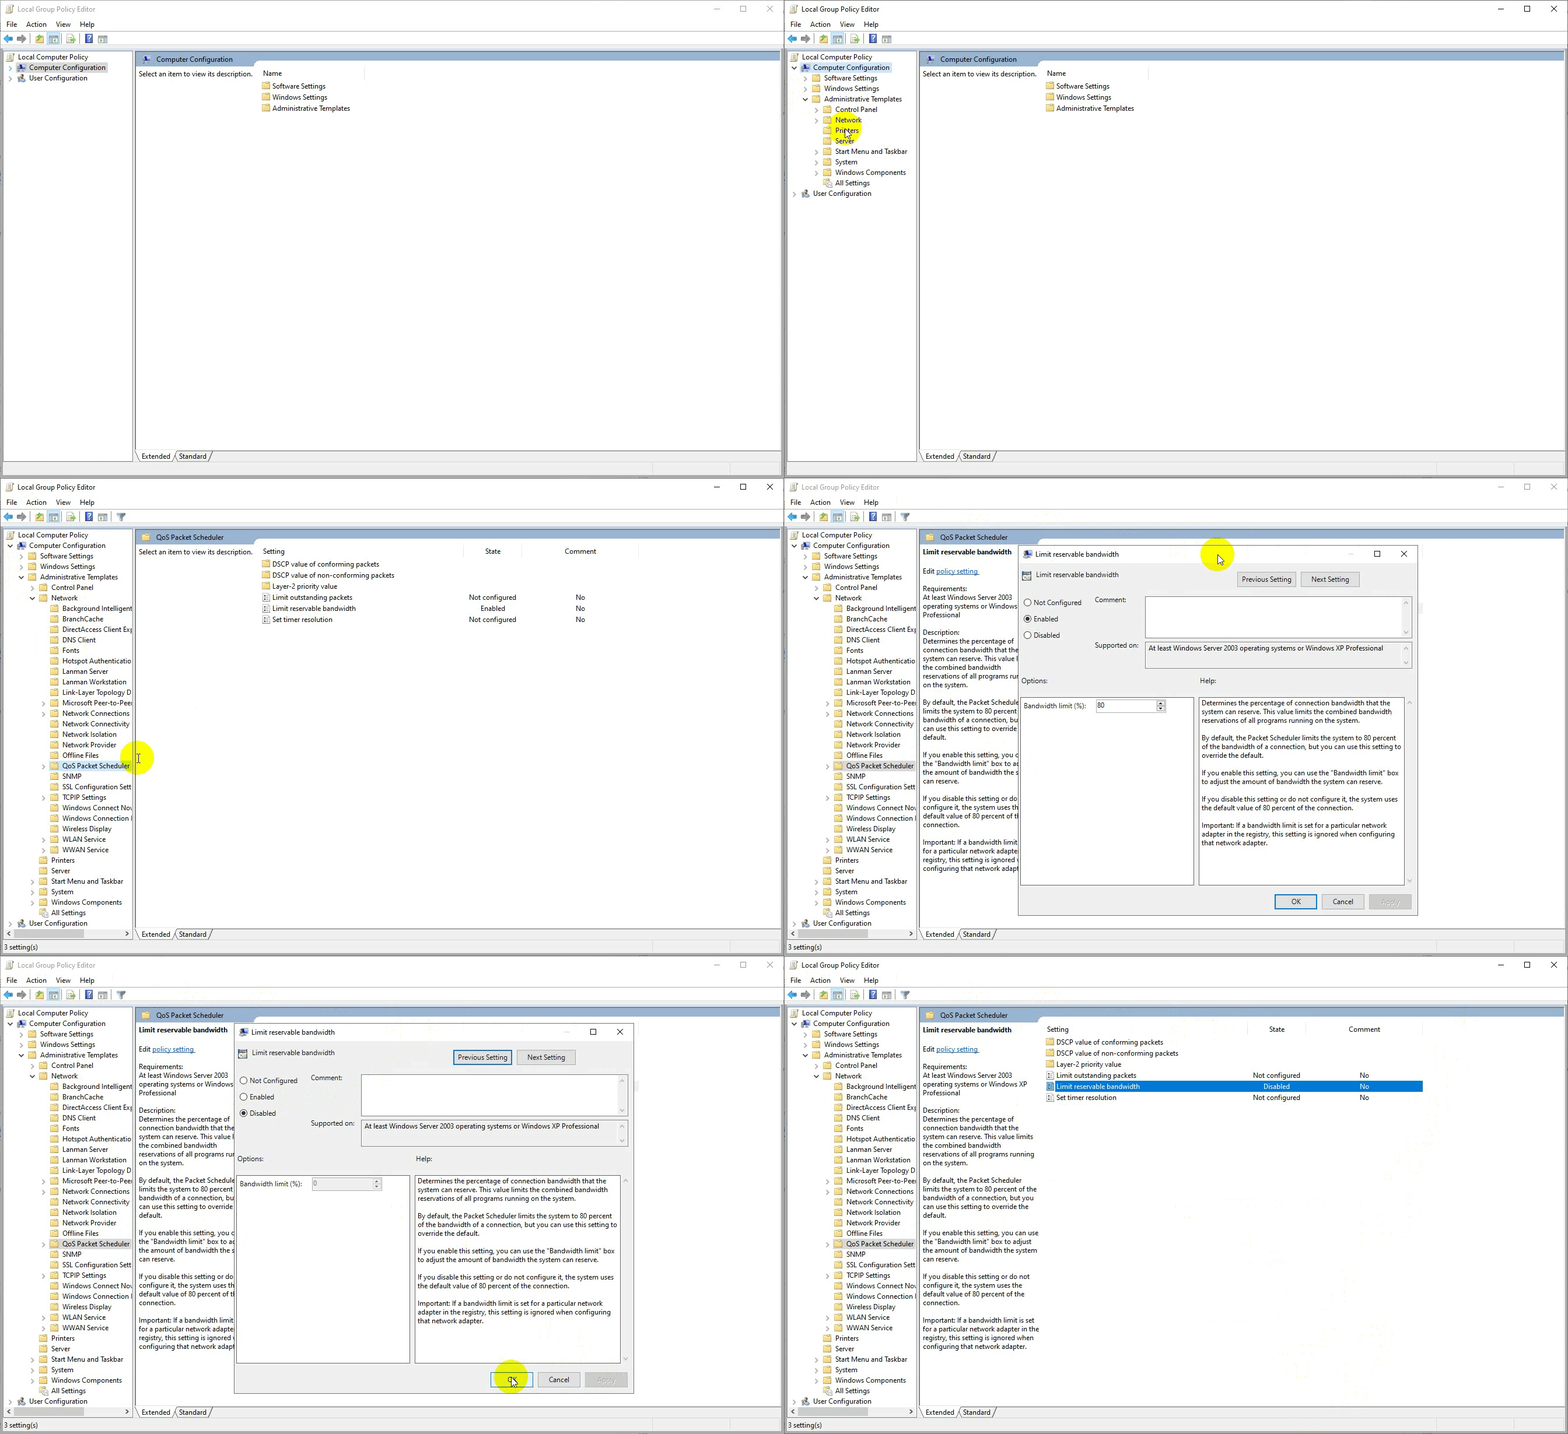
Disabling QoS Packet Scheduler - Restart your computer and check the download speeds.
Method 5: Disabling the Receive Window Auto-Tuning feature
This feature is also for old routers and computers to maximize the speed of the connection. However, it hinders the performance if you have a good quality router and minimum speed of 2MB/s that can control multiple connections simultaneously. To disable the Receive Window Auto-Tuning feature, follow these steps:- Hold the Windows Key and Press X. Choose Command Prompt (Admin) or PowerShell (Admin).
- Type the following commands one by one and press enter
netsh int tcp set global autotuninglevel=disabled
ipconfig /release
ipconfig /renew
ipconfig /flushdns
These commands should renew your IP address and flush your DNS as well so you don’t have to restart your computer, however, if you can do that we recommend restarting your computer to ensure all the settings have been applied.
Conclusions
If none of these tricks help you to increase your download speed in google chrome. It’s highly possible that your Firewall is blocking some ports that are hindering the overall performance of your chrome client. Fortunately, we have an article on this topic you can check out over (here). If that doesn’t work for you as well you can try using a 3rd-party downloader such as FDM or IDM to increase your download speed.Frequently Asked Questions
Google Chrome downloads so slowly because it doesn’t split the file it’s downloading into chunks, instead tries to download the whole file at once. You can fix this issue by enabling the Parallel downloading flag.
You can increase your Google Chrome’s downloading speed by disabling Windows Features such as QoS Packet Scheduler and applying optimal network settings as shown in our article to minimize the bandwidth throttling of your connection speed.


