How to Fix 403 Forbidden Error on PayPal
The PayPal 403 Forbidden error may occur when you attempt to make a transaction or simply access the website. This error indicates that your IP address does not have permission to reach the requested address. Common causes include your Internet Service Provider (ISP) or PayPal blocking your IP, usage of a third-party VPN, and other network restrictions.
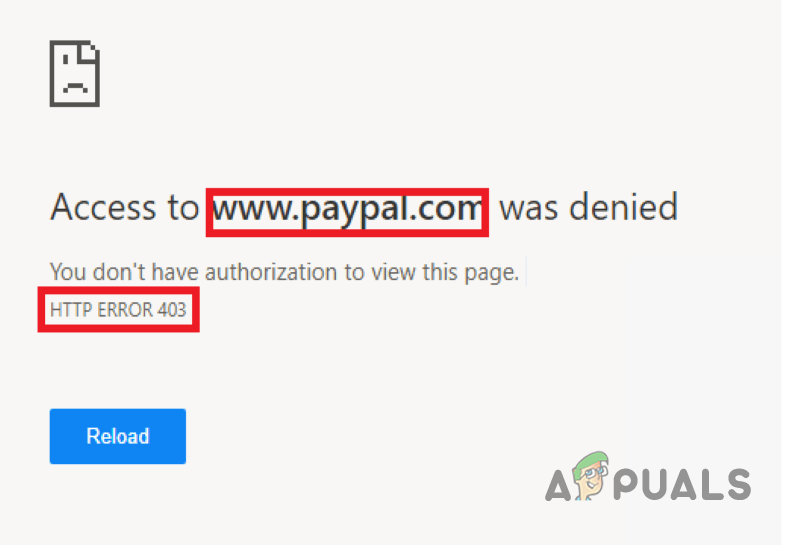
In many cases, simply switching to a different network can resolve the issue. This comprehensive guide will walk you through several effective methods to fix the PayPal 403 Forbidden error message. Each step is explained in detail, so you can confidently resolve the problem and regain access to your PayPal account.
1. Use a Different Browser
Start by trying a different web browser. Sometimes, the issue arises from a conflict or inconsistency in the request your browser sends—often caused by third-party extensions. Attempting to access PayPal from another browser can help determine if the problem lies with your current browser.
Alternatively, use Incognito or Private mode, which disables all extensions by default. If you still experience the error, consider installing a completely different browser. This step eliminates the browser’s configuration as the potential cause. If using another browser does not resolve the problem, continue to the next method.
2. Use a Different Network Connection
Your current network connection could be contributing to the error, especially if PayPal has blocked your IP address. This typically occurs for security reasons, such as spam prevention, and is more common with shared WiFi networks.
To resolve this, connect to PayPal using an alternative network. For example, you can try switching to your mobile data connection. By doing so, your device will use a new public IP address, which may not be blocked by PayPal’s security filters. If you continue to see the error after changing networks, proceed to the next solution.
3. Clear Browser Cache and Cookies
Corrupted or outdated browser cache and cookies can trigger the 403 Forbidden error on PayPal’s website. Cookies manage your user session and store data to optimize your browsing experience, while the cache helps improve website performance. However, discrepancies in this stored data can sometimes lead to access issues.
Clearing your browser’s cache and cookies will refresh your session and eliminate any corrupt data that could cause the error.
3.1. Google Chrome
- Click the More menu button (three dots) in the top-right corner.
- Go to More tools > Clear browsing data.
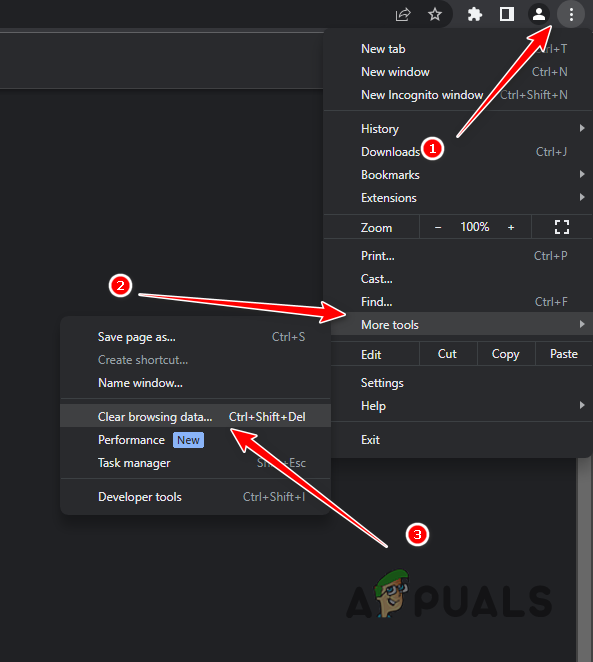
Navigating to Clear Browsing Data - Select All time in the Time range dropdown.
- Check Cookies and other site data and Cached images and files.
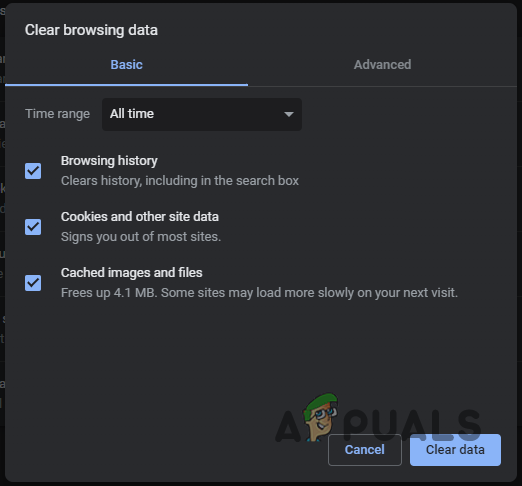
Clearing Browser Cache on Google Chrome - Click Clear data to remove cached files and cookies.
3.2. Microsoft Edge
- Click the More menu in the upper-right corner.
- Select Settings from the dropdown menu.
- Navigate to Privacy, search, and services.
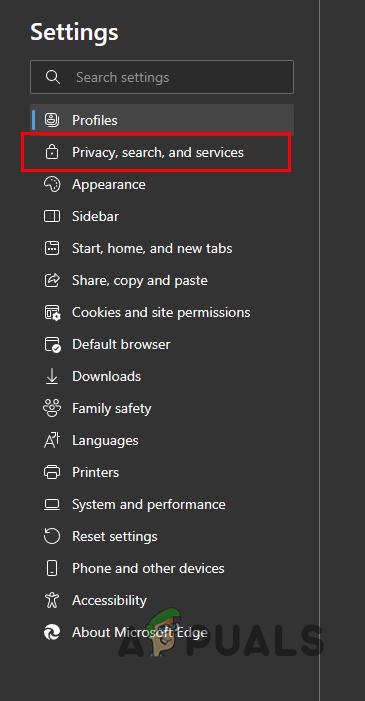
Navigating to the Privacy, Search and Services tab - Scroll down and click Choose what to clear next to Clear browsing data now.
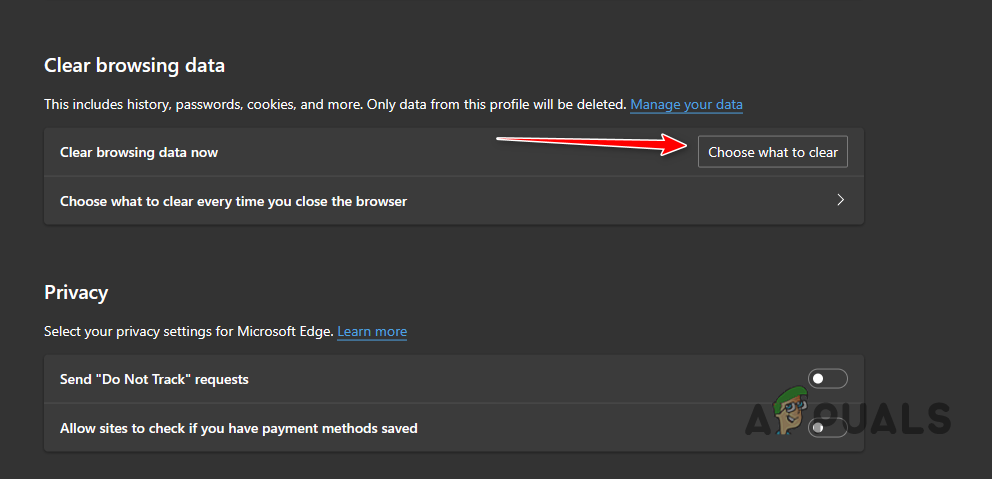
Clearing Browser Data - Set Time range to All time.
- Select Cookies and other site data, Cached images and files, and Site permissions.
- Click Clear now.
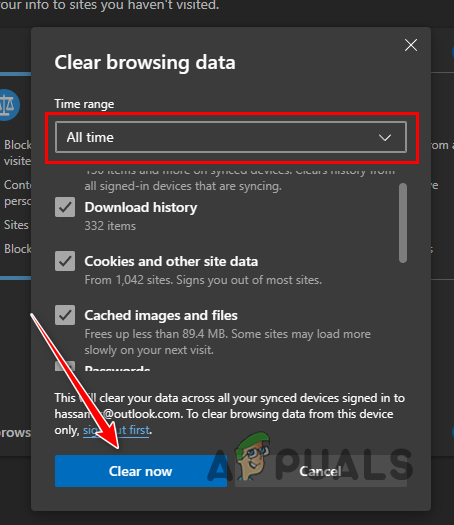
Clearing Browser Cache on Microsoft Edge
3.3. Mozilla Firefox
- Open the More menu in the top-right corner and choose Settings.
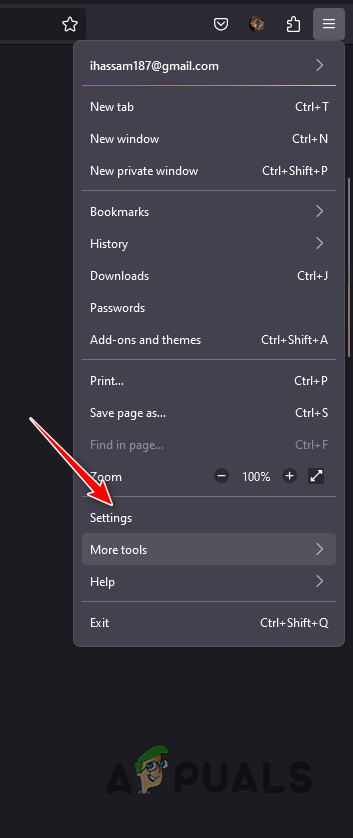
Navigating to Firefox Settings - Select Privacy & Security from the left sidebar.
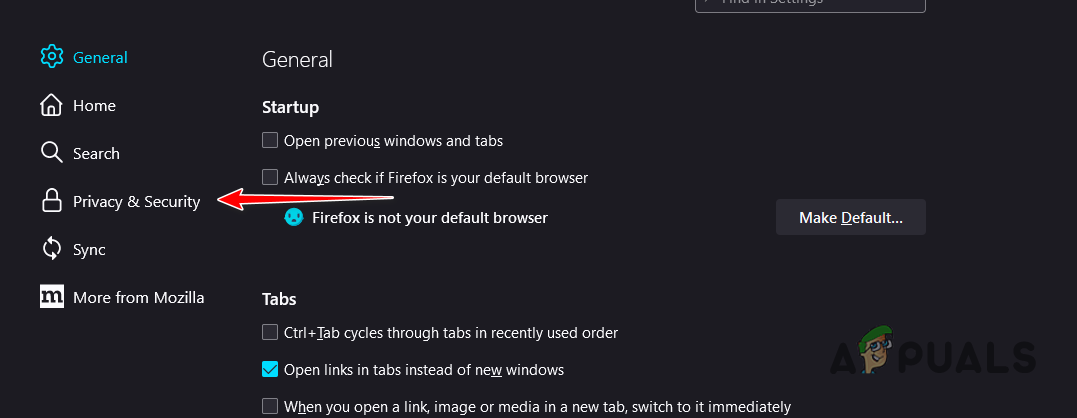
Navigating to the Privacy and Security tab - Click Clear Data.
- Ensure both checkboxes are selected in the dialog box, then click Clear.
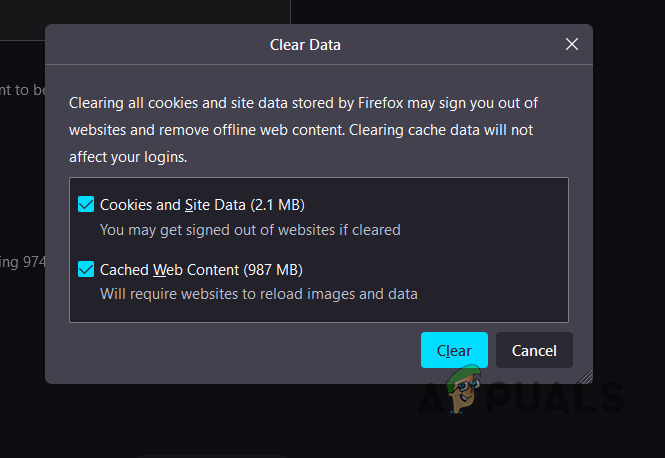
Clearing Browser Cache on Firefox
By clearing your cache and cookies, you remove outdated or corrupted session data that may be preventing access to PayPal.
4. Disable or Remove Third-Party VPN
Third-party VPNs can occasionally lead to access issues on PayPal. While VPNs enhance privacy by masking your IP address, many public VPN addresses are recognized and blocked by PayPal for security reasons. This prevents suspicious or unauthorized access to user accounts.
If you are currently connected to a VPN, disconnect it so your real IP address is visible to PayPal servers. This simple step often restores access.
- Press Windows key + I to open the Settings app.
- Navigate to Network and Internet > VPN.
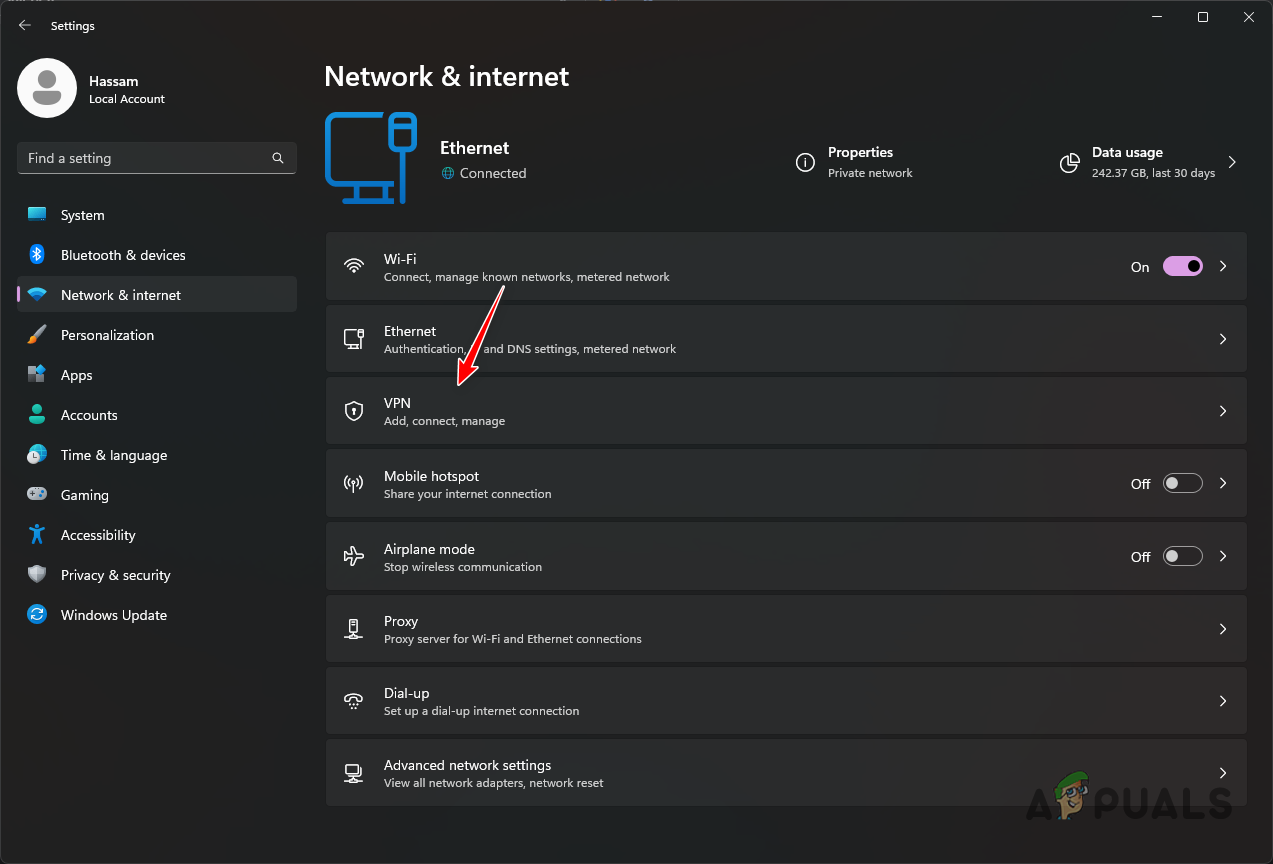
Navigating to VPN Settings - Click Disconnect next to your active VPN connection.
- To fully remove the VPN, click the down arrow icon.
- Select Remove from the additional options.
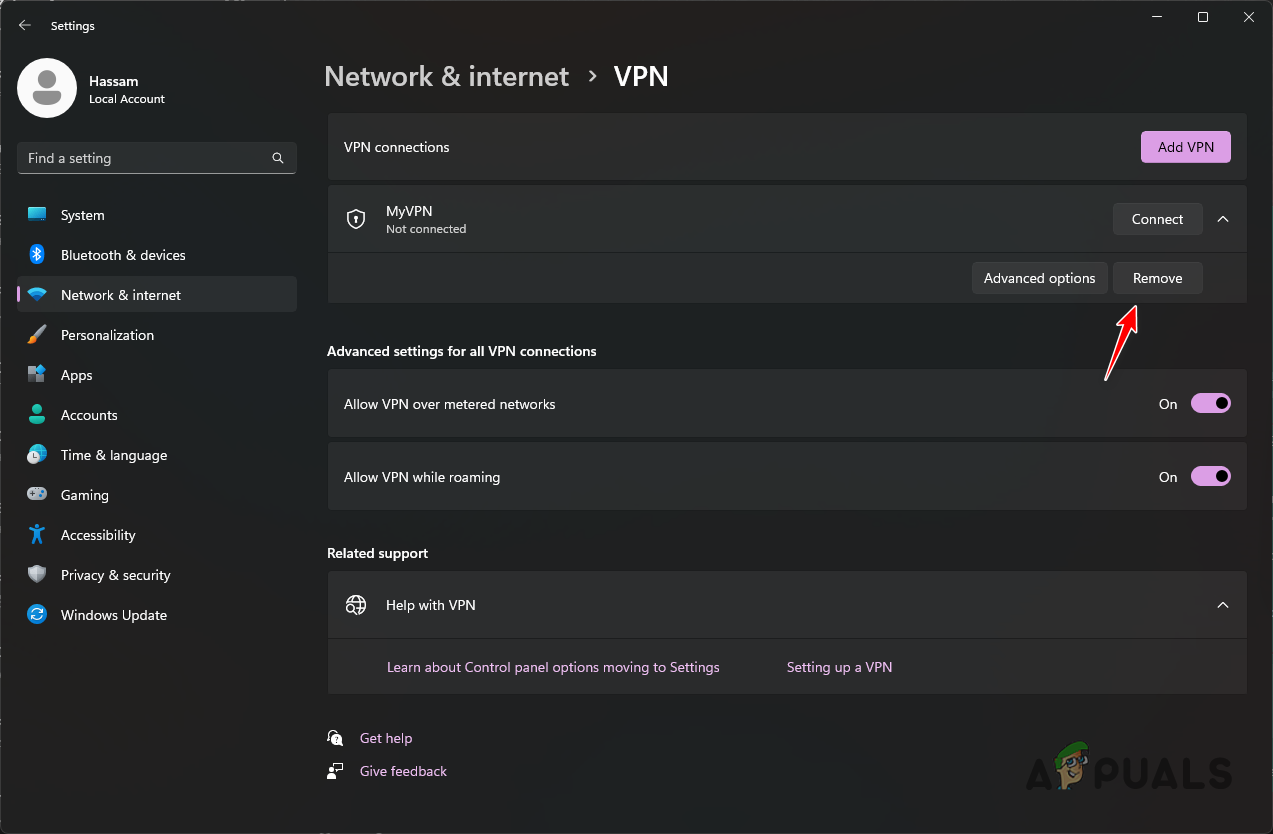
Removing VPN Connection
Disconnecting or removing your VPN helps ensure your legitimate IP address is used, which significantly lowers the likelihood of being blocked by PayPal.
5. Contact Your Internet Service Provider (ISP)
If none of the above solutions resolve your issue, the problem may be caused by deeper network inconsistencies or blocks implemented by your ISP or PayPal. In this case, contact your ISP for assistance. Your provider can perform advanced troubleshooting to trace your connection request, pinpoint the source of the problem, and, if necessary, allocate a new public IP address.
While this process may require some time, it is often the most effective way to resolve persistent network-related 403 Forbidden errors. Your ISP’s technical support team is equipped to address and resolve issues that you cannot fix on your own.
 Reviewed by


