How to Fix ‘Feature update to windows 10, version 21H1 Failed to Install’?
The Windows 10 21H1 update often fails at 100% installation, after which the computer restarts and undoes the update without displaying a clear error message. Error code 0x800f0922 usually means either a failed connection to the Windows Update servers or not enough space in the System Reserved partition.
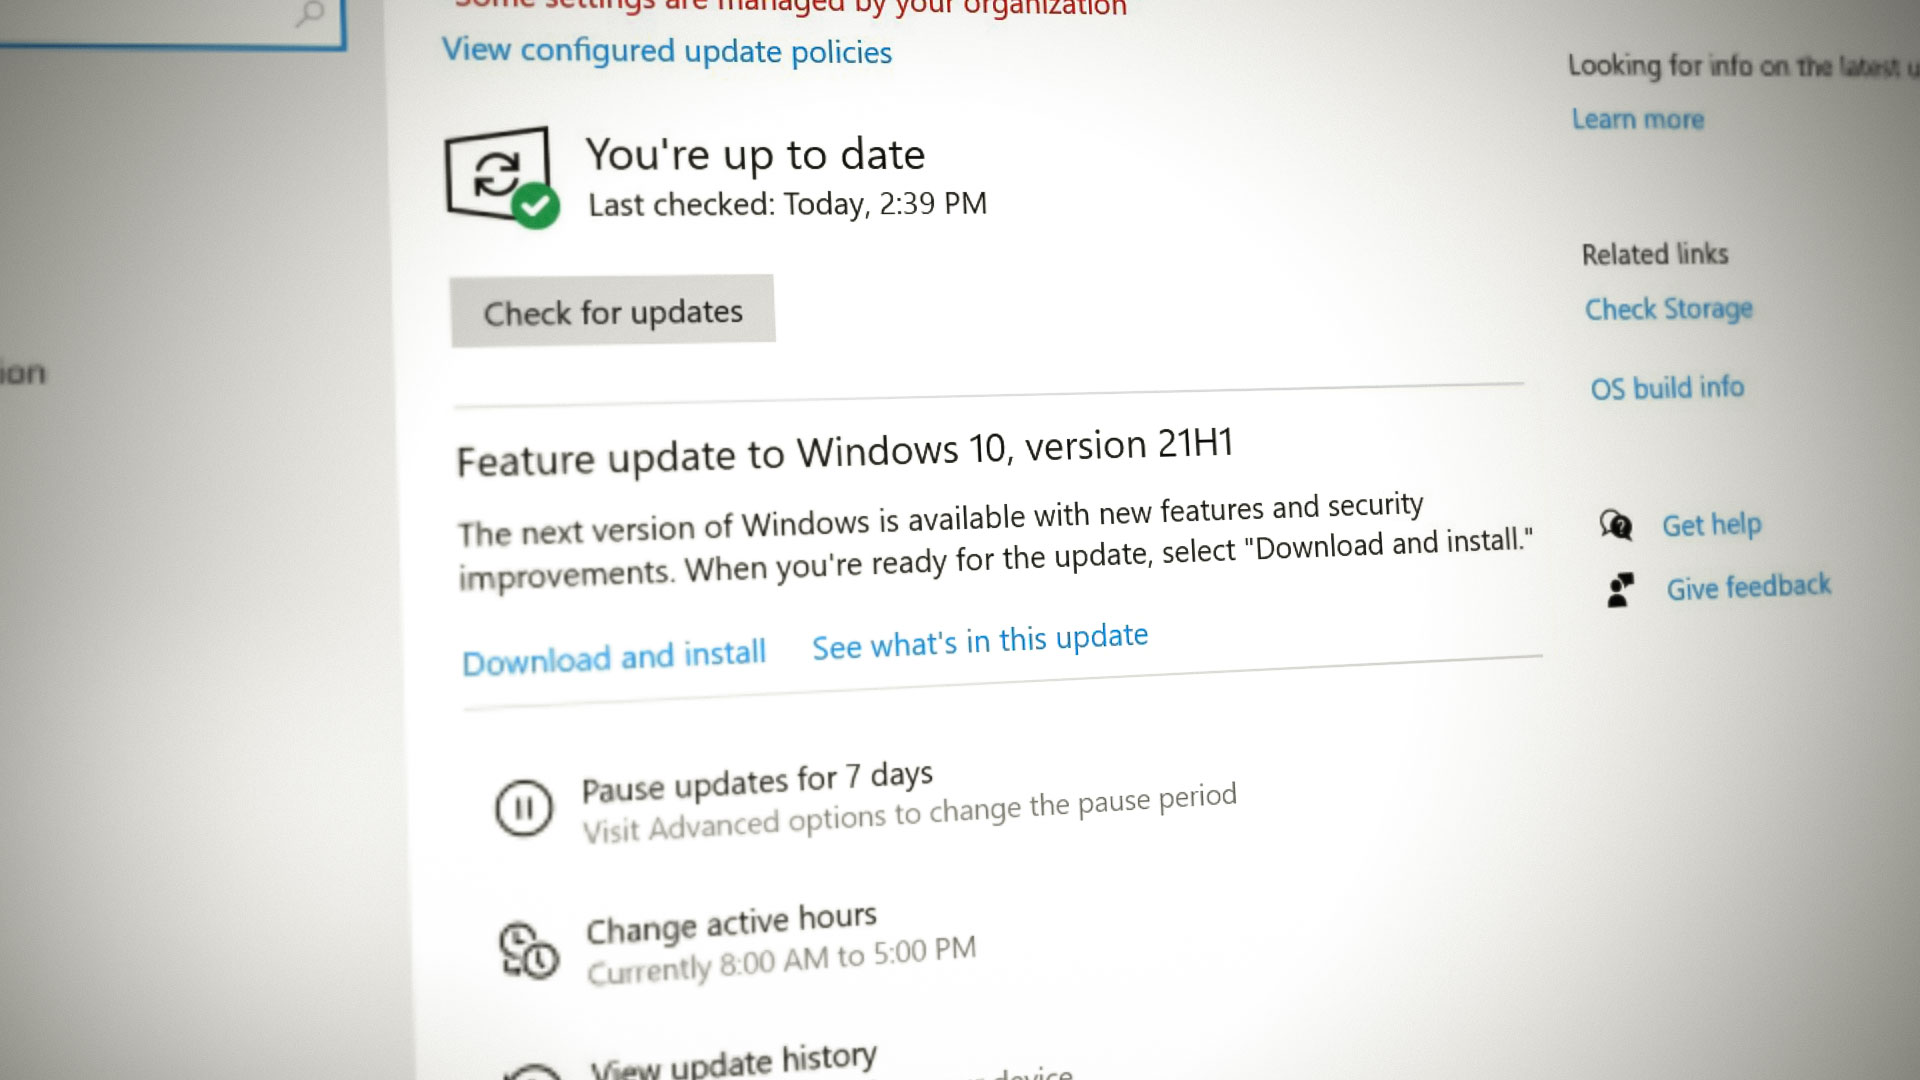
The most common cause is a full or incorrectly set up System Reserved partition. Other possible reasons include VPN problems, outdated drivers, or conflicts with antivirus software. Now that you know the causes, let’s discuss the solutions.
1. Use the Latest Update Assistant to Update Your System
Typically, the 21H1 update should install automatically through Windows Update. However, if automatic installation fails, using the Update Assistant to manually install the update is often effective.
- Open a web browser and navigate to the official Windows 10 download page from Microsoft:
https://www.microsoft.com/fr-fr/fr-fr/fr-fr/en-us/software-download/windows10
- Click the Update Now button to download the Update Assistant.
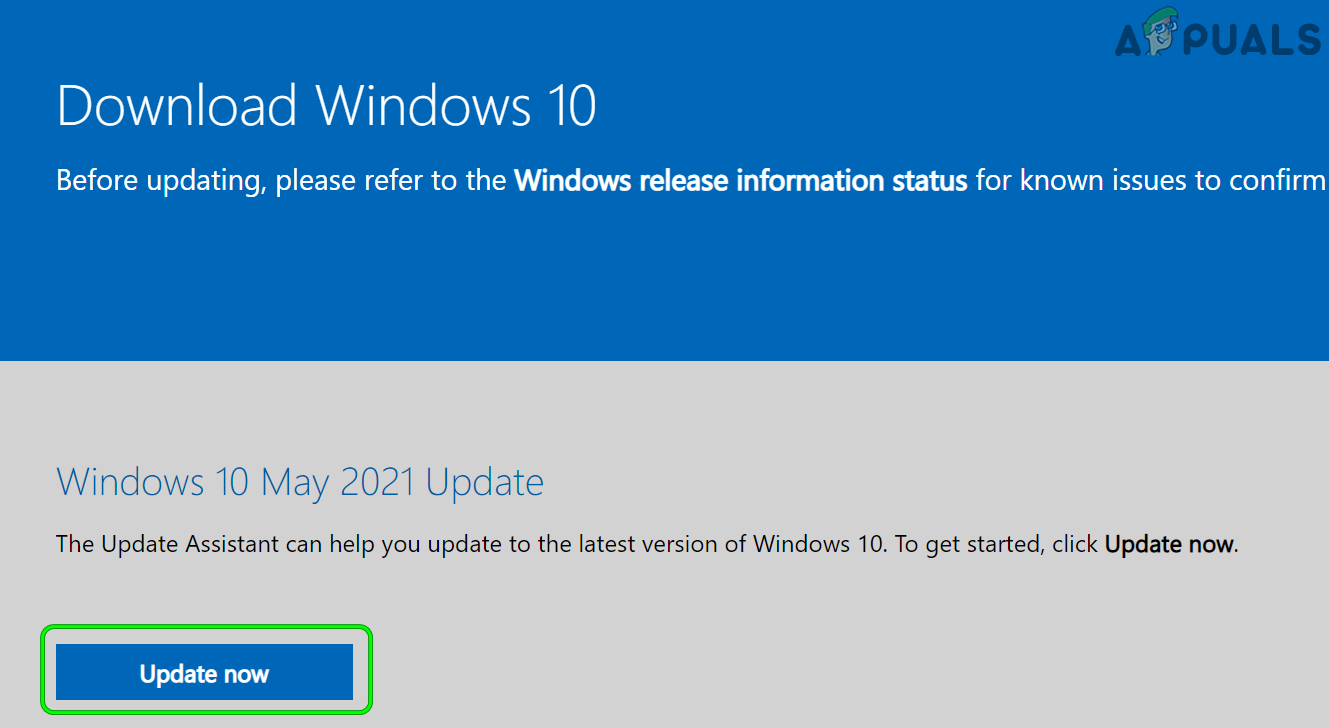
Download Latest Windows Update Assistant by Clicking on Update Now - Run the Update Assistant as an administrator and follow the on-screen instructions to complete the update process. Administrator privileges ensure proper system access for the update.
- After updating, restart your PC and check if your system version has been updated to 21H1.
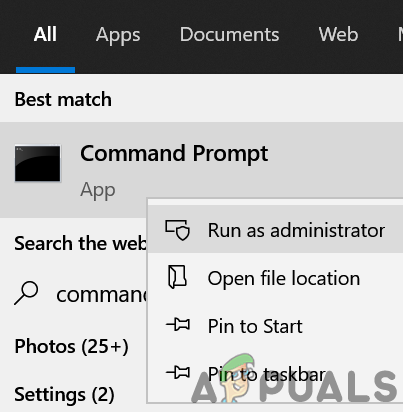
2. Perform DISM and SFC Scans on Your System
Corrupted system files can prevent updates from being installed successfully. Running DISM (Deployment Imaging Service and Management Tool) and SFC (System File Checker) scans will attempt to repair these files, potentially resolving installation failures.
- Click the Windows button, type CMD, right-click on Command Prompt, and select Run as Administrator.
Open Command Prompt as Administrator - Enter the following command to begin the DISM scan:
Dism /Online /Cleanup-Image /RestoreHealth
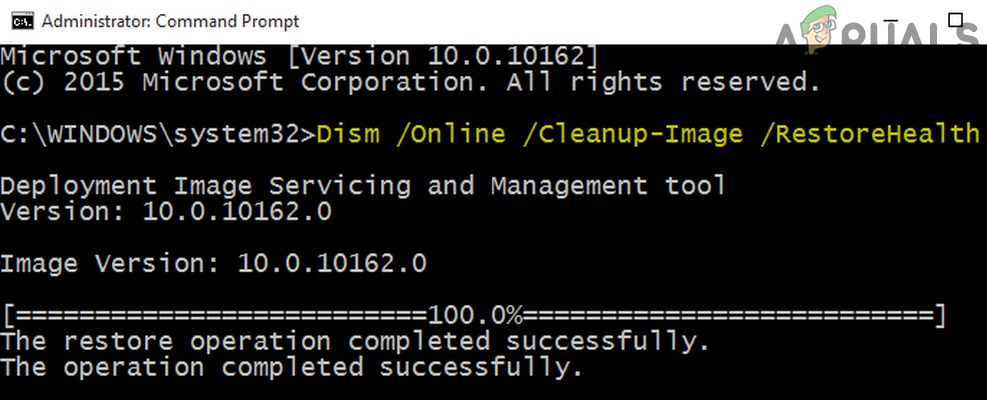
Use the DISM Command to RestoreHealth - Wait for the DISM scan to finish (this can take 20 to 30 minutes). Next, execute the following command to run an SFC scan. It is recommended to run this when you do not need your PC for a while, such as overnight, as it may take considerable time:
sfc /scannow
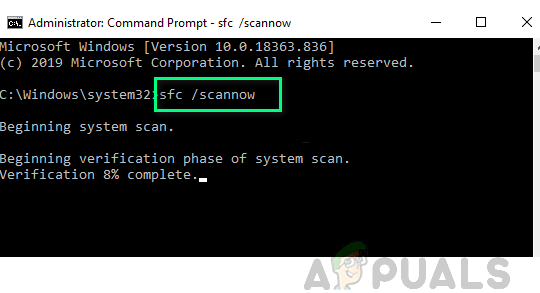
Perform an SFC Scan - Once the scan has completed, restart your PC and try installing the 21H1 update again.
3. Update Your PC’s BIOS to the Latest Version
An outdated BIOS can conflict with new Windows updates and prevent installation. Keeping your BIOS firmware up to date helps ensure compatibility with major Windows releases such as 21H1.
- Follow the manufacturer’s instructions to update your PC’s BIOS. Use the appropriate guide for your brand:
- After completing the BIOS update, verify if the 21H1 update can now be installed.
Keeping your BIOS current ensures system stability and update compatibility.
4. Perform an In-Place Upgrade of Your PC’s Windows
If previous solutions have not resolved the issue, performing an In-Place Upgrade will reinstall Windows while preserving your settings, applications, and personal files. This process can resolve deeper system issues that prevent updates.
- Open a web browser and visit Microsoft’s official Windows 10 download page:
https://www.microsoft.com/fr-fr/fr-fr/fr-fr/en-us/software-download/windows10
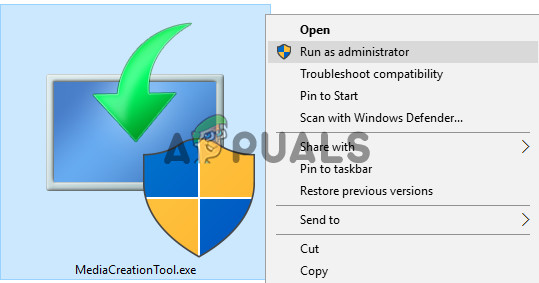
- Scroll down to the Create Windows 10 Installation Media section and click Download Tool Now.

Download the Media Creation Tool from the Microsoft Website - After downloading the tool, run the setup as administrator and accept the license agreement.
Launch the Media Creation Tool as Administrator - Select Upgrade This PC Now and carefully follow the prompts. When prompted, ensure you select Keep Windows Settings, Personal Files, and Apps to preserve your data and configuration.
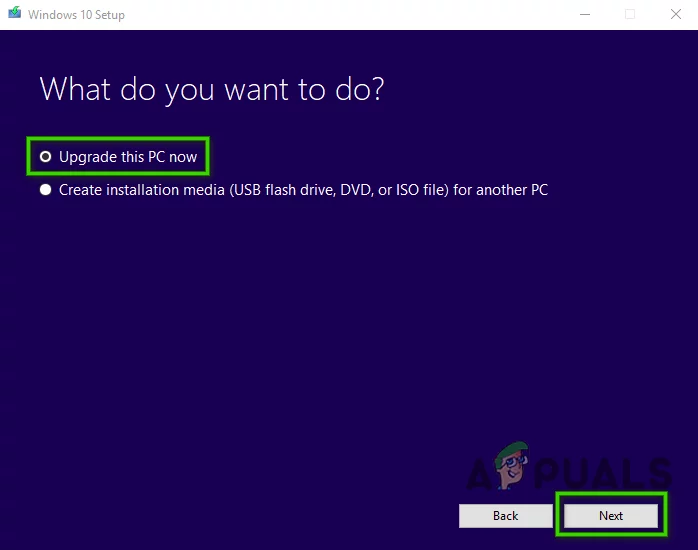
- Once the upgrade process completes, your system should now be updated to Windows 10 21H1.
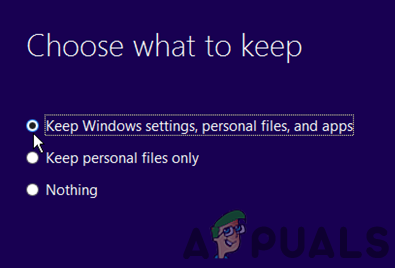
Keep Windows Settings, Personal Files, and Apps
If the issue persists, consider performing a repair installation of your current Windows setup. As a last resort, you may need to perform a clean installation of Windows 10. While this process is more involved, it is often the definitive solution for persistent update failures.
By following the steps above, you can systematically address the most common reasons for Windows 10 21H1 update issues and restore your PC to full functionality.


Update Assistant did the trick for me after trying several other solutions – THANKS!