Windows Video App Can’t Play Error 0xc1010103
Playing a video file in the Windows Video App can sometimes cause the error message, “Can’t play – 0xc1010103,” to appear, stopping the video without any clear reason. This error usually means the app cannot play the video because it does not support the video’s format or the file is damaged. Most often, this problem happens if the video file format is not compatible or the file itself is corrupted.
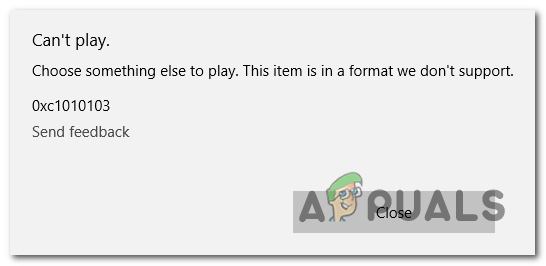
Sometimes, missing codec packs, outdated drivers, or problems with hardware acceleration can also cause this error. It is most commonly seen with MKV, HEVC, or high-bitrate MP4 files, especially after a Windows update or when changing graphics drivers. Now that you know the causes, let’s discuss the solutions.
1. Run the Video Playback Troubleshooter
If you have recently performed a Windows update, this issue may result from a common glitch originating from the Video app’s temp folder. Many users facing this problem have reported success by running the Video Playback troubleshooter and restarting their computers.
If this scenario applies to you, it is likely that Windows already has a built-in repair mechanism that will automatically fix the error.
- Open a Run dialog by pressing Windows key + R. Type ms-settings:troubleshoot and press Enter to access the Troubleshooting section in Settings.
- In the Troubleshooting window, navigate to the right section and find the Find and fix other problems category.
- Click on Video Playback, then select Run the troubleshooter from the expanded options to launch the tool.
- Wait for the initial scan to complete. If a recommended solution is detected, click Apply this fix.
- Once the process finishes, reboot your computer and check if the issue has been resolved at startup.

2. Update GPU Drivers
If you encounter the 0xc1010103 error consistently—across all video file types, not just .MKV files—it is likely that the problem lies with your GPU drivers. This is especially common on laptops equipped with both an integrated and dedicated GPU.
Many users have resolved the issue by starting their computers in Safe Mode, uninstalling their current display drivers, and then updating to the latest graphics driver version using manufacturer-provided software. This process eliminates potential driver corruption or incompatibility, ensuring your system has the most stable and current drivers.
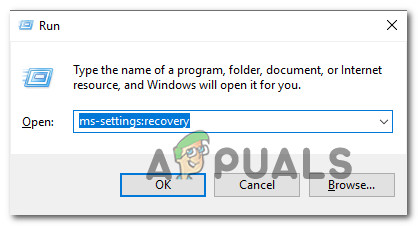
- Press Windows key + R to open a Run dialog. Type ms-settings:recovery and press Enter to go to the Recovery section under Update & Security in Settings.
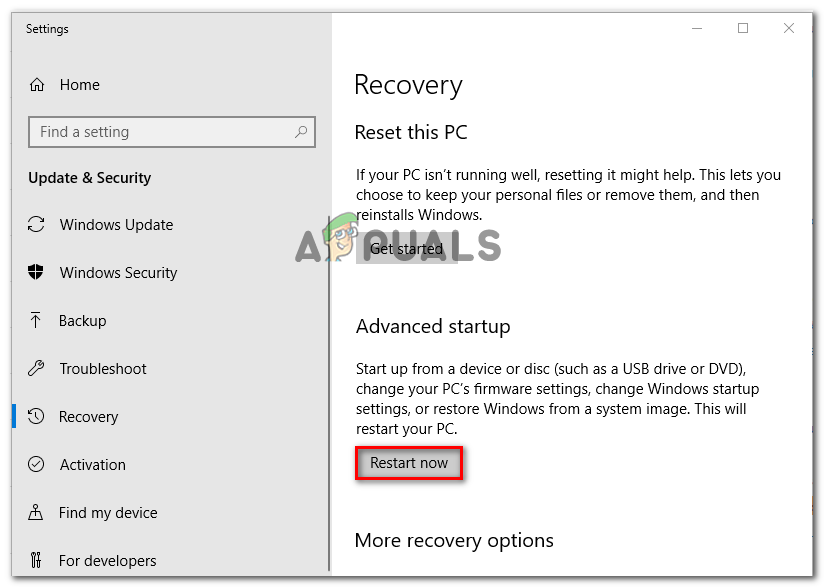
Accessing the Recovery tab - Under the Recovery tab, locate the Advanced startup section. Click Restart now. Your system will reboot and open the Advanced Startup menu.
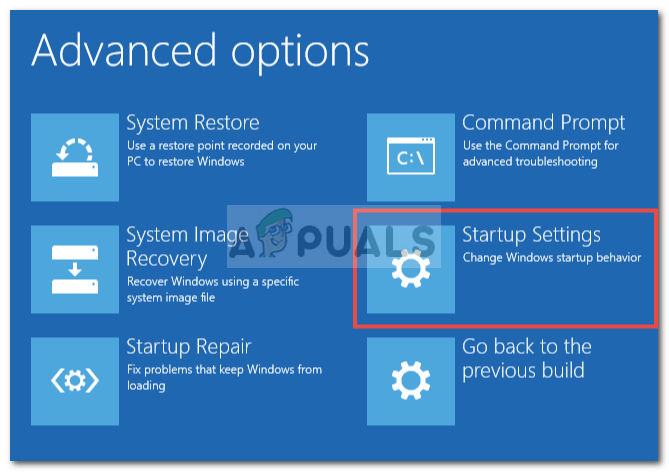
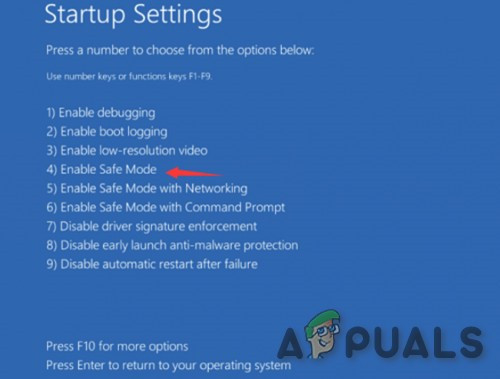
Accessing the advanced startup menu - Navigate to Troubleshoot > Advanced Options, then select Startup Settings.
Windows 10 Advanced Options - On the Startup Settings screen, your computer will restart once more. When the Startup Settings menu appears, press the F4 or 4 key to boot into Safe Mode.
Enable Safe Mode in Startup Settings - Once in Safe Mode, open another Run dialog by pressing Windows key + R. Type devmgmt.msc and press Enter to launch Device Manager.

Running Device Manager - Within Device Manager, expand the Display adapters section. Right-click on each listed graphics adapter and select Uninstall device.
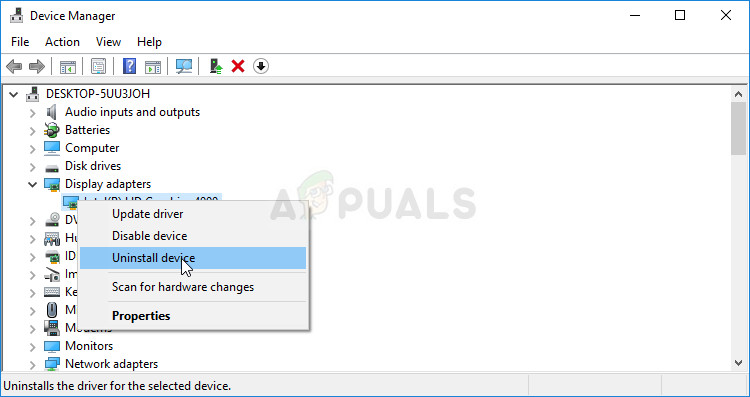
Uninstalling the graphics adapter Note: If your laptop has both integrated and dedicated GPUs, uninstall both drivers.
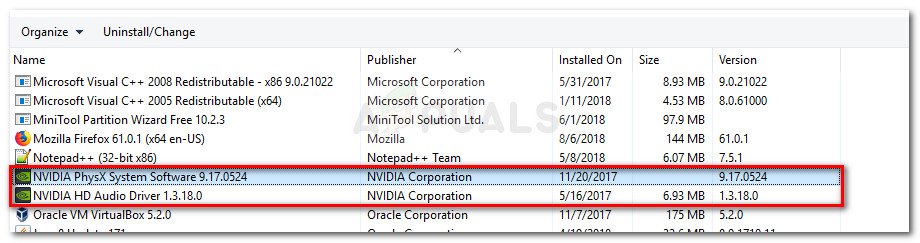
- After uninstalling the device drivers, close Device Manager. Open another Run dialog (Windows key + R), type appwiz.cpl, and press Enter to access Programs and Features.

Typing in “appwiz.cpl” in the Run prompt - Scroll through the list of installed applications and uninstall any software signed by your GPU manufacturer (Nvidia, AMD, or Intel Graphics). For faster navigation, group by Publisher. Right-click each entry and choose Uninstall, then follow the on-screen instructions.
Uninstall all GPU related software - After uninstalling all relevant drivers and software, restart your computer to return to normal mode.
- Next, download the latest drivers compatible with your GPU from your hardware manufacturer’s website. Use the following links to access the drivers:
Nvidia’s Download Page
AMD’s Download Page
Intel Graphics Download Page - Download and install the appropriate drivers for your GPU model and operating system version. Once installation is complete, restart your computer.
- Finally, attempt to play the videos that were previously failing with the 0xc1010103 error to confirm the issue has been resolved.


To better understand the issue please let us knowAre you on Laptop?
Have you tried using alternatives like VLC?Also, I suggest you try creating a new user account and check if the problem persists on that account or not.