How to Fix 007 First Light Not Launching on PC?
When 007 First Light won’t launch on PC, the only visible clue can be the launcher briefly switching to Running, a black window flashing and closing, or no window appearing at all after you click Play.
This is different from a crash after the main menu. In this case, the game is usually failing before it has a full screen, menu, or in-game error box to explain what happened.
Windows can have started the executable, but the game still has to finish its first startup sequence. That includes loading patched files, checking the install location, choosing the correct GPU, initializing the graphics driver path, reading local profile or save data, and opening the first display window.
1. Install the Current Patch and Check the Hard Requirements
On hybrid systems, one known launch pattern is the game picking the integrated GPU instead of the dedicated GPU, so updating first is safer than trying old registry or adapter workarounds.
Use this section before deeper Windows cleanup. If the launcher is already fully updated and the PC clearly meets the requirements, this is only a confirmation step, not a rollback or downgrade step.
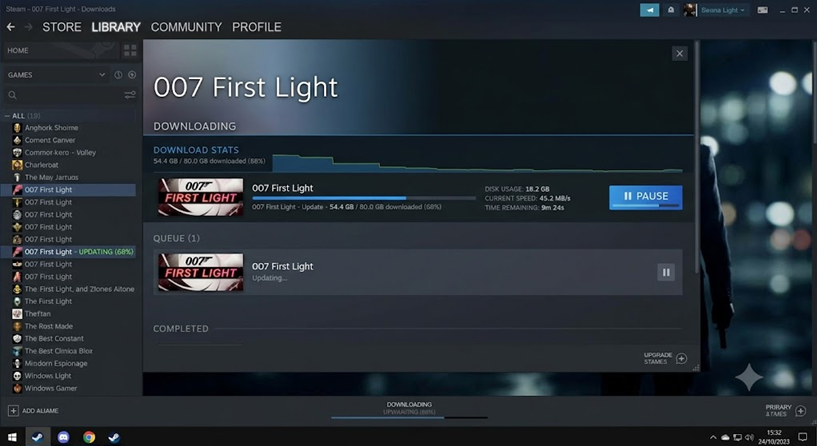
- Open Steam, Epic Games Launcher, or the Xbox app and let every pending 007 First Light update finish.
- If you saw older advice about deleting an Adapter registry key or forcing a GPU through the registry, update the game first. A normal patch is safer than editing Windows launch data.
- Confirm the game is installed on an SSD, not a hard drive.
- Make sure the install drive has enough free space beyond the listed 80 GB requirement.
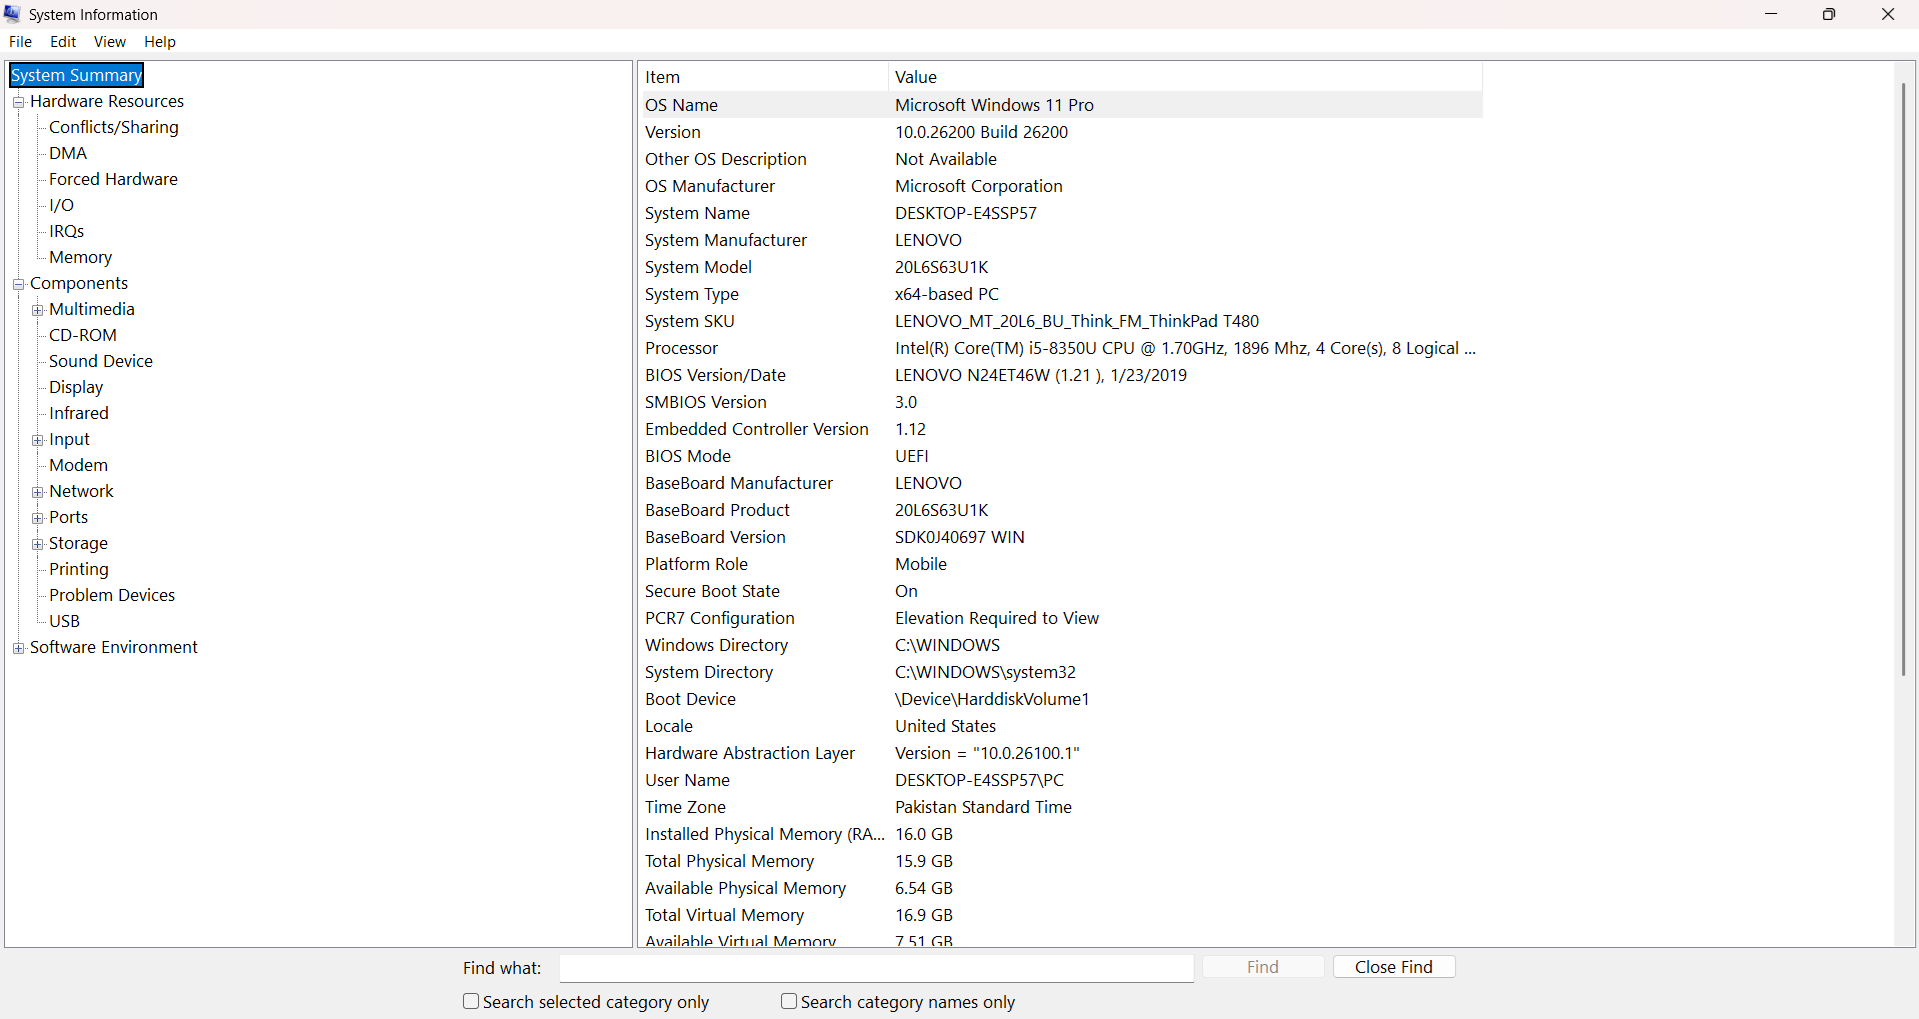
- Compare the PC against the current minimum requirements: Windows 10/11 64-bit, Intel Core i5-9500 or AMD Ryzen 5 3500, 16 GB RAM, and GeForce GTX 1660, Radeon RX 5700, or an equivalent Intel discrete GPU.
The SSD requirement, 16 GB RAM floor, and listed CPU/GPU minimums need to be cleared before later fixes can hold. - If this is a fresh install, stay online long enough for the one-time Day 1 patch download to complete, then close and relaunch the game.
If the PC misses the minimum spec or the patch never finishes, fix that first. If the system should qualify and the current build still will not open, move to the next method.
2. Run IOI’s Fast Launch Checklist Once
IOI’s PC troubleshooting page lists the same fast order for startup issues: restart the PC, update Windows, update the GPU driver, verify or repair files, and disable overlays. Do these once in order before trying deeper fixes.
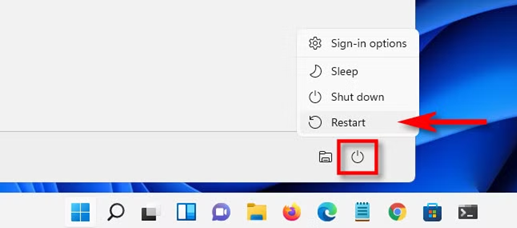
- Restart the PC fully.
- Install pending Windows Update items, then restart again if Windows asks.
- Install the newest stable driver for your NVIDIA, AMD, or Intel GPU, then restart.
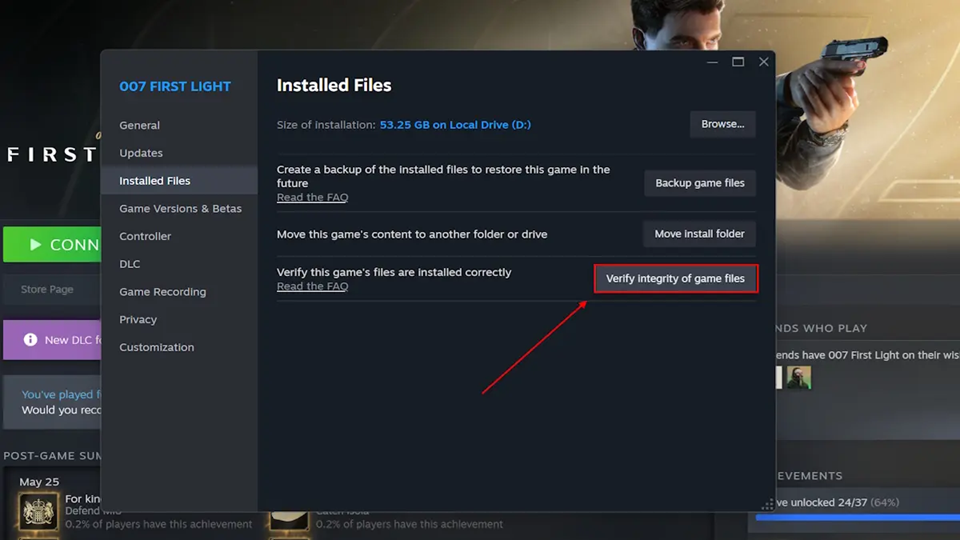
IOI’s startup checklist starts with Windows state, GPU drivers, file repair, and overlays before heavier repair steps. - Repair the game files from your storefront. On Steam, open Library > Properties > Installed Files > Verify integrity of game files. On Epic, use Library > three dots > Manage > Verify. For Xbox app or Microsoft Store installs, use Windows Repair if the game exposes app options.
Storefront verification is faster than a full reinstall and catches damaged or incomplete game files. - Close overlays and capture hooks before testing again, including Steam Overlay, Discord Overlay, Xbox Game Bar, NVIDIA or AMD overlays, MSI Afterburner, and RivaTuner.

Overlay and recording tools are one of IOI’s first launch-conflict checks when the game opens then closes or does nothing.
If the game opens after this pass, keep the working change and avoid stacking extra tweaks on top. If clicking Play still does nothing or the game closes immediately, clear launch arguments and security conflicts next.
3. Remove Launch Arguments, Permission Blocks, and Antivirus Conflicts
A custom launch option, injected tool, or antivirus block can keep breaking every test even after the game files are repaired. Use this when the game still closes immediately after the basic update and file-repair pass.
- Clear any custom launch options you added in Steam or Epic Games Launcher.
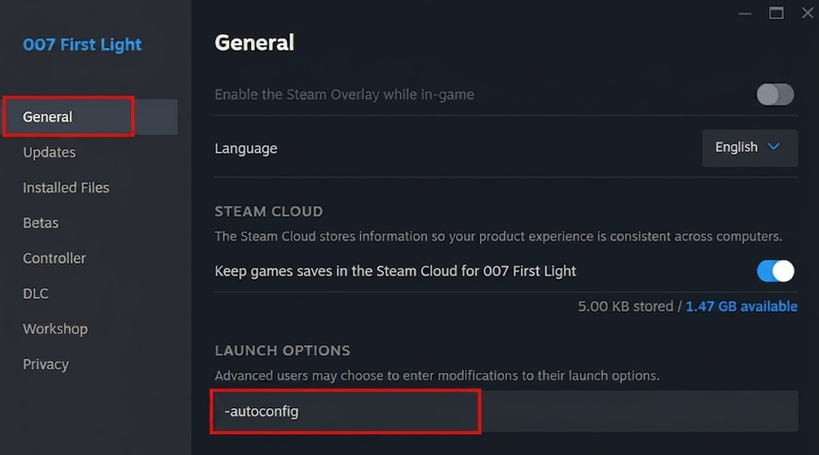
Remove old command-line tweaks before judging the current patched build. - For Steam or Epic installs, right-click the launcher or game executable and try Run as administrator once.
- Temporarily pause third-party antivirus for one test launch. If the game opens, turn protection back on and add an exception for the game folder and launcher.
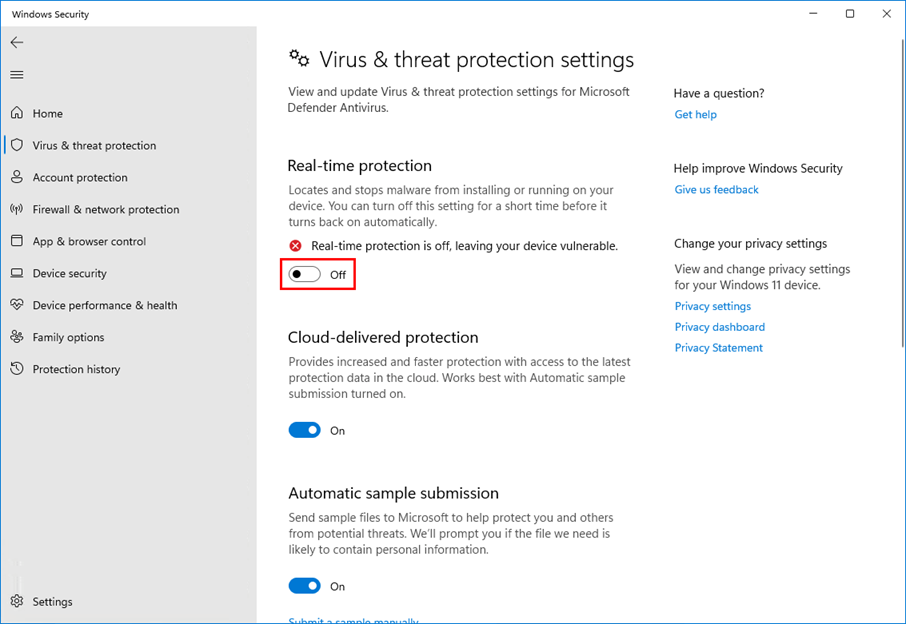
Use antivirus disablement only as a short test. If it helps, keep an exception instead of leaving protection off. - Launch the game again with only the storefront and the game running.
If the game opens after clearing launch options, permissions, or antivirus conflicts, stop there and keep the change that worked. If it still fails, move to the next method and test with a clean boot.
4. Use a Clean Boot to Check for Background Conflicts
IOI points persistent launch issues to a clean boot, and Microsoft describes clean boot as a way to start Windows with nonessential services and startup items disabled. Skip this if the game already opens normally after the earlier steps; otherwise it is safer than randomly killing processes because it gives you a clear before-and-after test.
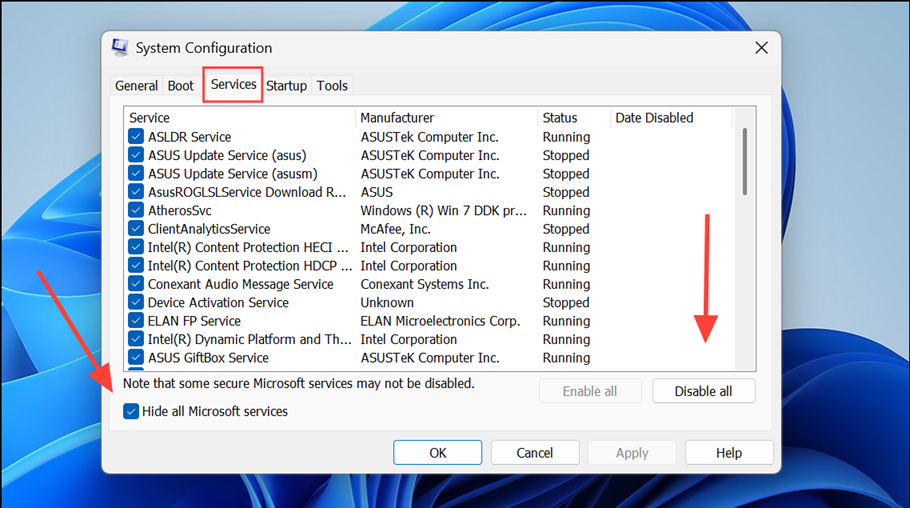
- Press Windows, type msconfig, and open System Configuration.
- Open the Services tab.
- Check Hide all Microsoft services, then click Disable all and Apply.
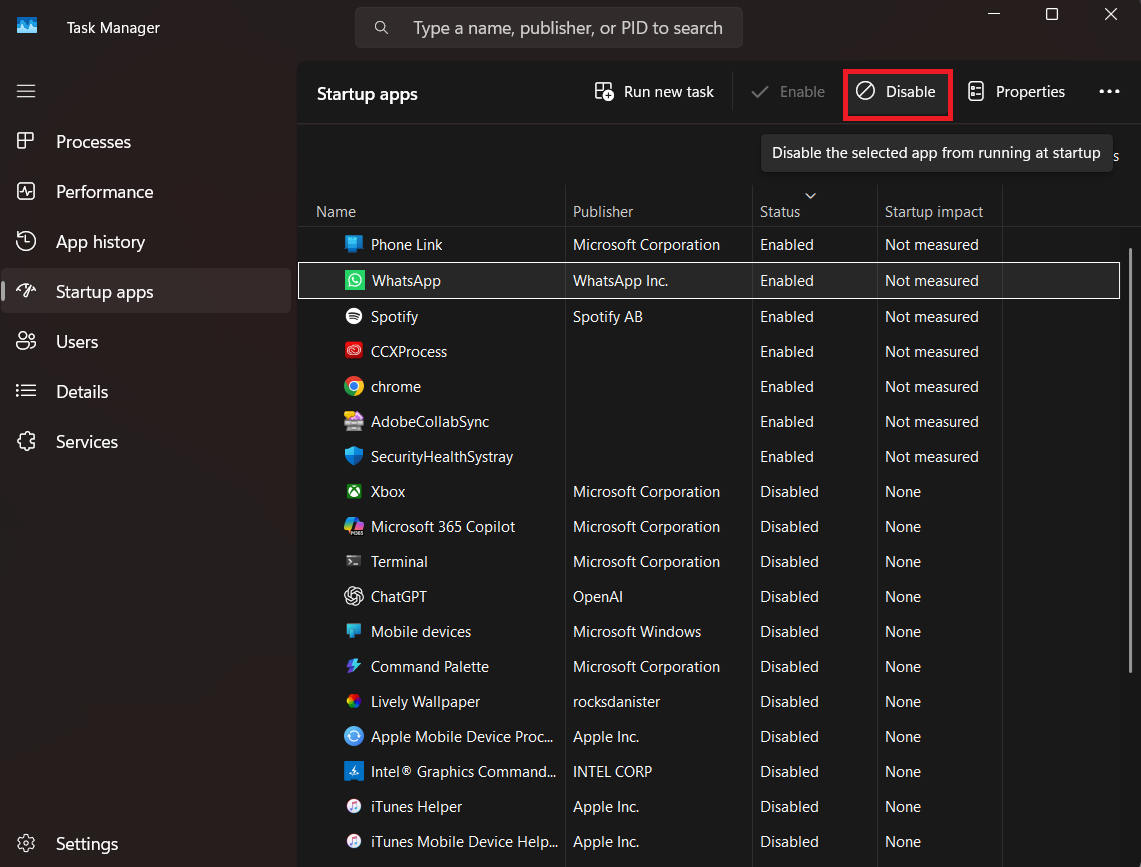
Hide Microsoft services first so the test disables third-party services rather than core Windows services. - Open the Startup tab and click Open Task Manager.
- Disable enabled startup items, then restart the PC.
If the game opens in clean boot, one of the disabled startup apps or services is the likely blocker. - Test 007 First Light before re-enabling anything.
- If it launches, re-enable services and startup items in batches until the conflict shows itself, then return Windows to Normal Startup after testing.
If the game opens in clean boot, re-enable items in batches until you find the blocker. If it still refuses to launch in clean boot, move to the next method and repair the Windows app path or reinstall the game once.
5. Repair the Xbox/Microsoft Store App Path or Reinstall Once
Reinstalling is most useful after the current patch, requirements, file repair, overlays, security software, and clean boot are already tested. Otherwise you may redownload the same game while leaving the real blocker untouched.
Before using Reset or reinstalling, make sure any local saves are backed up or synced, and create a Windows restore point if you are changing the Microsoft Store app package. If this change makes things worse, roll back through your backup or the launcher’s normal repair path instead of stacking more resets.
- If you installed through the Xbox app or Microsoft Store, open Settings > Apps > Installed apps.
- Open the game’s app options, then choose Repair. Use Reset only if Repair is unavailable or does not help.
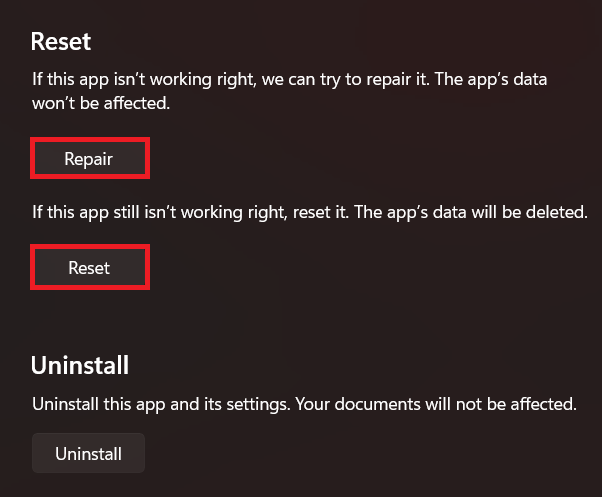
Windows app repair is worth trying on Microsoft Store or Xbox app installs before a full reinstall. - If you installed through Steam or Epic and verification did not help, uninstall the game from the launcher.
- Reinstall the game on an SSD from the official launcher.
- Let the launcher finish patching before the first launch.
- Launch once before restoring overlays, launch options, or monitoring tools.
A clean reinstall belongs near the end, after faster repair and conflict checks have already been tested.
If the game opens after this, the install or Windows app package was damaged. If it still fails on a clean current install, move to the next method and prepare a support report instead of repeating the same local fixes.