Fix: Your network settings are blocking party chat [0x89231906]
Being able to communicate with your teammates during an online game is one of the most enjoyable aspects of online multiplayer gaming and that is one of the reasons that the pre-installed Xbox app exists on your Windows PC.
However certain errors occur where the app displays an error message which contains the following text:
“Your network settings are blocking party chat”, with the error code 0x89231906 displayed right next to it.
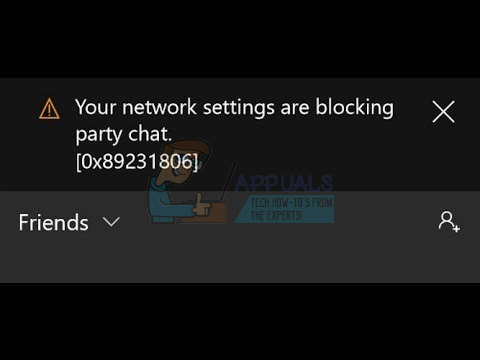
This issue can be quite a major one since you are automatically disconnected from the party chat you were once part of and it won’t allow you to connect back to it. You are also not able to use the chatting feature at all but you are still able to play the game normally online. Follow the instructions below to find out how to fix this problem.
Solution 1: Open Some of the Ports Needed for the Chatting Feature
Opening some of the ports which were probably blocked by default is bound to fix most of the issues which occurred with the functionality. Port forwarding is not a difficult process and it involves making an exception for certain ports through your firewall.
If these ports were blocked by default, the Party Chat could not connect to the Internet properly and that is why you received the error message above. Follow the steps below in order to fix this!
- Navigate to Control Panel by searching for it in the Start menu and click on System and Security >> Windows Firewall. You can also switch the view to Large or Small icons and click on Windows Firewall instantly.

- Select the Advanced settings options and highlight Inbound Rules in the left section of the screen.
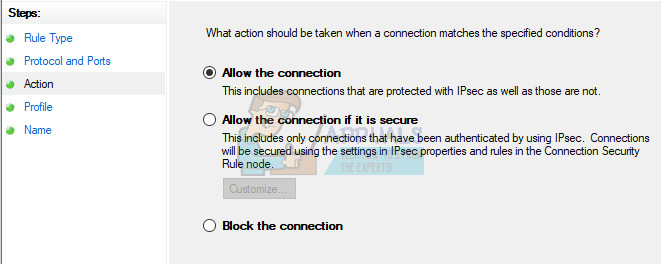
- Right click on Inbound Rules and click on New Rule. Under the Rule type section, select Port. Select either TCP or UDP from the first set of radio buttons (TCP is recommended) and switch the second radio button to “Specific local ports. You will need to add the following ports in order to fix you Party Chat functionality:
- 53, 80, 88, 500, 3074, 3544, 4500
- Make sure you separate them by a coma right to the last one and click on Next after you have finished.
- Select the Allow the connection radio button in the next window and click Next.
- Select the network type when you want to apply this rule. If you switch from one network connection to another quite often, it’s recommended that you keep all of the options checked before clicking Next.
- Name the rule something which makes sense to you and click Finish.
Solution 2: Uninstall Third-Party Network Tools and Adapters
Third-party network tools and adapters sometimes seem like the premium solution for a problem you are having and they sometimes provide an improvement of your overall Internet connection of they bring a new amazing feature.
However, it seems that these tools sometimes interfere with features such as Xbox Party Chat and users have reported that they were able to use the feature after they have uninstalled such tools, such as Hamachi or Tunngle. Follow the steps below.
- First of all, make sure you are logged in with an administrator account as you won’t be able to delete programs using any other account.
- Backup the data you want to save because deleting Hamachi will remove it.
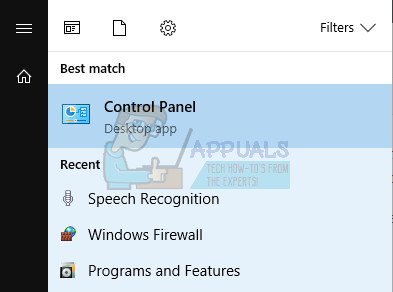
- Click on the Start menu and open Control Panel by searching for it. Alternatively, you can click on the gear icon in order to open settings if you are using Windows 10.
- In Control Panel, select to View as: Category at the top right corner and click on Uninstall a Program under the Programs section.
- If you are using the Settings app, clicking on Apps should immediately open a list of all installed programs on your PC.
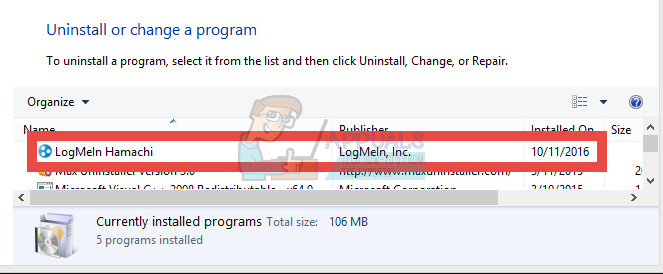
- Locate Hamachi in Control Panel or Settings and click on Uninstall.
- Hamachi’s uninstall wizard should open with several options. Choose that you want to uninstall the program and wait for a couple of minutes.
- A message will pop up asking “Do you want to completely remove Hamachi for Windows?” Choose Yes.
- Click Finish when the uninstalled completes the process and restart your computer to see whether errors will still appear.
Additionally: It’s important to check whether there are any remaining third-party network drivers on your computer which may be causing issue with both the Windows Firewall and your Xbox Party Chat feature. Do so by following the steps below:
- Start Control Panel by searching for it in the Search bar located at the left part of your taskbar, click Hardware and Sound, and then click Device Manager.
- Expand the node next to Network adapters, right-click the on the entry which should be named similar to the program which installed it (Hamachi for example). If you are not sure, perform a Google search for each of the devices you see under the Network adapters section and conclude just which one you should uninstall by right-clicking on it and selecting the Uninstall device option.
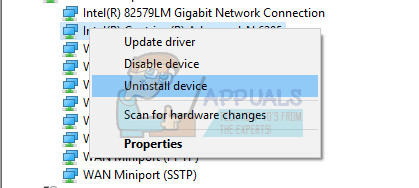
- On the Confirm Device Removal dialog box, click OK to start the uninstall process.
- When the uninstall process is complete, restart your computer and check to see if the issue appears again.
Solution 3: Changing the Default Communication and Default Playback Device
The solution may lie in the fact that your device are disabled by default, especially if you are using an external pair of headsets or similar. You can tweak these settings easily so make sure you select the proper device to use for your party chat.
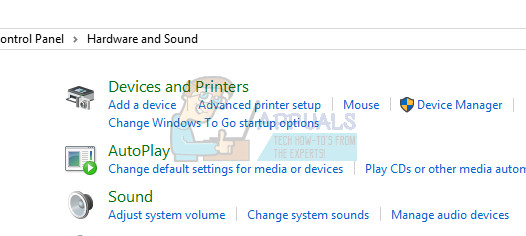
- Right-click on the volume icon located at your taskbar and choose the Playback Devices option. If this icon is not located at your taskbar, you can locate Sound settings by opening Control Panel, switching the view to Category and selecting Hardware and Sound >> Sound.
- Check to see if your devices are enabled under the Playback and Recording tabs. If you notice that they are disabled, right-click on them and choose the enable option.
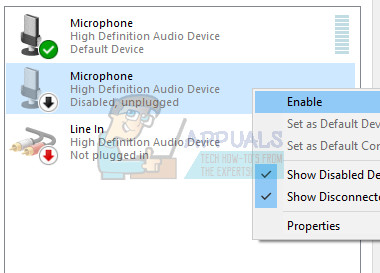
- If you have multiple microphones or headsets connected, try changing the default playback and recording devices by right-clicking on the device and selecting the Set as Default Communication device.
Solution 4: Enable the Teredo Client Using Command Prompt
In computer networking terms, Teredo is a transition tool that gives full IPv6 connectivity for IPv6-capable hosts that are using the IPv4 Internet but have no native ability to connect to an IPv6 network. Unlike other protocols, it can perform its function even from behind network address translation (NAT) devices such as home routers, etc.
Enabling this client has helped plenty of people deal with this annoying error code and we recommend you check this out.
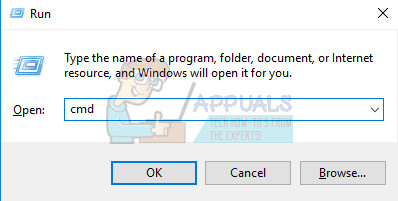
- Open Command Prompt in Windows 10 or Windows 8 by typing “cmd” in the Search box and opening the first result with administrator privileges. Another option is to open Run and type “cmd”.
- Execute the following commands one by one. Make sure you click Enter after you have copied each one in order to run it.
netsh
int teredo
set state disabled
int ipv6
set teredo client
- Restart your computer and try connecting to a Party Chat now and see if you are able to do that.
Solution 5: Clear the Persistent Storage and Resetting the MAC Address on Xbox ONE
Persistent storage holds files that are related to your Blu-ray discs, but since these files can cause issues, you’ll need to remove them. This option is related to Xbox One users who are are struggling with this problem and not for the Windows users. Fix the problem by following these steps:
Clearing the Persistent Storage:
- Open Settings on your Xbox One and navigate to Disc & Blu-ray.
- Click on Blu-ray.
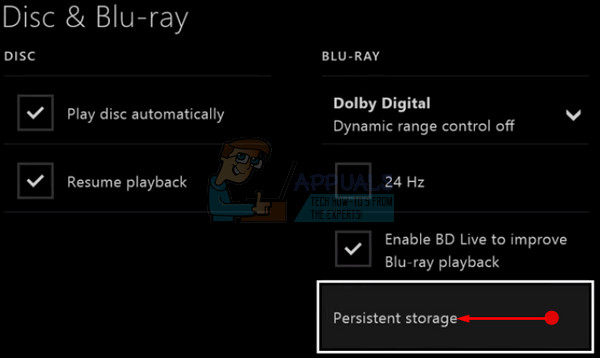
- Select Persistent storage and choose the Clear persistent storage option. You might have to repeat this step few times in order to completely delete the persistent storage.
Resetting the MAC Adress:
- On the Home screen of your Xbox One, navigate to the left to open the Guide. Select Settings from the list options which appear.

- The Settings section displays several options, click on All Settings on the top in order to proceed.
- Choose Network Settings. Here, few sections can be observed so go to Advanced Settings.
- Click on Alternative MAC address on the screen which appears promptly.
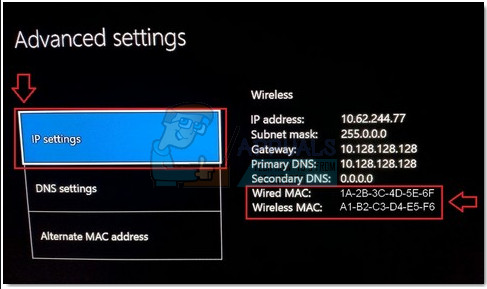
- In order to reset the MAC address, click the Clear button. The following screen will ask you to restart the console, click on Restart.
- Finally, check if you still confront Xbox Error 0x89231906 when running a Party Chat in-game.
THANK YOU