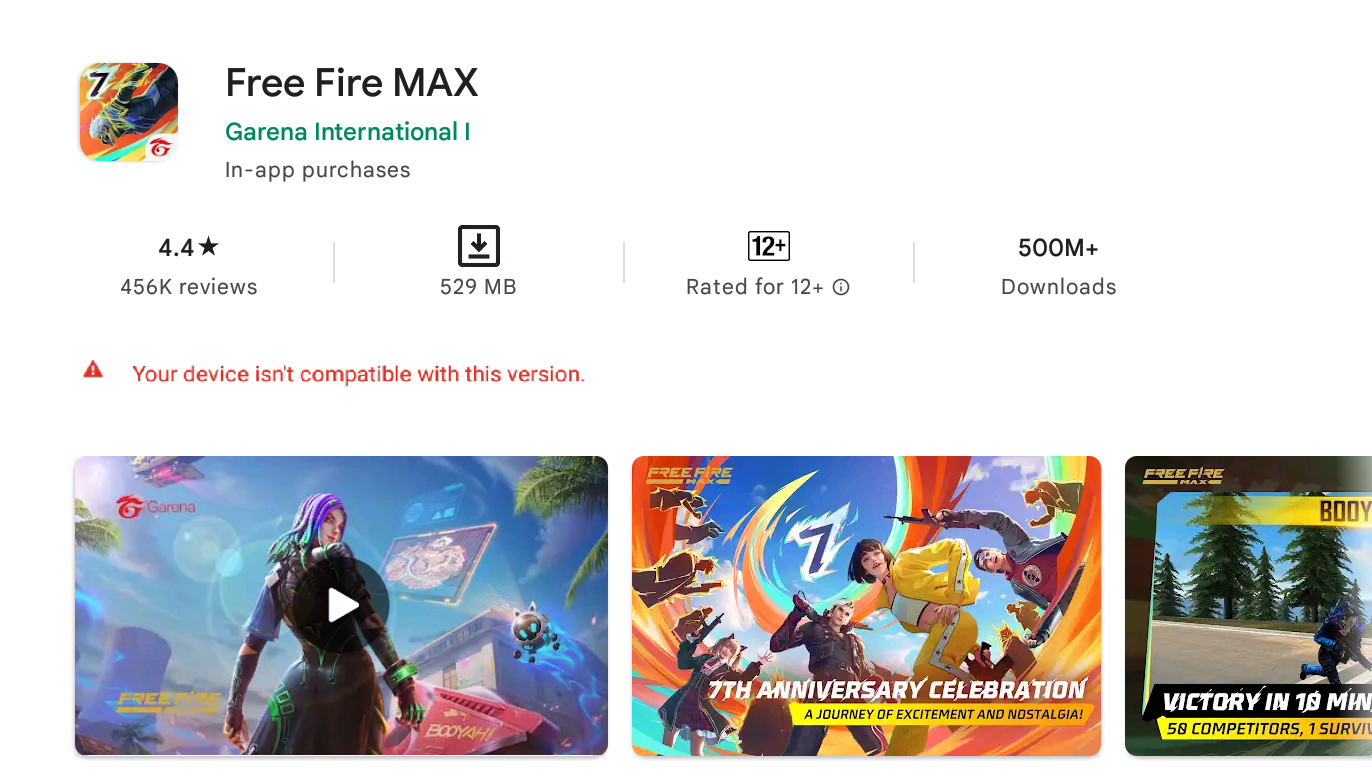
How to Fix “Your Device Isn’t Compatible with This Version” Error in BlueStacks?
When attempting to install a game or app in BlueStacks through the Google Play Store, users may encounter the error message “Your device isn’t compatible with this version”. This error usually happens when trying to install an app designed for the 64-bit version of BlueStacks while running the 32-bit version.
Running an incompatible device profile in BlueStacks is a common cause of this issue, as some apps require specific Android versions and system setups. Other factors can include an outdated version of BlueStacks or wrong settings.
Before you start troubleshooting, we recommend updating BlueStacks to the latest version and using a 64-bit instance with the correct Android version to solve this issue.
1. Update BlueStacks
Compatibility issues often arise with older versions of apps due to bugs and glitches. Therefore, it is important to update BlueStacks to the latest version as these updates aim to fix various errors and problems.
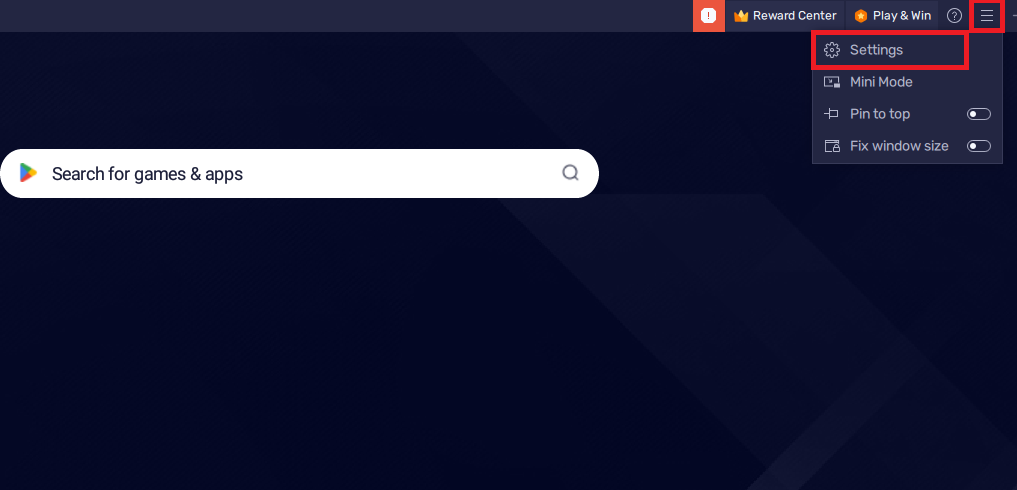
- Open BlueStacks. Look for the hamburger icon (three horizontal lines) on the title bar and click it. Next, choose the Settings button.
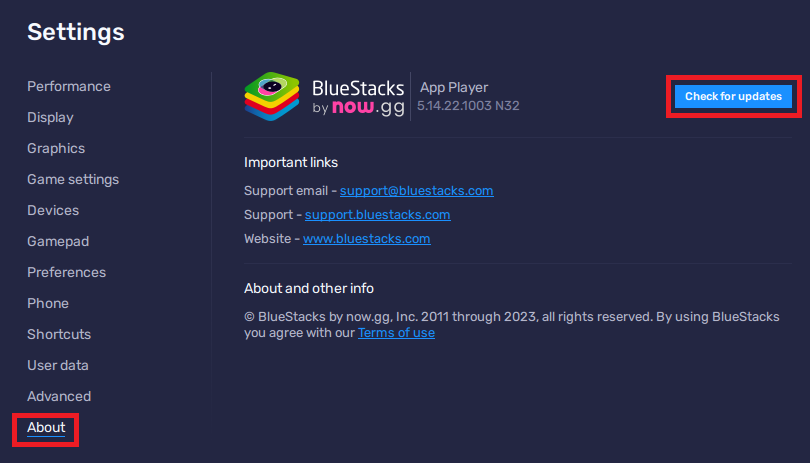
- In the Settings menu, find and select the About section. Then click the “Check for updates” button to ensure you have the latest version of the app.
2. Clear Google Play Store App Data
Corrupted app data from Google Play Store might cause functionality issues, leading to error messages.
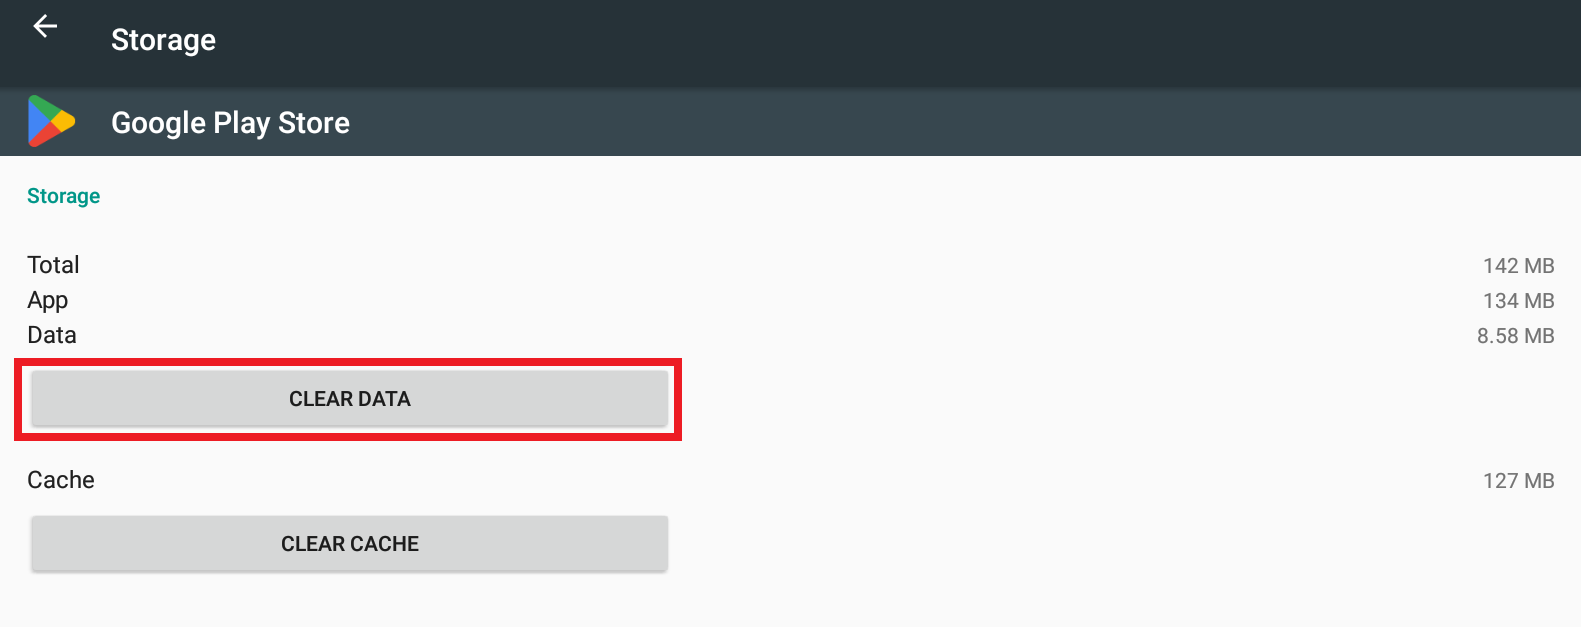
Note: Clearing Google Play Store app data will log you out; ensure you remember your Google account password before you proceed.
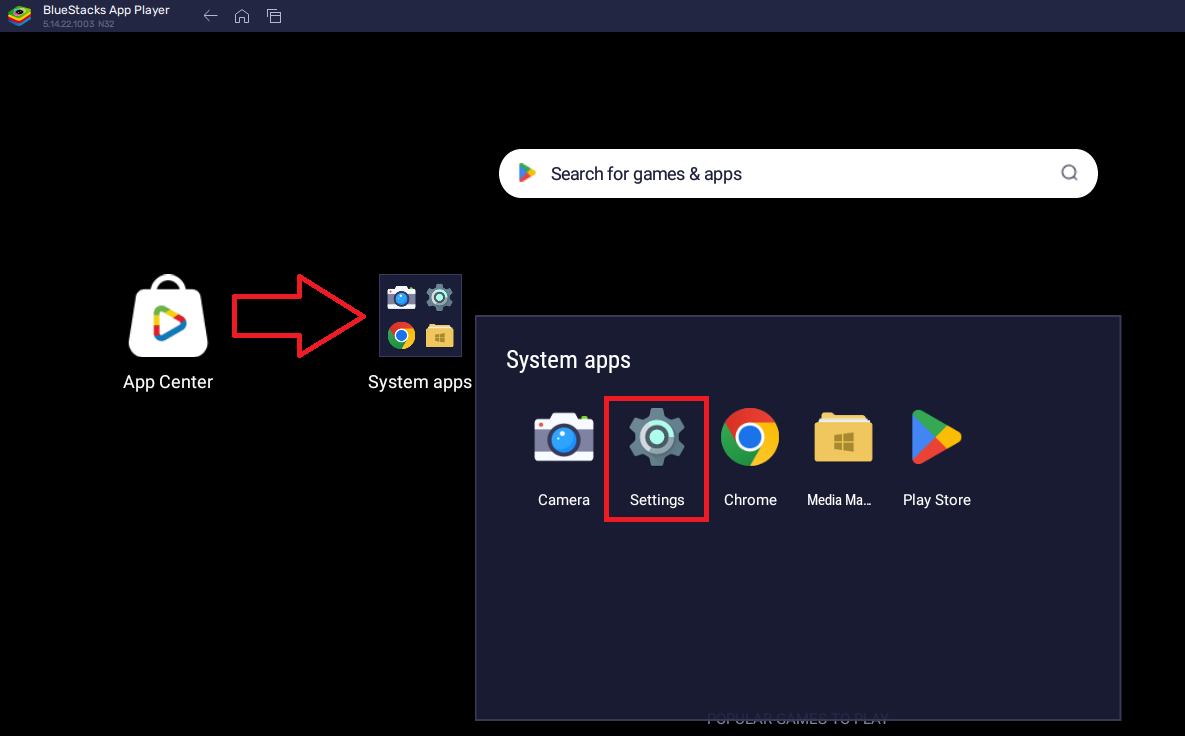
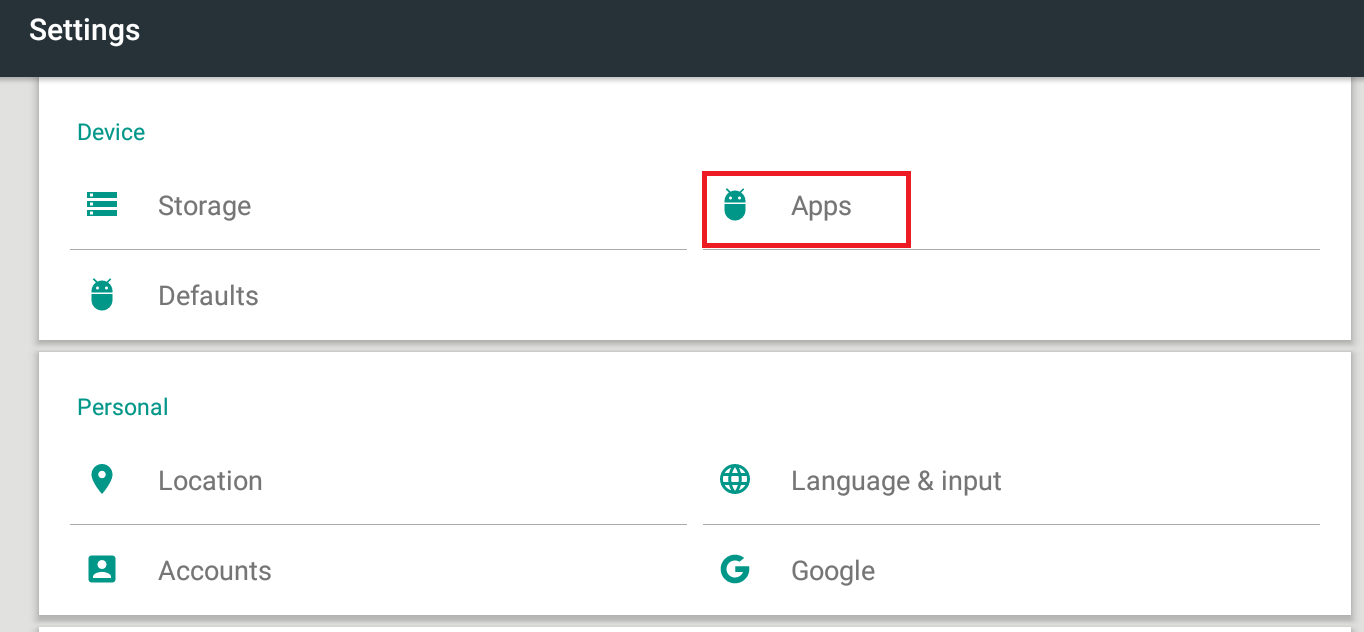
- Go to the BlueStacks homepage and click on the System Apps folder. Inside the folder, click on the Settings icon.
- In the Android settings menu, find the Device section and click on Apps.
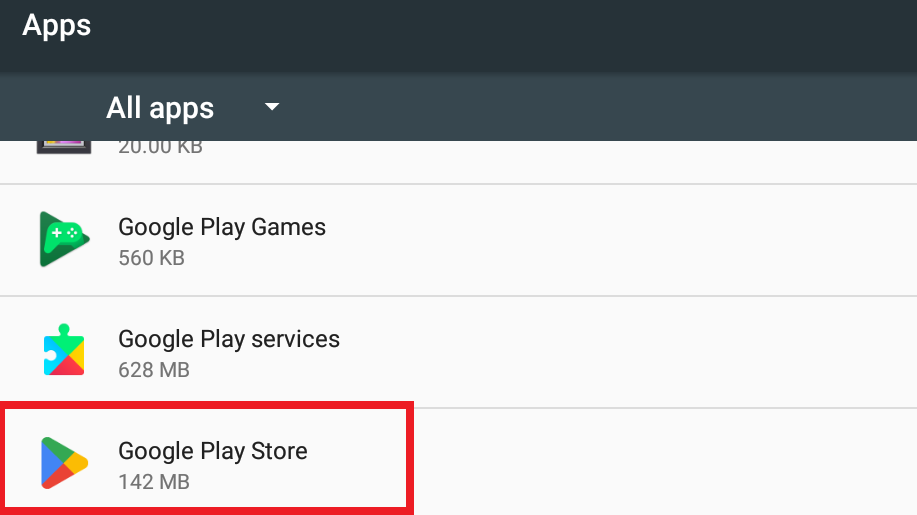
- Scroll through the list of apps, find the Google Play Store, and click on it.
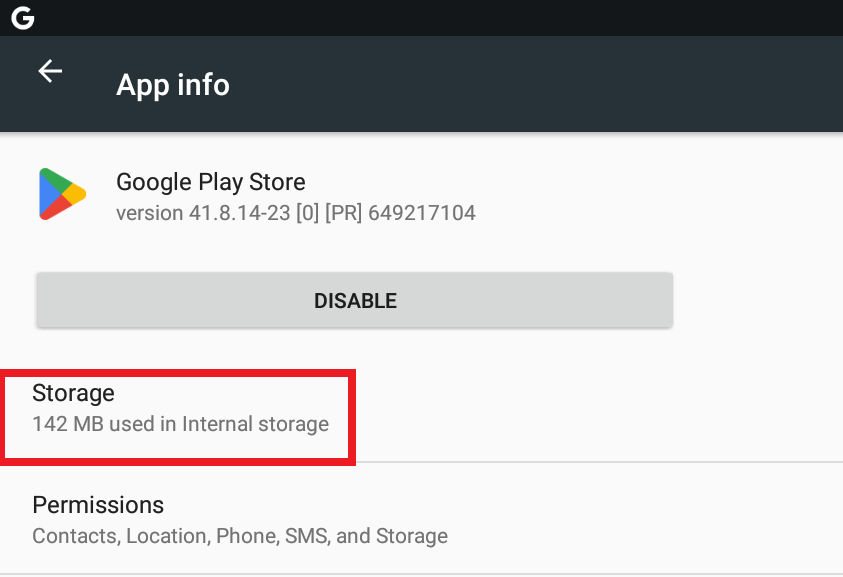
- Inside the Google Play Store app info window, click on the Storage button.
- In the storage menu, find and click the ‘Clear Data’ button to delete the app data.
3. Switch Android Instances
An Android instance in BlueStacks is a virtual system running a version of Android. Using an incompatible Android version may cause errors.
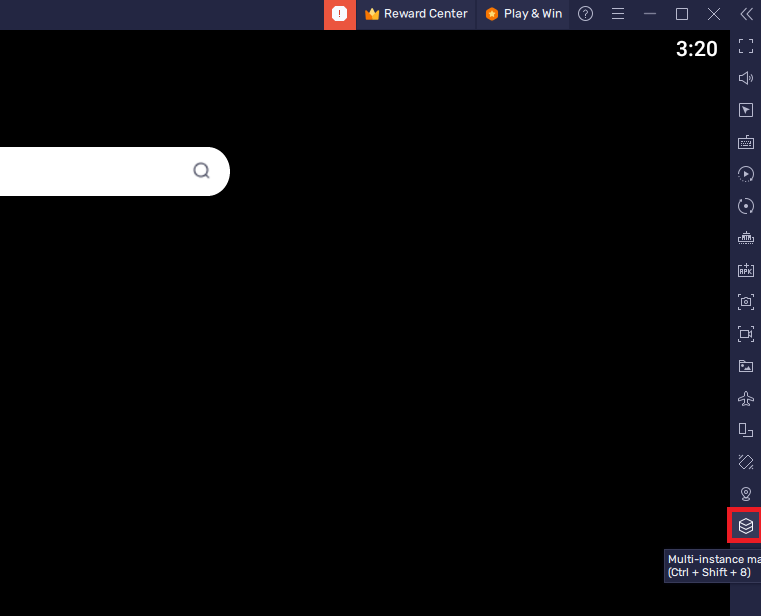
- Click on the Multi-instance Manager button located on the sidebar.
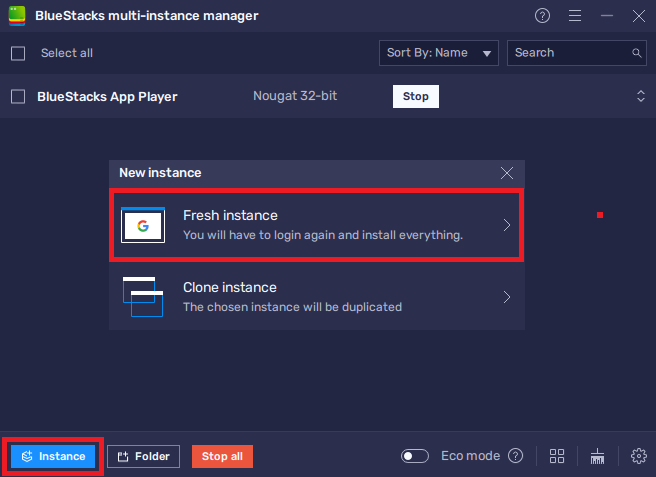
- Click on the Instance button on the taskbar.
- In the window that opens, select Fresh Instance.
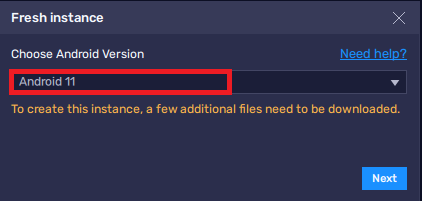
- From the drop-down version list, select Android 11 and click Next.
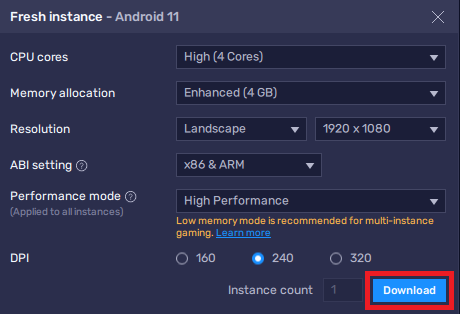
- Choose performance options for the new instance according to your preference.
- Click on the ‘Download’ button to download additional files needed for the new instance.
- Click on the Start button to launch the Android 11 instance.

- If an error persists, try creating an instance with a different Android version.
4. Change Device Profile
The device profile in BlueStacks emulates a specific Android device model. Change the device profile if the app needs a different model to work correctly.
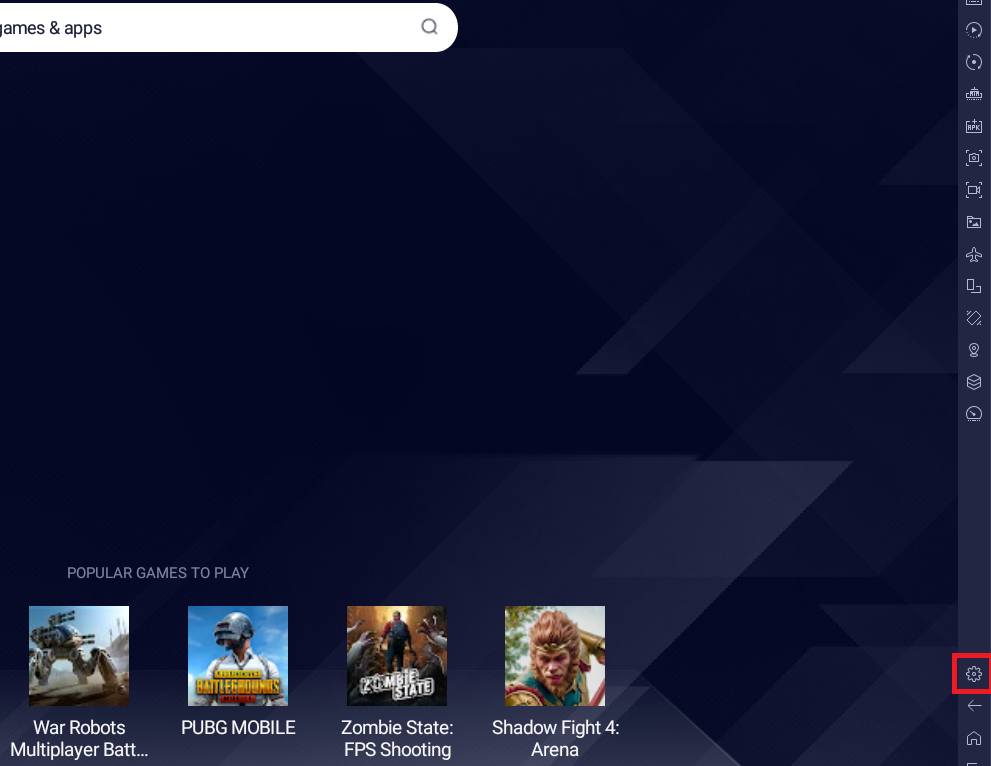
- Click on the Gear icon located on the sidebar to access BlueStacks settings.
- In the settings menu, go to the ‘Phone’ section.
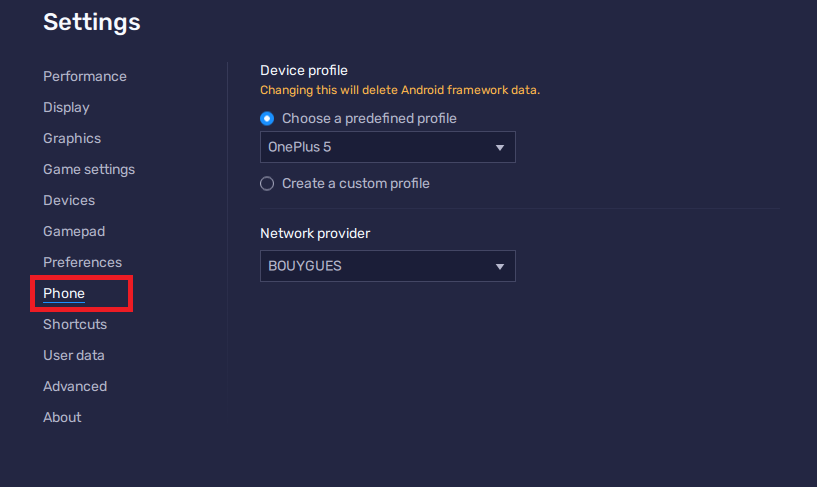
- Under the Device Profile section, click on the drop-down menu. Select an Android device from the list, and click Save changes.
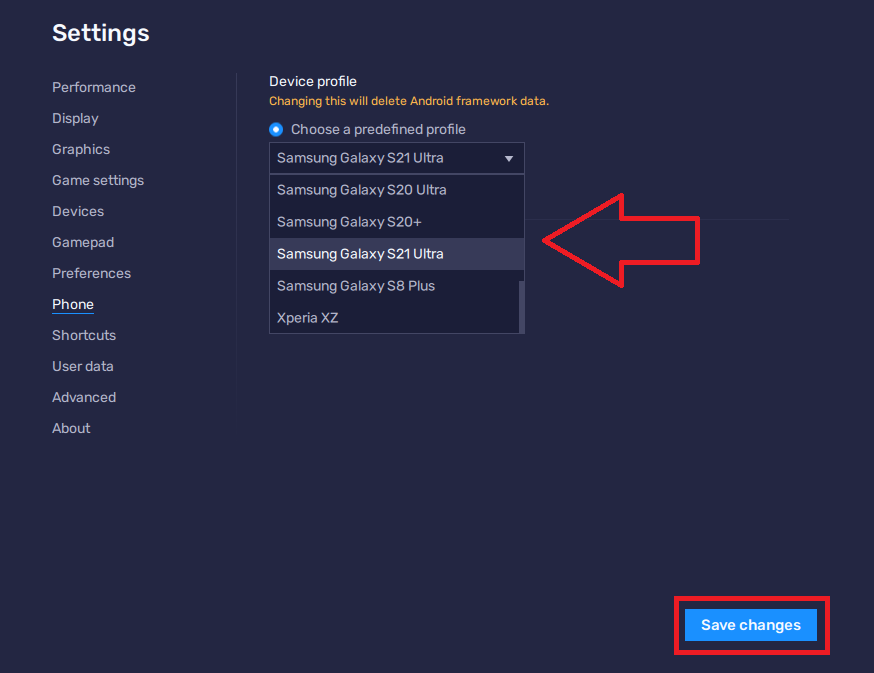
- Restart the BlueStacks app. If the error persists, repeat these steps and select a different device from the list.
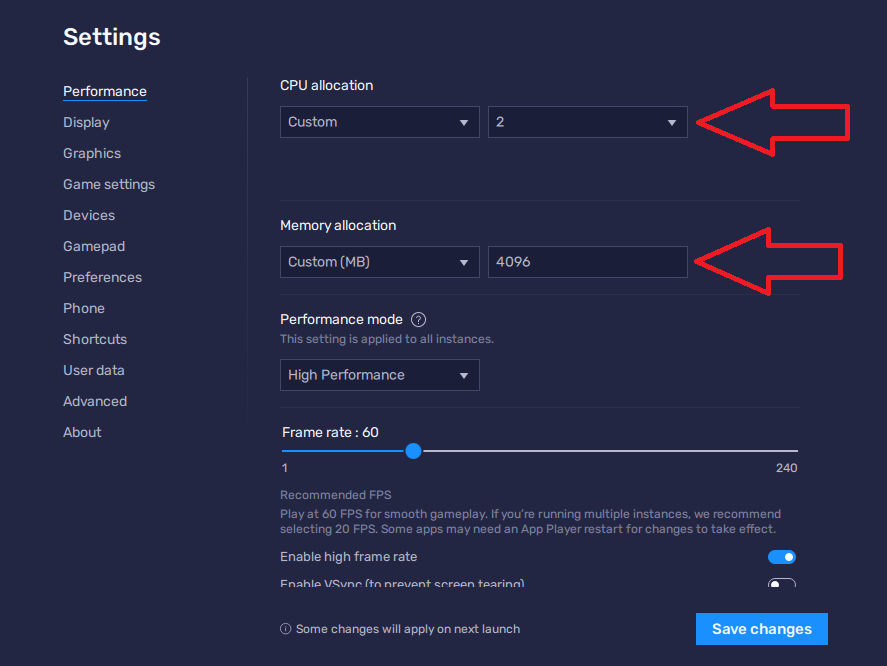
5. Increase CPU and Memory Allocation
Some apps need more CPU and memory resources to work properly. Allocating more CPU cores and memory in BlueStacks settings can prevent various compatibility issues.
- Click on the Settings icon located on the sidebar to open BlueStacks settings.

- Go to the Performance tab. Here, click on the drop-down menu under CPU and memory allocation.
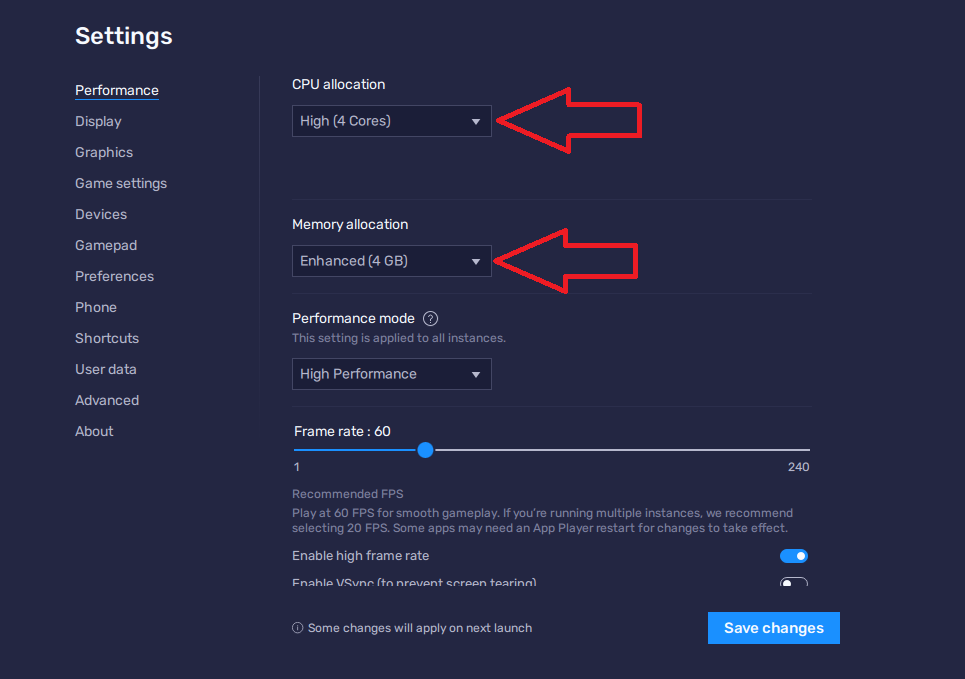
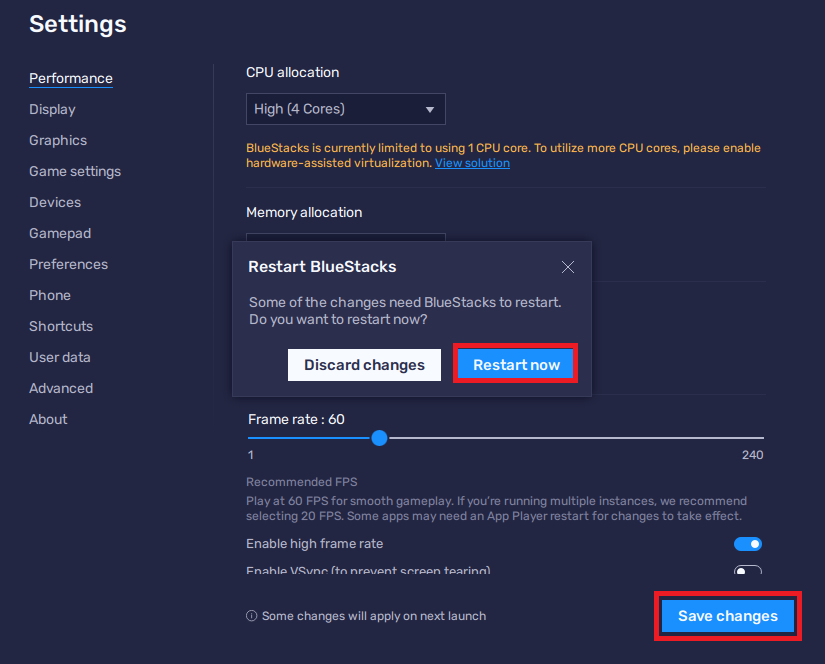
- Select a higher number of cores and memory from the drop-down menu. If you prefer custom settings, choose Custom and allocate resources as needed.
- Click on the Save changes button. Then, click the Restart Now button to apply the new settings.
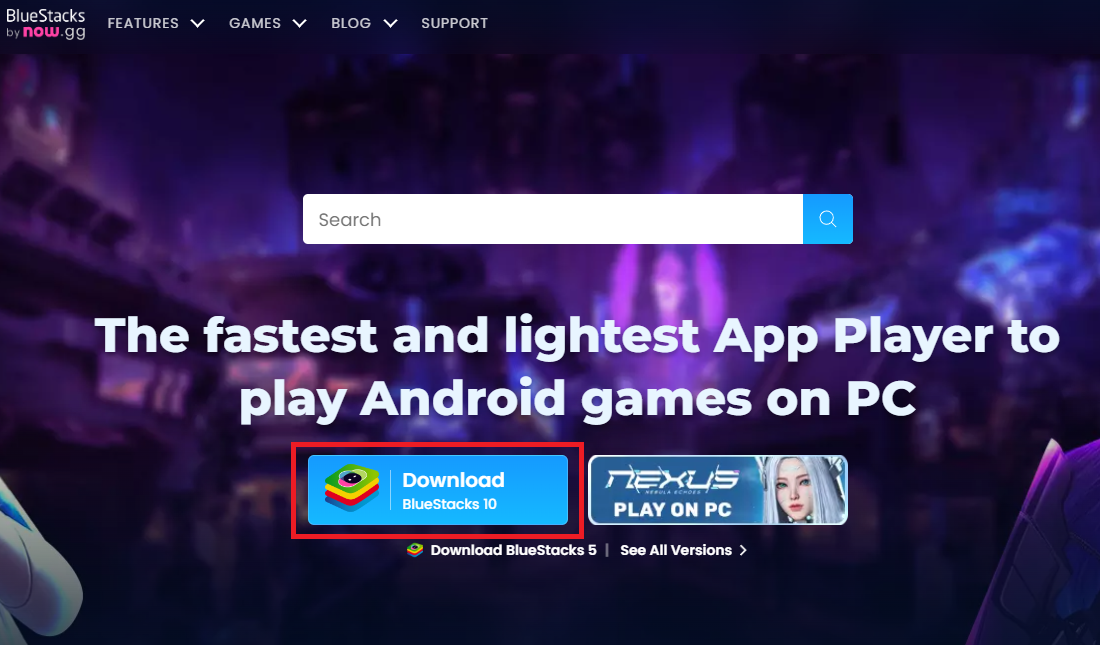
6. Reinstall BlueStacks
If the problem persists after trying all the previous solutions, consider reinstalling BlueStacks to restore default configurations and replace any missing or corrupt files.
- Navigate to the BlueStacks webpage and click on the download button.
- Double-click on the installer once it’s finished downloading, and follow the on-screen instructions to reinstall the app.


