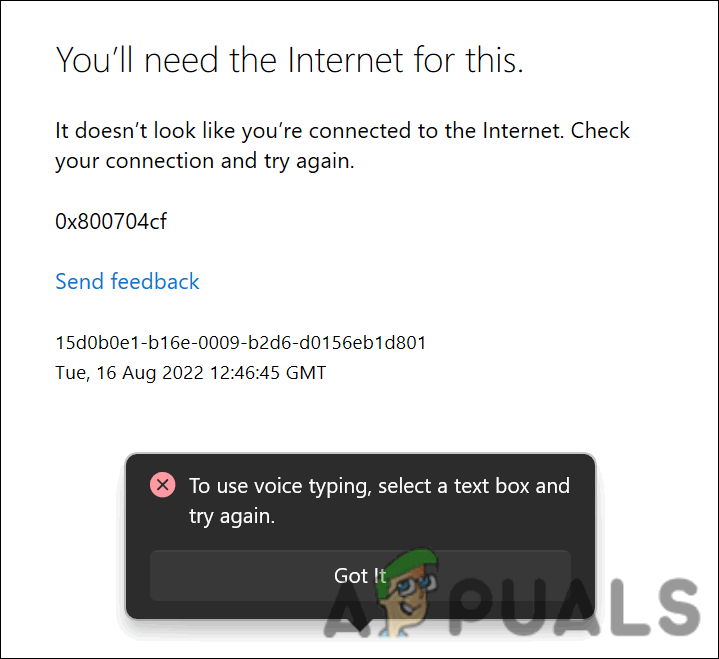
Fix: ‘You’ll Need Internet for this’ Error While Using the Voice Typing Feature
The error ‘You’ll need internet for this’ appears when the users try to use the voice typing feature in Windows 10 or 11. This error is often accompanied by the error code 0x800704CF.
Let’s have a look at the troubleshooting methods that can fix the problem.
1. Install the Pending System Updates
The error at hand was reported by a number of users recently, and Microsoft acknowledged the problem. Reportedly, a fix has been released in the latest update, so if you haven’t installed it yet, getting it now will hopefully fix the problem for you in no time.
Here is how you can install the pending updates on Windows 11:
- Press Win + I keys together to open Windows Settings.
- In the following window, choose Windows Update from the left pane.
- Move to the right side of the window and click on the Check for updates button.

Click on the Check for updates button - Wait for the system to look for any available updates and then install them one by one.
- After the updates are installed, restart your computer and check if you can now use the voice typing feature without any issues.
2. Run the Internet Connection Troubleshooter
You might also be facing the problem due to a temporary glitch within the network service, which brings up the ‘You’ll need internet for this’ error every time you attempt to use the voice typing feature.
If this scenario is applicable, you can run the Internet connection troubleshooter to look for potential issues. It has been designed by Microsoft itself, and you can find it in the Settings app of Windows.
If the troubleshooter identifies an issue, it will notify you, as well as suggest you a relevant fix. You can also apply that fix with a single click using the troubleshooter.
Here is how you can run the internet connections troubleshooter:
- Press Win + I keys together to open Windows Settings.
- Choose System from the left pane and click on Troubleshoot on the right side of the window.
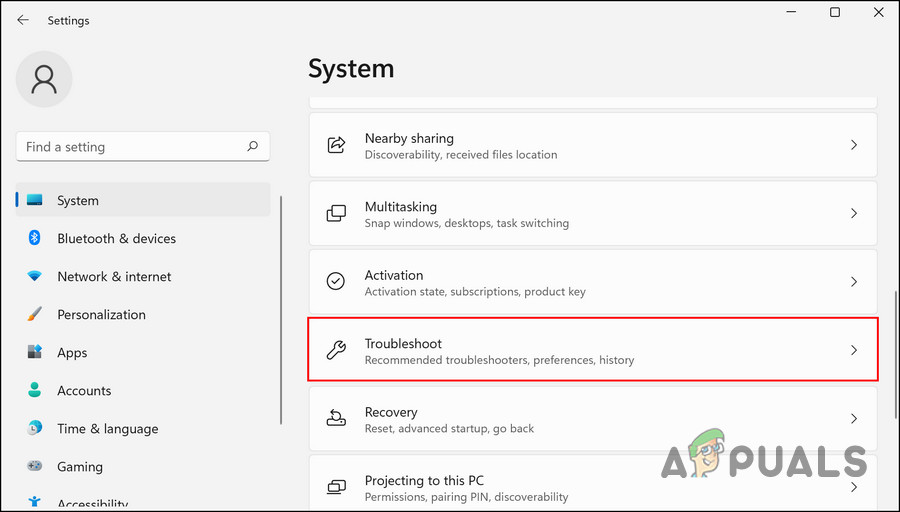
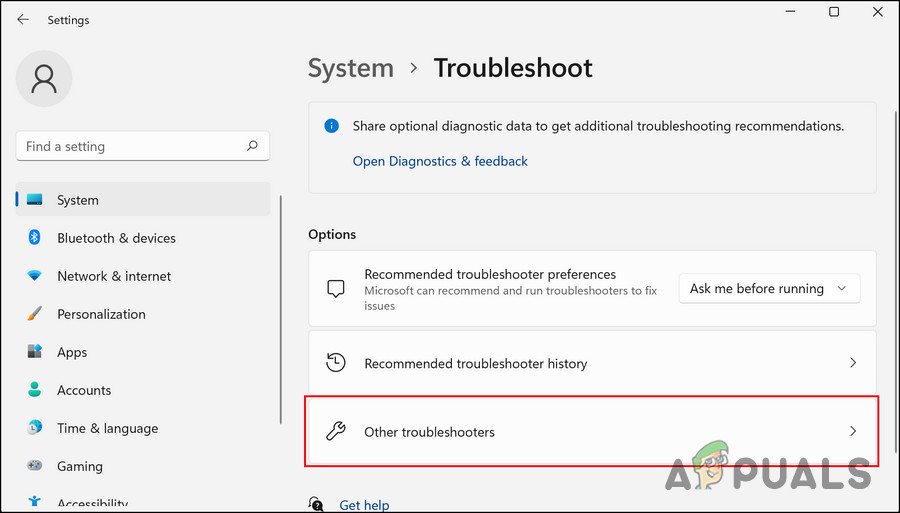
Choose Troubleshoot option - In the following window, click on Other troubleshooters.
Access the other troubleshooters in Windows - Look for the Internet Connections troubleshooter and click on the Run button associated with it.
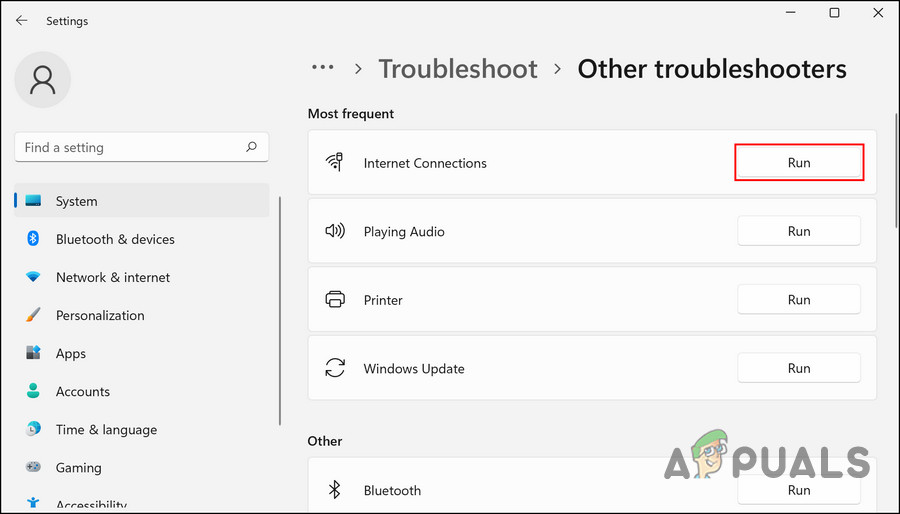
Click on the Run button - Let the troubleshooter completes its initial scan.
- If the utility asks you to pinpoint the issue, go ahead and select the problem that you have been facing. The troubleshooter will conduct another scan and present you with the results.
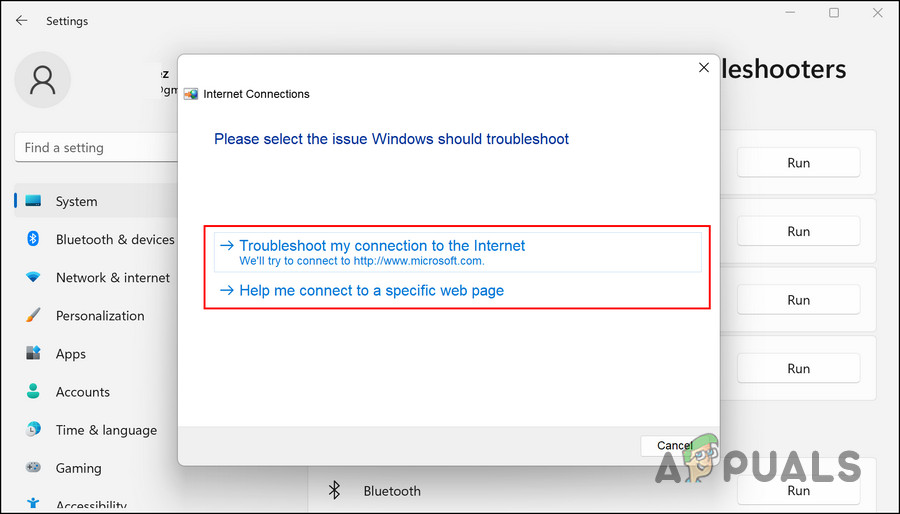
Select the issue in the troubleshooter - If any issues are found, click on Apply this fix to implement the solution suggested by the troubleshooter.
- If the tool fails to find any issues, click on Close the troubleshooter.
3. Reinstall the Network Wi-fi Card
Another fix that worked for users was reinstalling the network Wi-Fi card using the Device Manager.
The steps of performing this fix are quite simple, which is why we recommend you give it a shot.
Here is all that you need to do:
- Type Device Manager in Windows search and click Open.
- In the following window, expand the Network adapters section.
- Locate your Ethernet or Wi-Fi card and right-click on it.
- Choose Uninstall device from the context menu.

Choose Uninstall device from the context menu - Follow the on-screen instructions to proceed.
- Once the driver is uninstalled, press the F5 key to refresh the Device Manager. This will automatically reactivate the network card.
- Once done, restart your PC. Hopefully, upon reboot, the issue will no longer appear.
4. Disable VPN or Proxy (If Applicable)
If you are using a VPN or proxy on your system, then there is a chance that you are facing the problem due to that as well.
If, after disabling the VPN, the issue resolves, then we recommend that you consider uninstalling the service or switching to a better alternative.
5. Reset the Network Settings
It also might be a good idea to reset your network settings in order to fix any issues with the internet and connectivity. Resetting network settings is similar to a factory reset in restoring all network-related functions and settings to their original state.
When you reset your network settings, you’ll lose your Wi-Fi name, password, Bluetooth connections, VPN settings, and mobile network settings like data management.
- Press Windows + I keys simultaneously on your keyboard to open Windows Settings.
- In the Settings window, click on Network & internet > Advanced network settings.
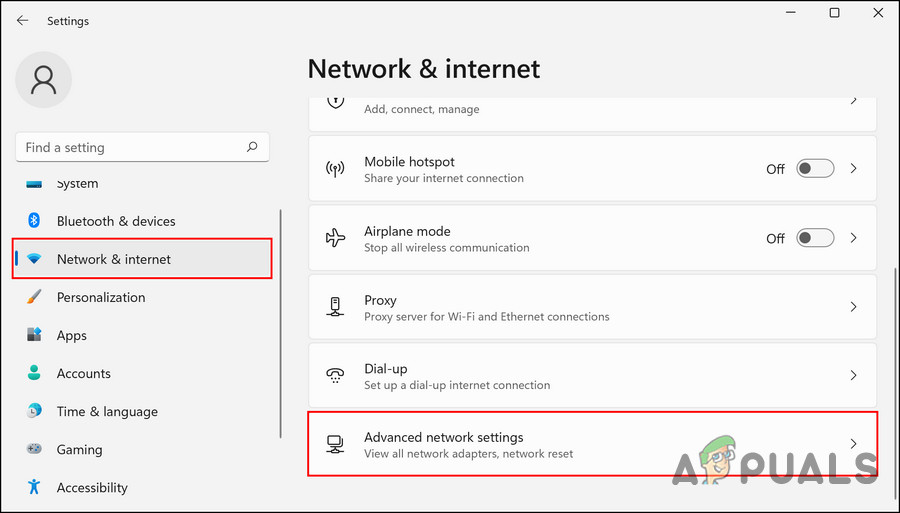
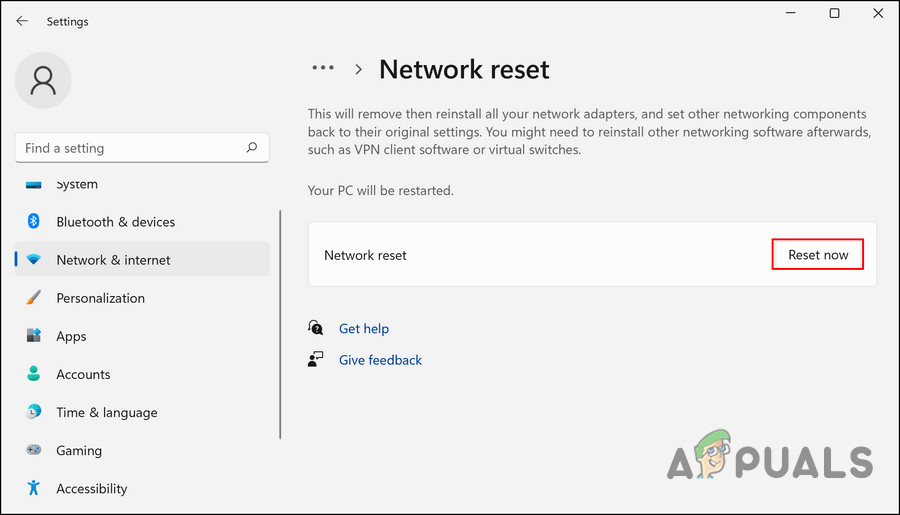
Access the advanced network settings - In the following window, choose Network reset.
- Click Reset now and wait for the process to complete. Once done, check if the problem is solved.
Click the Reset now button


