How to Fix Xbox Game Pass Error Code 0x80073d13?
Xbox has always provided great games for users to play but it has been reported several times that while installing certain games on the Xbox Game Pass PC app, they encounter an error with code 0x80073D13. The issue arises when the game downloads get stuck between 4.5 to 9.5 percent thus, creating an unfavorable experience for gamers to play their favorite game. The error notification is as follows:

What Causes Xbox Game Pass Error Code 0x80073d13?
We have listed down some of the causes of this problem after reviewing the user’s feedback and technical authorities in detail. This problem may arise due to any of the following reasons:
- Low Storage Space: The main and common reason for games to show error is when people have low storage space left for games in local disk. When they try to download it shows an error.
- Different Disk Format: Another reason for XGP games to show error is that XGP games do not support exFAT or FAT32 disk format. The problem arises when the partition drive has a different disk format by default. XGP games have the delta-update mechanism and use low features of NTFS to move data around and update games. This error mostly occurs while updating games.
- Different Allocation size: Another major reason for XGP games to pop up this error is the different allocation unit size. As the XGP games work in 4kb format and sometimes the disk has 16kb format. This clash results in the error.
Solution 1: Create a New Partition
Note: This solution is only applicable if you have only one partition. Since there is a possibility of data loss, it is advised that you create a backup beforehand. For some reason, Xbox Beta App requires a system to have at least two disk partitions to install games. Therefore, creating a new partition has been reported to be helpful for many gamers online. Please go through the following steps to create one:
- Press WIN+R on the keyboard. Type diskmgmt.msc and click OK.
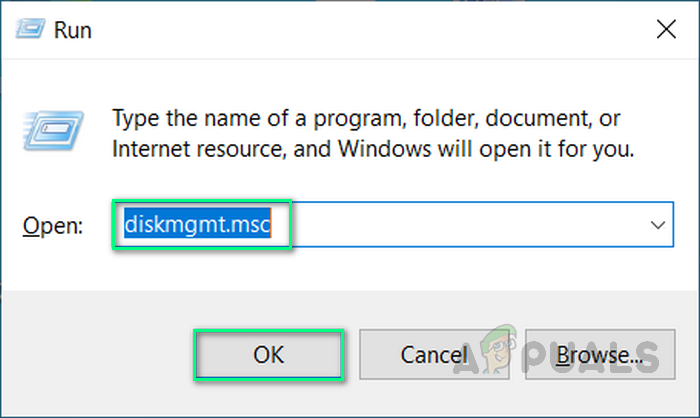
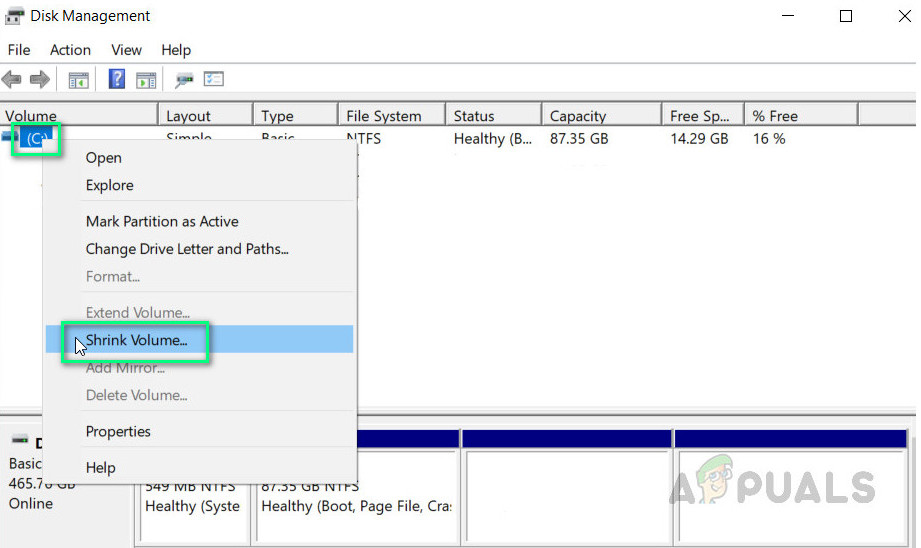
Opening Disk Management - Right-click the C drive in the grid at the top and select Shrink Volume.
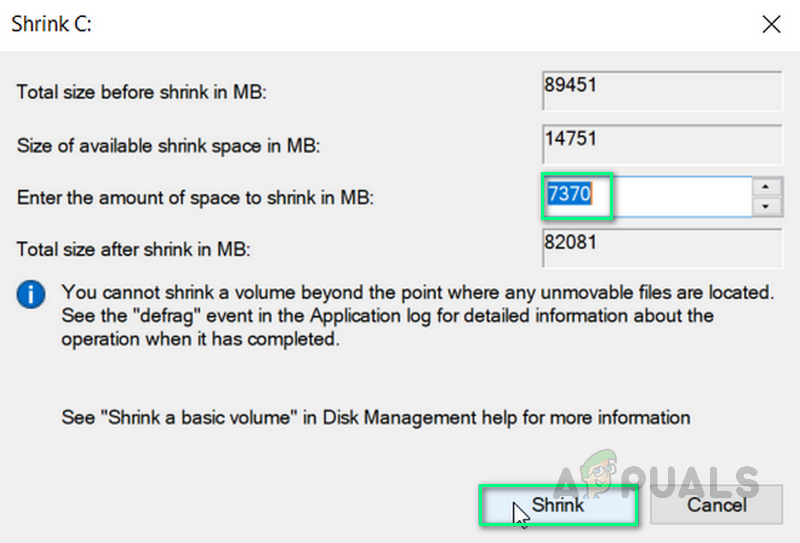
Opening C Drive Volume - Type the amount of space you want to shrink the C drive by. (This will be the space you will allocate to a new D drive later).
Note: Do not choose the entire amount displayed in the size of available shrink space. You have to leave some space for system reserved files therefore, enter half an amount of the available shrink space to be safe. - Click Shrink and after a moment your C drive will be a bit smaller and you’ll notice a new unallocated section near the bottom. (This process takes some time to proceed)
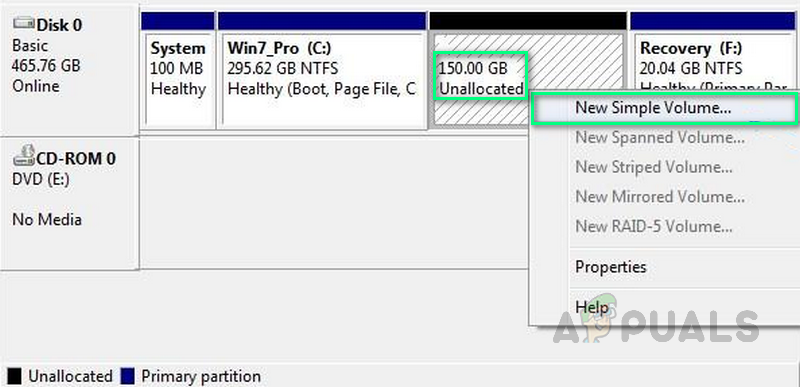
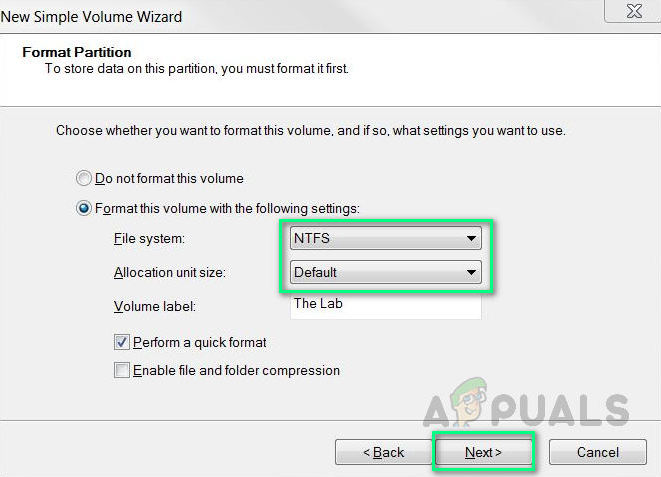
Shrinking C Drive Volume - Right-click on the Unallocated Space at the bottom right and select New Simple Volume.
Opening New Sample Volume - Set File System as NTFS, set Allocation Unit Size to Default or 4kb, and click Next. You now have a D drive where you will install the XGP games.
Setting Parameters - Open the Xbox PC App, click your profile icon at the top, and select Settings.
- Click General on the left.
- Go to drive selection and select D drive as the games saving directory.
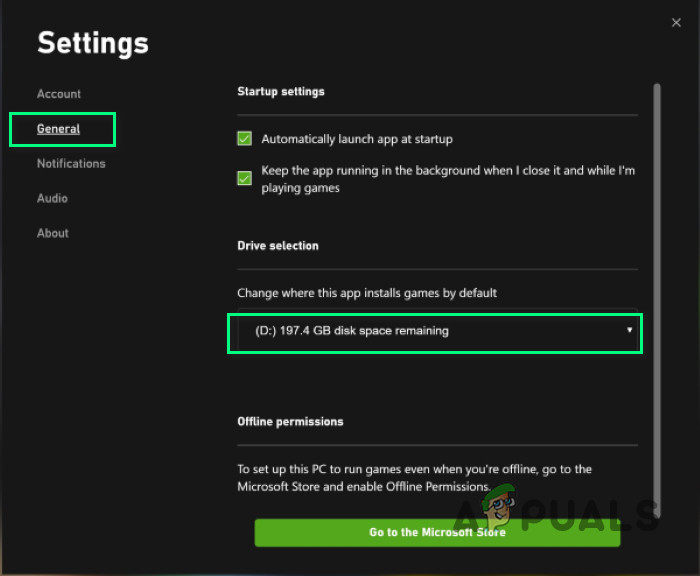
Selecting D Drive - Try installing a game. It should now be successful.
Solution 2: Format the Existing Drive
Changing the filesystem from exFAT to NTFS has resulted in the solution to this problem. To format your existing drive properly, follow these steps:
- Right-click on the Local Disk and select Format.
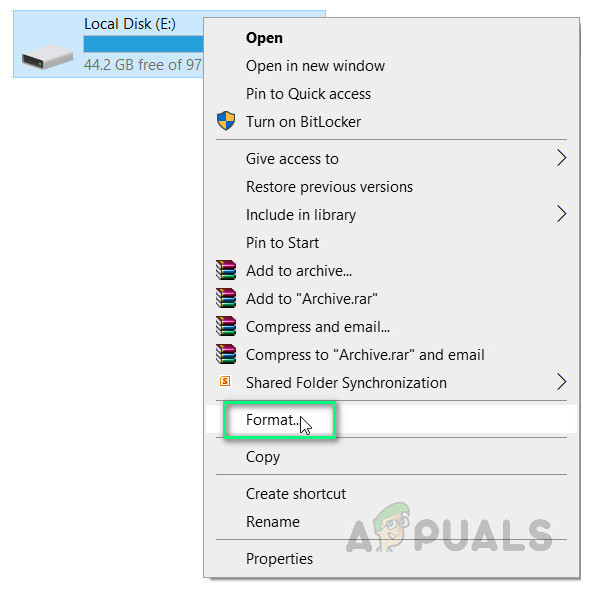
Opening Format Options - Set File System as NTFS.
- Change the Allocation Size to 4096 bytes.
- Click Start. This process takes time, so wait for it to format properly. This may fix your problem.

Formatting Local Disk
Solution 3: Make C drive as Default Drive
This problem may also arise when the default drive for new games/apps is not the main Windows drive. Changing it to the default drive (i.e. C) resolves the issue. To make these changes, follow the steps:
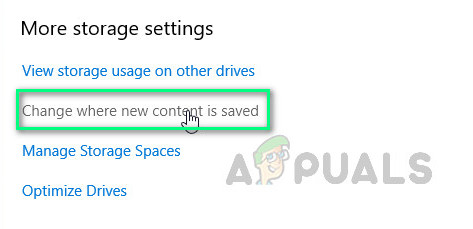
- Click Start, type Storage Settings, and open it.
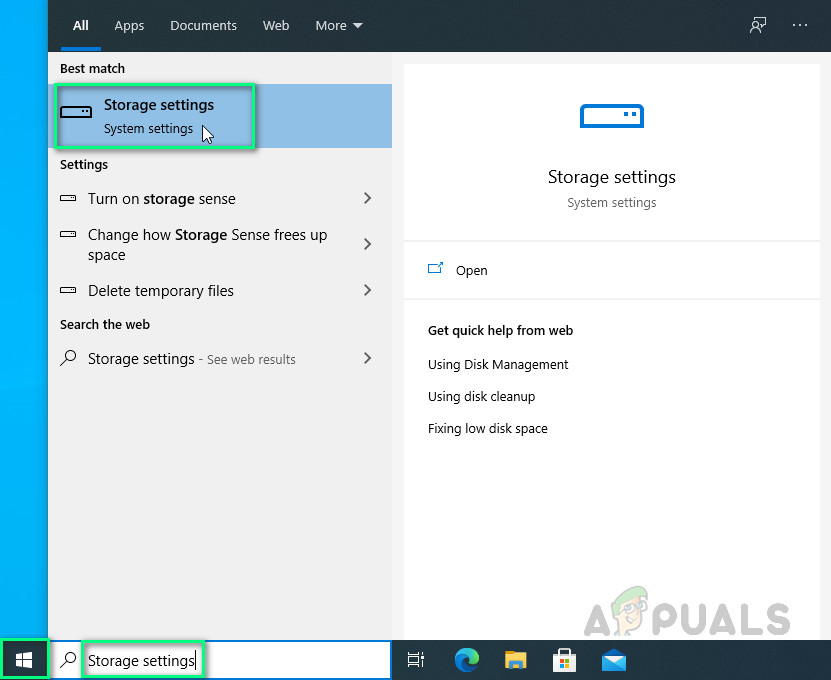
Searching Storage Settings - Now click on Change where new content is saved under More Storage Options.
Opening New Content Storage Settings - On the top left select Local Disk C as default for saving new games/apps.
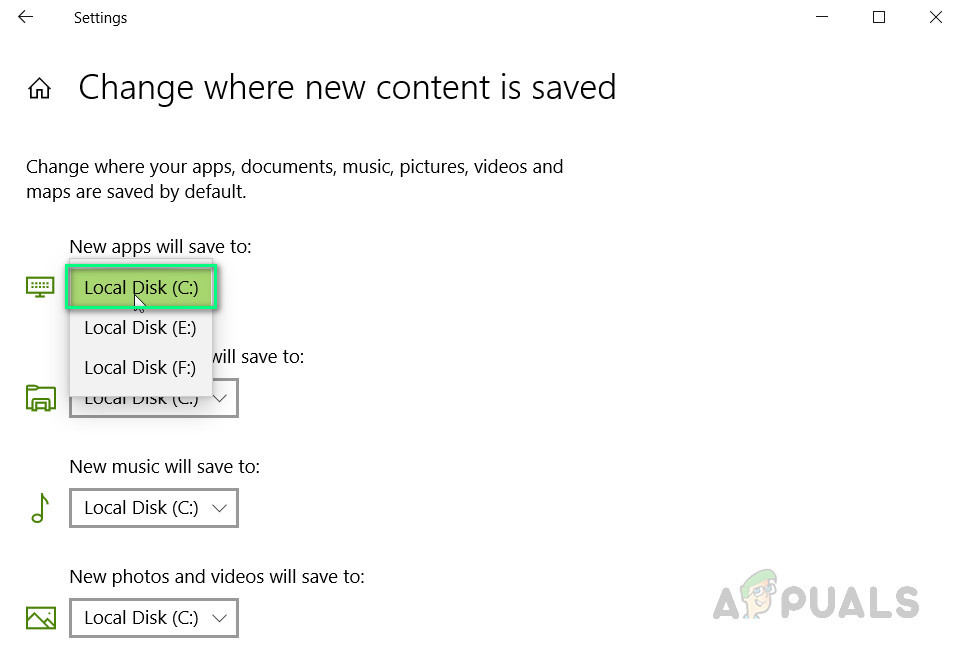
Setting C Drive as Default - Click OK. This may fix your problem.
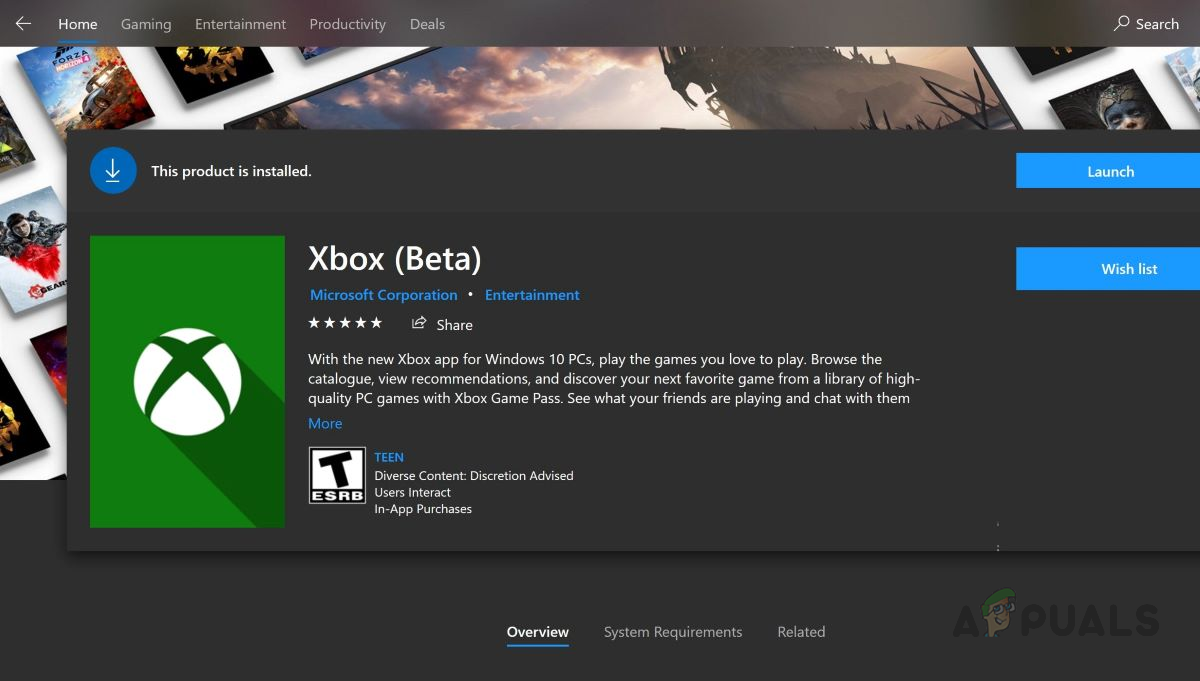
Solution 4: Reinstall Xbox Beta App
The problem may be arising due to an outdated version of the Xbox App on your computer. To download and install the latest version of the Xbox App follow these steps:
- Click Start, type Apps & features, and open it.
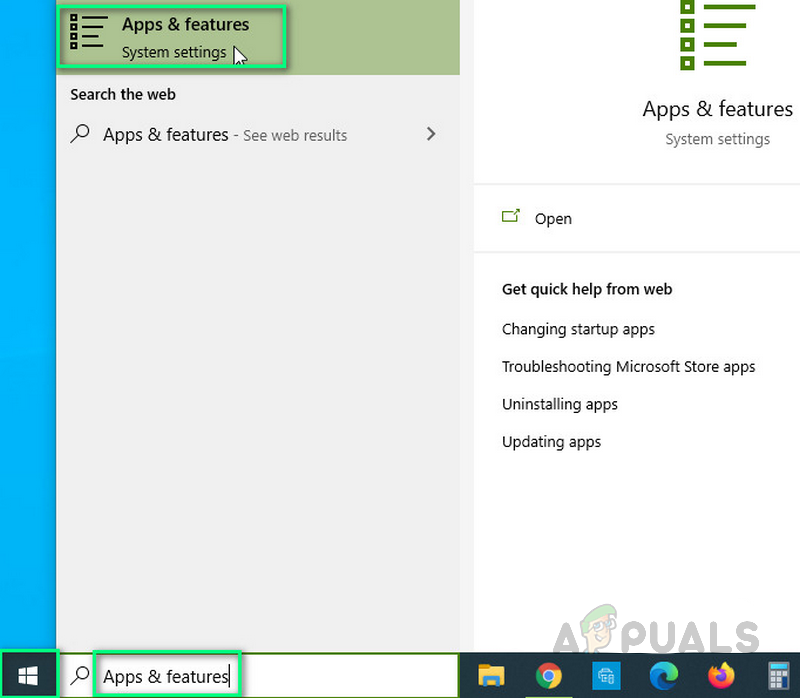
Opening Apps & Features - Select Xbox Beta App and click Uninstall.
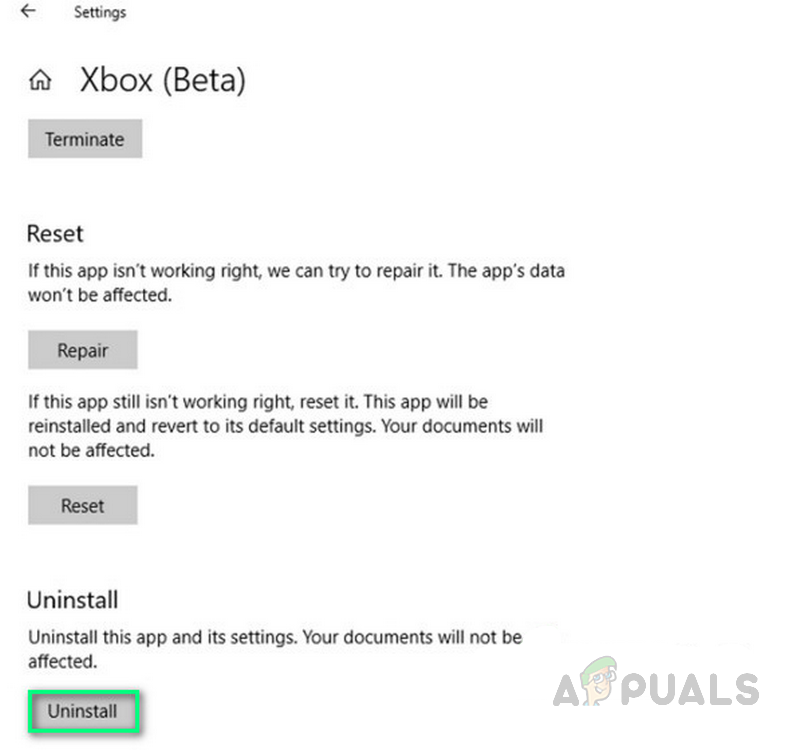
Uninstalling Xbox Beta App - Download Xbox App from Microsoft Store and reinstall it.
Reinstalling Xbox Beta App - Try launching Xbox App to see if this helped. This should finally fix your problem.
Use the online HTML, CSS, JavaScript resources to generate the perfect code in your web projects


Changing the allocation unit size worked for me! Thank you!