How to Fix WSL Register Distribution Error 0x80370102?
When you encounter the WSL Register Distribution Error 0x80370102, it typically prevents you from installing a Linux distribution on your Windows Subsystem for Linux (WSL). This error code means that the virtual machine required by WSL could not start due to a missing or disabled system feature.
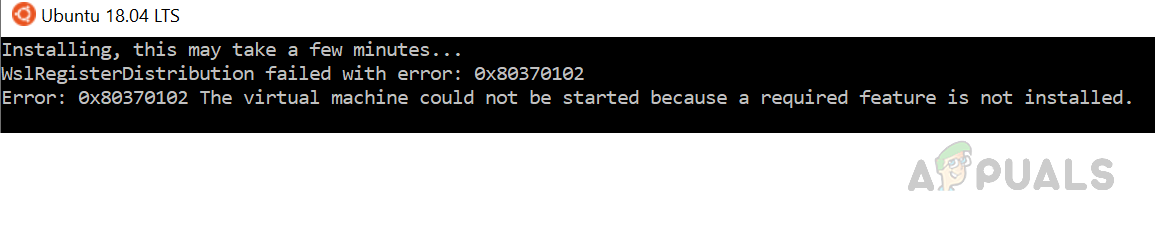
The most common cause is that virtualization is either not enabled in the BIOS/UEFI settings or that the Hyper-V feature is disabled in Windows. Other potential issues include conflicts with Virtualization-Based Security (VBS) or problems with the WSL installation itself.
Solution 1: Enable Hardware Virtualization from BIOS
When users try to run Ubuntu in a VirtualBox without enabling Hardware Virtualization, the system causes multiple errors, such as audio performance issues and the WSL Register Distribution error. A virtual machine acts like a real computer, letting you use different operating systems and software on your device.
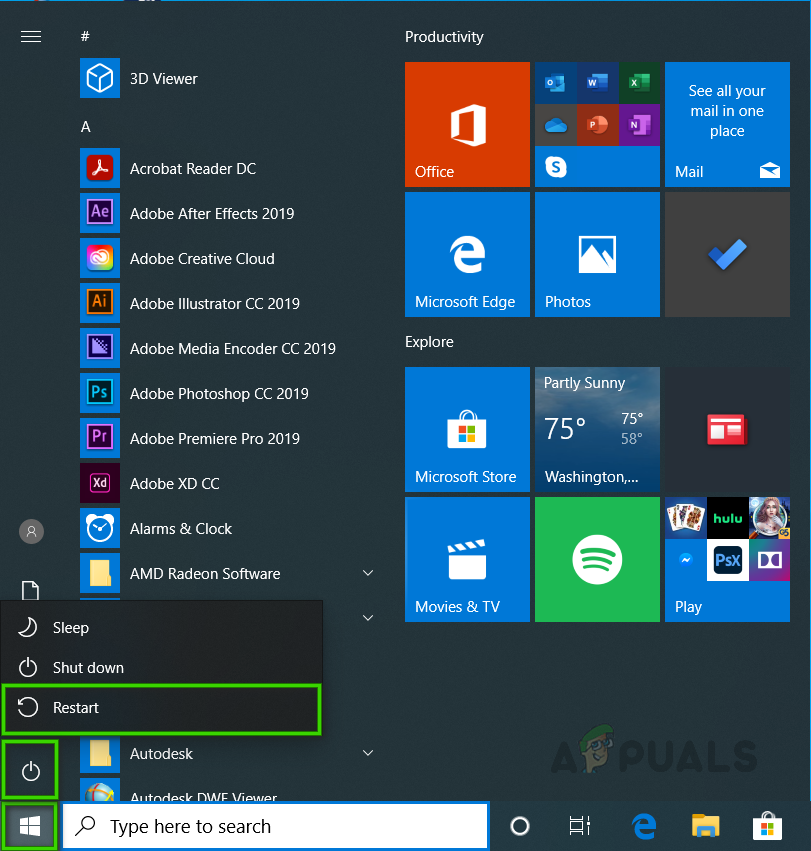
- Click Start, then select Power Option and click Restart.
Restarting PC - Depending on your BIOS manufacturer, the key to log into the BIOS will vary. Press the Del, Esc, F1, F2, or F4 key on your keyboard as soon as the screen goes black.Note: If you don’t get in the first time, restart your PC and try another key.
- Find the CPU configuration section (Menu can be called Processor, CPU config, Chipset).
- Find the Virtualization setting and Enable it.Note: The Virtualization setting may be named Intel Virtualization Technology, AMD-V, Hyper-V, VT-X, Vanderpool, or SVM.
- Choose the option Save & Exit.
- The computer will reboot with Hardware Virtualization enabled. Check to see if the issue persists. If it does, follow the next method.
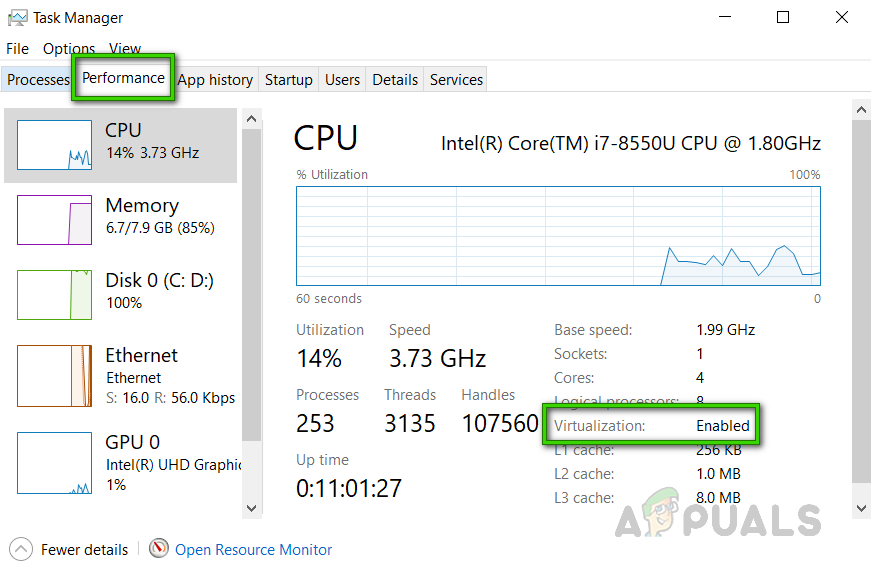
Note: Make sure your device supports hardware virtualization. You can check if Virtualization is enabled under the Performance tab in the Task Manager.
Solution 2: Enable the Hyper-V Feature
Hyper-V enables administrators to make better use of their hardware by virtualizing multiple operating systems to run off the same physical server simultaneously. If it is not enabled, an error may occur while installing a Linux distribution to access via Windows.
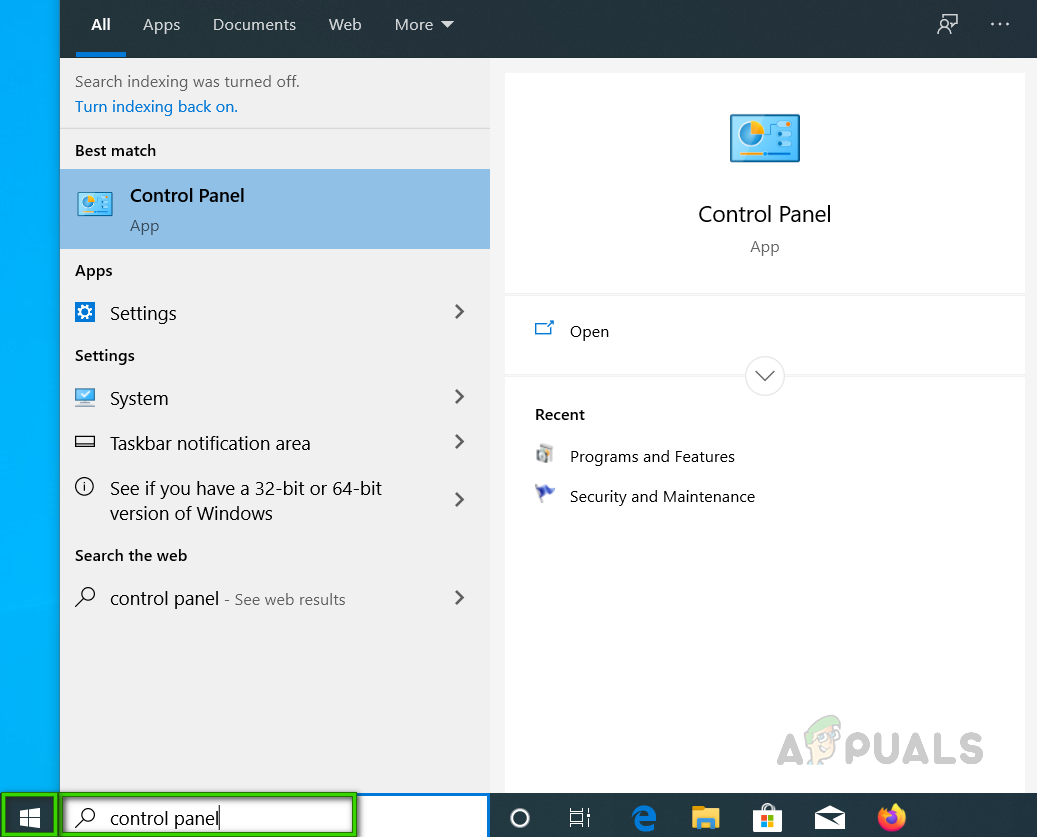
- Click Start, search for Control Panel, and open it.
Opening Control Panel - Click on Programs.
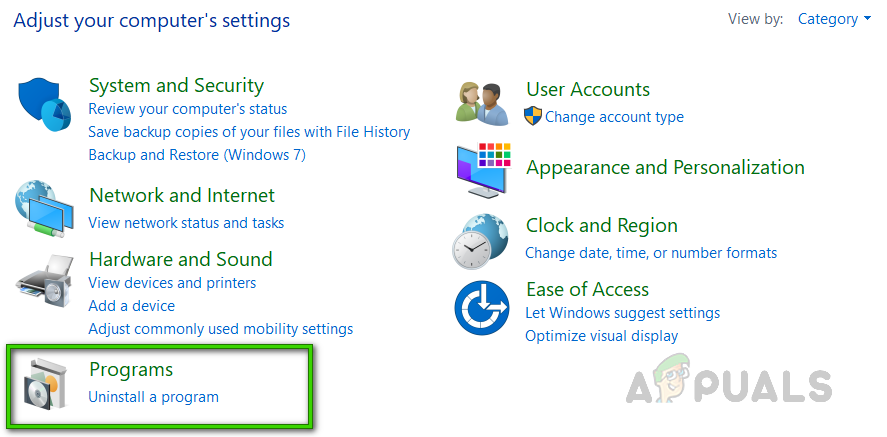
Opening Programs - Click on Programs and Features.
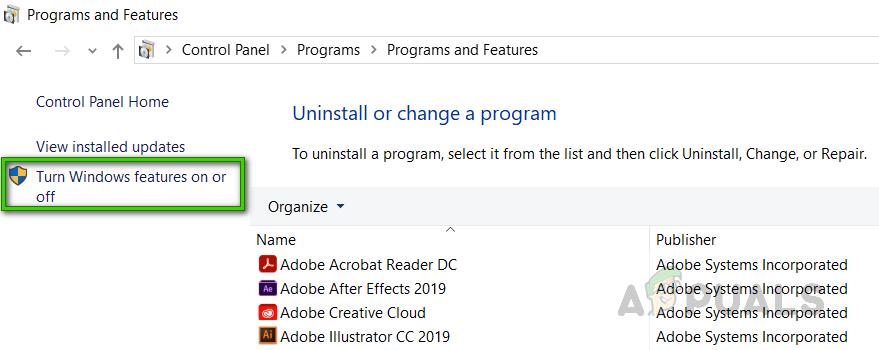
- On the left panel, click on the Turn Windows Feature on or off option.
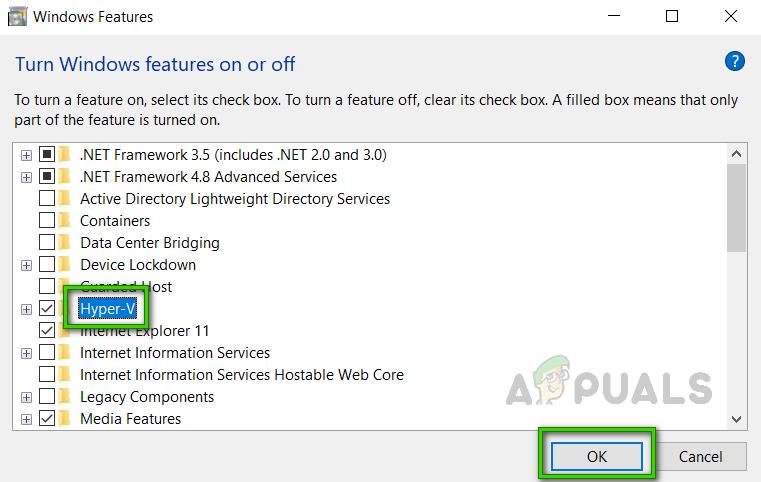
Turning Windows Features ON or OFF - Check the Hyper-V option and click OK.
Checking Hyper-V - Now Reboot your system for these changes to take effect. If this doesn’t help, proceed with the next solution.
Solution 3: Expose Virtualization Extensions & Change RAM Settings
Nested virtualization is a feature that allows you to run Hyper-V inside a Hyper-V virtual machine (VM). This helps run a Visual Studio phone emulator in a virtual machine or test configurations that ordinarily require several hosts. It has been reported that activating Nested Virtualization has worked as a solution for many users online.
- Turn off your virtual machine in Hyper-V Manager.
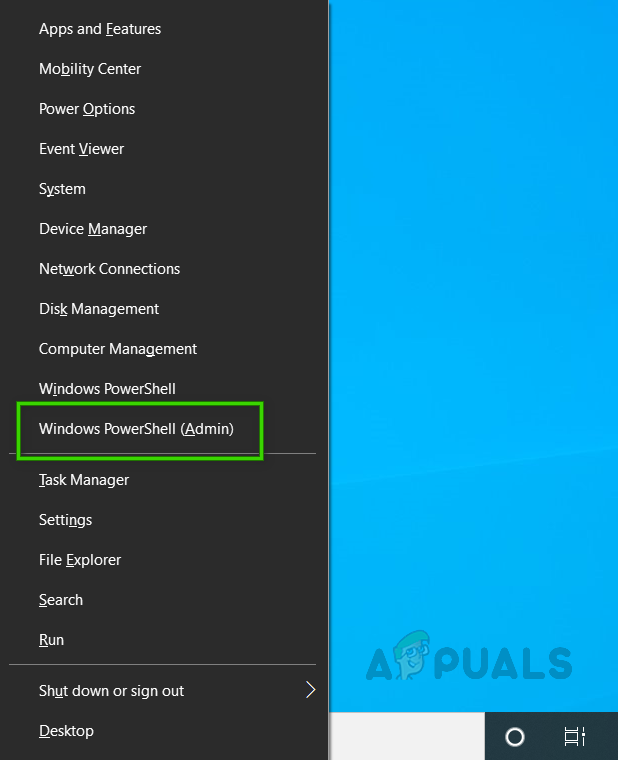
- Press Win + X on the keyboard and select Windows PowerShell (Admin) from the pop-up list.
Opening Windows PowerShell (Admin) - Inside the PowerShell window, copy-paste this command to change the name and values to your VM processor.
Set-VMProcessor <VMName> -ExposeVirtualizationExtensions $true
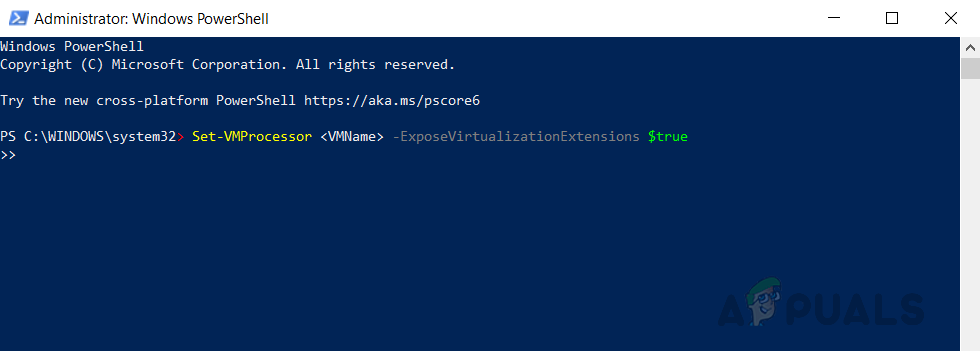
Entering Command - Press Enter to run it.
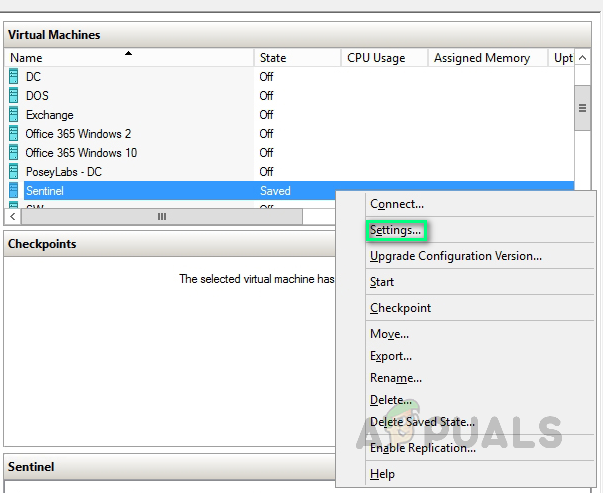
- Now right-click on your virtual machine in Hyper-V Manager and select Settings.
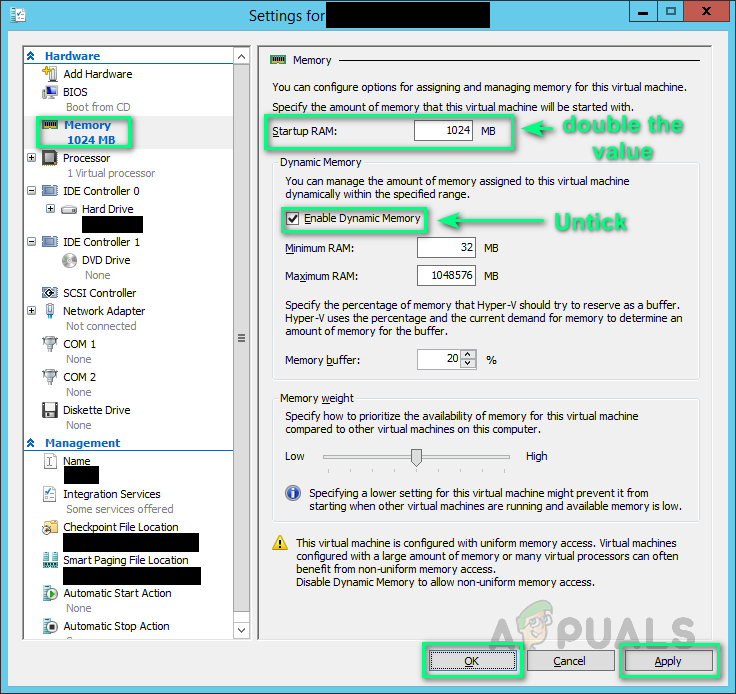
Opening VM Settings - Click on Memory in the left pane, untick Enable Dynamic Memory and double the RAM value e.g., 2048 > 4096.
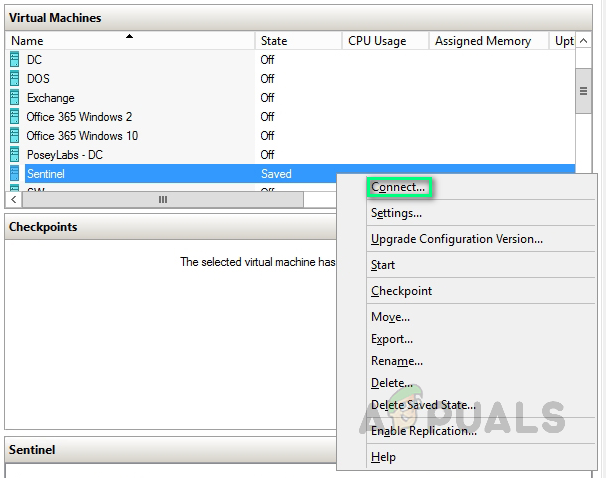
Changing Memory Settings - Start your virtual machine.
- Right-click on your virtual machine and select Connect. This will run Hyper-V, and your system will restart. Try running Ubuntu again. This should finally fix your problem.
Connecting VM


me trying installing it on windows 11 got this error 🙁