How to Fix World War 3 Stuttering and Low FPS Issues?
World War 3 has received a lot of attention back when it was announced, but the developer seems to run out of favor as technical issues pile up with no official launch date in sight. Most technical issues can be overlooked, but one of the most talked-about problems with this game is the stuttering and low FPS issues (even on medium specifications). While trying to play the game, you might notice that your FPS is dropping significantly, making it impossible to enjoy the game.
After a lot of complaints were made by the users, we’ve done an in-depth investigation of these problems and come up with a shortlist of all the possible causes that might trigger these issues:
- Not enough CPU power – The low performance might be caused by the fact that the game is not using as much CPU power as it can. This is causing it to stutter and the low FPS, especially since the biggest bottleneck of this game is actually CPU processing. You can fix this to some degree by devoting more CPU to the game, raising the power that it is using. This can be done from the Registry Editor, but will only be effective if you have a CPU that supports it.
- RAM Leak – These problems might be also caused because the game is not using enough RAM memory. But this is not due to the lack of resources, it’s due to a memory leak that the game allows happen. This can be simply fixed by dedicating the maximum available RAM consumption to the game via the Registry Editor.
- Graphics Settings put stress on GPU – Another cause for this error might be the in-game settings that are simply too high, causing your game to stutter and not work properly. This can be simply fixed by going to the settings of the game and lowering the settings, disabling the graphics features that you want, and even downscaling the resolution.
- DPI scaling behavior – According to some affected users, World War 3 can experience this type of issue due to the default DPI scaling behavior that ends up producing general rendering instability with low and medium PC configurations. If you’re dealing with this problem, the best way to fix it is by overriding the default DPI scaling behavior from the Properties screen of the game.
- Unnecessary in-Game settings – If you’re trying to run the game on a low-end PC, another thing you can do in order to improve the experience with World War 3 is to disable certain Video and Gameplay settings that will ultimately have an impact on your overall FPS count.
Now that you know all the potential causes, here’s a list of all the methods that will help you make your World War 3 game work properly (or at least improve you’re experience), without the stuttering and low FPS:
Redirect more resources to your CPU
The first thing you can try is to give more power to your CPU. If you’re dealing with stuttering issues and inconsistent FPS when playing World War 3, the first thing you should investigate is a potential CPU-related bottleneck.
So far, the game still has issues redirecting the available CPU resources. Fortunately, you can fix this issue by leveraging a quick regedit fix that is quite popular among World War 3 community members.
By deploying this fix, you will devote more CPU to the game, improving the performance and reducing the stutter and low FPS problems. This is how some players have managed to make their World War 3 playable.
Note: Look into this fix if you’re using an older CPU model from AMD or Intel.
Here are the steps you need to follow in order to optimize the CPU resource allocation when World War 3 is rendered on your PC:
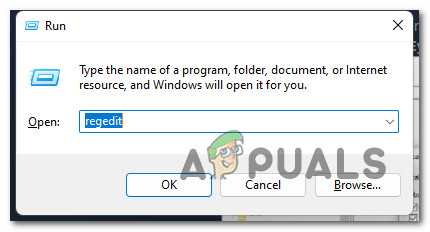
- You need to start by opening a Run dialog box by pressing the Windows key + R, then type ‘regedit’ to open the Registry Editor.

Open up the regedit Note: If you are prompted by the User Account Control window, click Yes to grant admin access.
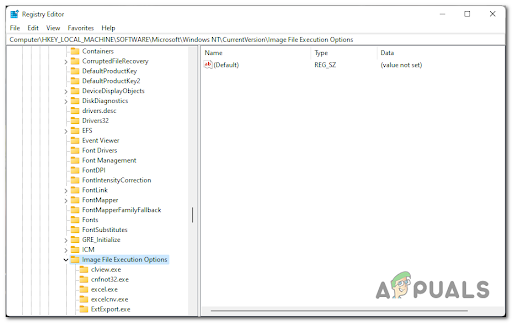
- Once inside the Registry Editor, you need to go to this location:
HKEY_LOCAL_MACHINE\SOFTWARE\Microsoft\Windows NT\CurrentVersion\Image File Execution Options
Note: You can manually go to this location, or you can insert the location directly in the upper bar.
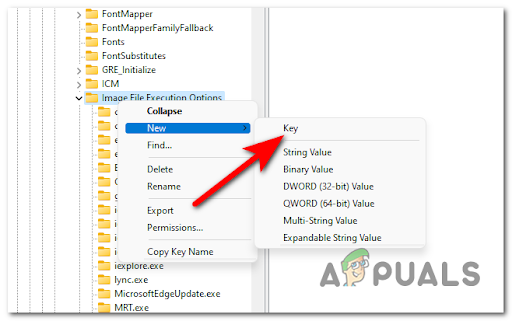
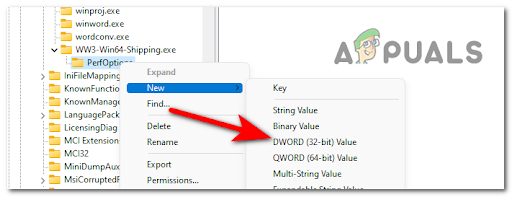
Navigating to the correct location - After that, you need to create a new folder(key) by right-clicking on Image File Execution Options, then clicking on New > Key. You need to name the folder WW3-Win64-Shipping.exe.
Creating a new key - Once you’ve done that, inside the WW3-Win64-Shipping.exe folder create another folder named PerfOptions.
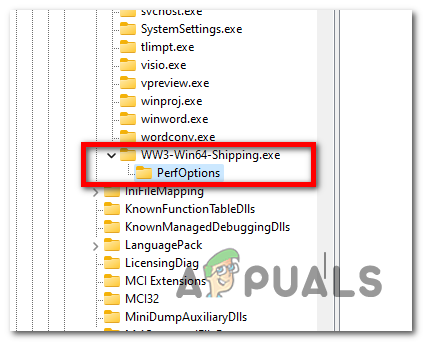
Accessing the PerfOptions key - Now you need to create a DWORD (32-bit) Value and name it CpuPriorityClass.
Creating a new DWORD value - After that, double-click on the value and change the Value data to 3, then click on OK to save the changes.
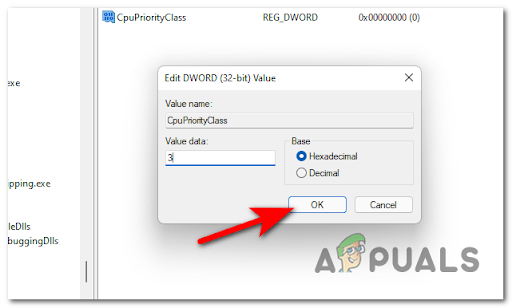
Editing the newly created Dword - When you are done with that, restart your PC and test the game to see if the FPS is still low.
In case World War 3 wasn’t fixed, check below the next method.
2. Fix Windows Memory Leak
If the first fix above didn’t do anything for you, you’ve just confirmed that the problem was not occurring due to a PC-related bottleneck, the next thing you should investigate is a potential memory leak rooted in your RAM.
If this scenario is applicable, next thing you should allocate more RAM consumption to the game in order to improve the performance.
Note: This method will dedicate the maximum available RAM consumption to World War 3 and possibly stop the stuttering from appearing.
World War 3 community members recommend using this fix in scenarios where you have 8 GB or less available RAM.
Here are the steps that you need to follow in order to ensure that you’re not experiencing framerate and stuttering issues with World War 3 due to a memory leak:
- Press the Windows key + R to open a Run dialog box and type inside the search bar ‘regedit’, then press Enter to open the Registry Editor.
Open up Regedit - Now that you are inside the Registry Editor, go to the following location manually or by inserting the code directly in the upper bar:
HKEY_LOCAL_MACHINE\SYSTEM\ControlSet001\Services\Ndu
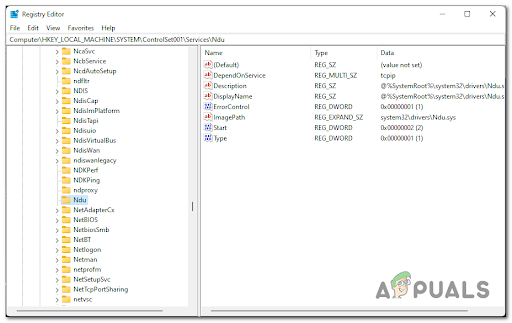
Accessing the NDU server - Now that you are inside the Ndu folder, double click on where it says Start and change the Value data to 4, then click on OK to save the changes.
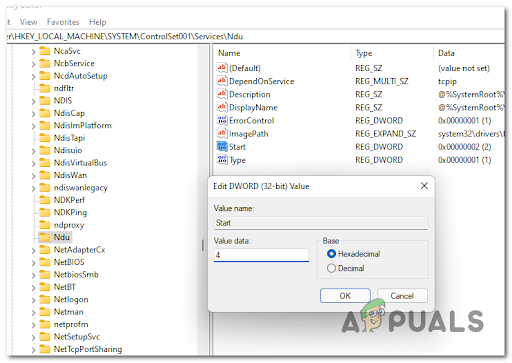
Modifying the Start value data - Once you are done, reboot your computer, and when it boots back, launch World War 3 to see if it will work more fluidly than before.
If this method didn’t fix your game as well, check the next possible fix below.
3. Tweak the graphic settings
If the first two methods were not effective in your case, you successfully ruled out a potential RAM leak and a CPU bottleneck from your potential culprit’s list.
The next thing you should do at this point is to start tweaking your in-game graphics settings.
Some affected players have managed to improve the performance on a medium to high-end PC by forcing the World War 3 game to launch in High-Performance mode from the Windows menu.
Note: This might seem like dumb advice, but attempting to play the game on Ultra (via the in-game settings) is still very unoptimized and you’ll most likely run into stuttering issues unless you’re using the very latest GPU models.
If you’re contained to using a medium-tier GPU like the GeForce RTX™ 3050 or the Radeon RX 6500XT, don’t force the Ultra settings because you’ll have a bad time. Instead, enforce the High-Performance graphics settings via the Windows Custom Graphics menu to play in a stable manner.
To do this, you need to go to the Graphics Settings and add the World War 3 client, then change the performance to High Performance.
In case you don’t know how to set the graphical settings to High Performance, here’s how you can do it:
- You need to start by opening the Graphics settings. You can do this by pressing the Windows key + R to open a Run dialog box, then search for ‘ms-settings:display-advancedgraphics’ or you can search directly from the taskbar.
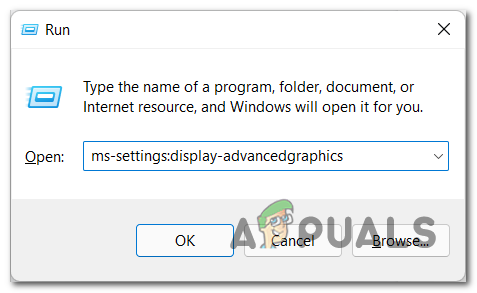
Accessing the advanced graphical settings - Inside the Graphics settings, click on the Browse button under Add an app and search for the WW3Client.exe, then click on Add.
Adding the WW3 client - Now you need to scroll through the list of apps until you find the UE4Game, then click on it and open the Options and select High performance to change the performance.
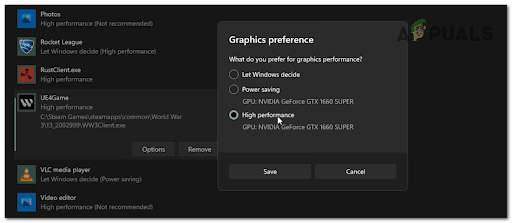
Setting the high performance - Once you’ve done that, save the changes and you can close the settings. Open the game and test it to see if you still encounter stuttering and low FPS errors.
If World War 3 is still unplayable due to the performance, check the next method below.
4. Override high DPI scaling behavior
If you’ve burned through all the potential fixes above and you’re still encountering framerate and stuttering issues with World War 3 that you shouldn’t (given your rig), chances are you’re dealing with these problems due to a DPI scaling bottleneck.
This stuff is mostly reported to occur with Windows 11 in situations where gamers have migrated to Windows 11 from Windows 10 or older.
If this scenario is applicable, affected players recommend you also change the high DPI settings from the World War 3 Client Properties menu. This is how they have managed to fix the stuttering and low FPS errors.
In case you don’t know how to override the high DPI scaling behavior, here is a guide that will help you do it:
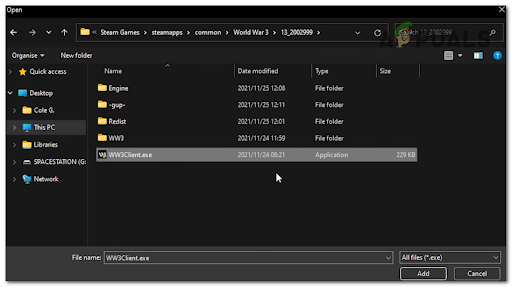
- You need to access the folder of the game. You can do this by searching manually in the File Explorer for the World War 3 folder, or go to the library of Steam and right-click on it, then click on Manage and Browse local files.
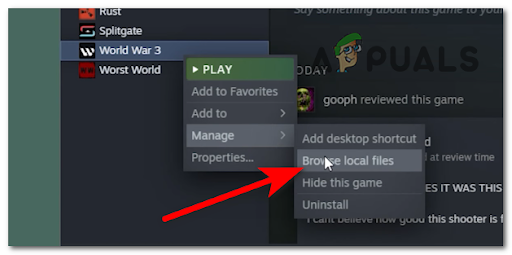
Browsing Local files - Once you are inside the World War 3 folder, go to the 13_2002999 folder to find the WW3Client.exe, then right-click on it and go to the Properties.
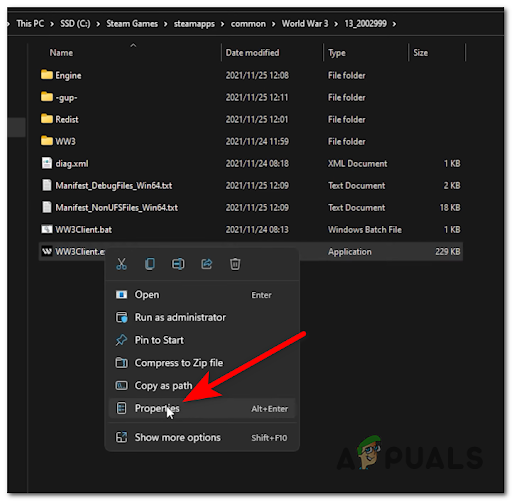
Accessing the Properties menu Note: That folder might be named differently, the only thing you have to do is to find the WW3Client.exe.
- After the Properties menu appears on your screen, go to the Compatibility section. The first thing you need to do is to check the box next to Disable full-screen optimizations, then check the box next to Run this program as administration as well.
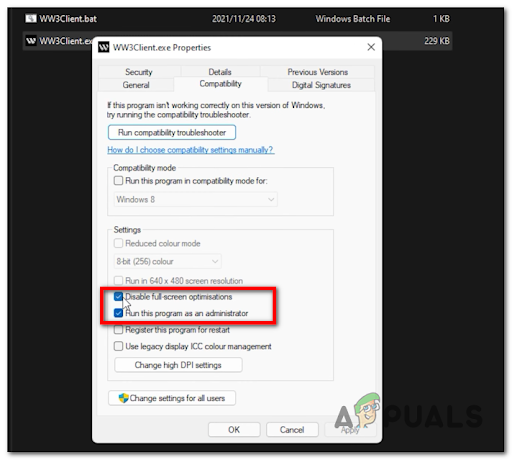
Disabling fullscreen optimizations - Once you’ve done that, click on the Change high DPI settings button and check the box next to Override high DPI scaling behavior.
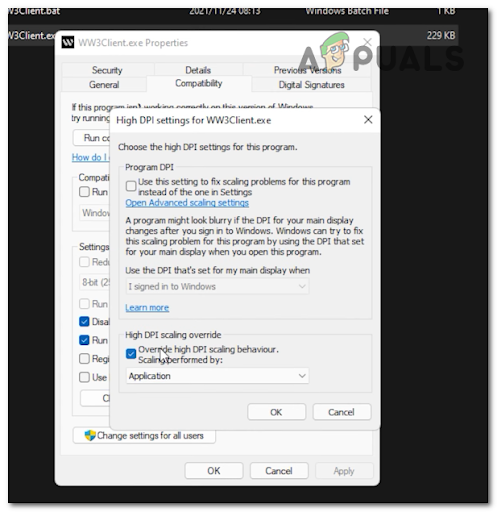
Overriding DPI scaling - When you are done with that, save the changes and launch the game to see if it is still not working properly.
If none of the methods before have helped you fix the stuttering and low FPS issues for World War 3, check below the last method.
5. Lower the in-game settings
If you’re still overly annoyed by the stuttering and framerate issues with World War 3 despite the fact that you tried every fix above, the last thing you can try is to lower the in-game settings.
This can be very helpful with the FPS because the high settings could be the principal cause of these problems, so by lowering it you could make the game playable.
To enforce this, you need to go to the settings of the game, and before going to the Video settings, go to the Gameplay settings first and enable all the settings available under Debug.

Once you are done with that, go back to the general settings menu and access the Video section. Here is where you can lower the graphics settings.
Note: Disable as many settings as you think are necessary, lower the settings to Medium or even Low if you need a bigger number of FPS. You can also downscale the resolution because it will make a big difference when it comes to the FPS and stutter problems.
After you are done with that, save the changes and test the World War 3 game to see if the stutter and low FPS are still present.


