World War 3 Fails to Update? Here’s the FIX
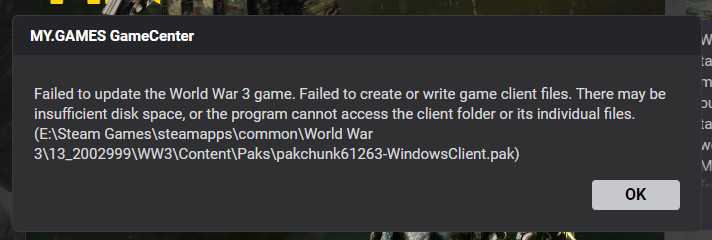
Some World War 3 players are reporting that despite the fact that a new update is available for the game, any attempt at installing it results in the ‘Failed to update the World War 3 game‘ error. This issue seems to occur on every recent Windows version (Windows 7, Windows 8.1, Windows 10, and Windows 11).
After investigating this particular issue, it turns out that there are several different underlying scenarios that might ultimately cause this problem with World War 3. Here’s a list of culprits that are most likely responsible for preventing you from installing a World War 3 pending update:
- Insufficient disk space – You might notice that the game is refusing to update is a scenario in which the disk partition where the main World War 3 game files are installed doesn’t have enough space. As a rule of thumb, you should make sure that the disk partition where the game is installed has at least 35 Gb of free space before attempting to install the update once again.
- Missing Windows Update .NET Dependency – If you are experiencing this issue on Windows 11, one possible cause that’s often overlooked is a missing .NET dependency that usually gets installed via Windows Update. If you have pending Windows Updates that are waiting to get installed, install them first before attempting to install the WW3 pending update once again.
- Steam is not opened with admin access – Another scenario that might produce this error is a situation in which Steam is not actually opened with admin access. This will prevent the game launcher from replacing existing files (which is exactly what needs to be done in the case of an update). In this case, you can fix the problem by forcing Steam to open with admin access.
- Corrupted administrator account – According to some community members, this problem can also arise in a case where the administrator account that you’re using is actually corrupted. In this case, you should experience similar problems with other games. To fix this problem, you’ll need to create a new administrative account.
- Corrupted game files – Game file corruption can also be the root cause of this problem, as a lot of affected users are reporting. In their case, running the integrity check function on Steam and ensuring that every game file is replaced fix the issue and allowed them to update.
- Installer Packaging issue – This type of issue happened in a past with WW3 as a game installation problem ended up breaking the updating function. If this scenario is applicable, the only viable fix is to uninstall the game and reinstall the latest build that includes the pending update.
- Firewall interference – As it turns out, the installation of a pending WW3 update can also be prevented by a false positive caused by the active firewall. This seems to occur with both the built-in solution (Windows Firewall) and with certain 3rd party security suites. It’s not clear if the fault lies with the developers or not, but the fix seems to be to either whitelist Steam + the WW3 game executable or to uninstall the overprotective 3rd party suite.
1. Free up disk space
As it turns out, the number one cause why you might expect to deal with this issue is a scenario that prevents the game’s updating function from copying over the new update failed due to lack of free space.
So if you’re currently dealing with the ‘Failed to update the World War 3 game’ error, the ideal way to start is to make sure you have sufficient disk space on the partition where the main World War 3 game is installed.
Some community members are recommending at least 10 GB of free space when installing pending updates, but our recommendation is to keep always keep a buffer of at least 35 GB of free space on the partition where you installed World War 3.
In order to free up space (if this method is applicable), you can either do it manually (by deleting stuff yourself) or automatically (via the Windows Cleanup Utility).
If you want to save time and ensure that you are not deleting stuff that’s actually valuable to your OS, we recommend the automated approach – it’s much easier to perform and will save you from mistakenly deleting files that you shouldn’t delete.
In the event that the partition in question currently holds other large games or applications that you’re no longer using, you should prioritize them first when uninstalling.
However, if you’re looking for specific instructions that will walk you through the process of using the Disk Cleanup utility to free up the required space for World War 3 (and the game is installed on the system partition), follow the guide below to learn how to use the Disk Cleanup utility to free up system space:
- Start by pressing Windows key + R to open up a Run dialog box.
- Once you see the Run dialog box, use the text box to type ‘cleanmgr’ inside the text box and press Enter to open up the Disk Cleanup utility.

Opening up the Disk Cleanup Utility - If you see the User Account Control (UAC) prompt, use your mouse to click Yes in order to grant admin access.
- Once you’re finally inside the Disk Cleanup menu, select the drive that holds your World War 3 installation.
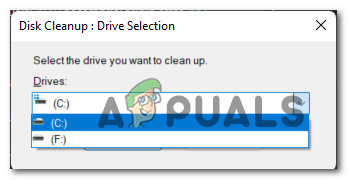
Selecting the Windows drive Note: If World War 3 is installed on the Windows drive, look for the Windows logo.
- From the next menu of the Disk Cleanup utility, start by checking the following boxes while leaving everything else unchecked:
Downloaded Program Files
Temporary Internet Files
Recycle Bin
Temporary Files
- Once you select everything mentioned above, click on Clean up system files and click Yes at the User Account Control prompt.
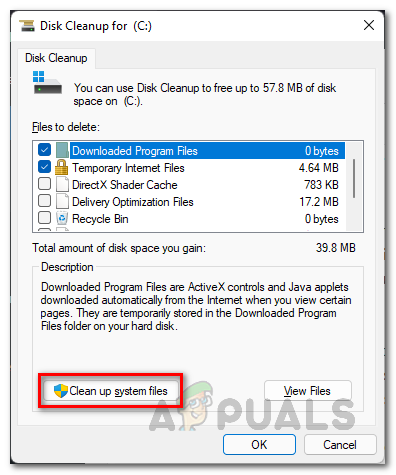
Cleaning up the System files - After the Disk Cleanup scan is finally complete hit Ok to save the changes.
- Finally, after you manage to use this method to free up 35+ Gb of free space, reboot your PC and wait for the next startup to complete.
- Attempt to install the pending World War 3 update once again and see if you are now able to install it all the way through without seeing the same ‘Failed to update the World War 3 game’ error.
If this method didn’t help and you concluded that the WW3 error has nothing to do with the available free space, move down to the next potential fix below.
2. Open Steam with admin access
Once you made sure that you have enough space to accommodate the pending update, the next thing you should look at is the allowed privileges.
Steam needs administrator access in order to be able to replace and write new files onto the existing World War 3 installation. If Steam is not opened with admin access, you might find yourself in a scenario where every pending update will fail (not just for World War 3).
If you’re not sure whether Steam runs with admin access or not, follow the instructions below to check and ensure that admin access is given every time Steam is launched:
- Make sure that Steam is closed and not running in the background.
- Right-click on Steam, then choose Run as administrator from the context menu that just appeared.
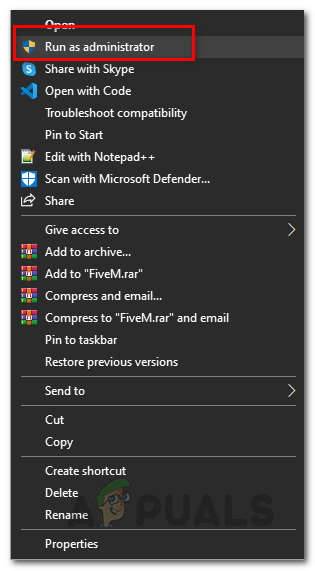
Running as administrator - Now that you’re certain Steam runs with administrative privileges, launch World War 3 and see if the update installs without issue.
- In case the same kind of issue is no longer occurring, you’ve fixed the problem, but you still need to make this behavior permanent.
- To do this, right-click on the Steam icon and click on Properties from the context menu.
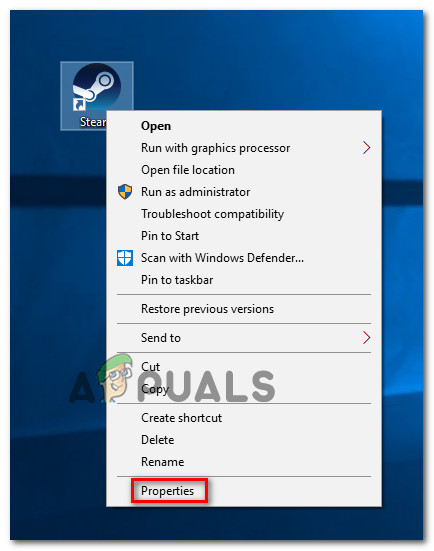
Accessing the Properties screen - Inside the Properties screen of Steam, go to the Compatibility tab using the horizontal ribbon at the top.
- Move down to the Settings section and check the box associated with Run this program as administrator.
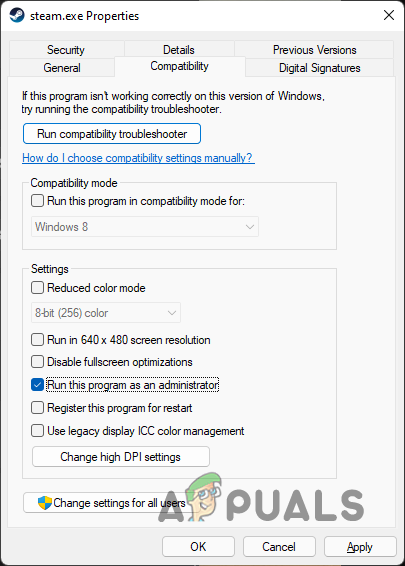
Configuring Steam to run as administrator - Finally, click on Apply to save the changes, then launch World War 3 once again and see if the problem is now fixed.
In case Steam was already running with admin access or this method didn’t fix the problem, move down to the next potential fix below.
3. Install every pending Windows Update
As it turns out, another fairly common scenario that might prevent World War 3 from auto-updating itself is a missing .NET dependency. This issue is solely reported on Windows 11 where a specific .NET dependency that the game needs is labeled as an optional update and won’t get installed automatically.
If you find yourself in this scenario, you should be able to get the issue fixed and allow World War 3 to install every pending update by installing every pending update that’s currently available via Windows Update.
Note: Make sure you install every critical, cumulative, and optional update that is currently pending.
For specific instructions on how to do this, follow the steps below:
- Open up a Run dialog box by pressing Windows key + R.
- Inside the text box, type ‘ms-settings:windowsupdate’ and press Enter to open up the Windows Update page of the Settings menu.
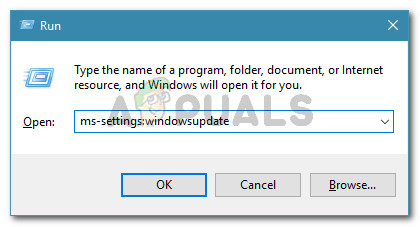
Access the Windows Update screen - Inside the Windows Update screen, move over to the right-hand side menu and click on Check for Updates to see if any new Windows 11 updates are available.
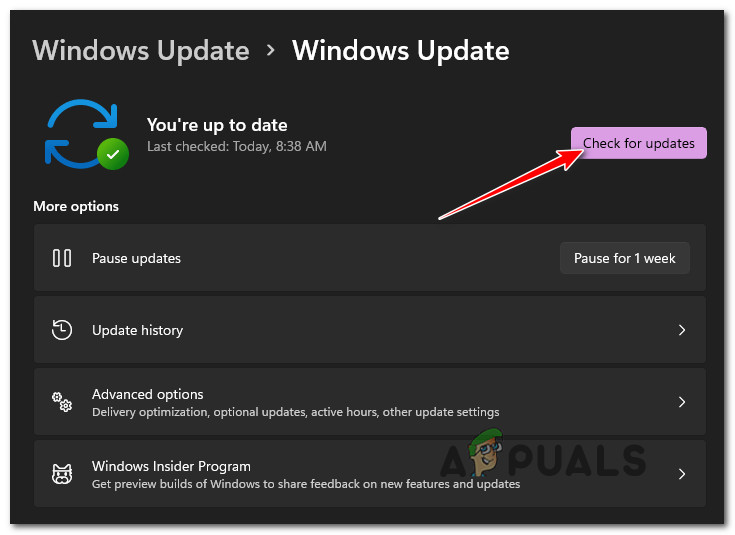
Checking for update - After the initial scan is complete, check the results and see if a new update is available.
- If any new ones are available, click on Download now, then wait until they’re downloaded and click on Install Now (in case the installation doesn’t start automatically).

Installing every pending Windows Update - Wait until every available Windows 11 is installed, then reboot your PC when asked to do so.
Note: If you have a lot of pending updates waiting to be installed, you might be prompted to restart your PC before every update is installed. Do as instructed if this happens, but make sure to return to this screen and complete the installation of the remaining updates after the next startup is complete. - After every available update is installed and you manage to bring your Windows 11 build to the latest, launch Steam once again and run World War 3 to see if the pending game update installs without an error this one around.
If the ‘Failed to update the World War 3 game‘ error is still occurring, move down to the next potential fix below.
4. Create a new Windows administrative account
An unlikely but definitely possible culprit that might prevent World War 3 from updating itself is a scenario in which the main Windows account that you’re using when launching steam is somehow affected by corruption.
Several users dealing with the same kind of issue have confirmed that they finally fixed the problem by creating a new administrator account in order to replace the corrupted equivalent.
After doing this, a lot of affected users have confirmed that World War 3 finally completed the pending update and they could play the game normally.
If this scenario is applicable and you want to give this fix a try, follow the instructions below to create a new Windows administrative account to replace your current one:
- Start by pressing Windows key + I to open up the Settings app on Windows 11.
- Inside the Settings menu, access the side menu by clicking on the action button in the top-left corner of the screen.
- Next, from the sideline menu that just appeared, click on Accounts from the list of available options.
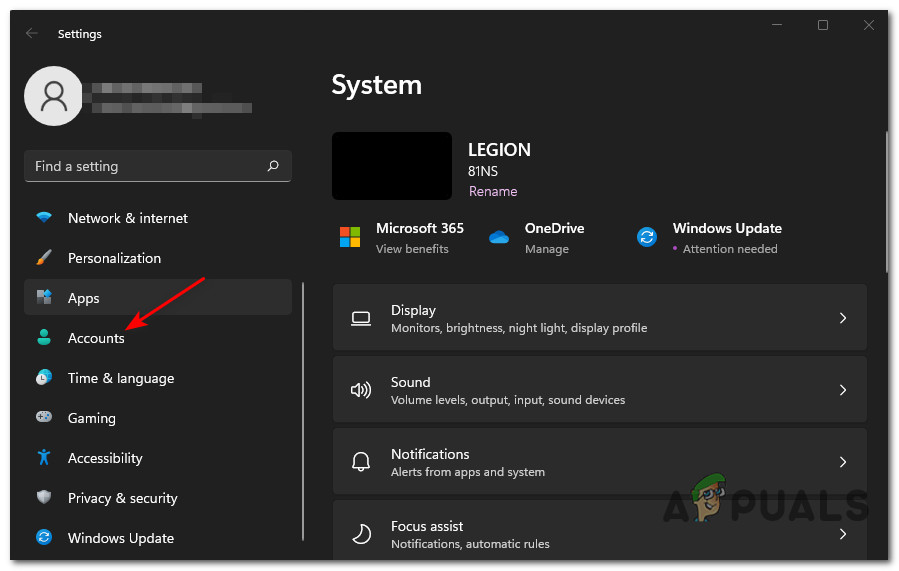
Accessing the account menu - Inside the Accounts tab, move over to the right-hand side menu and click on Family & other users.
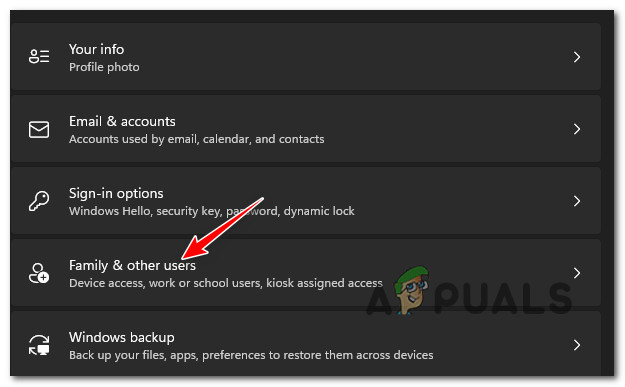
Accessing the Family and other users tab - Inside the Family & other users tab, go under Other users (from the same right-hand side menu) and click on the Add account button.
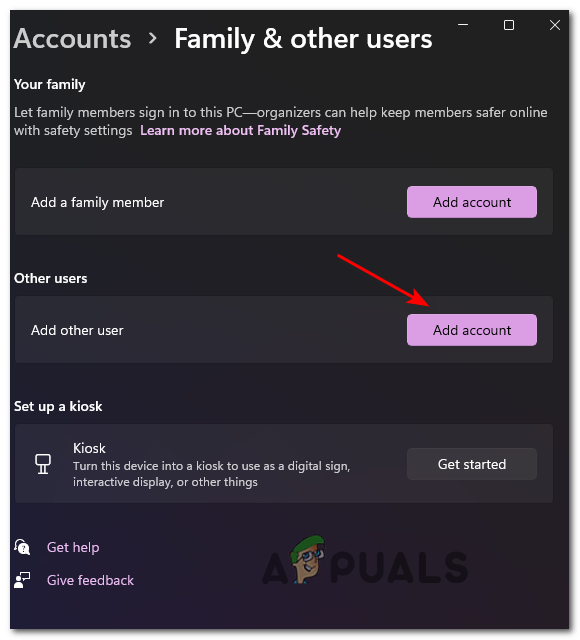
Adding the account - Next, click on the I don’t have this person’s sign-in information hyperlink under the box where you can input the email.
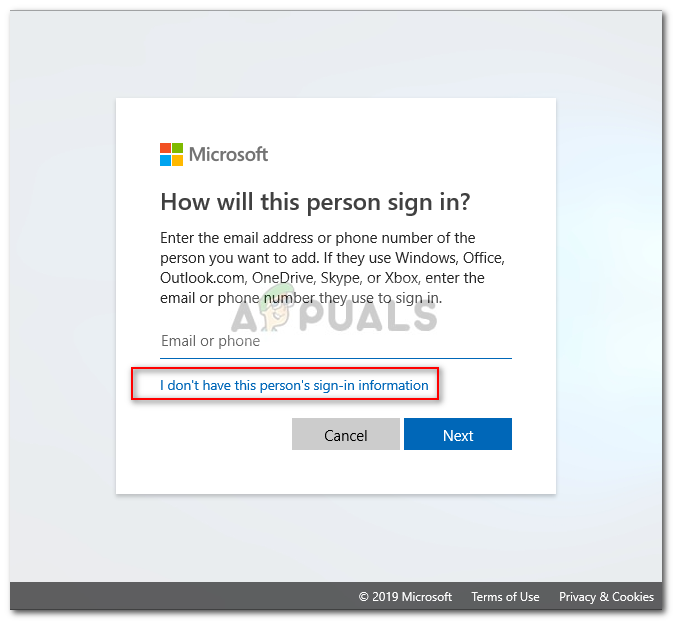
Creating a local account Next, click on Add a user without a Microsoft account and wait for the next screen to load.
- From the Create a user for this PC page, start by entering the Local account username and add a password if you want to add an extra security layer.
- Once the new local account is named and a password is added, hit the Next button and wait until the account is initialized.
- Click Next one more time to finish the creation of the local account.
- The newly created local account will become visible under Other users (inside the Family & Other users tab).
- Finally, reboot your computer and sign in to the newly created Windows account.
- Launch World War 3 once again and see if the pending game update installs just fine this time around.
If the problem is still not fixed, move down to the next potential fix below.
5. Deploy an integrity check in Steam
If none of the potential fixes so far have proven to be effective for you, you should start troubleshooting for some time of corruption that is preventing World War 3 from updating itself.
WW3 game file corruption typically appeared after a botched update or after some type of AV scan that ended up flagging one or more game files due to a false positive.
Almost every scenario like the one described above can actually be rectified by deploying a file integrity check on World War 3 from the Steam menus.
If you haven’t tried this potential fix yet, here’s what you need to do:
- Open your Steam client and make sure you are signed in with the same account that holds ownership to World War 3.
- From the main Steam dashboard, click on Library from the menu at the top.
- From the list of games, locate World War 3 and right-click on it from the menu on the left.
- Once you see the World War 3 context menu appearing, choose Properties.
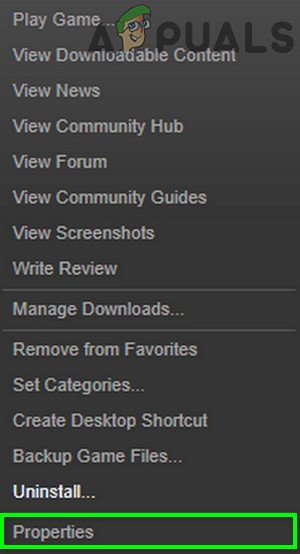
Accessing the Steam Properties menu of World War 3 - Inside the Properties screen, go ahead and click on Local Files.
- From the next menu, click on Verify the Integrity of Game Cache.
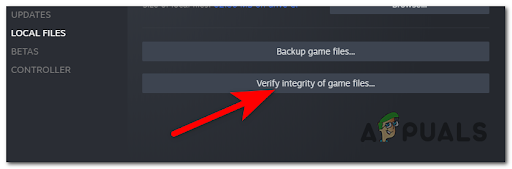
Deploying an integrity check - At the next prompt, click Yes and wait for the operation to complete.
Note: In case the scan will manage to find inconsistencies with the game files, follow the on-screen instructions to repair the game before restarting your computer. - After the integrity check procedure is finished via Steam, launch World War 3 once again and see if you are now able to install the pending updates.
If the problem is still not fixed, move down to the next potential fix below.
6. Prevent Firewall from blocking the game update
If none of the methods covered so far have proven to be effective in your case and you still can’t update World War 3 to the latest version available, you should also consider a potential firewall interference.
According to other community members, this type of problem is encountered with both the built-in firewall solution (Windows Firewall) and a 3rd party equivalent.
If this problem is indeed caused by a firewall action, the focused approach is to whitelist the game launcher (Steam) and the main World War 3 executable from your AV settings.
Note: In the event that whitelisting is not an option for you, the only way to prevent the firewall rules from being enforced is to simply uninstall the security suite that’s causing this problem.
Try going for the whitelisting method first and only resort to uninstalling the problematic security suite if there’s no other way. In any case, we covered both scenarios with a couple of sub-guides:
Whitelist Steam + the Main WW3 Executable
If this method is applicable to you and you’re experiencing this problem while using the built-in firewall, the most elegant way of solving the conflict is to whitelist Steam and World War 3 from the setting menu of Windows Firewall:
Note: In case you are using a 3rd party firewall instead of a Windows Firewall, the steps below won’t be applicable. In this case, look online for specific steps on whitelisting the two executables according to the firewall solution you’re using.
Here’s what you need to to do whitelist Stream and the main World War 3 executable:
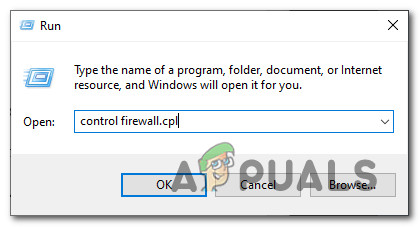
- Press Windows key + R to open up a Run dialog box.
- Type ”control firewall.cpl” and press Enter to open up the standard menu of Windows Firewall.
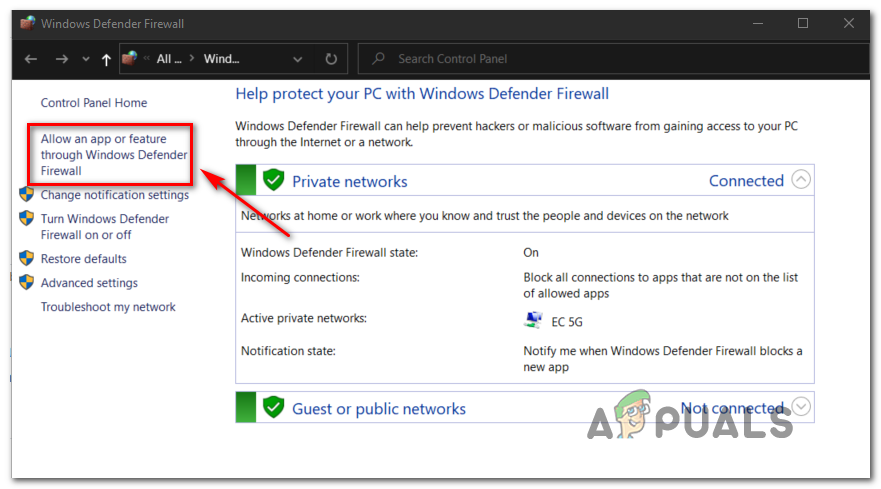
Accessing the classic Windows Firewall menu - In the Windows Defender Firewall menu, move to the left-hand side click on Allow an app or feature through Windows Defender Firewall.
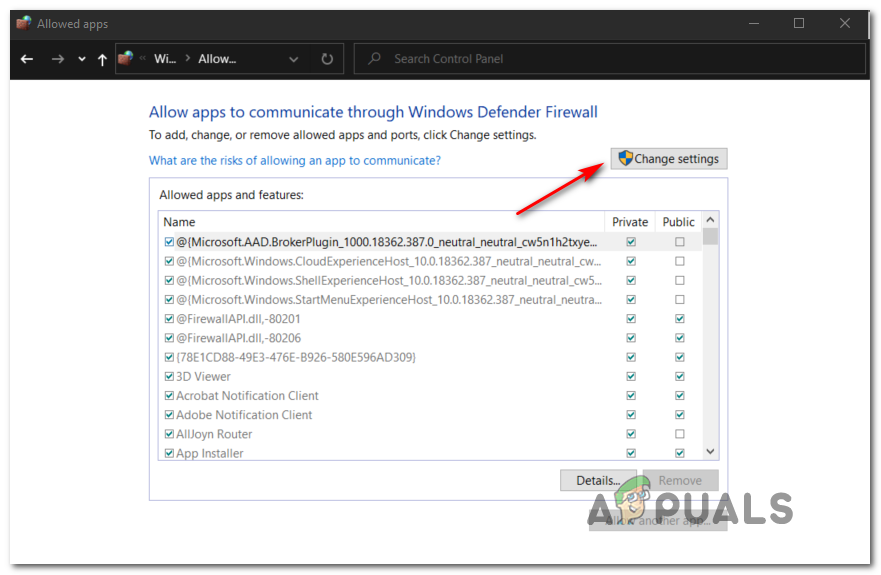
Allow an app or feature through Windows Firewall - From the next screen, click on Change settings button and allow admin access by clicking Yes at the UAC (User Account Control) prompt.
Changing the settings - Move down through the list of programs and see if you can locate Steam or the WW3 executable.
- In case they’re missing, click the Allow another app button, then click Browse, navigate to their location, and add the two entries manually by clicking Add.
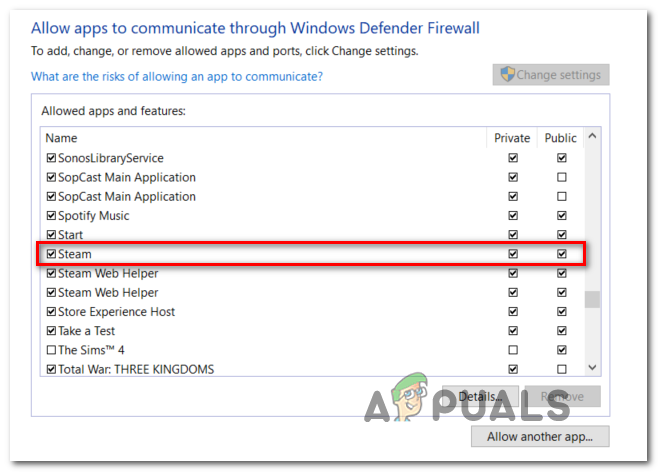
Whitelisting Steam - Once you’ve ensured that both entries (Steam + the World War 3 executable) appear inside the list of Allowed apps and features, check both the Private and Public boxes.
- After you enforce these modifications, reboot your PC before launching World War 3 once again and see if you’re still dealing with the same kind of problem.
Uninstall the overprotective 3rd party firewall
In case whitelisting the Steam executable and the game launcher was not an option for you, the next thing you can do is uninstall the overprotective firewall solution.
Keep in mind that even if you disable the firewall solution that you’re using, the same security rules will likely remain in place and prevent World War 3 from communicating with the game server.
Note: In case you are using Windows Firewall, you won’t be able to uninstall the firewall solution like you would normally do with a non-native firewall. Instead, follow this guide to disable Windows Security.
On the other hand, if you’re actually using a 3rd party firewall solution, follow the instructions below to uninstall the firewall solution:
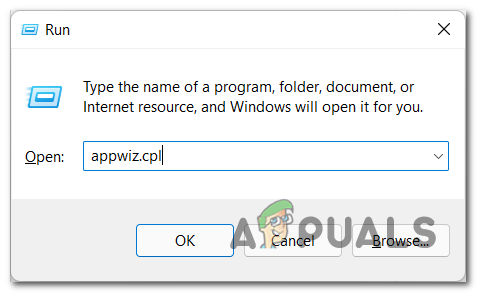
- Open a Run dialog box by pressing Windows key + R.
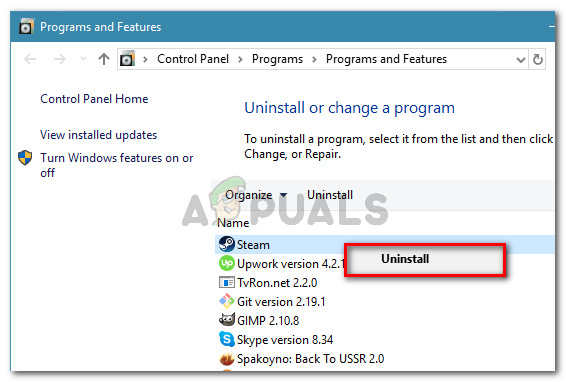
- Type ‘appwiz.cpl’ inside the text box and press Enter to open up the Programs and Features screen.

Open up the Programs and Features menu - From the Programs and Features menu, move to the left and scroll down through the list of installed programs.
- From that list, locate the 3rd party AV that you’re trying to uninstall.
- Right-click on its entry and choose to Uninstall from the newly appeared context menu.
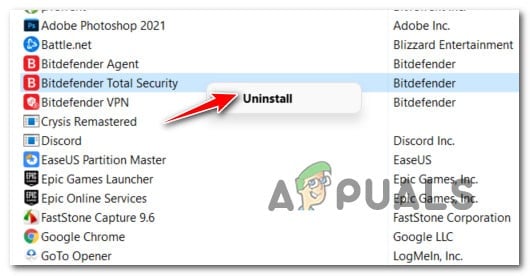
Uninstall antivirus or firewall - Once you’re inside the uninstallation screen, follow the on-screen prompts to complete the uninstallation process.
- After the uninstallation operation is complete, open Steam yet again and launch World War 3 and see if the problem is now resolved.
If World War 3 still refuses to update, move down to the next potential fix below.
7. Reinstall World War 3
In case you got this far and nothing has really worked in allowing you to install the pending World War 3 update, there’s really nothing else you can do other than deploying a reinstall procedure.
We’ve managed to identify several community members confirming that once they uninstalled the game via Programs and Features and reinstall the latest build via Steam.
This will eliminate the need to update since you’re already installing the latest available update along with the main game.
Here’s what you need to do to reinstall the game:
- Open a dialog box by pressing Windows key + R on your keyboard.
- Next, type ‘appwiz.cpl’ and press Enter to open up the Programs and Features window.
Open up the Programs and Features menu - In the Programs and Features screen, scroll down through the list of applications, and locate your Steam installation.
- After you see the entry associated with Steam, right-click on its entry and choose Uninstall from the newly appeared context menu.
Uninstalling Steam - If you get the User Account Control (UAC), click Yes to grant admin access.
- Next, click Uninstall to confirm the operation, then wait for the operation to complete.
- Once the main Steam installation has been successfully uninstalled, go ahead and repeat the uninstallation procedure with World War 3.
- Once both the launcher Steam and the game have been removed, restart your computer and wait for the next startup to complete.
- Finally, visit the official download page of Steam and install the latest available launcher build.
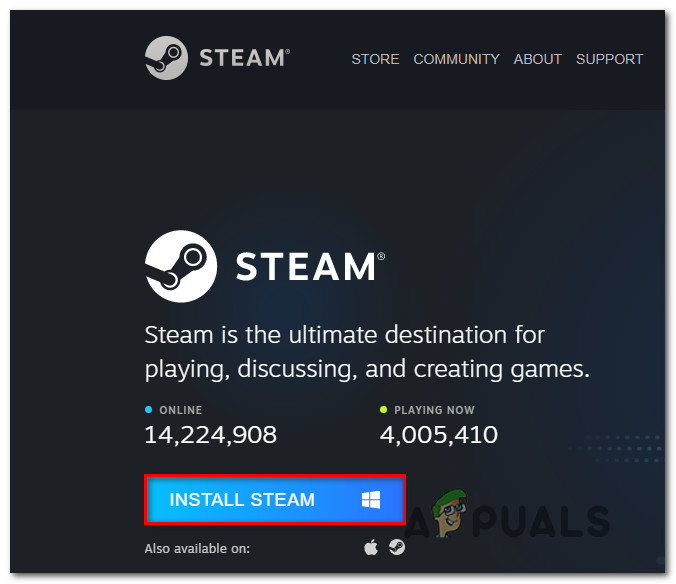
Downloading Steam - After Steam gets reinstalled, use it to reinstall World War 3 from your Library.
- Launch the game once again and you should no longer see the ‘Failed to update the World War 3 game‘ error.


