Fix: Windows Update Error Code ‘0x80888002’ in Windows 11?
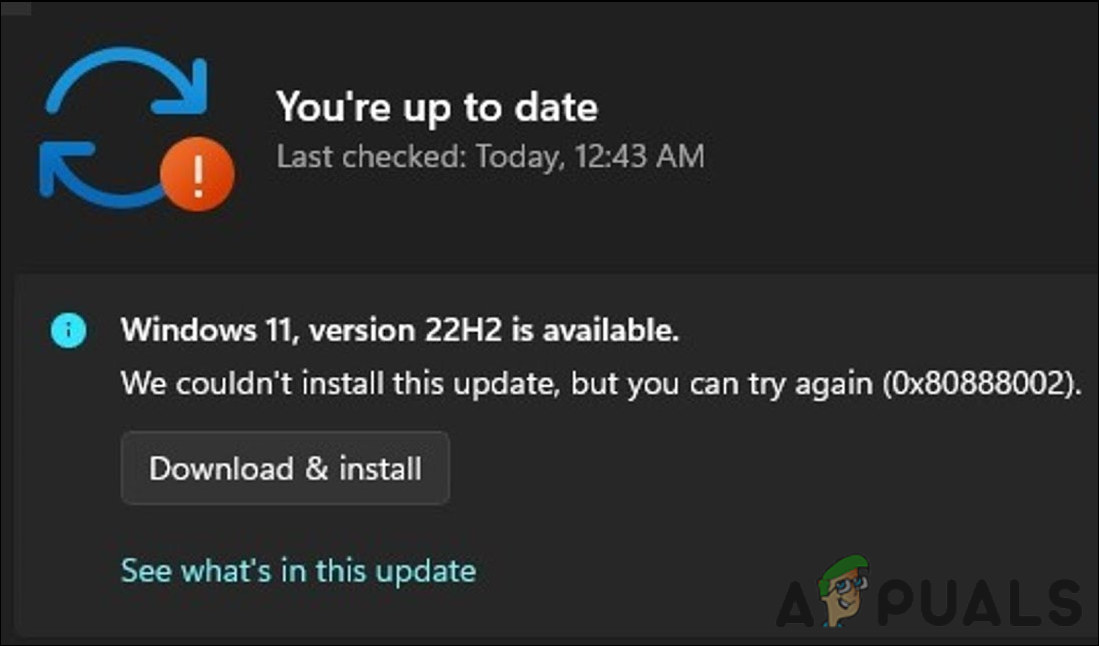
In the past, Windows 11 updates were used to verify whether a computer met its requirements and is valid. These checks could be beaten by using .dll files, scripts, or by changing the ISO file. This changed with the release of the Windows 11 v22509 update, which throws the error code 0x80888002 when the users try to install Windows 11 on incompatible hardware.
You may also be facing the error because of a problem within the system, such as the Windows Update service being disabled. This guide is divided into two parts. In the first part, we will show you how to use a batch script to bypass the installation requirements and successfully upgrade to Windows 11.
This second method will walk you through the troubleshooting methods you can try if you already use compatible hardware. Proceed with the method that fits your situation the best.
1. Use a Batch Script to Bypass Installation Requirments
If you are using incompatible hardware, then you can use a script called MediaCreationTool.bat via Github to install the update successfully.
The script is safe to use, but you can check the source code for any discrepancies if you have any questions regarding it.
Here is all that you need to do:
- Head over to the MediaCreationTool.bat GitHub page.
- Click on the Code button and choose Download ZIP from the context menu.
- Once the file is downloaded, launch File Explorer and navigate to the Download folder.
- Right-click on the downloaded file and choose Extract.
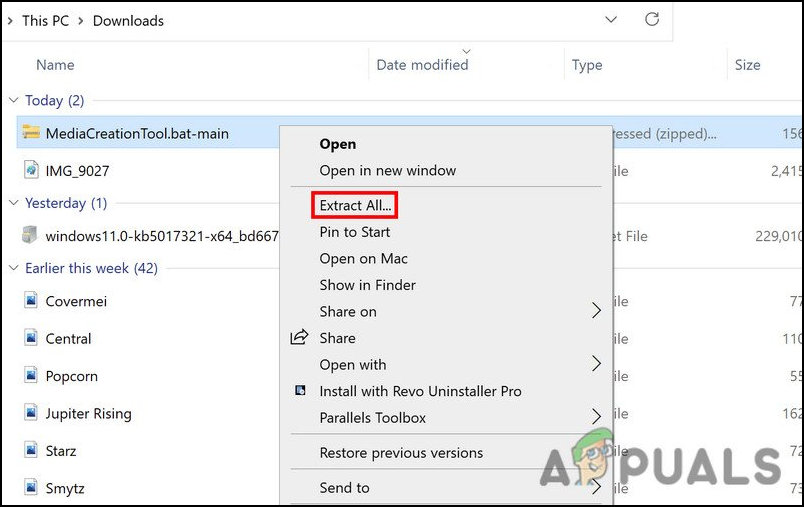
Extract the downloaded file - Next, launch the extracted folder and access the bypass11 folder.
- In this folder, double click on the Skip_TPM_Check_on_Dynamic_Update.cmd file.
- If a Windows SmartScreen prompt appears, click on Run anyway.
- Then, press Enter to start the process in Windows PowerShell.
2. Ensure the Windows Update Service Is Running
If your hardware follows the minimum installation requirements already, then the next thing that you can do is make sure that the Windows Update service is running. This service is required for the system to install system, security, and app updates on Windows.
If this service disabled or simply not functioning properly, you will run into the issue at hand.
Here is how you can proceed:
- Press Win + R to open Run.
- Type services.msc in Run and click Enter.
- In the following window, locate the Windows Update service and right-click on it.
- Choose Properties from the context menu.
- Click on the Start button to run the service.
- If the service is already running, click on the Stop button, wait for a few seconds, and then hit Start again.
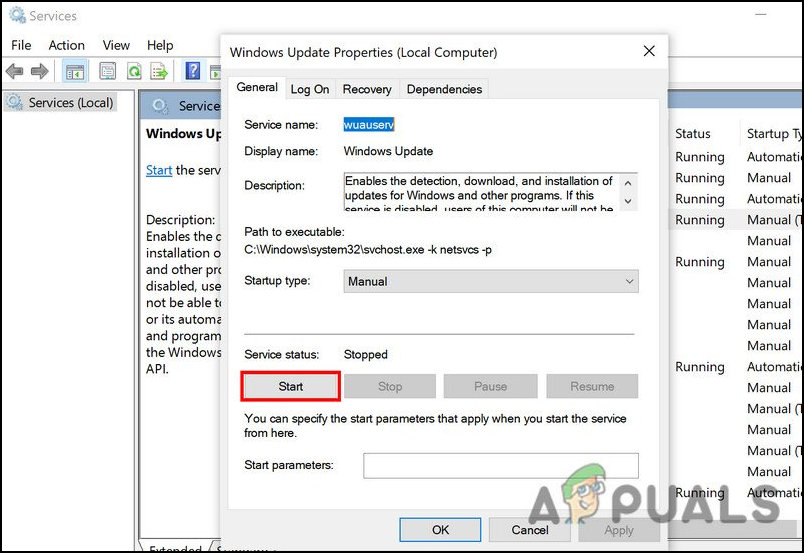
Start the Windows update service - Expand the dropdown for Startup type and choose Automatic.
- Click Apply > OK to save the changes.
Once done, try installing the update again and check if the problem is now fixed.
3. Run the Windows Update Troubleshooter
You can also resolve update-related issues in Windows using the built-in troubleshooting utilities offered by Microsoft. The most appropriate one to use in this case is the Windows Update troubleshooter, which scans the system for potential errors that might be preventing you from installing the update.
If any issues are identified, it will resolve them without requiring much input from your side.
Here is how you can proceed:
- Press Win + I to open Windows Settings.
- Choose System from the left pane and click on Troubleshoot in the right side of the window.
- Now, click on Other troubleshooters.
- In the following window, look for the Windows update troubleshooter and click on the Run button for it.
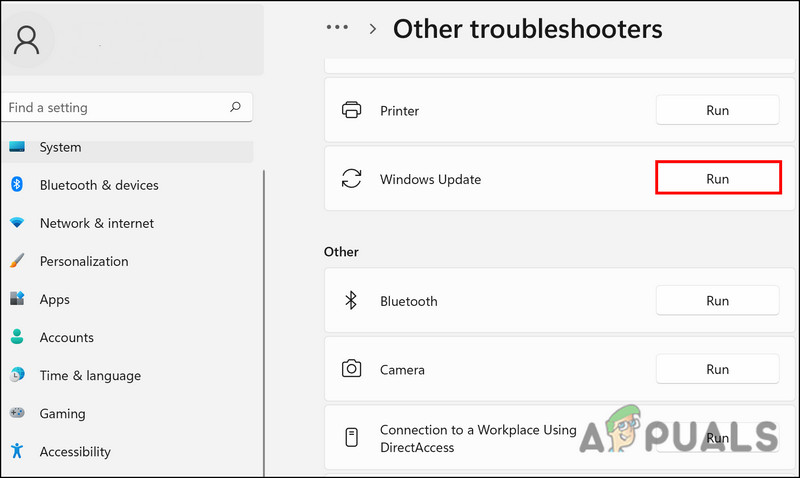
Run the Windows update troubleshooter - The troubleshooter will now begin scanning the system for errors. If any issues are identified, it will notify you and suggest a relevant fix. In that case, click on Apply this fix.
- If the troubleshooter fails to identify the problem, click on Close the Troubleshooter.
4. Downgrade to Windows 10
If none of the methods has worked for you and you are still trying to install the update on unsupported hardware, then we recommend you downgrade to Windows 10. It will prevent you from further issues within the system.
Here is how you can proceed:
- Press Win + I to open Windows Settings.
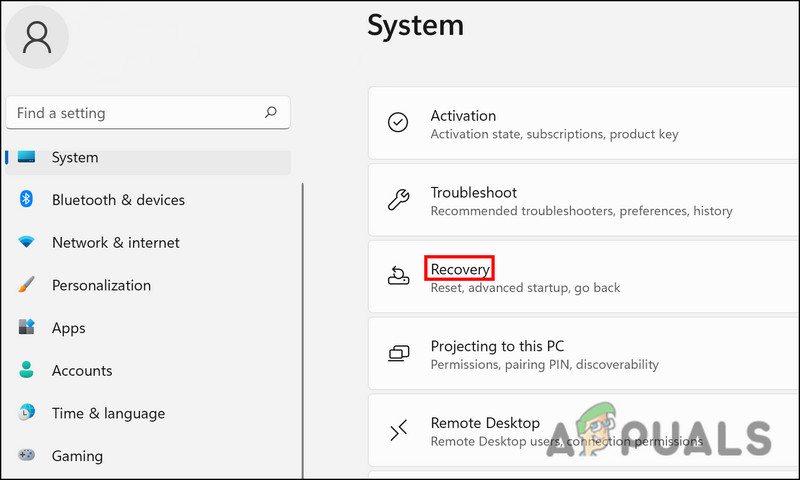
- Choose System from the left pane.
- Move to the right side of the window and click on Recovery.
Access the Recovery menu - In the following window, click on the Go back button.
- Choose a reason for going back and follow the on-screen instructions to complete the process.


