Fix: Windows Update Assistant Error Code: 0x8007054F
Windows Update error 0x8007054F usually occurs when you try to install Windows Updates by using Windows Update Assistance. It encounters because of the corrupt system or Windows updating files. It can also trigger when your system services that support windows updates are stopped; your system has insufficient storage for updates installation, or the startup applications interfere with the installation of the windows updates.
After analyzing the possible reasons for this error, here are some methods you can apply to fix the issue;
1. Run Windows Update Troubleshooter
Sometimes the Windows update installation error appears because of temporary glitches. The system files or folders that support WU are not loaded properly and do not proceed with the installation of WU, and an error appears. In this case, run the Windows Update troubleshooter. It will help you identify the problem and will repair it. Here are some steps to run the windows update troubleshooter on your system;
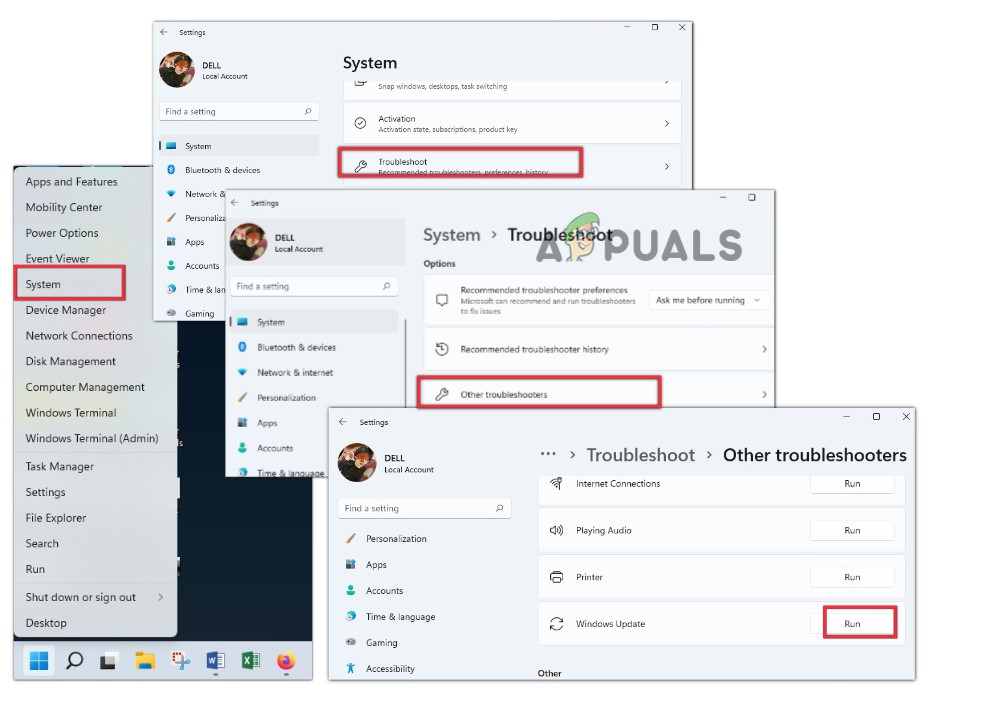
- Right-click on the Start Menu and select System from the list.
- Scroll down to Troubleshoot. Then select other troubleshooters.
- Now go to Windows Update and press the Run option. It will take some time to detect the issue and repair it.
- Once it is complete, restart your system and check if the error appears.
Run The Windows Update Troubleshooter
2. Disable the VPN Connection
VPN (Virtual Private Network can interfere with the Windows Updating process. It can cause network connectivity issues and stops downloading the Windows Update. So, if you are facing the issue, try to disconnect the VPN using the following steps;
- Go to the arrow icon present on the taskbar.
- Click on the VPN icon, and the dashboard will open.
- Now press the disconnect option. Once the VPN disconnects, try installing the updates and check if the error appears.
3. Rename the SoftwareDistribution and Catroot32 Folder
These two folders contain files that are relevant to
Windows Update. But when they are corrupt or bugged, they can cause trouble downloading ad installation if windows updates. So, rename these folders; they will create new windows update files that eventually help you with error fixation. Thus, follow the below steps;
- Click on the Menu and type Command Prompt.
- Press the “run as administrator” option.
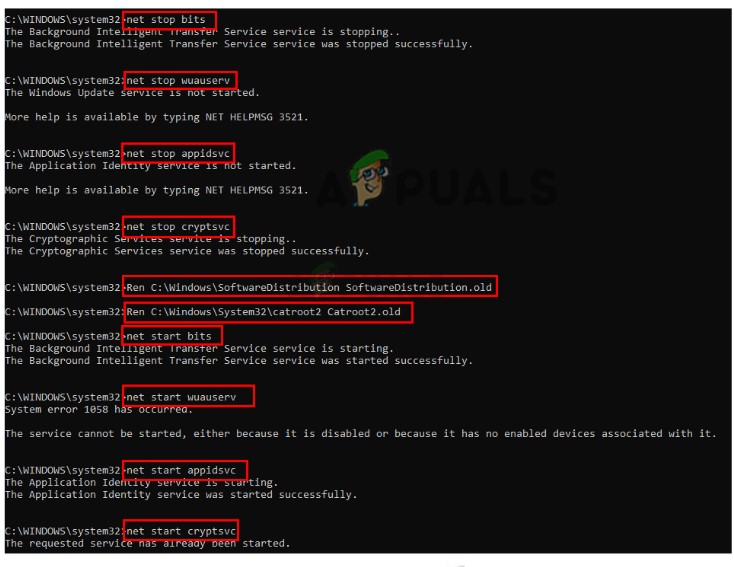
- Now type the following command one by one on the command line and press the Enter key.
net stop bits
net stop wuauserv
net stop appidsvc
net stop cryptsvc
Ren %systemroot%\SoftwareDistribution SoftwareDistribution.old
Ren %systemroot%\System32\catroot2 catroot2.old   net start bits
net start wuauserv
net start appidsvc
net start cryptsvc
- Now type exit and press enter key again. This process will create two folders of, SoftwareDistribution and Catroot32, which contains new windows update files.
- So once the process is complete, try to install the windows update and check if the error occurs or not.
Rename SystemDistribution and Catroot32 Folder for Windows Update Installation
4. Run SFC Scanning
The windows update error 0x8007054F appears when the system files are corrupt, missing, or damaged. SFC scanning detects the problem associated with these files and repairs them. So, follow these steps to perform scanning;
- Again go to the start menu, type CMD and click on the “Run as Administrator” option.
- Now type this command and hit the Enter key.
sfc /Scannow
- This process will take some time. Once it is done, restart your system and try to install the windows updates.
5. Perform a Clean Boot
If you still face the issue, try to perform a clean boot. Sometimes, the startup applications cause problems in WU installation. They might have bugs or outdated drivers that can affect your PC’s performance and the error encounters. So, follow the below steps to run your system in a clean-boot state;
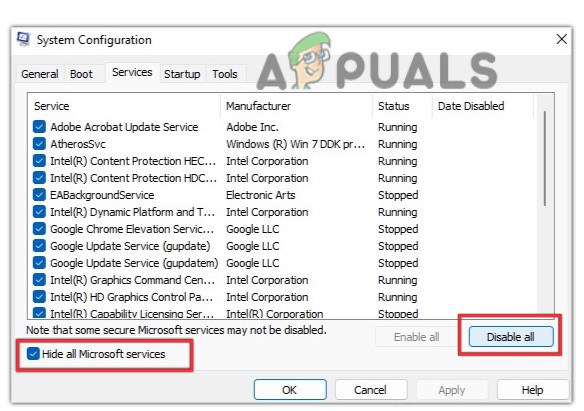
- Go to Start Menu and type System Configuration.
- Open the app. Click on the Services tab from the Menu bar.
- Now check the box “Hide all Microsoft Services” and press Disable All.
- So, click on ok, and your system will start in the clean boot state.
- Try to install the windows update. If the error does not appear, the problem is with the services.
- Then re-enable the services one by one till you find the faulty one. Install drivers for that service to fix it.


