How to Fix Windows Update Error 0x8007001F in Windows 11
The error 0x8007001F occurs when the users attempt to install the latest Windows 11 update on their computers. The error message says ‘Something went wrong and does not list any causes that might be resulting in the error.
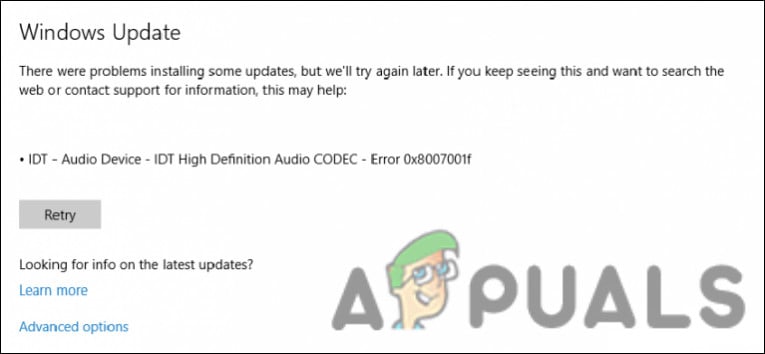
In this guide, we will look at the troubleshooting methods to try if you encounter this problem. Proceed with the fix that fits your situation the best.
1. Run the Windows Update Troubleshooter
The first thing you should try doing in case of an update error is running the Windows update troubleshooter. This troubleshooter is designed to scan the system for issues preventing the system from installing the updates.
Here is what you need to do:
- Press Win + I together to open Windows Settings.
- Choose System from the left pane and click on Troubleshoot in the right pane.
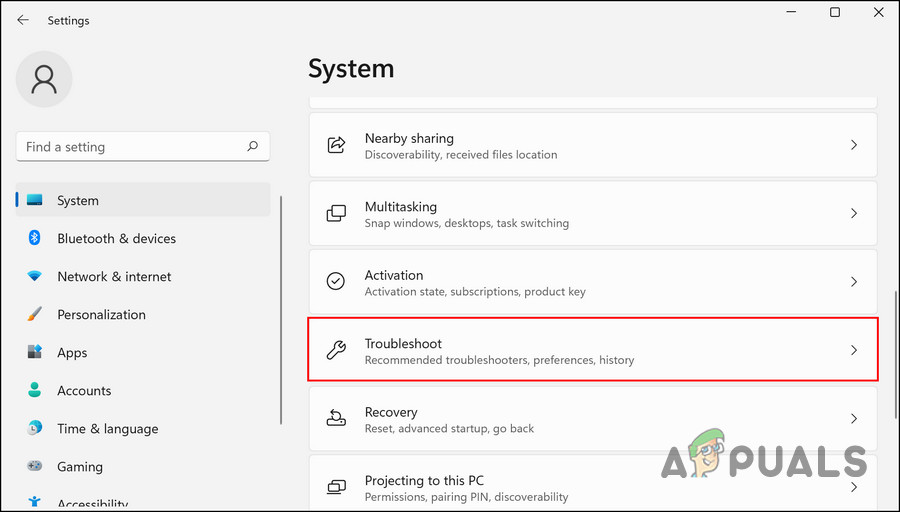
Choose Troubleshoot from the list - In the following window, click on Other troubleshooters.
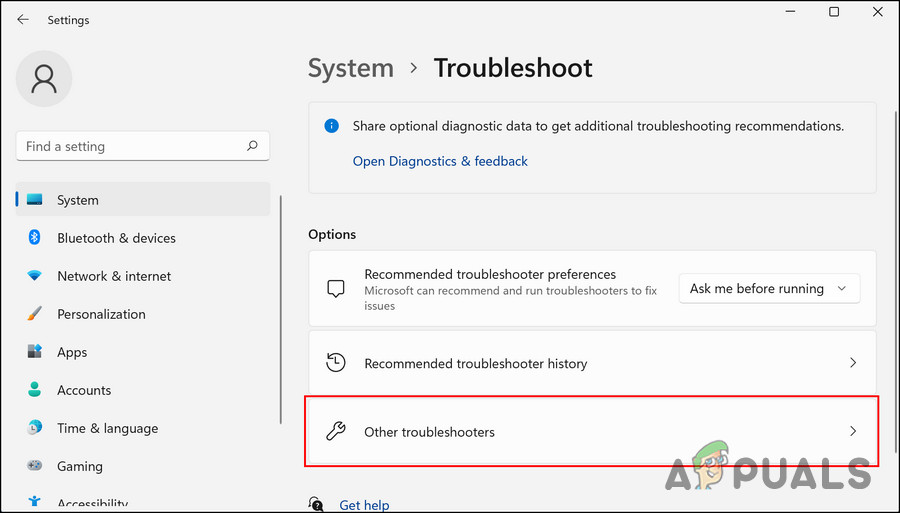
Click on Other troubleshooters - Now, look for the Windows Update troubleshooter and click on the Run button for it.
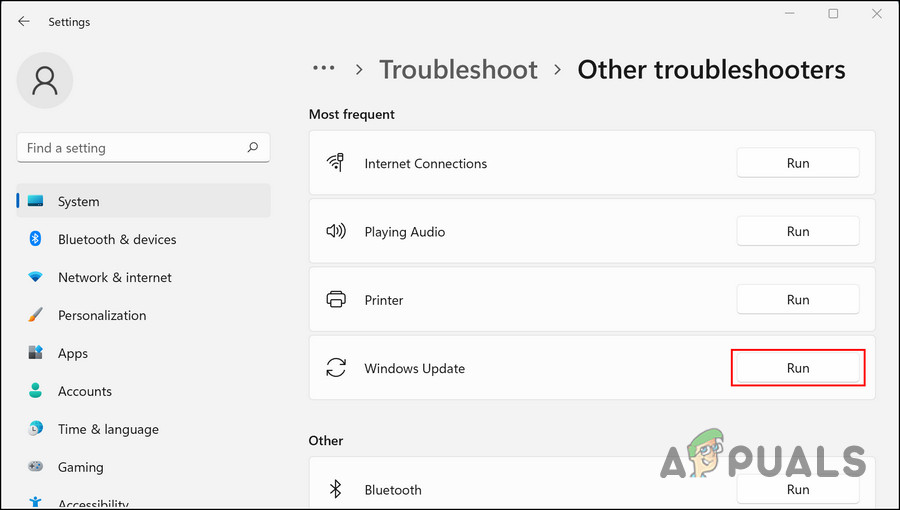
Run the Windows update troubleshooter - Wait for the troubleshooter to complete its scan. Once done, the troubleshooter will notify you of the results.
- If any problems are found, click on Apply this fix to implement the fix suggested by the troubleshooter.
- If the utility fails to find the problem, click on Close the troubleshooter to exit the program and move to the next method below.
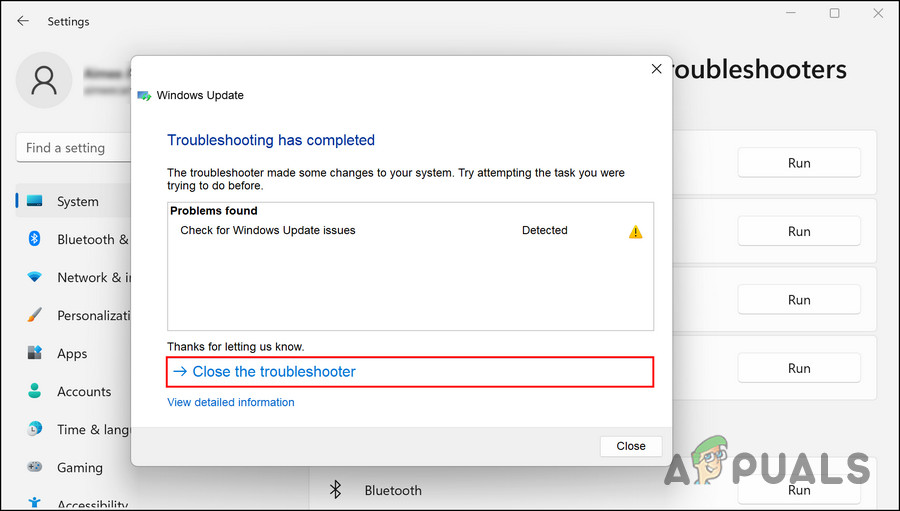
Click on Close the troubleshooter
2. Modify the Registry
In the case of the error 0x8007001F, some users reported that the issue was caused due to a faulty registry key. The error is related to the profile key in the Registry, and deleting the invalid subkeys can fix the problem for you.
Here is how you can delete the invalid keys to fix the problem:
- Press Win + R to open Run.
- Type regedit in the text field of Run and click Enter.
- Click Yes in the User Account Control prompt.
- Once you are inside the Registry Editor, navigate to the following location:
HKLM\SOFTWARE\Microsoft\Windows NT\CurrentVersion\ProfileList
- Look for the invalid profiles, right-click them, and choose Delete from the context menu.
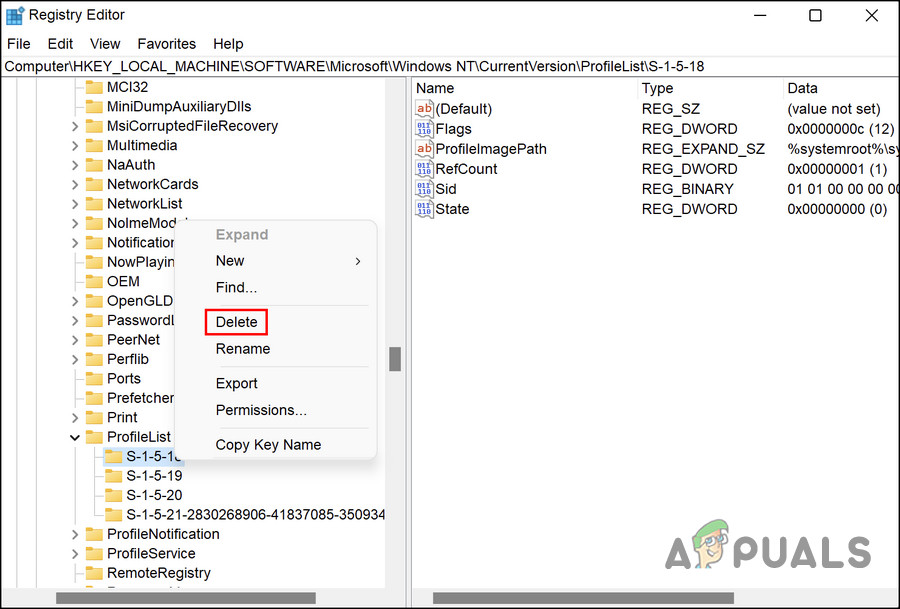
Delete the selected key - If you do not know which profiles are causing the problem, download and run the SetupDiag Tool.
- Once the tool is downloaded, click on the file to run it and let the tool create a Logs.zip Package.
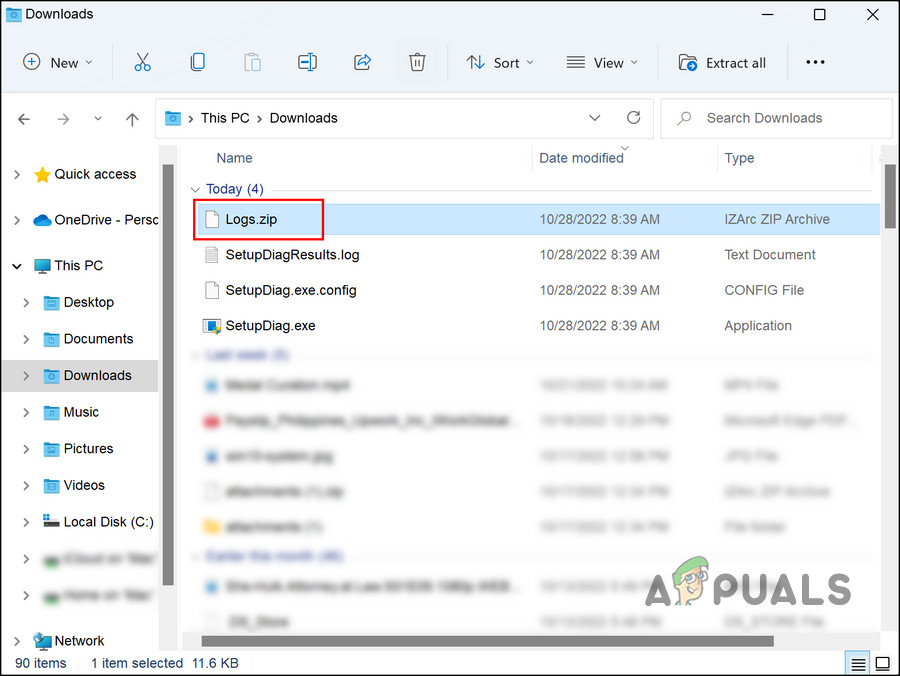
Choose Logs.zip in the File Explorer - Extract the zip file and look for the problematic registry key. You will see a warning sign with it.
- Once found, delete it using the steps above.
3. Reset Windows Update Services & Cache
This problem may also arise because of the corruption of the update services. Windows requires certain services and components to be working properly to install the updates. If any of these components are faulty or disabled, you will run into the error at hand.
Repairing these services is quite simple, and you can use the Command Prompt to perform these steps. In this method, we will restart these services and reset the cache files using a bat file we created. We suggest you create a restore point before proceeding with this method, since it will help you revert to the current state of the system if anything goes wrong during the execution.
Once the restore point is created, follow these steps:
- Click on this link to download the Windows Update batch file.
- Once the download is complete, right-click on the file and choose Run as administrator from the context menu.
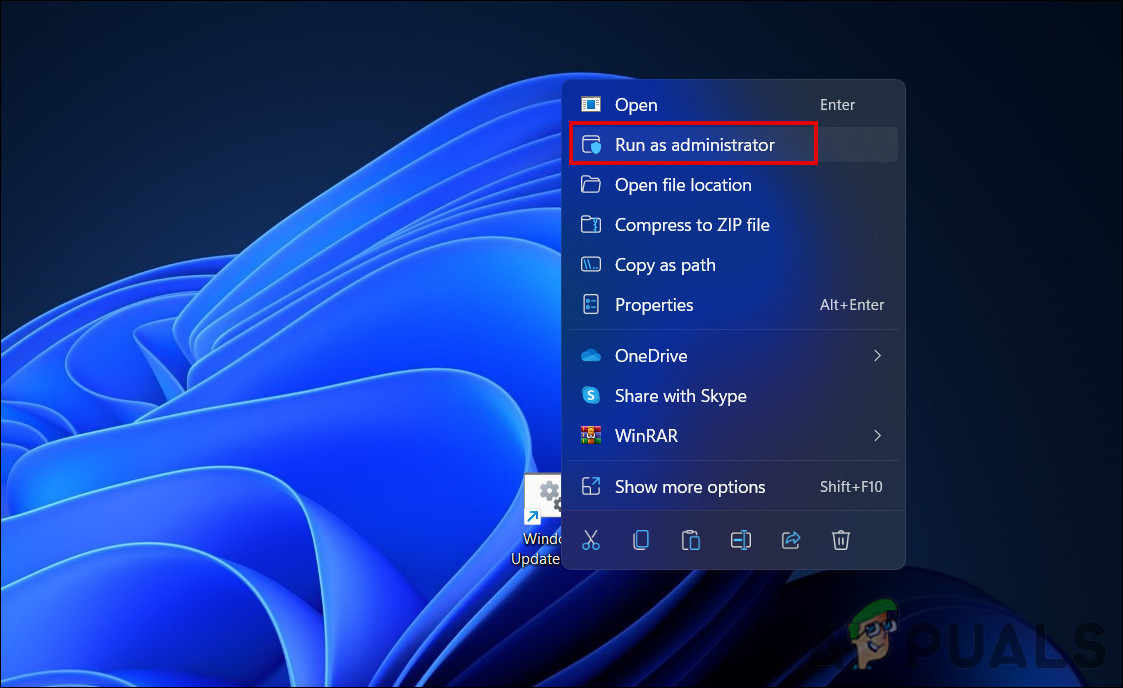
Run the bat file as administrator - Wait for the repair process to complete and once it’s done, restart your computer.
Upon reboot, try to download the targeted update which was previously causing the error and check if the issue is now resolved.
4. Install the Update Manually
If Windows is encountering problems while installing an update automatically, you can also attempt to install it manually. Microsoft has created an online catalog of updates, which lists all the released updates. You can look for the targeted update there are install it by following the on-screen instructions.
Here is how you can do that:
- Head over to the Microsoft Update Catalog in your browser.
- Type the KB number of the update in the search field at the top right and click Enter. You can find the KB number in the Windows Update section of the Settings app.
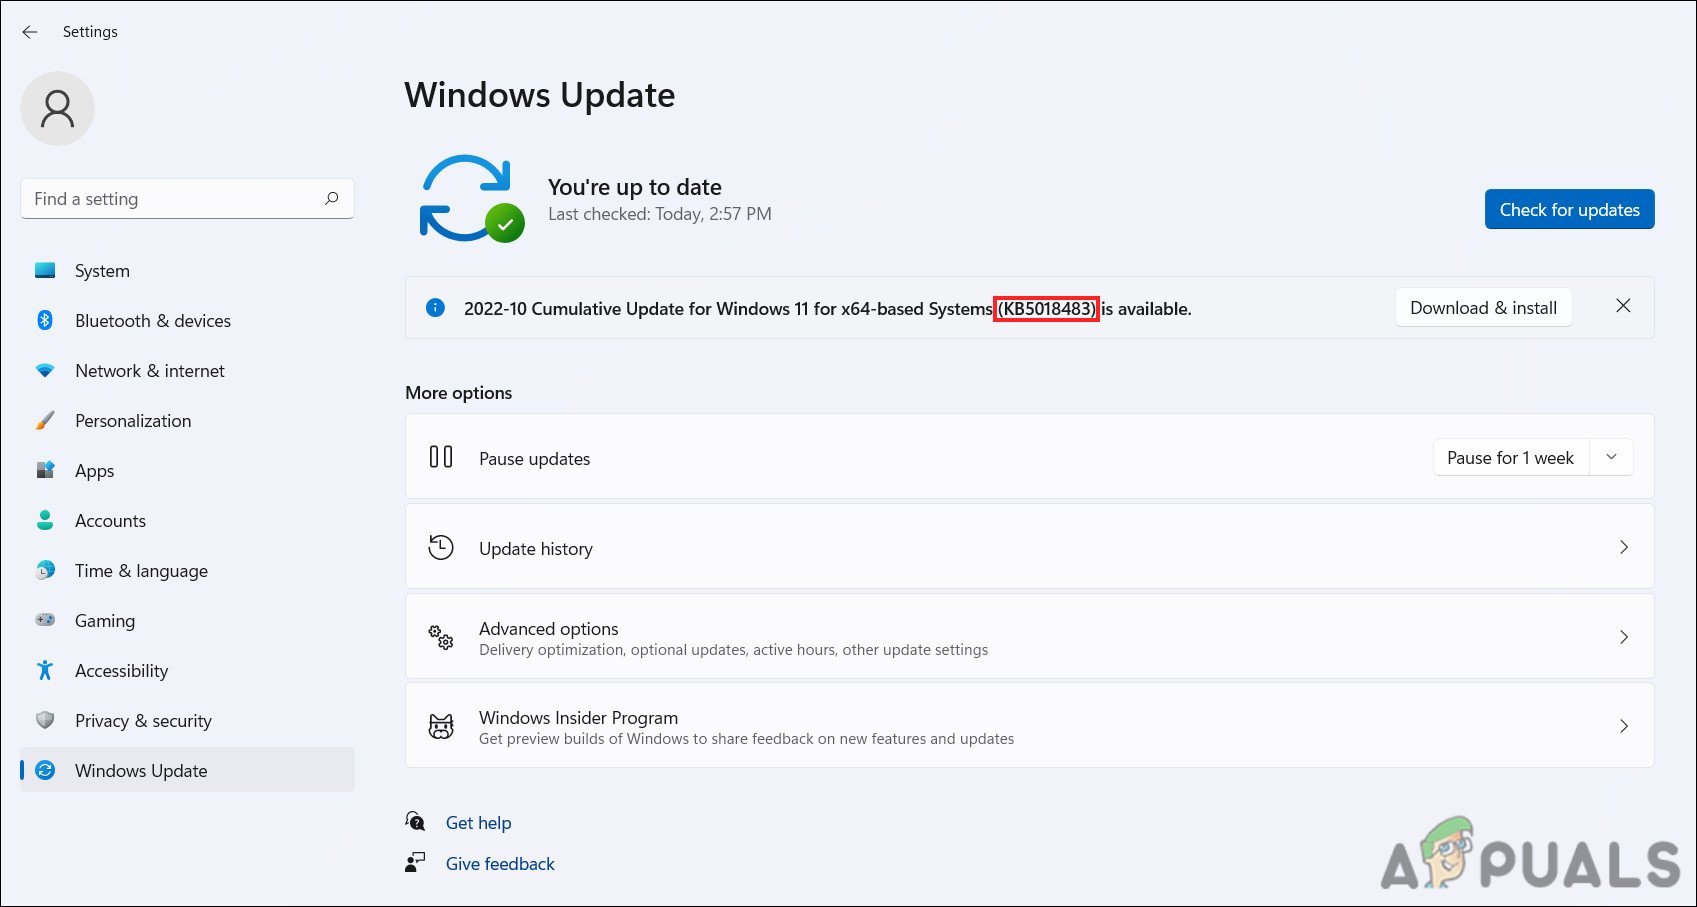
Access the KB number - You should now be presented with the appropriate results. Find the right update for your device according to the device specifications and click on the Download button for it.
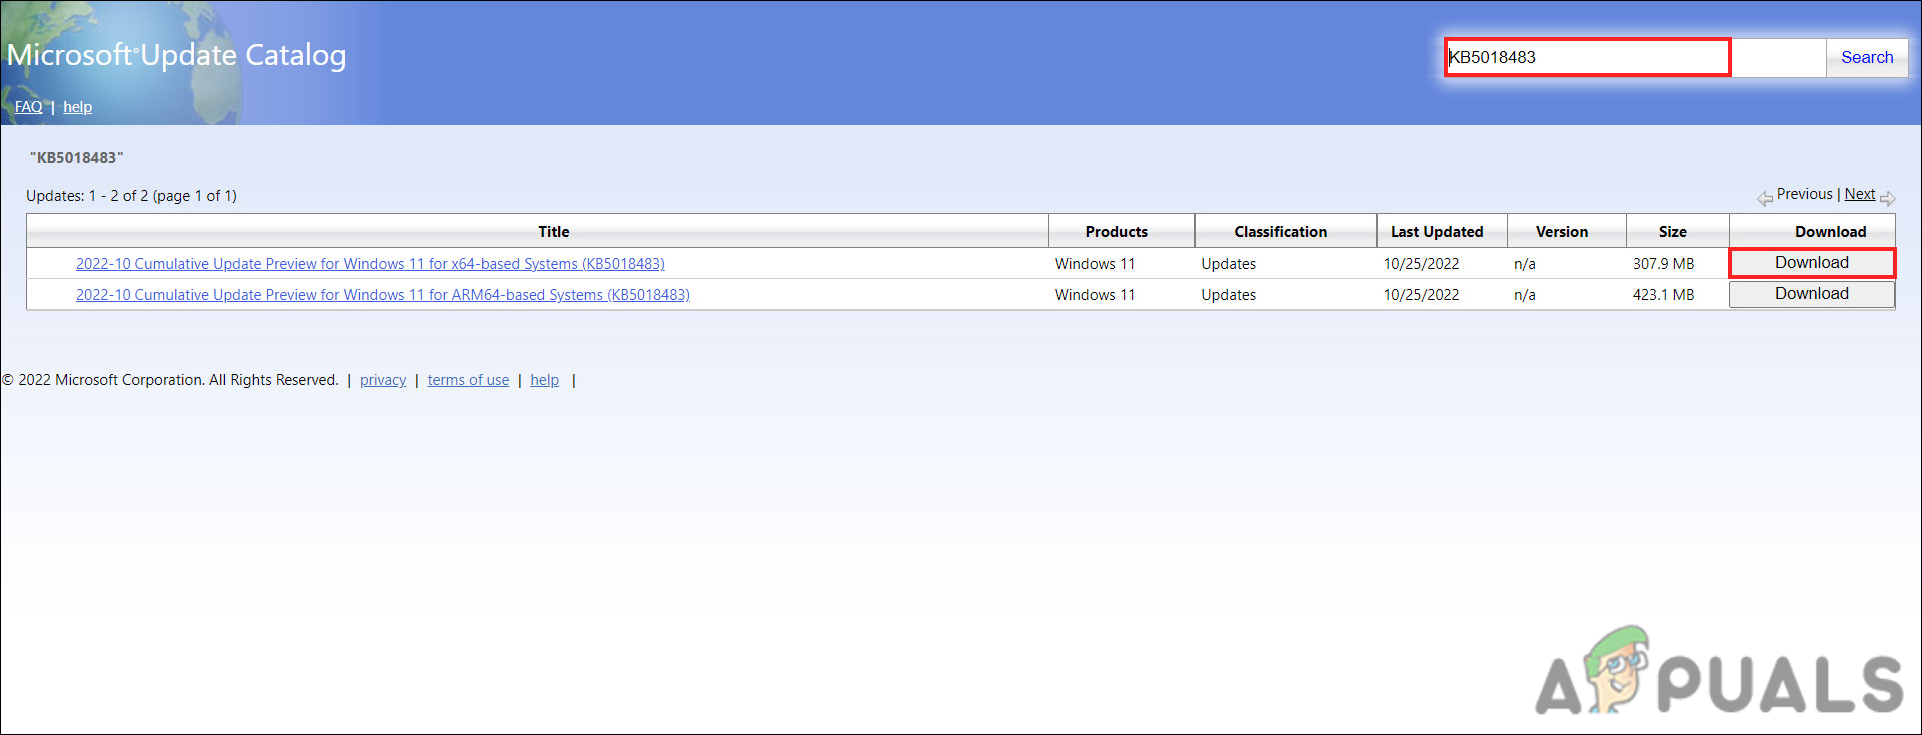
Click on the Download button to install the update - Once the file is downloaded, click on it and follow the on-screen instructions to install the update.
This should help you skip the error at hand. If you are still facing the problem, it may be a good idea to contact the official Microsoft support team and report the issue to them. You can ignore the update until an official fix is launched.


