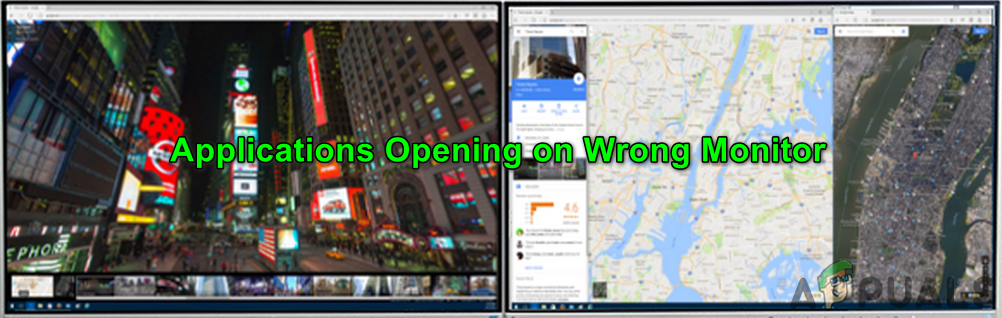
Fix: Programs open on Second Monitor instead of Main Monitor
Programs opening on the second monitor instead of the main one can occur due to improper multi-monitor configuration or outdated system drivers. This issue typically happens when applications mistakenly launch on a secondary monitor, especially after system restarts or display changes.
The most common causes are misconfigured display settings or applications remembering their last-used monitor. Other factors include outdated graphics drivers or issues with how Windows handles multi-monitor setups. Ensure display settings are correct, and consider updating drivers to resolve the problem.
Additionally, prioritize monitors connected via HDMI or DisplayPort over DVI/VGA, as these may be preferred by your system.
In this article, we will discuss different ways to solve this error.
1. Update the System Drivers and Windows to the Latest Build
Updating your system drivers and Windows helps with multi-monitor compatibility and fixes bugs that cause apps to open on the wrong screen. Updates often improve how the system handles and prioritizes monitors.
- Update your Windows to the latest build, ensuring that optional updates are also installed.
- Next, update your system drivers to the latest versions. Use tools like Intel Driver and Support Assistant or Dell Support Assistant, if available, to update drivers.
- After updating Windows and drivers, check if the multi-monitor issue is resolved.
2. Close the Window in the Windowed Mode on the Desired Display
Position the app correctly before closing it to make sure it opens on the right monitor. Switch to windowed mode to drag the program to your chosen screen, and then close it. This helps most programs remember the last location used.
- Launch the application and let it fully load.
- Switch to windowed mode by clicking the Restore button, then drag it to the desired monitor.
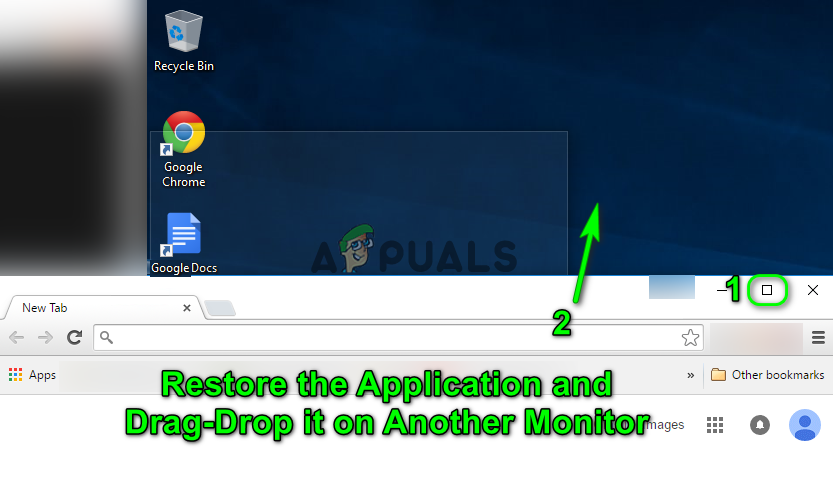
Restore the Application and Drag-Drop it on Another Monitor - Close the app without maximizing/minimizing it. Check the system tray and Task Manager for any remaining processes related to the app.
- Check if the monitor issue is resolved. If so, use the app in maximized mode on the next launch.
- If the issue persists, repeat steps 1-3, but this time hold the Ctrl key while closing the app and see if the issue is resolved.
3. Re-enable the Incorrect Monitor
Sometimes, turning the wrong monitor off and on again can make the system update its display settings. This helps Windows correctly identify the main monitor, fixing issues with where programs open.
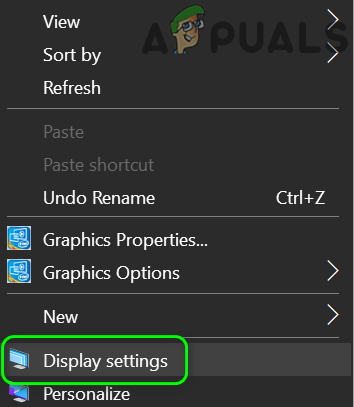
- Close the application and ensure no related processes are running in Task Manager or the system tray.
- Right-click on the desktop and select Display Settings.
Open Display Settings - In the Display section, scroll to Multiple Displays and select the incorrect display.
- Choose Disconnect This Display and reboot your PC.
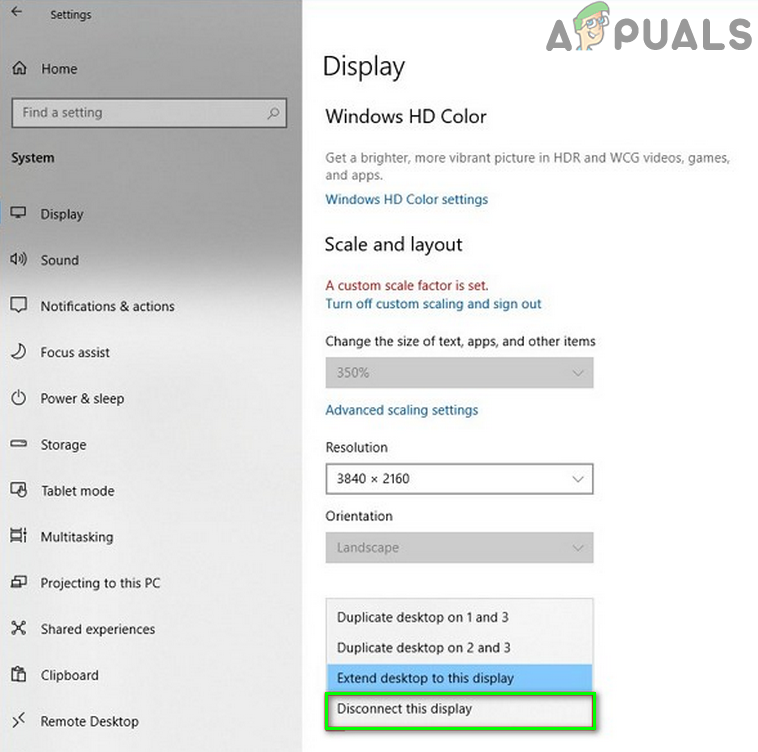
Disconnect the Wrong Display - After reboot, relaunch the application on the desired monitor, exit, and re-enable the incorrect monitor. Check if resolved.
- If not, remove the monitor again (steps 1-4). Press Windows + X to open Quick Settings.
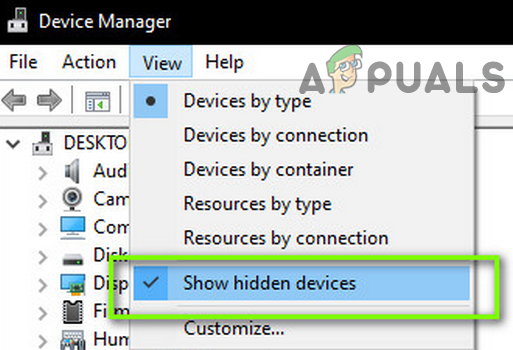
- Access Device Manager and expand the View menu.
Open Device Manager - Select Show Hidden Devices and expand Monitors.
Show Hidden Devices in Device Manager - Remove all monitors except your current one and reboot.
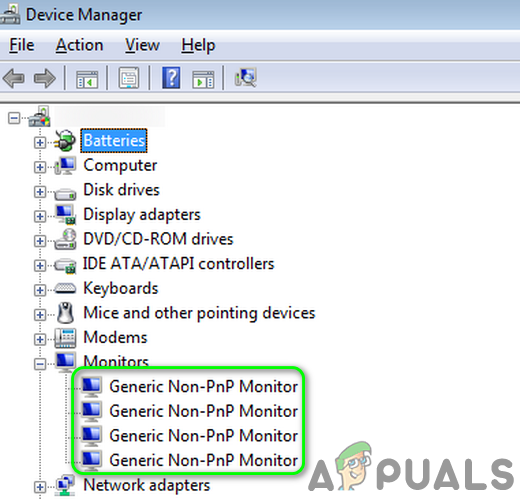
Remove All the Monitors Except the Current Monitor - After reboot, repeat steps 5 & 6 to see if the issue is resolved.
4. Set the Main Display to Another Monitor
Changing the main display to another monitor helps reset how Windows decides where to open apps. By making another monitor the main display, the system adjusts its default behavior, which can fix apps opening on the wrong screen and ensure they open where you want.
- Exit the application and forcefully close its processes in Task Manager.
- Press the Windows key, open Settings, and go to System. Navigate to the Display tab, then scroll to Multiple Displays.
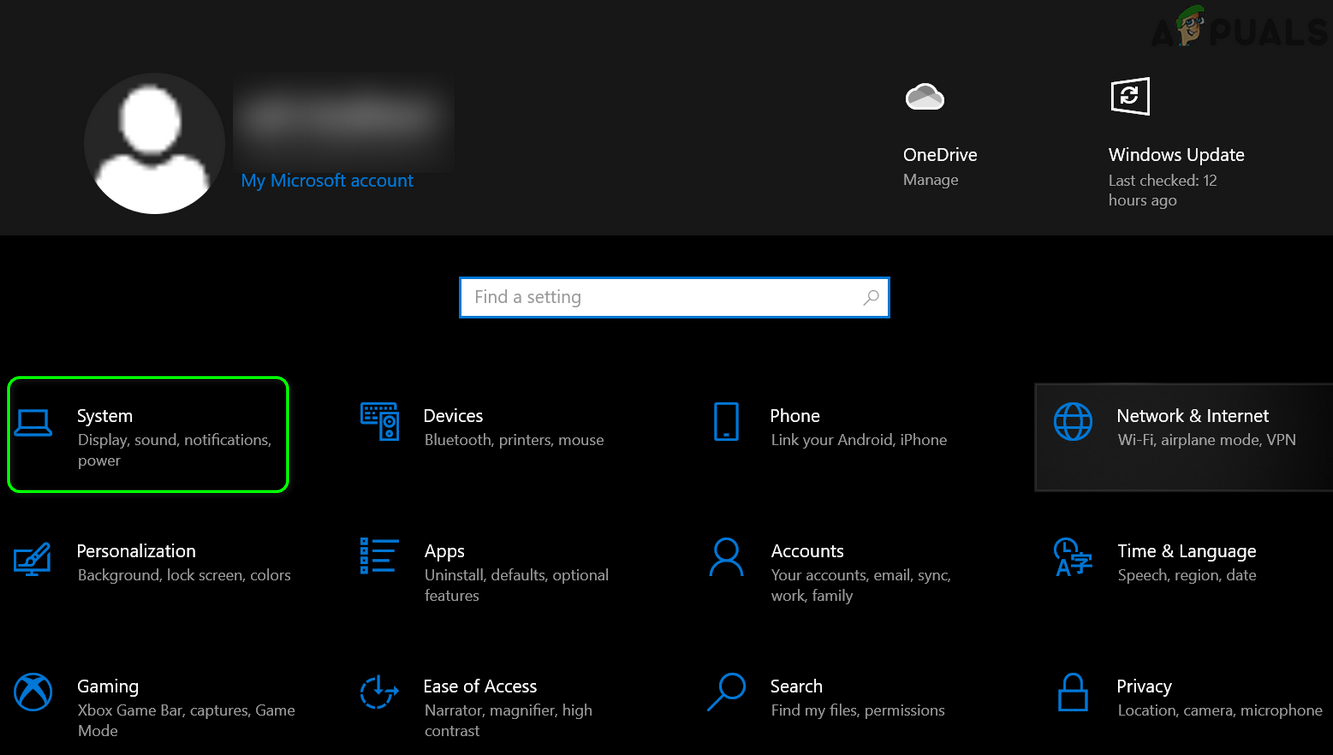
Open System in Windows Settings - Choose the desired display and click Make this My Main Display. If it’s already the main display, switch to another and then revert back.
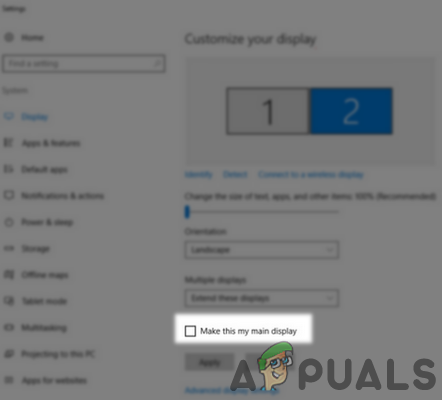
Mark the Monitor as the Main Display - Verify if the application opens on the correct monitor.
5. Switch Between the Screens
Sometimes, moving an application between screens can reset its memory. By pressing Win + Shift + Arrow Key, you can quickly move the app to the right screen, helping it recognize the correct display. This method is useful when programs keep opening on the wrong screen, as it changes their screen location without changing system settings.
- Open the application and let it load fully.
- Press Windows + P and select Second Screen Only to move the app back to the main monitor.
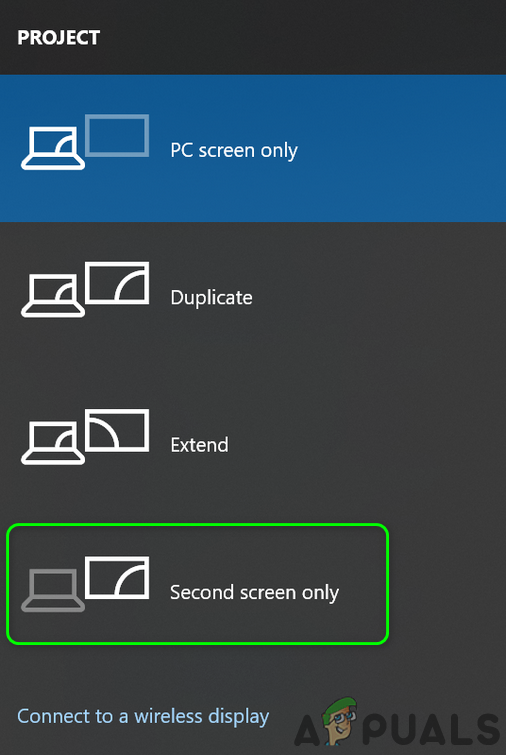
Select the Second Screen Only in Project Settings - Press Windows + P again and choose PC Screen Only.
Select the PC Screen Only - Close and reopen the application to ensure it starts on the main monitor.
6. Use the Preview Screen
Using the preview screen helps you see which monitor Windows sees as the main display. By going to display settings, you can check monitor positions, move displays to match their real setup, and make sure the main monitor is set correctly. This is important to make sure everything works as you want.
- Open the application and hover over it on the Taskbar to see the preview.
- Right-click the preview and choose Restore.
- Hover again, right-click the preview, and select Move.
- Use Shift + Windows + Arrow (right or left) to move the app to the desired monitor.
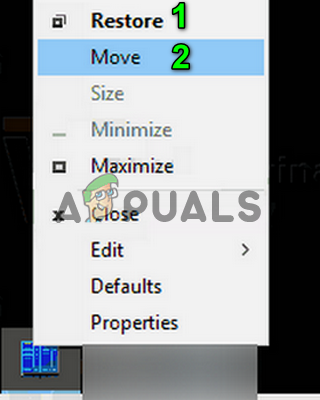
Click on Restore and Then Move the Application - Put the app in windowed mode by clicking Restore, then close it.
- Relaunch the app to see if it opens on the desired monitor.
7. Customize the Taskbar
Adjusting taskbar settings can affect how apps work on multiple monitors. By showing the taskbar only on the main monitor or changing its settings, you can help Windows recognize the main screen, reducing the chances of programs opening on the second monitor.
- Right-click the desktop and select Personalize.
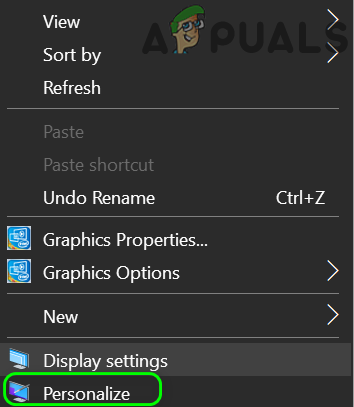
Open Personalize - In the left menu, choose Taskbar, then expand the dropdown for Show Taskbar Buttons on in the right pane.
- Select Taskbar Where Window is Open and check if start menu shortcuts open the app on the desired monitor.
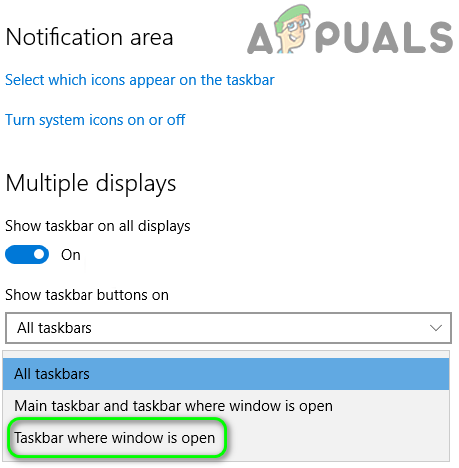
Select Taskbar Where Window is Open in the Dropdown of Show Taskbar Buttons on
8. Use GitHub PowerToys
The GitHub project PowerToys allows a power user to streamline and refine their Windows experience to enhance productivity. This utility includes advanced multi-display settings that can address the issue at hand.
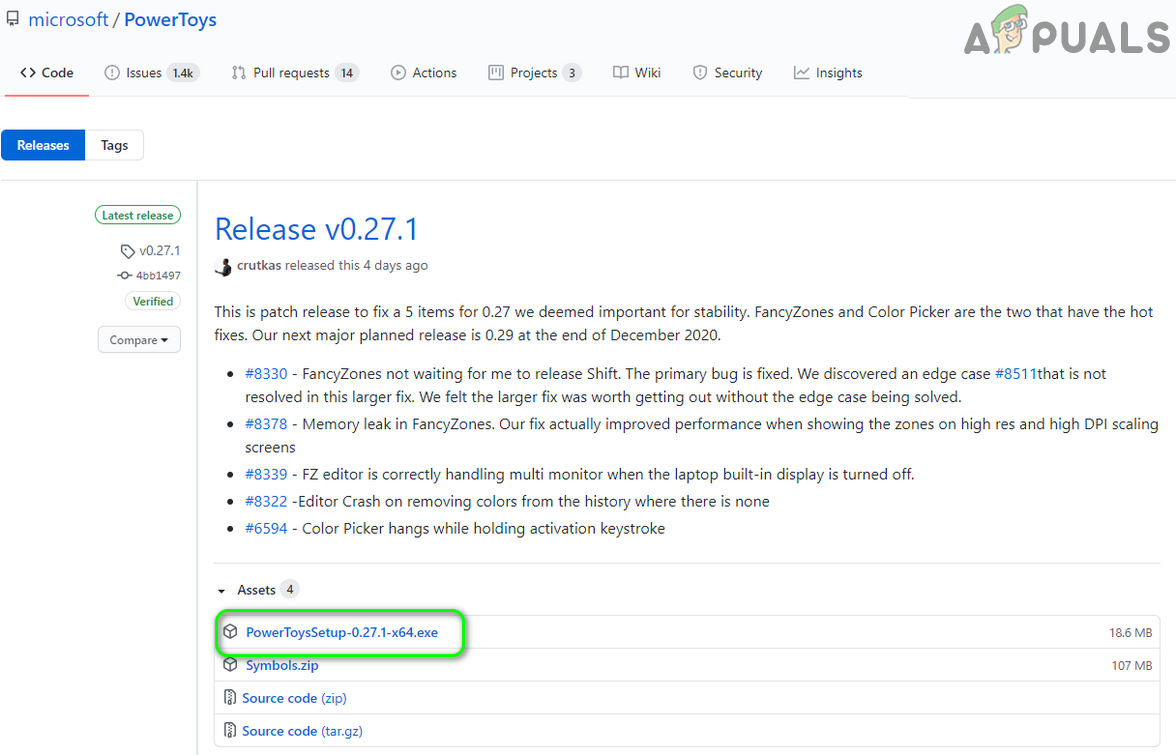
- Open a web browser and go to the GitHub PowerToys releases page.
- Download and install the EXE file with administrative privileges.
Download PowerToys - Open PowerToys, go to Settings, click on FancyZones, and select Edit Zones.
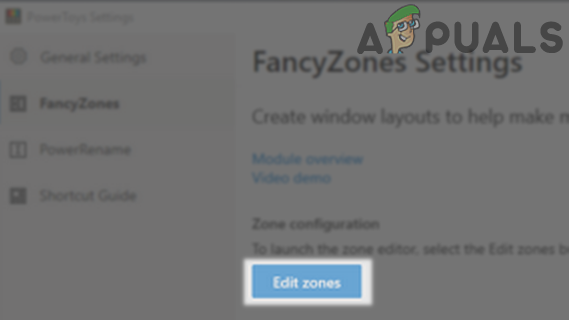
Edit Zones in the Fancy Zones Settings - Set your layout (row/column) and disable “Show Space Around Zones” on each monitor by moving the PowerToys window there.
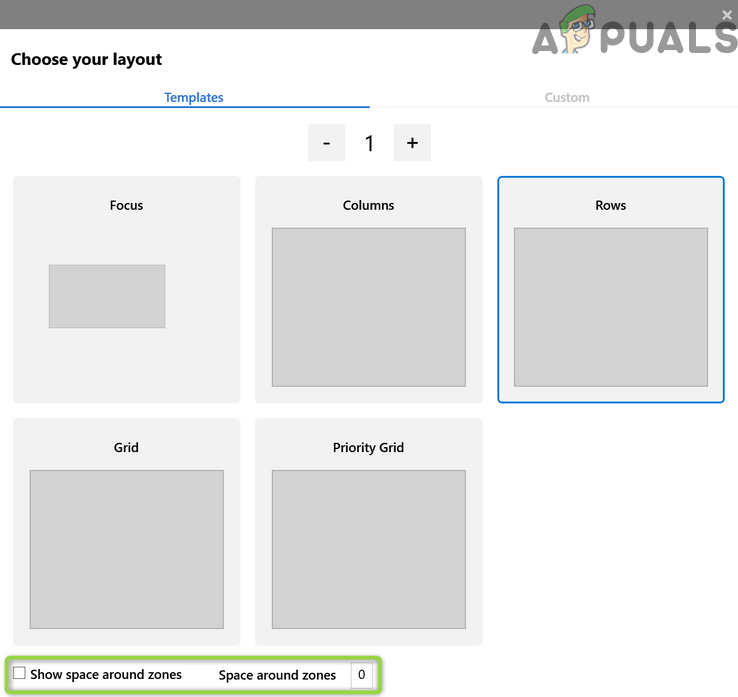
Uncheck Show Space Around Zones - In PowerToys Settings under FancyZones, enable “Move Newly Created Windows to Their Last Known Zone.”
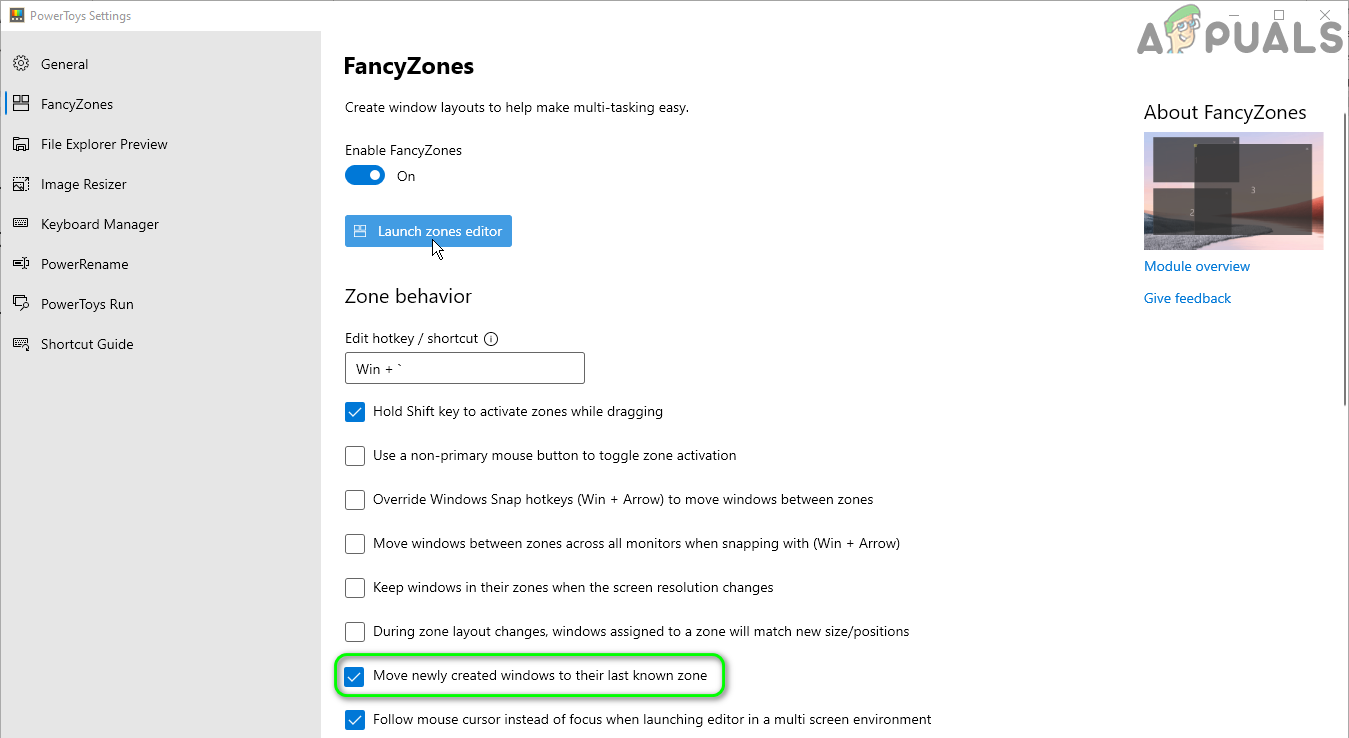
Move Newly Created Windows to Their Last Known Zone - Drag the application to your desired screen, hold the Shift key, then release to assign it to that screen.
- Relaunch the app to ensure it opens on the correct monitor.
9. Create the Application’s Shortcut on the Desired Monitor
Placing the shortcut on the monitor where you want the app to open makes sure it starts on that screen. This method tells Windows to use that monitor, allowing you to manage where apps launch without changing other settings.
- Exit the application, ensuring no related processes are running in Task Manager.
- Locate the EXE file of the application. For Fortnite, it’s typically found at:
%PROGRAMFILES%\Epic Games\Fortnite\FortniteGame\Binaries\Win64
- Move to the desired monitor using Shift + Windows + Left/Right Arrow keys.
- Right-click your desktop and select New > Shortcut.
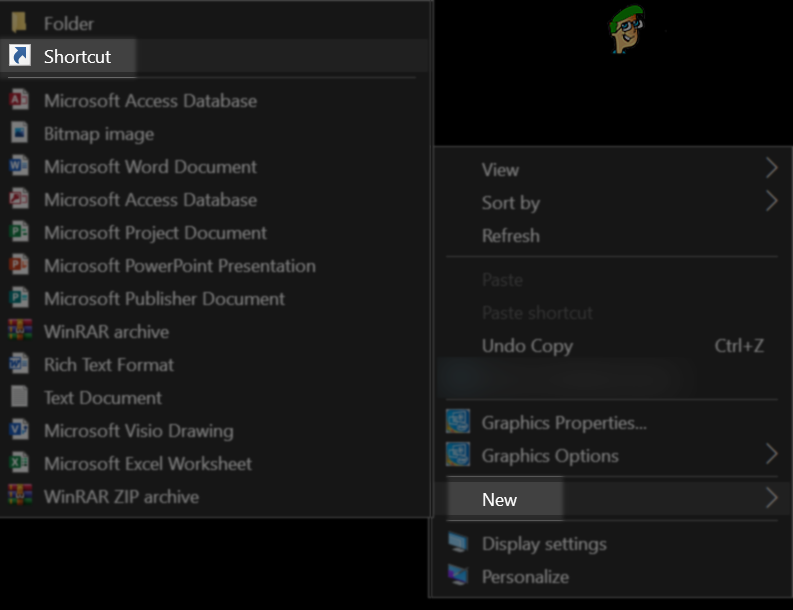
Create a New Shortcut - Click Browse and navigate to your application’s EXE file.
- Click Next, then Finish.
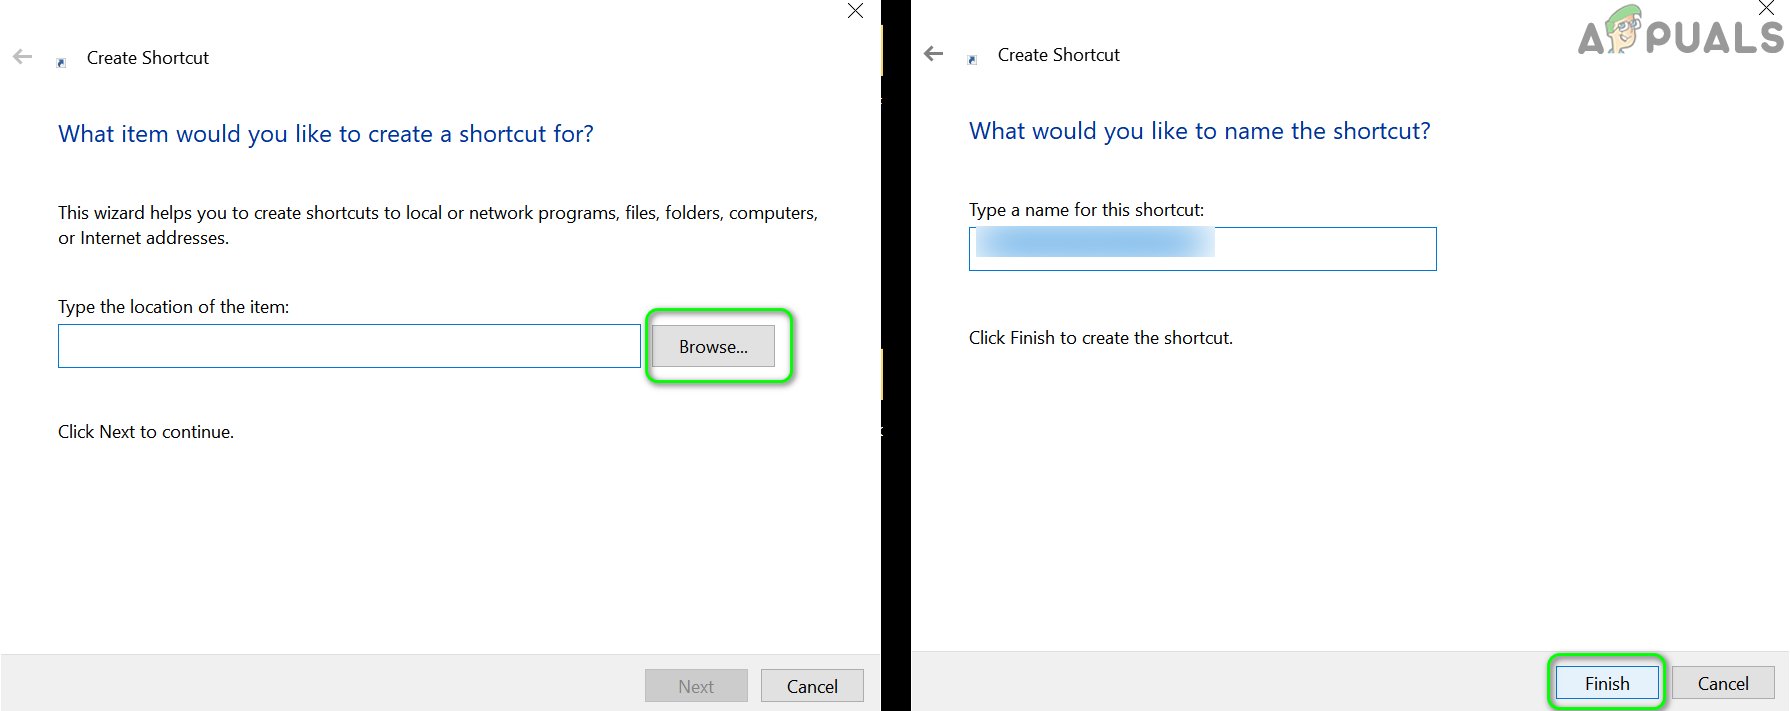
Click on Browse and Then Finish to Create the Shortcut - Launch the app using the shortcut to check if it opens on the desired monitor.
- If successful, right-click the shortcut icon and select Properties.
- In the Run dropdown, select Maximized window to ensure it launches maximized on the target monitor.

Change the Run to Maximized in the Shortcut Properties
10. Change the Application Settings and Use Command Line Arguments
Changing an application’s settings or using command-line options lets you control where programs open. By choosing the display in the app’s preferences or adding commands to make it launch on the main monitor, you can stop it from opening on the wrong screen.
- Open the application/game and look for settings to specify a monitor. Enable the setting and see if it resolves the issue.
- If not, open the Steam client (install if necessary) and use Big Picture mode. This also works for non-Steam games.
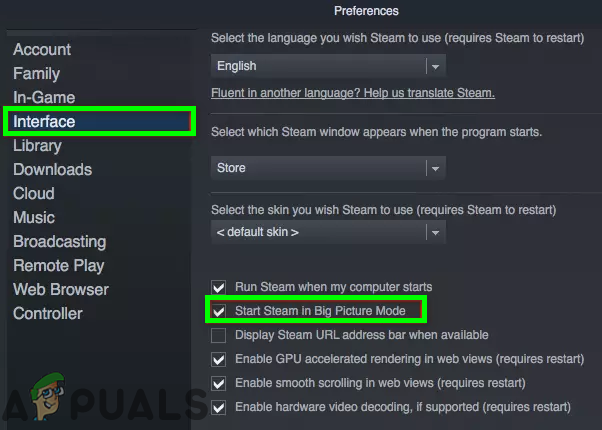
Enable Big Picture Mode in the Steam Client - In Display Settings, choose the monitor for your game and check if this solves the problem.
- If that doesn’t work, try editing the game’s configuration file (e.g., change MonitorIndex in Neverwinter’s GamePrefs.pref located at X:\Neverwinter\Neverwinter\Live\Localdata) to set the preferred monitor.
- Alternatively, use command-line arguments to select the monitor (e.g., some Unity games support -show-screen-selector or -adapter N, where N represents the monitor).
- If none of the above works, try the GitHub project of Borderless Gaming.


Thanks Kevin.. this is helpful and solve issue facing .. using “press Windows + P keys and choose PC Screen to duplicate monitor”