[SOLVED] Windows Goes to Sleep Mode Instead of Locking Screen
Different people have different settings set for their computers. However, nobody wants to compromise their privacy and security. Moreover, if you are working in an office there is a chance of people snooping in your work. In this case, you would want your device to remain locked. This is a common issue faced by Windows 10 users that their Windows does not lock when going to sleep and starts up without any sign0in required. Moreover, the settings present in Control Panel provide options for sleep but have no password-related settings.
Additionally, another reason for this problem is the divided settings options present in Windows. Some settings are present in the Settings app, some are present in Control Panel, while others have to be changed from the Registry app.
Change Screen Saver Settings
This is the most common solution or workaround for this problem.
- First, right-click on the home screen and click on Personalize.

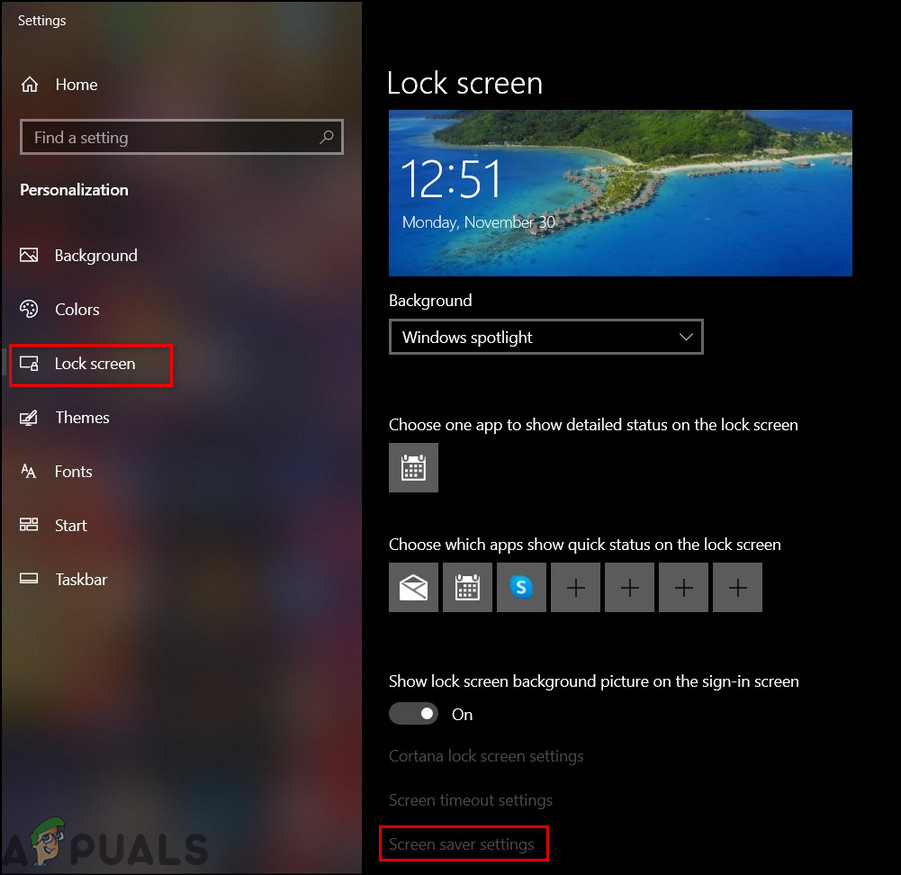
Click Personalize - Then, go to the Lock Screen tab.
- Scroll down to Screen saver settings.
Screen saver settings - Then, check the On resume, display logon screen
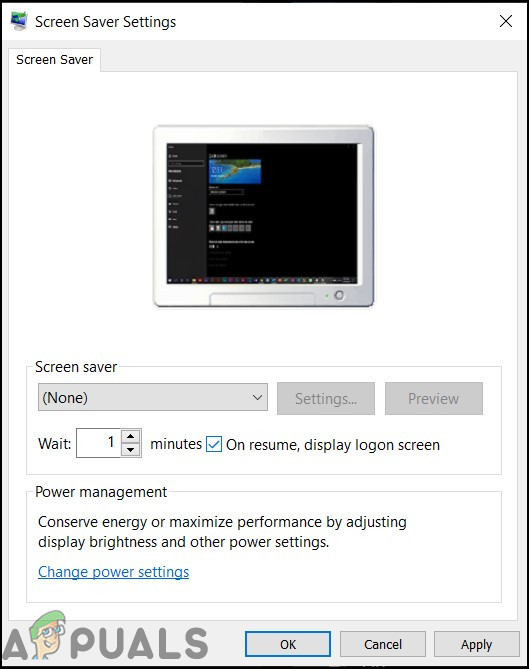
Set wait time - Moreover, you can also set the wait time; after how long you want to lock the screen. Click on Apply.
- Afterward, restart your computer.
Change Sign-in settings
In the event that the above solution does not work, you can set the computer to always require sign-in. This solution is a more proper solution than the previous one. In general, many people do not have to change this setting. However, if the previous solution did not work then you may have to change your sign-in settings. In order to do so
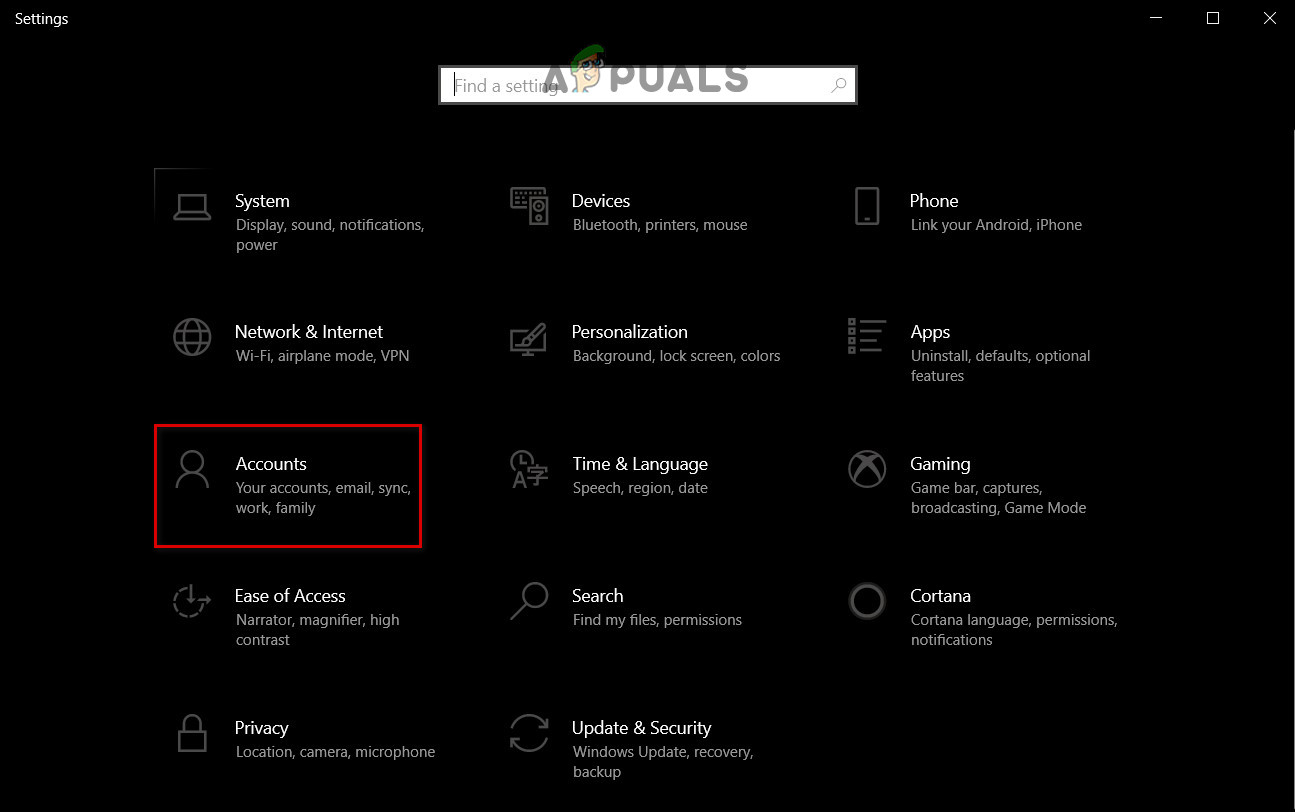
- First, press the Windows key and type Settings.

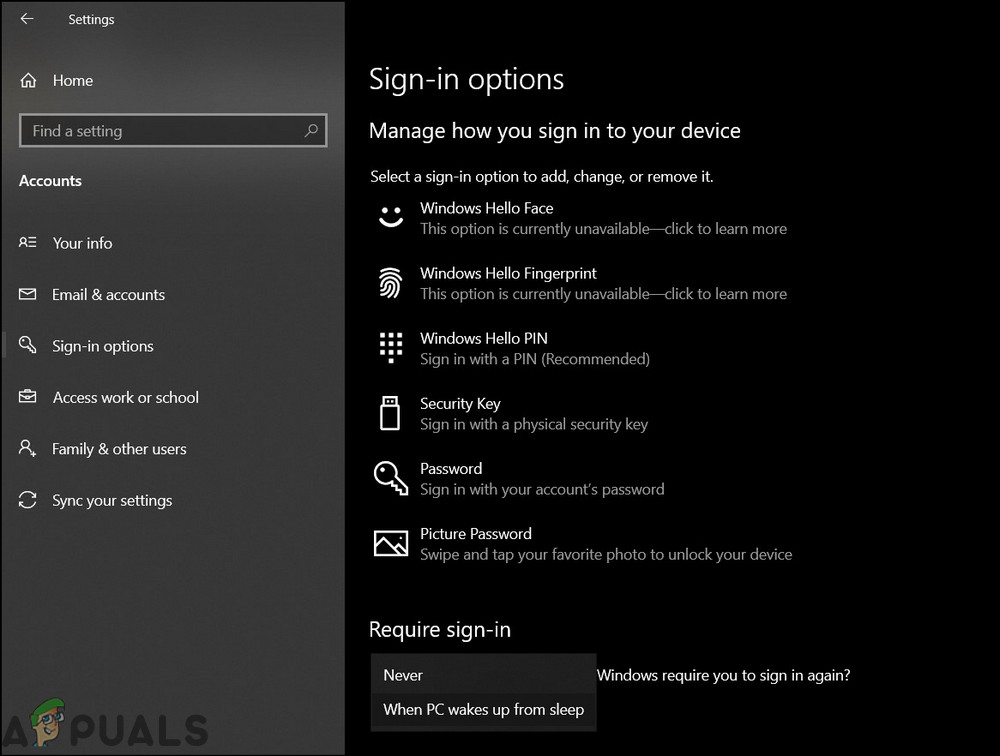
Enter Settings in Cortana search bar - Go to the Accounts settings page.
Accounts settings - Then, navigate to Sign-in options.
- Next under Require sign-in select the option When PC wakes up from sleep.
Change Require sign-in - Lastly, restart your computer.
Change Registry Settings
This solution is for the tech-savvy. However, it is still recommended to proceed with caution as changing unknown registry settings may cause issues. A reason presented by Windows users is that registry applications may have been changed by any application and could cause issues such as Windows not locking. Therefore, it is suggested to proceed with caution in this solution. To change the registry settings
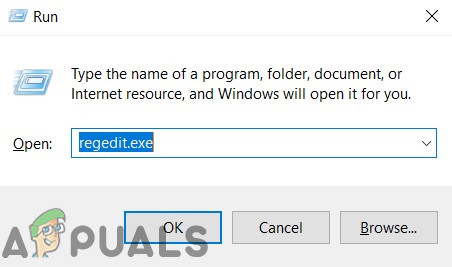
- Press Windows key + R. Type regedit.exe and press Enter.
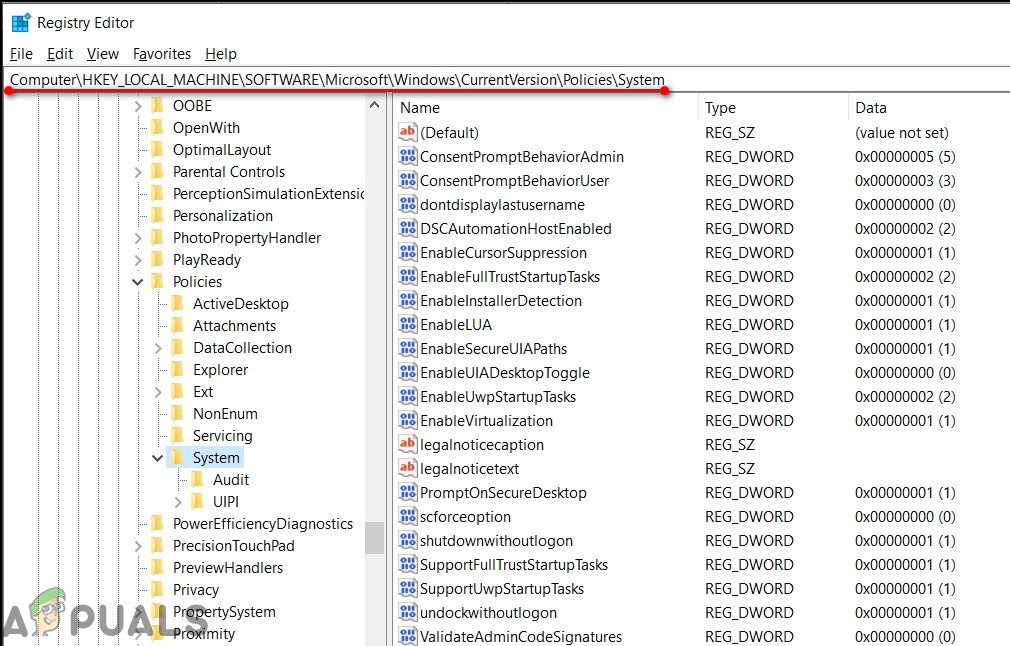
Registry editor - Then, type the following in the address bar or navigate manually to it.
Computer/HKEY_LOCAL_MACHINE/Software/Microsoft/Windows/CurrentVersion/Policies/System
Enter the value in the address bar - From the Edit menu select New -> DWORD (32-bit) value.
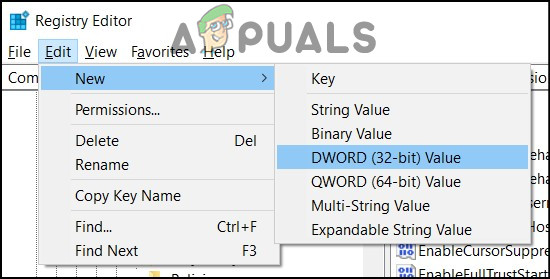
Create new DWORD - Enter a name DisableLockWorkstation and press Enter.
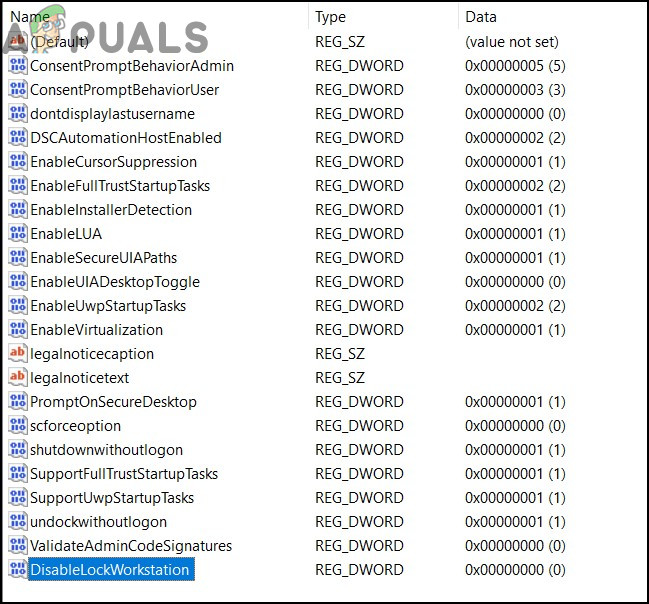
DisableLockWorkstation - Right-click on DisableLockWorkstation and click on Modify. Then, set the value to 1. Click OK.
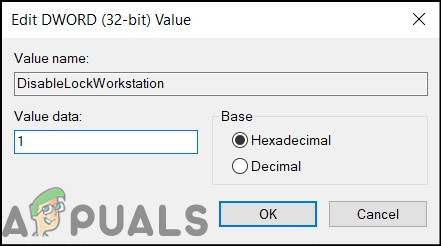
Set value 1 - Close the registry editor.
- Restart your computer.


