FIX: Windows 10 Update Fails with Error Code 0x80070013
The 0x80070013 error code you get from Windows 10 indicates that you are trying to install a driver on your computer that is already installed, or you’re installing one that is less compatible with your hardware than the one that you already have.
Now that you know what it is, we can see what it does when it happens. The error code will not allow you to install updates to your Windows 10 system and will cause Windows Update to fail until you deal with it. Since your system should be regularly updated, this is an issue that you should take care of as soon as possible.
While errors like this may scare you, there is a fairly easy solution that will make this error disappear, and you can continue updating your system, and that is to manually reset the Windows Update Components.
Manually reset your Windows Update Components
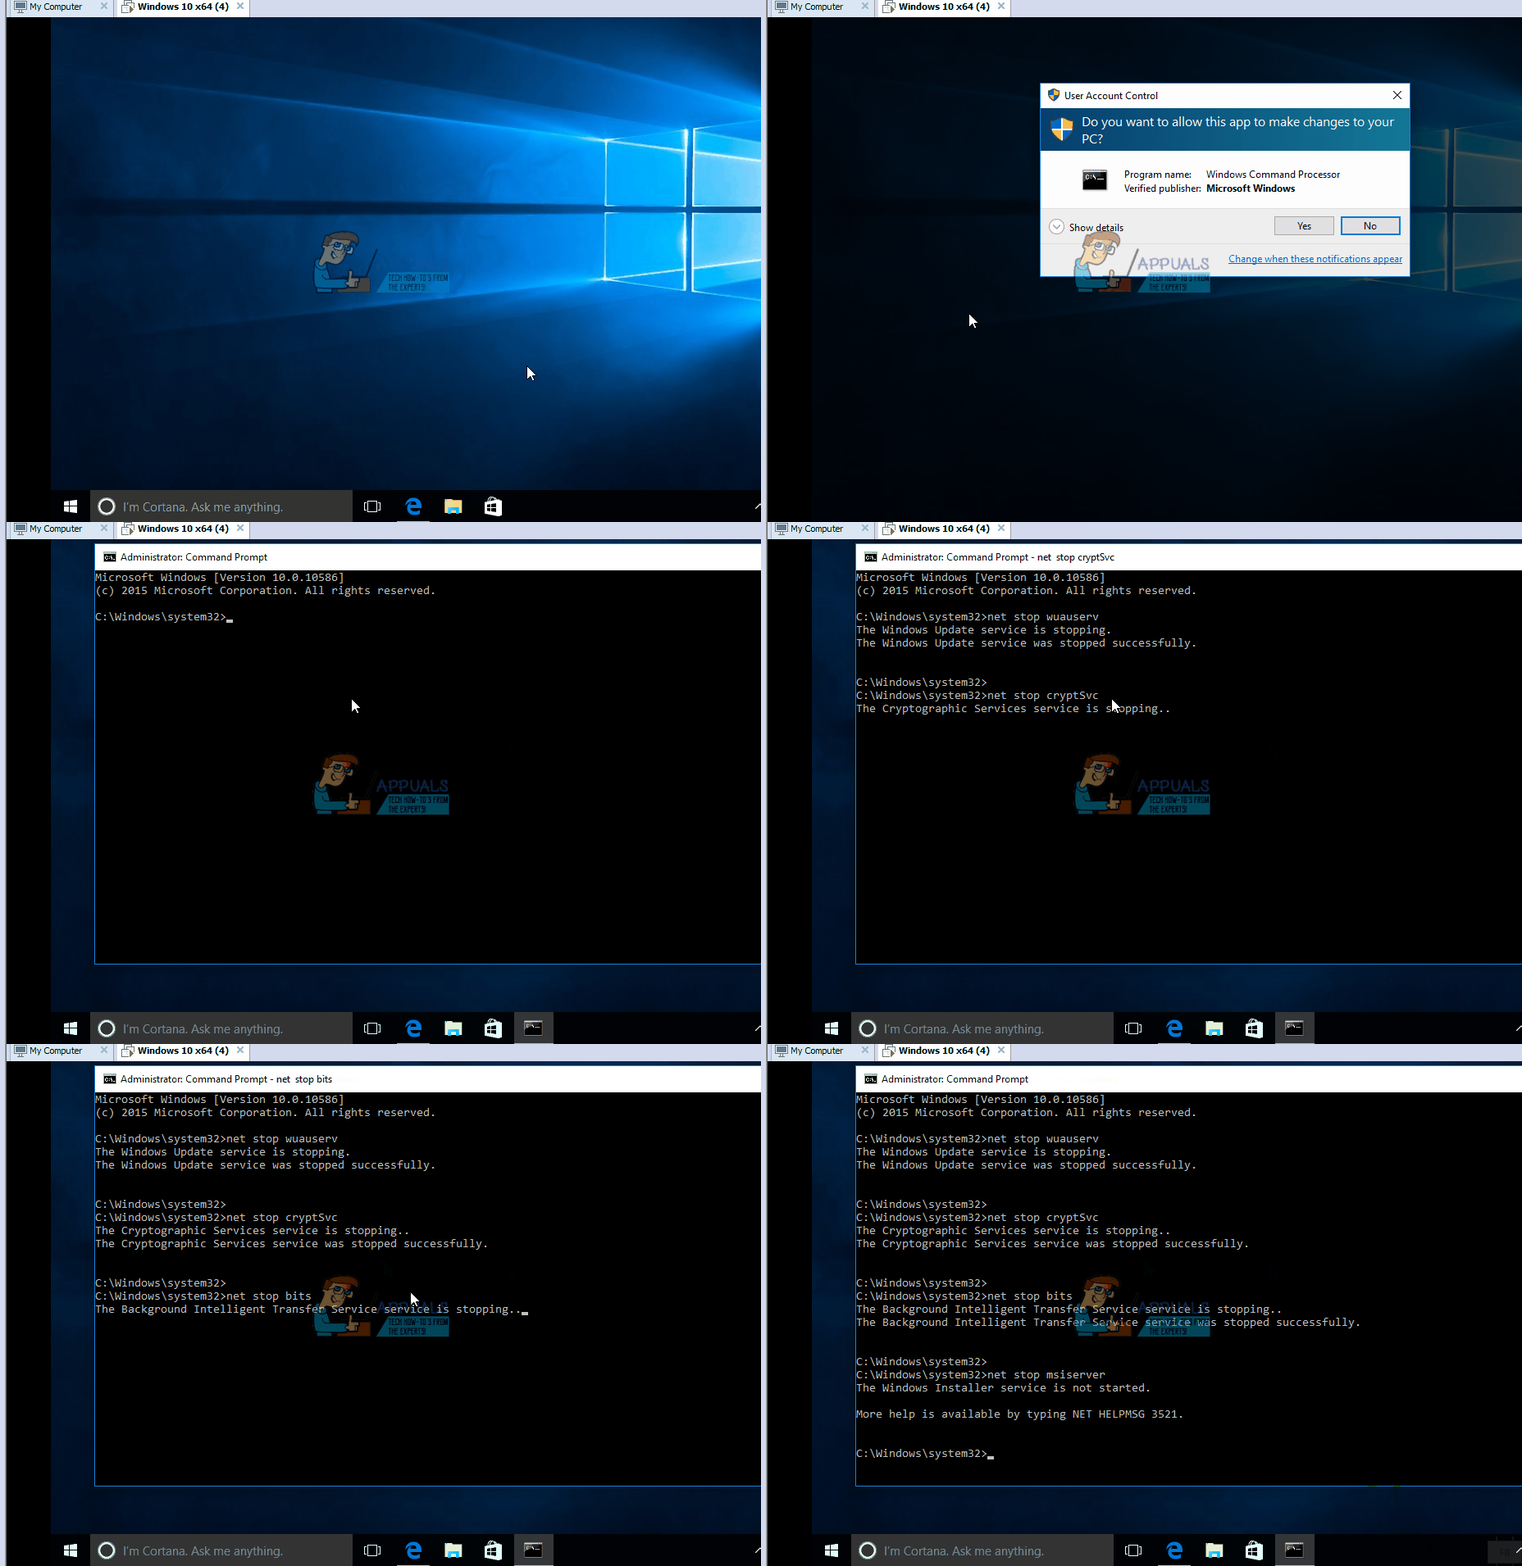
This method will require you to use an elevated command prompt to reset the Windows Update Components. In Windows 10, you can open it by pressing simultaneously the Windows and X buttons on your keyboard. You will see a menu with options. Find and select Command Prompt (Admin). If you get a User Account Control message, press Yes to allow the elevated command prompt to start. The commands you will need to type should be correct, no spelling mistakes are allowed, so be careful.
Once inside the command prompt, the first thing to do is to stop the MSI Installer, the Windows Update Services, and the BITS. To do this, type the following commands, and press Enter on your keyboard after each one. If any of them take more time to complete, be patient and wait for it to end before typing the next one.
net stop wuauserv
net stop cryptSvc
net stop bits
net stop msiserver

Now that the services are stopped, you need to rename two folders, namely the Catroot2 and SoftwareDistribution folders. Since you’re already in an elevated command prompt, you can rename them from there as well, just use the following commands and press Enter on the keyboard after both of them.
ren C:\Windows\System32\catroot2 Catroot2.old
ren C:\Windows\SoftwareDistribution SoftwareDistribution.old
After we’ve renamed the folders, the next step is to restart the services that we stopped earlier, so Windows Update can continue working. This is, again, done in the elevated command prompt, with the following commands (don’t forget Enter after you type every command):
net start wuauserv
net start cryptSvc
net start bits
net start msiserver
What we did so far reset the Windows Update Components, and got rid of any issues you were facing with Windows Update, as well as prevented a number of issues that may appear in the future. Once you’re done with the command prompt, you can close it by either typing Exit and pressing Enter, or by clicking the X button in the upper right corner.
An important note is to be careful to start the command prompt in the Admin mode, as described previously, because if you don’t you will be met with an Access is denied message when you attempt to rename the folders, and you won’t be able to fix the 0x80070013 error.
When you’re done with everything, you can again try to go through with Windows Update. You should now have no issues whatsoever and you can update your system with the latest stability and security patches. The aforementioned method should help you and you should be able to do it with ease, regardless of your technical knowledge.