SOLVED: Windows 10 Sleeps After 1-4 Minutes of Inactivity
After upgrading to Windows 10, many users experience their computers unexpectedly entering sleep mode within 1-4 minutes of inactivity, which can disrupt workflows. This issue commonly arises from incorrect “System Unattended Sleep Timeout” settings, which may override usual power configurations despite appearing correct.

Contributing factors include a hidden timer in the power settings—often triggered by recent updates or incorrect power profiles—as well as conflicts within power options, registry errors, or outdated drivers. Whether it’s 2 or 4 minutes, this behavior persists even if the sleep settings are configured for a longer duration, causing significant inconvenience.
In this article, we will discuss different ways to solve this issue.
1. Reset and Reconfigure Your Power Settings
To address Windows 10’s unexpected sleep issue, reset power settings and configure them again. This prevents hidden timers like “System Unattended Sleep Timeout” from activating too early and causing unwanted sleep mode.
- Press Windows + X and select Power Options.
- Click Additional power settings on the right.
- Select Choose when to turn off the display.
- Go to Change advanced power settings.
- Click Restore plan defaults.

2. Edit Registry
Change certain registry settings to access advanced power options and control how soon your system sleeps. This prevents automatic sleep from hidden defaults and stops unexpected sleep interruptions.
-
- Press Windows + R, type regedit, and press Enter.
- Navigate to:
HKEY_LOCAL_MACHINE > SYSTEM > CurrentControlSet > Control > Power > PowerSettings > 238C9FA8-0AAD-41ED-83F4-97BE242C8F20 > 7bc4a2f9-d8fc-4469-b07b-33eb785aaca0
- Double-click Attributes and set Value data to 2.
- Click OK and close the Registry Editor.

After applying the registry edits, change your system’s unattended sleep timeout to a longer period. To do this, follow these steps:
- Open the Start Menu and search for “power options”.
- Select the Power Options result.
- Click Change plan settings for the active power plan.
- Go to Change advanced power settings.
- Click Change settings that are currently unavailable.
- Under Sleep, adjust System unattended sleep timeout to 30 minutes.
- Set “Hibernate After” to 30 minutes as well.
- Apply and save the changes.
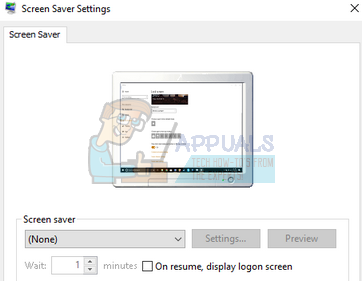
3. Check Screensaver Settings
The screensaver can cause issues with sleep mode. It’s a Windows feature that helps save energy by dimming the screen. An incorrect setup might lead to problems. Try disabling it to see if the issue continues.
- Press Windows + R, type “control panel”, and press Enter.
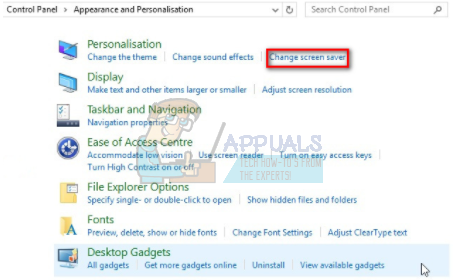
- Click on “Appearance and Personalization” in the Control Panel.

- Select “Change screen saver” under the Personalization section.
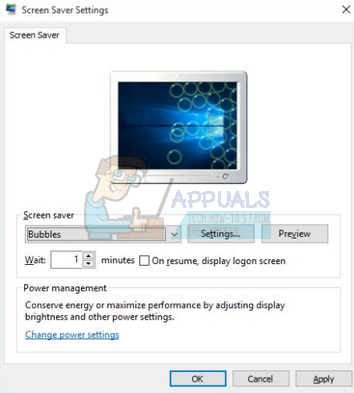
- In the Screensaver settings, check if it’s enabled. If so, set it to “None” to disable it.
If your Windows is updated to the latest version, you might not find the screensaver settings in the default location. Follow these steps instead:
- Press Windows + S and type “lock screen settings”. Hit enter.
- Select the first result to access your computer’s lock screen settings.
- Scroll down and click on “Screensaver settings”.
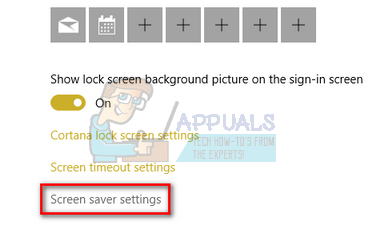
- Ensure no screensaver is active, as it may have a black background. Disable it and check if the problem persists.
Note: You can also set the screensaver time to a very large number if you don’t want to remove it completely.
4. Disable All Themes
Themes include settings like fonts, wallpaper, sounds, cursor, and sometimes a screensaver. An active theme might cause your computer to enter sleep mode randomly. Try disabling all themes and reset to default settings, assuming your sleep timer is set for more than 2-3 minutes.
- Press Windows + S, type “themes”, and open the top result.

- Select the default (or Windows) theme, exit, and restart your computer. If using a third-party theme, check if it’s causing the issue.

5. Change What the Power Buttons Do
Windows offers advanced power options that can sometimes cause issues. To address this, change the advanced power settings so that all power buttons do “nothing” in the “what the power buttons do” section.
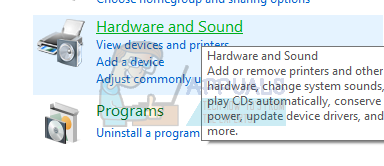
- Press Windows + R, type “control panel”, and press Enter.
- Click on “Hardware and Sound”.
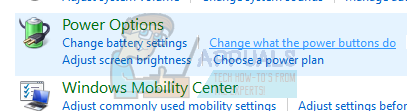
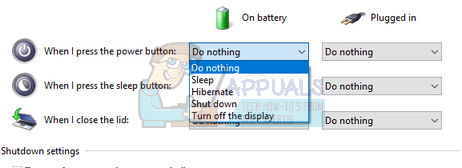
- Select “Change what the power buttons do” under Power Options.
- Set all to “Do nothing”, save changes, and restart your computer.
6. Download Third-Party Software
If other methods don’t work, try using third-party software like MouseJiggler to prevent sleep mode. This program mimics mouse movements, tricking the system into thinking the computer is in use.
- Download MouseJiggler and open it.
- Check Enable jiggle or Zen jiggle to keep your mouse active.

- Click the arrow button to minimize it to the taskbar.
- Disable anytime if needed.
I’ve had to use method 2 on a couple computers. It’s very annoying to have to go this far to stop the computer from sleeping in 2 minutes. Most newbies will never get this far. I can’t recommend Windows 10 to those who need this fix but will never be able to do it themselves.