What is the $Windows.~WS Folder
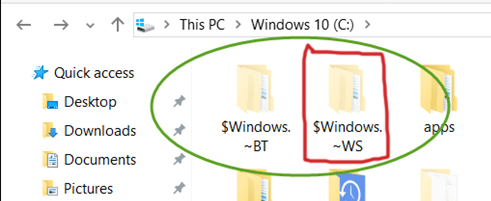
After the announcement of Windows 10, the majority of Windows 7 and Windows 8 users upgraded their systems to the latest OS. When upgrading from a previous version of Windows to Windows 10, instead of performing a clean install, two hidden folders will appear on the C drive (or any drive where Windows is installed). One of those hidden folders will be $Windows.~WS.
You can view these folders by unhiding the hidden folders from the View panel at the top. Upon examining the size of this folder, you will notice that it occupies a significant amount of space within your Windows drive. Consequently, several questions arise regarding the presence of this folder. Here are some of the answers you may be seeking.
What is $Windows.~WS, and where/how/when is it used?
As I mentioned, this folder is found inside your Windows Drive after the upgrade process. During the upgrade process, important data from your previous version of Windows is backed up. This data includes Windows folders, profiles, program file directories, and other important locations. Therefore, this data is stored inside the folder $Windows.~WS, which is always present in the drive where you have installed your Windows.
The $Windows.~WS folder is not merely a piece of scrap, as it contains all the important files required to revert to the previous version of Windows. So, if you wish to return to your old version, this folder serves as the last resort for you because it contains all the necessary information needed to move back.
Whenever you downgrade your Windows, this folder provides all the necessary components to perform the task successfully.
Can this folder be deleted?
Another question arises regarding this strange folder, i.e., can it be deleted and completely removed from the hard drive? The answer is yes, it can be deleted. However, you need to keep in mind that by deleting this folder, you will not be able to revert back to the previous version of Windows. So, if at any point you do not want to downgrade your Windows, then you can definitely delete this folder to create some space.
In order to delete this folder, follow the instructions below.
1. Open the Disk Cleanup utility by searching for it using Cortana. You can also open it from the Control Panel > Administrative Tools. Select the C: Drive from the list, as it is where Windows 10 will mostly be installed.
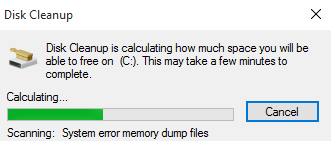
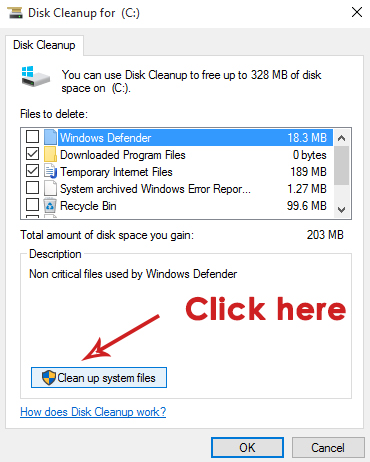
2. It will start calculating the files that need to be deleted. After it is done, you will see a list of files that need to be deleted. However, you won’t see the system files that you want to remove. For that purpose, click on the ‘Clean up system files‘ button.
3. The previous Windows installation will be displayed, along with the significant amount of memory space it occupies. Simply check this box and click the ‘OK‘ button located below.
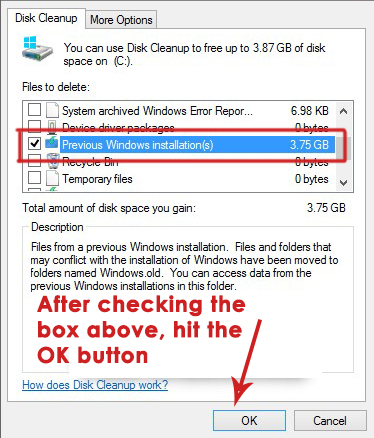
4. It will ask you to permanently delete the files. Click on ‘Yes,’ and it will start cleaning this junk from your hard drive. In the end, you will have a significant amount of free space on your C drive.