What is InstallAgent.exe and should I delete it?
InstallAgent.exe is a process signed by Microsoft that belongs to Microsoft App Store. Some users have been suspecting this executable of malicious behavior after noticing that in some cases it keeps the system awake (doesn’t allow the computer to enter into sleep mode/hibernation). However, InstallAgent.exe is a legitimate part o the Windows Store subsystem.
If the InstallAgent.exe process happens to be on at the moment when the system prepares itself to enter sleep/hibernation mode, it won’t be able to do so until the process finishes the necessary checkups. If App updates are turned off from the Store’s settings, the system will not be able to enter into hibernation/sleep mode at all.
What’s the purpose of InstallAgent.exe?
InstallAgent.exe is also referred to as the Microsoft app store update module. Its job is to look for all the available app updates and install them automatically. It has a scheduled task in Task Scheduler and is known to be called occasionally in order to perform the required checkups.
No apparent security threat
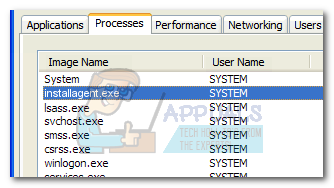
Our investigations found no traces of any malware that is known to camouflage itself as the InstallAgent.exe executable. But you can make sure of this by right-clicking the process in Task Manager and choose Open File Location. If the file is located in C:\Windows\SysWOW64\installagent.exe or C:\Windows\System32\installagent.exe, you can assume that the InstallAgent executable is legitimate.
Should I remove InstallAgent.exe?
Deleting InstallAgent.exe is pointless because Windows will automatically recreate it at the next system startup. Some users have also tried to disable Automatic Updates, hoping to stop the InstallAgent.exe process from opening again. But it appears that even if this option is turned off, Windows still calls on InstallAgent.exe to check and perform app Store updates.
Even more, in the event that Automatic Updates is turned off for Store, the InstallAgent.exe process will keep running indefinitely, thus preventing the system from entering into sleep or hibernation.
How to prevent InstallAgent.exe from keeping the system awake
There are multiple methods you can follow in order to stop InstallAgent.exe from preventing your system to enter into hibernation/sleep mode. Below you have three different methods that will prevent the InstallAgent.exe process from keeping your system awake. Please follow whichever method seems more convenable to your situation.
Method 1: Enable Automatic App Updates
The easiest method out of the bunch is to enable automatic app updates from the Store‘s settings to do this. This will not force the InstallAgent.exe process to stay open indefinitely.
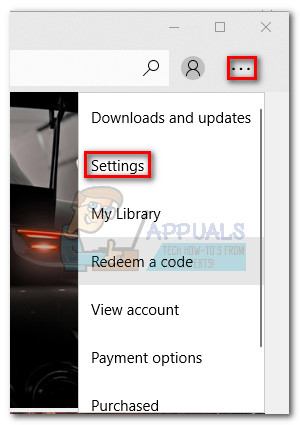
To do this, simply open Microsoft Store (directly from the taskbar or by using the Start bar to search for “store”). Then, access the Store’s settings by clicking the action menu (three-dot icon) in the top-right corner and choosing Settings.
 Once you gain entrance into Settings, simply enable the toggle under Update Apps automatically.

If you want to keep App updates to off, follow Method 2 or Method 3.
Method 2: Running the powercfg command in Command Prompt
Another way to prevent the InstalAgent.exe process from keeping your system awake is to run the POWERCFG /REQUESTSOVERRIDE PROCESS command in an elevated Command Prompt. Here’s how to do this:
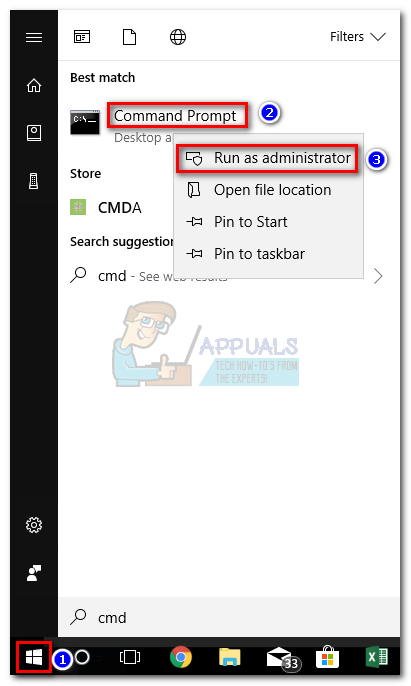
- Click the Windows Start bar (bottom-left corner) and search for “cmd“. Then, right-click on Command prompt and choose Run as Administrator.
- In the elevated Command Prompt, type or paste the following command and press Enter:
POWERCFG /REQUESTSOVERRIDE PROCESS InstallAgent.exe system - If the command returns no errors, you can assume that the process was successful. If you still find that the InstallaAgent.exe process is preventing your system from going to sleep, follow the final method below.
Method 3: Disabling the Automatic App Update triggers from Task Scheduler
A sure way to stop InstallAgent.exe from preventing your system to enter into sleep mode is to disable a couple of triggers via Task Scheduler. Here’s a quick guide on how to do this:
- Press Windows key + R to open up a Run command. Type “taskschd.msc” and hit Enter to open Task Scheduler.
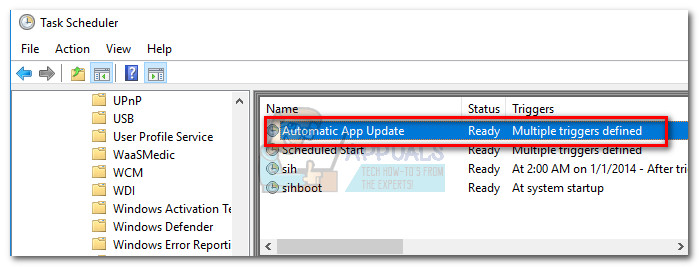
- In Task Scheduler, use the left pane to navigate through Task Scheduler (Local) > Task Scheduler Library > Microsoft > Windows > WindowsUpdate.
- Then, move over to the middle pane and double-click on Automatic App Update.
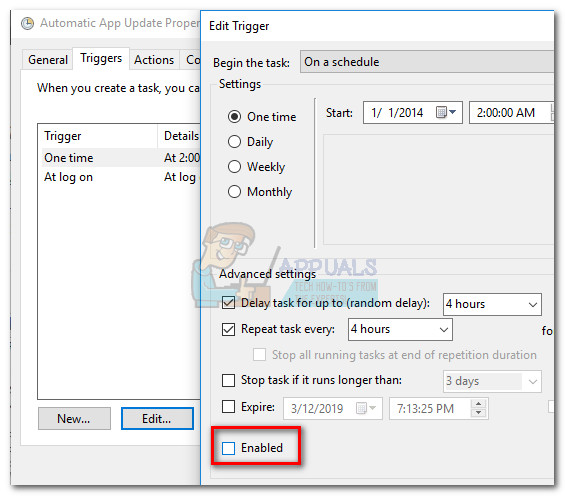
- Next, select the Triggers tab and proceed by clicking on each trigger, select edit, then deselect the checkbox next to Enabled, then hit OK to save the changes. Repeat this procedure with each trigger present in the Trigger list.
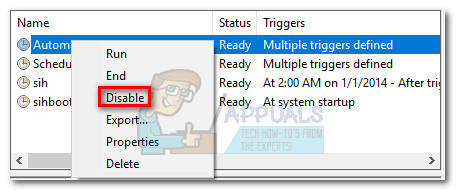
- Once each trigger has been disabled, return to the center pane of Task Scheduler, right-click on Automatic App Update and choose Disable.